How do School Admins create a benchmark or diagnostic assessment?
 Updated
by
Gayle McKee
Updated
by
Gayle McKee
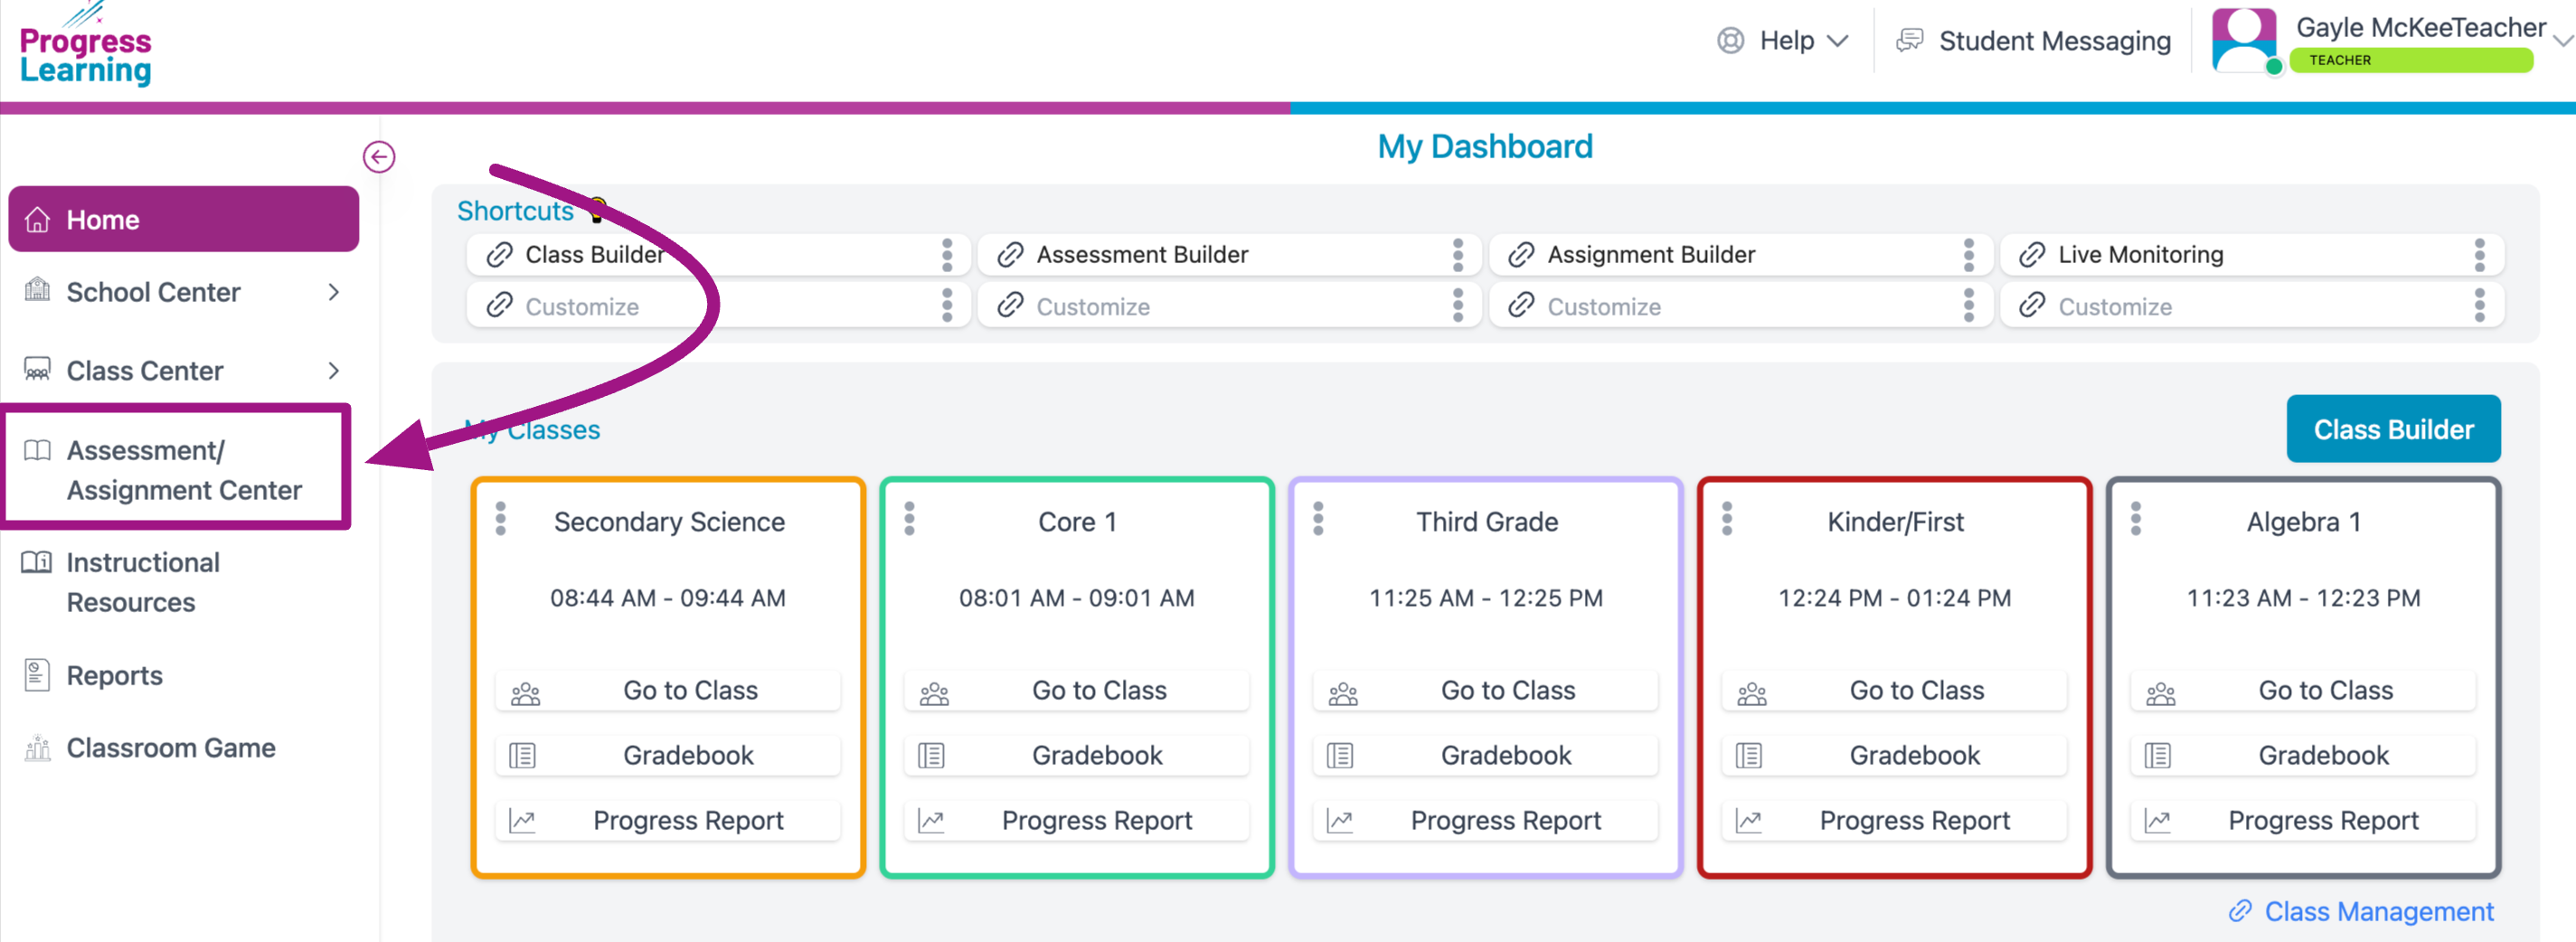
- From the homepage, click on the Assessment/Assignment Center icon from the left side menu.
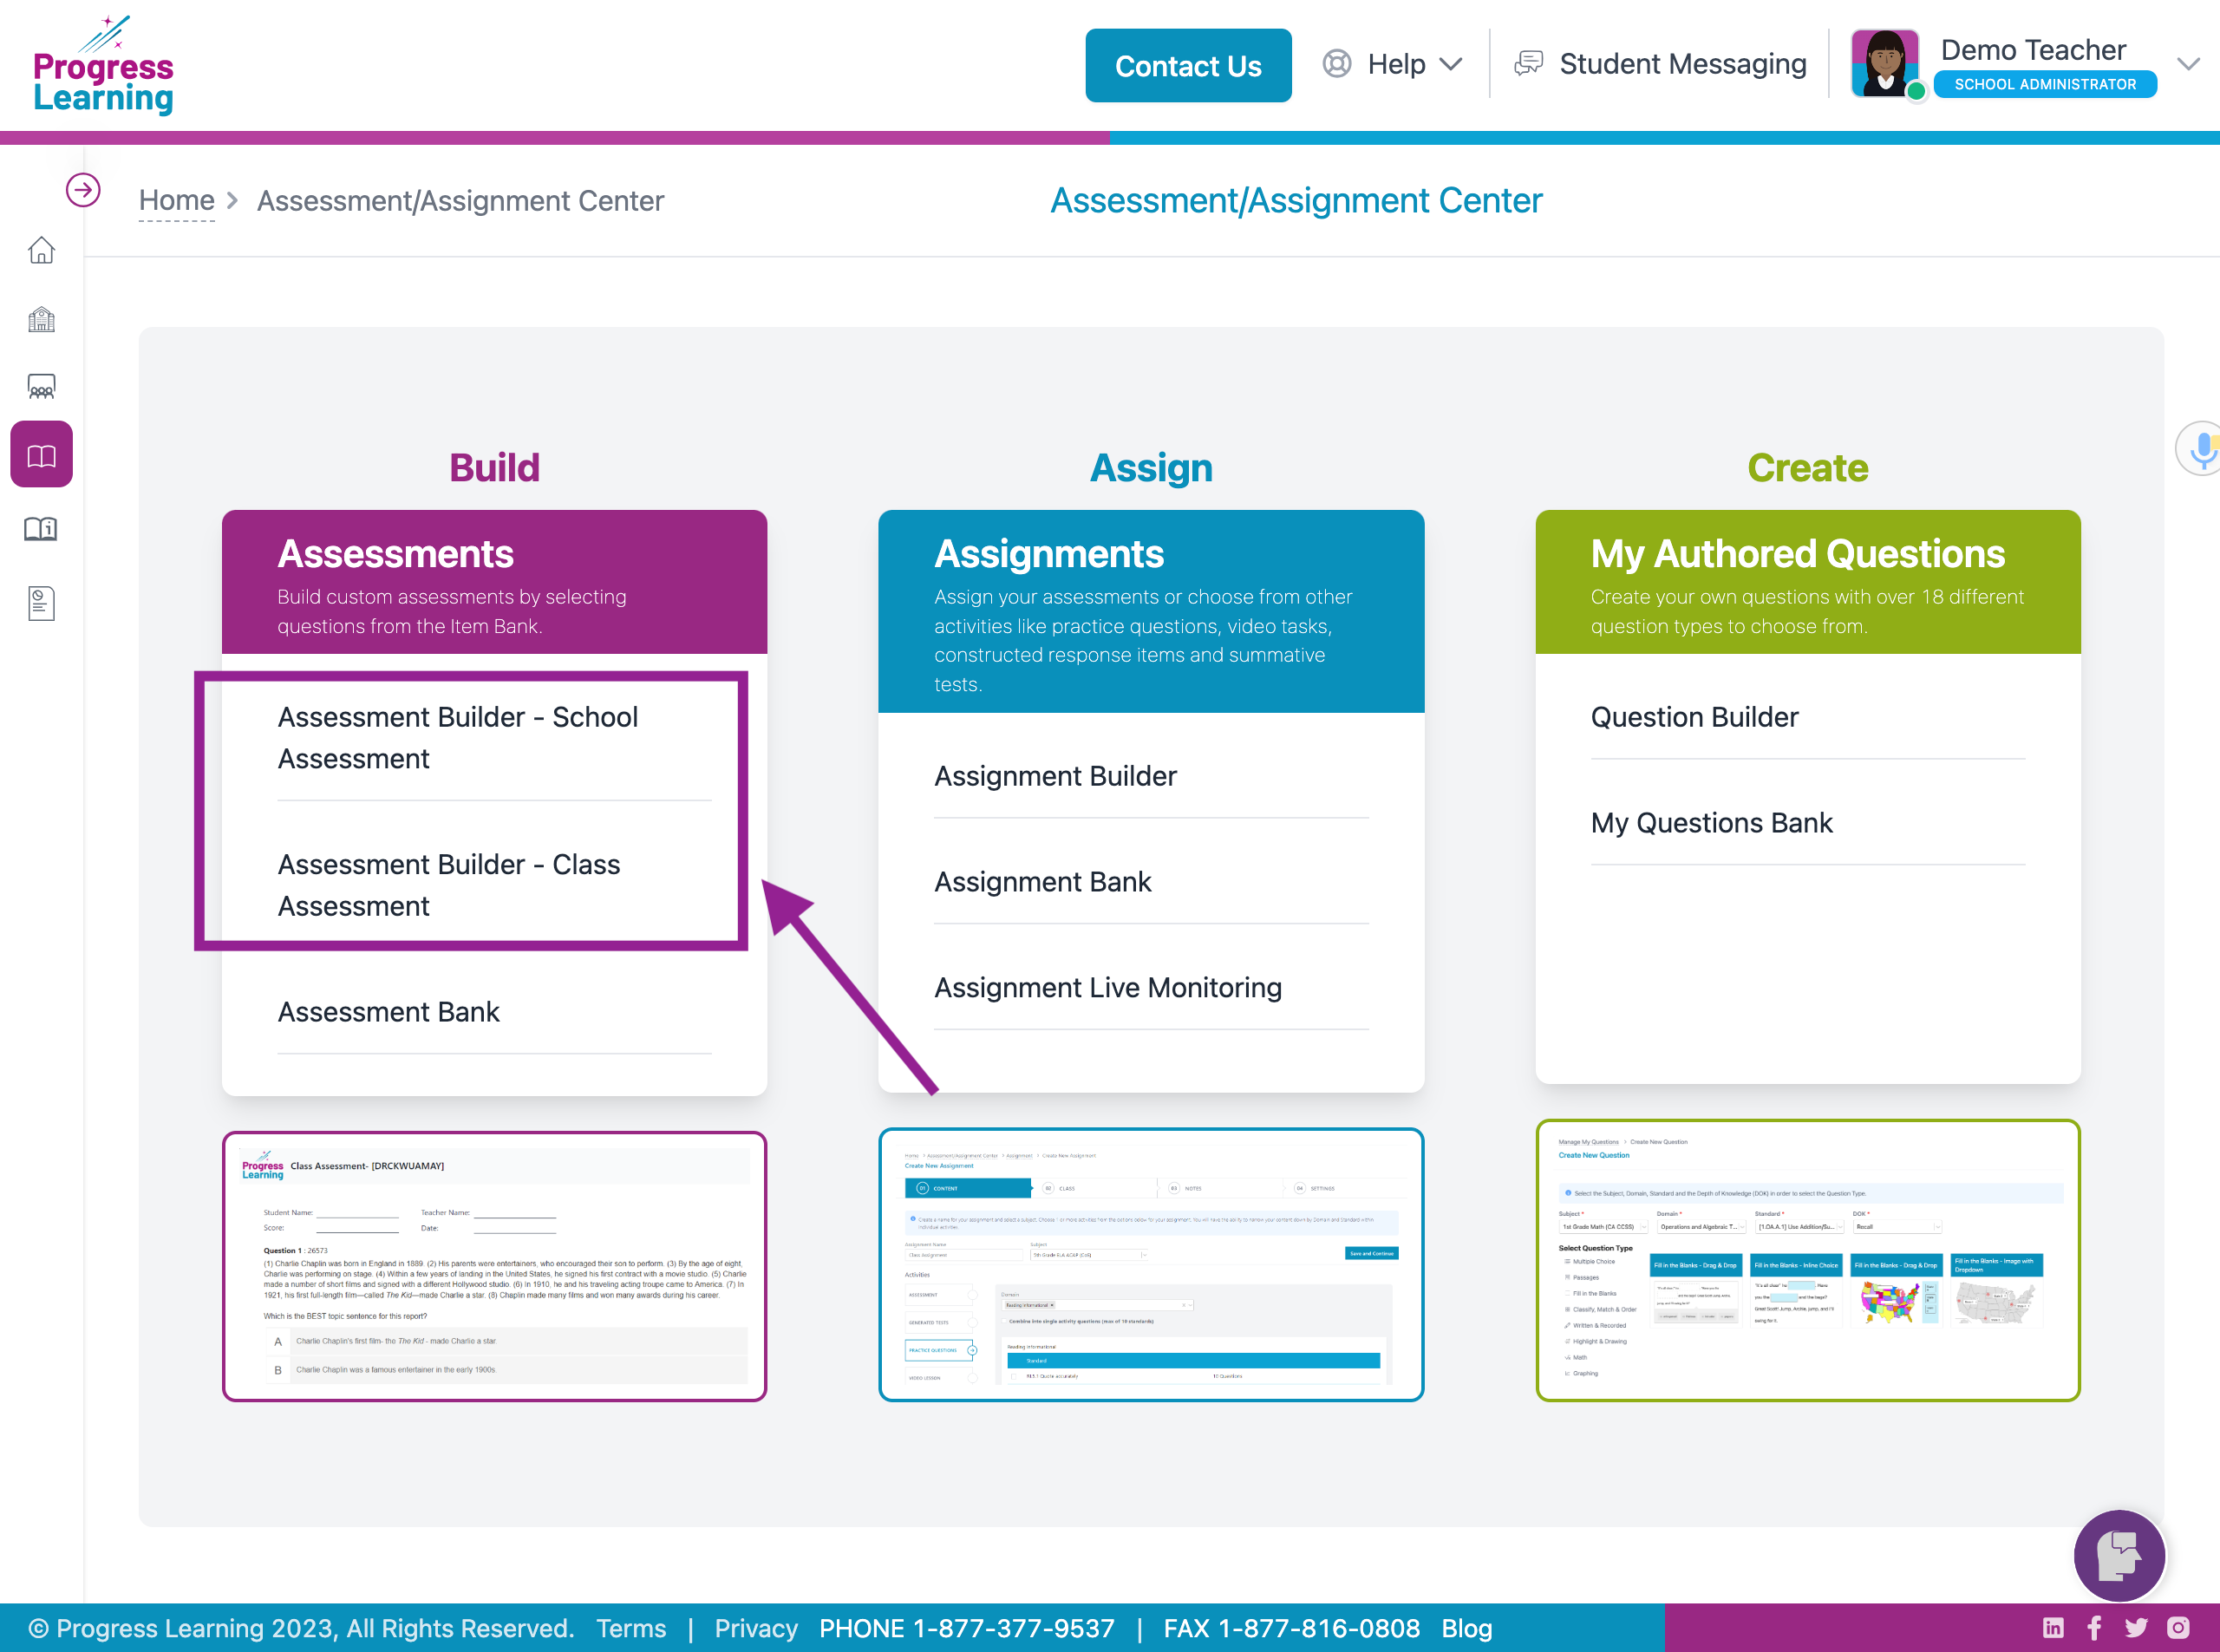
- Building Your Benchmark Assessment: Click on either the *Assessment Builder - School Assessment link or the Assessment Builder - Class Assessment link in the first Assessment box.
- *Assessment Builder - School Assessment - Only users with School Admin access will see this link. Admins can use this to create school-wide common assessments to be shared.
- Assessment Builder - Class Assessment - All teachers can use this to create assessments for their own classes. You will be allowed to share the assessment with other teachers in your building who also teach the same grade and subject area.
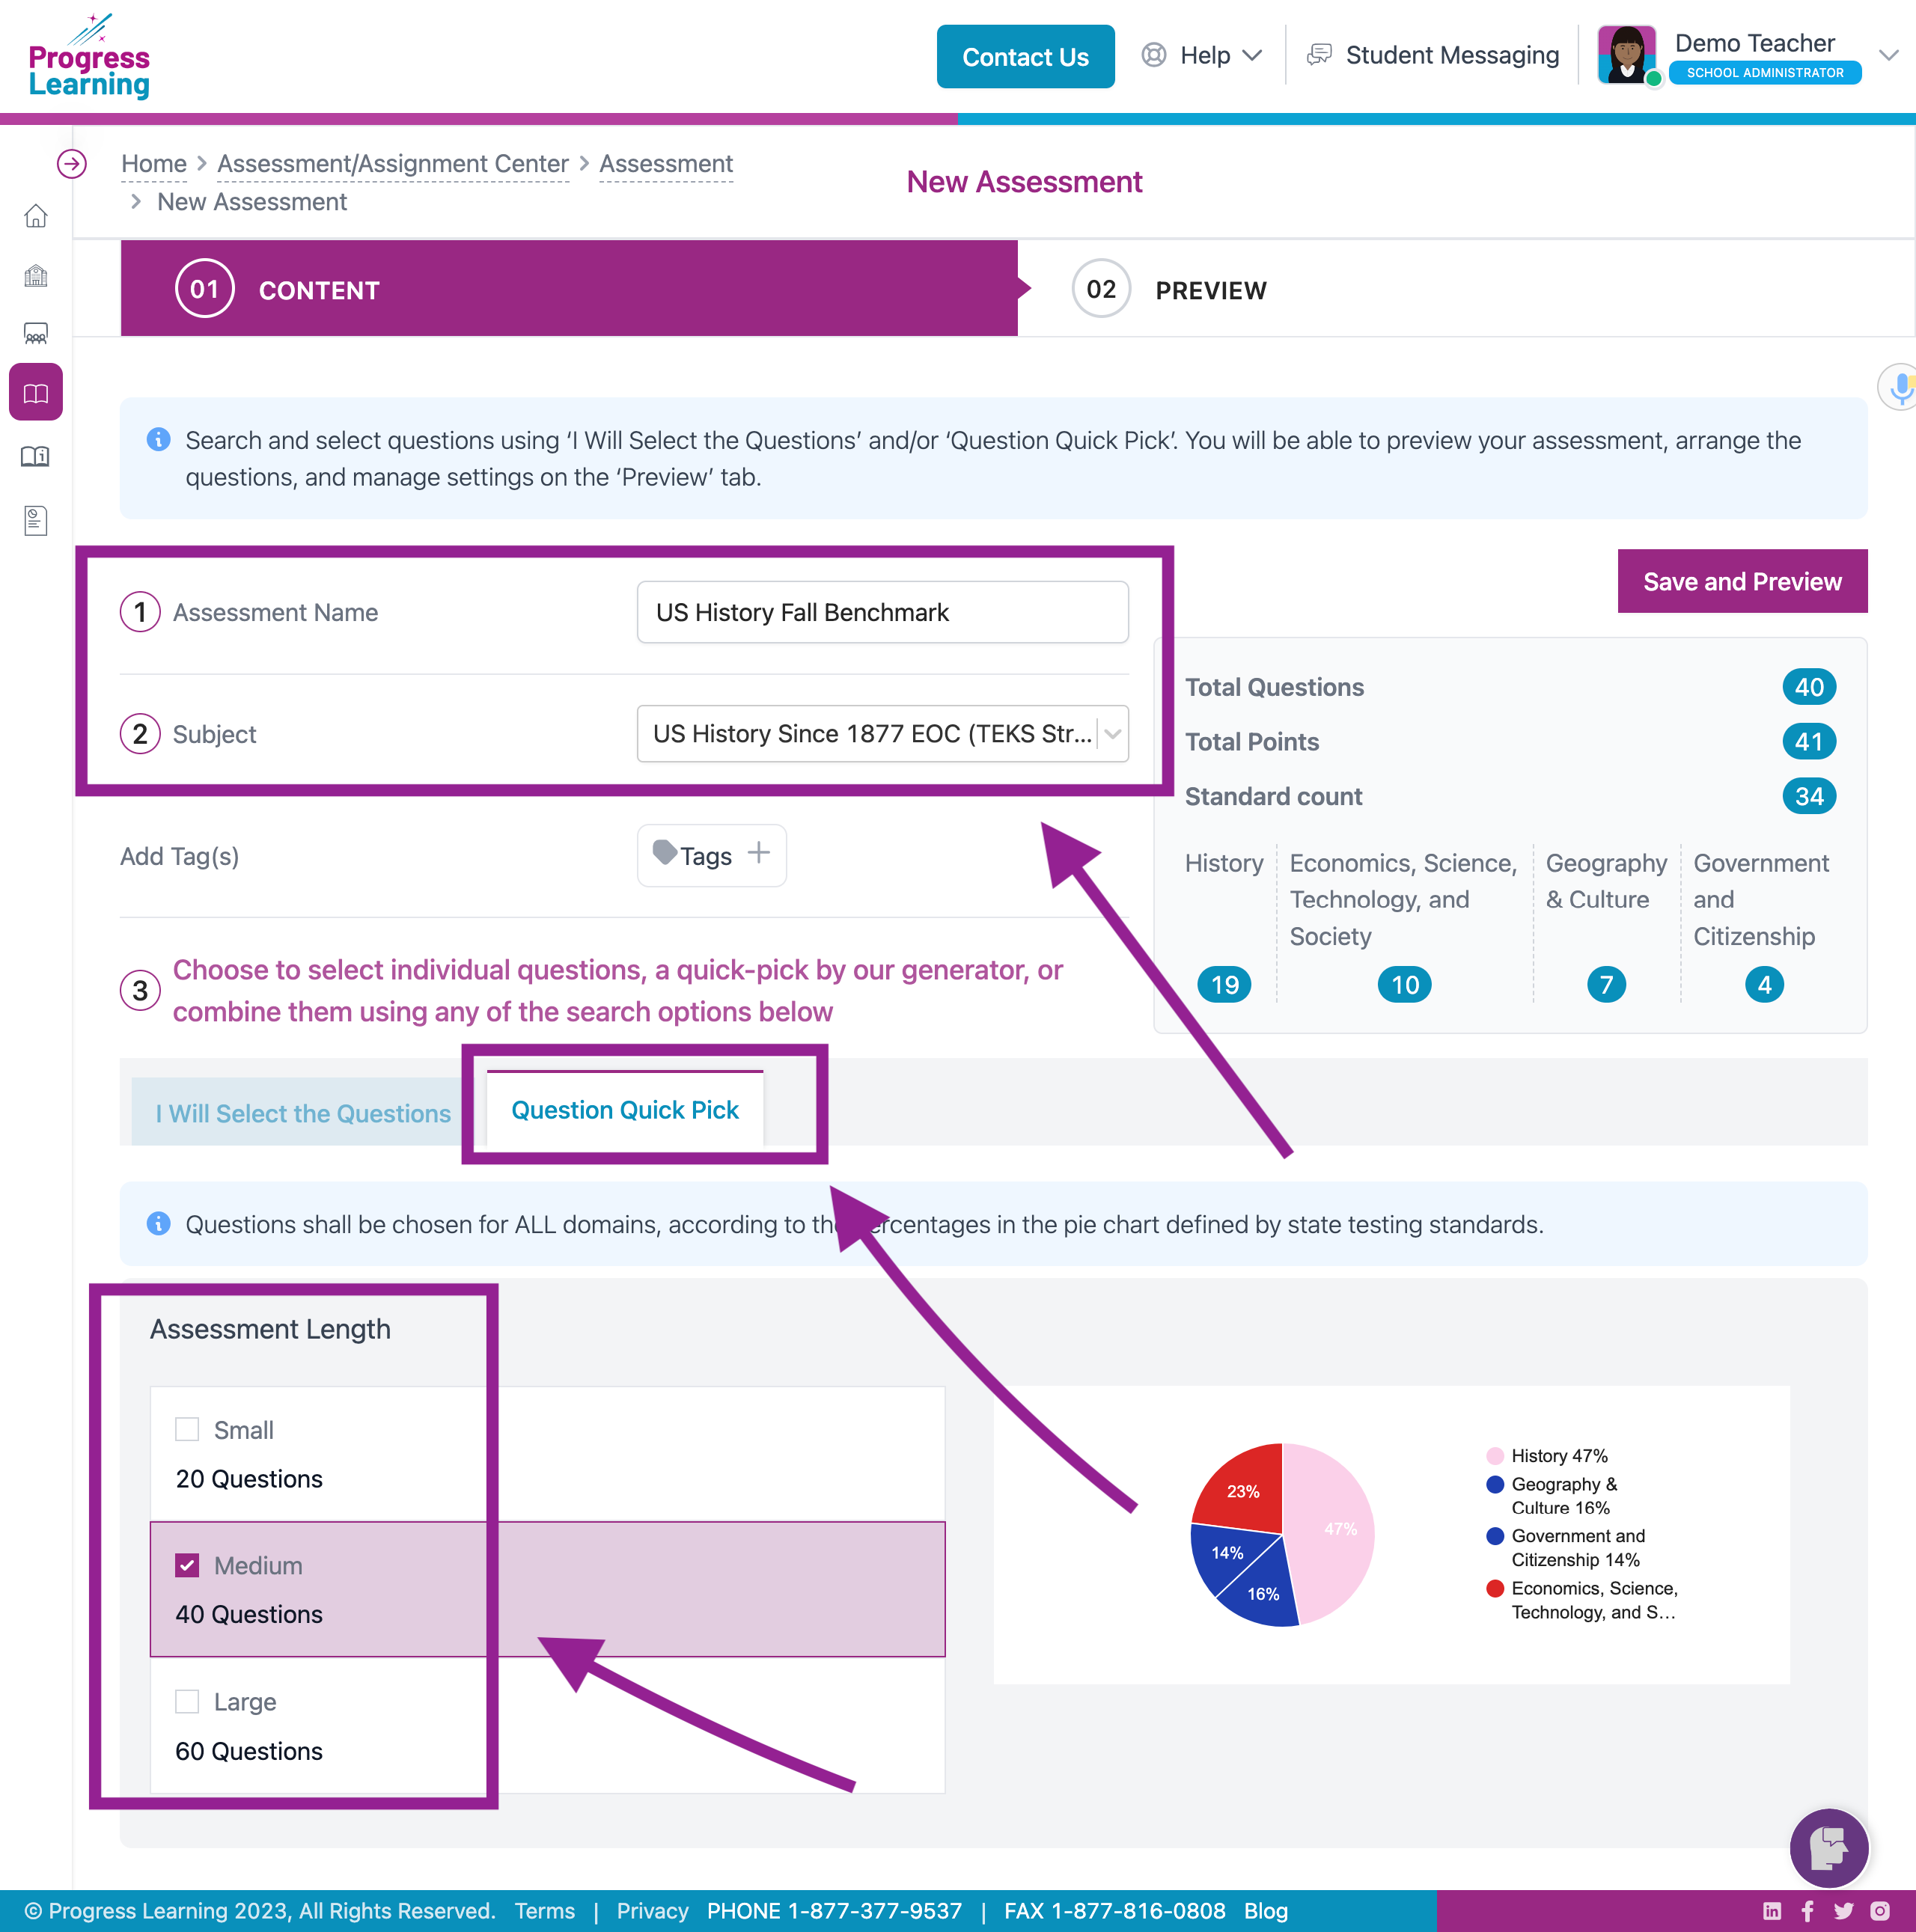
- On the first Content tab, type in the Assessment Name. Choose the subject from the drop-down menu. You can add optional tags, which serve to categorize your assessments.
- To easily create a benchmark that closely mirrors your state assessment, click on the Question Quick Pick tab. The program will auto-generate an assessment that matches your state's assessment blueprint.
- Choose the size (number of questions) of your assessment. The best practice is to select a full-size assessment.
- Scroll up and click Save and Preview.
- In the Preview tab, you can choose your preferred assessment settings.
Assessment Settings |
* Selecting "Yes" is recommended. If teachers assign the benchmark, they will also be able to see the assessment data and assign remediation as needed.
|
After choosing your settings, you can make final edits to your benchmark assessment. For example, click on the "x" to delete a question. Click on Preview and Replace to preview the question and replace it with a similar question. You can drag and drop the questions into the order that you prefer using the two-column "double kabob" icon to the left. If you need to add questions to the assessment, click on the Content tab and choose "I will select the questions" to select additional questions.
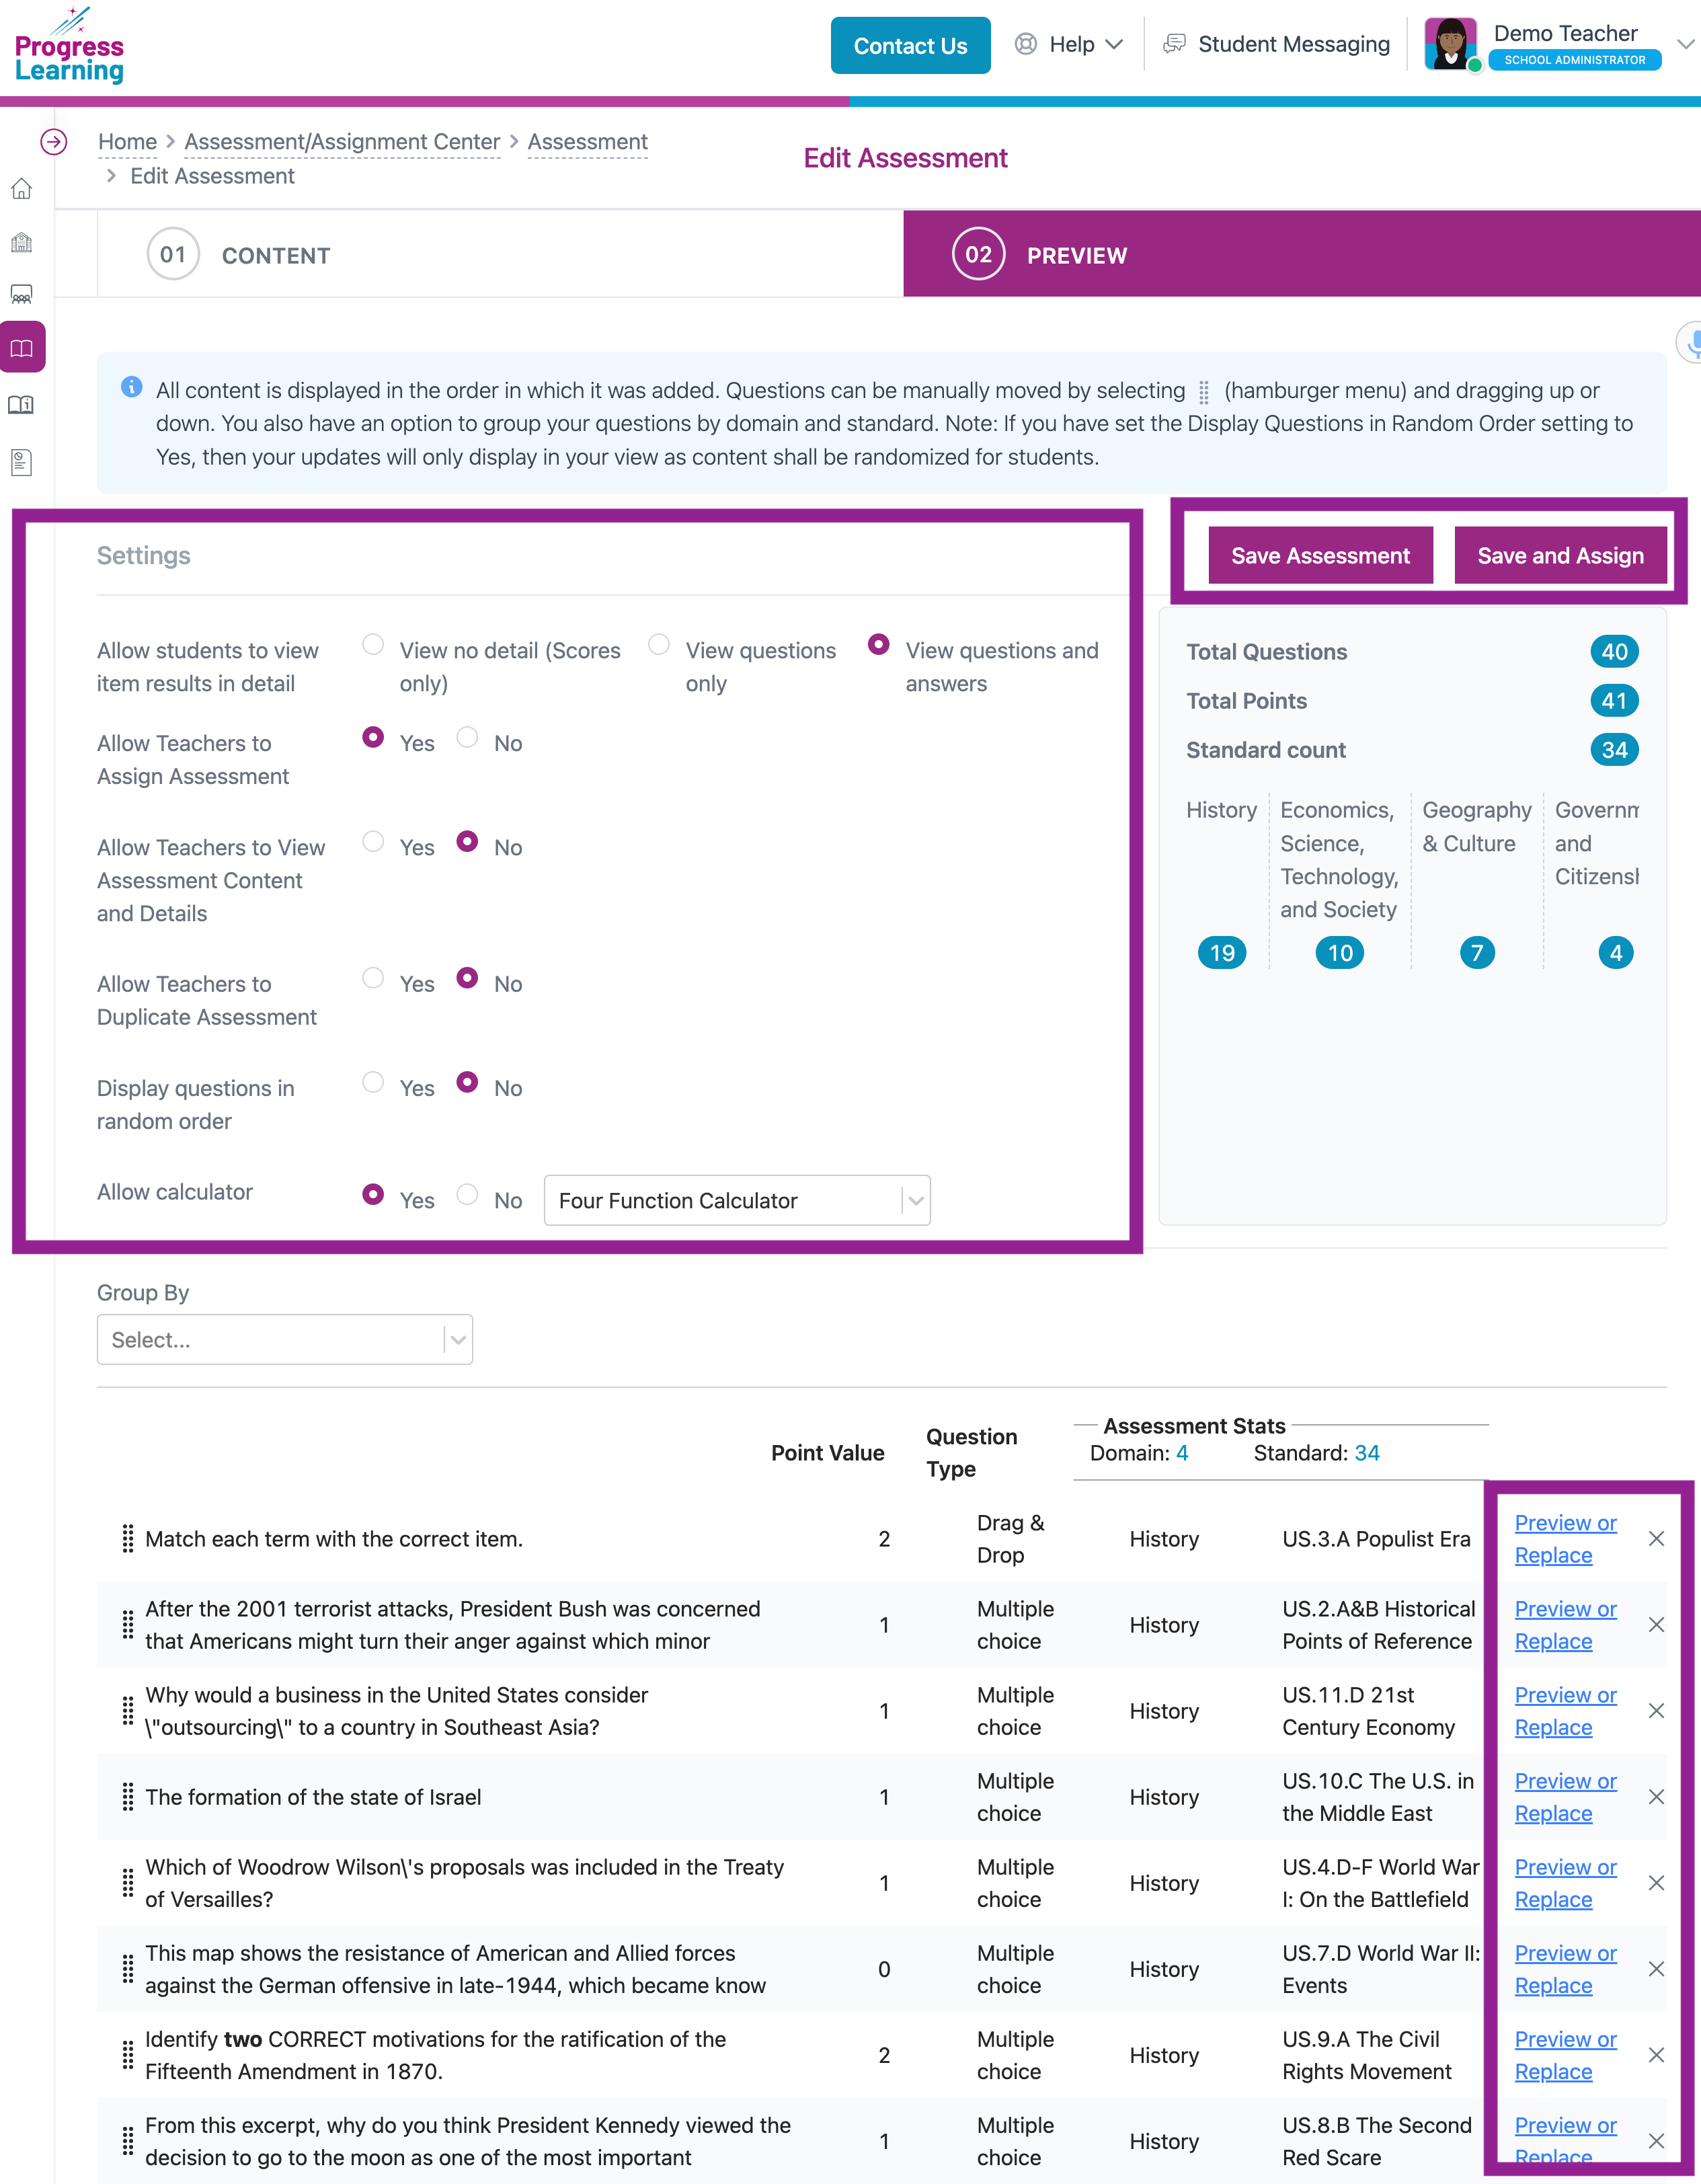
- When you are done editing your benchmark assessment, scroll to the top and click either Save Assessment or Save and Assign.