How do I create a shared assessment and how can others find it?
 Updated
by
Gayle McKee
Updated
by
Gayle McKee
Creating a Shared Assessment
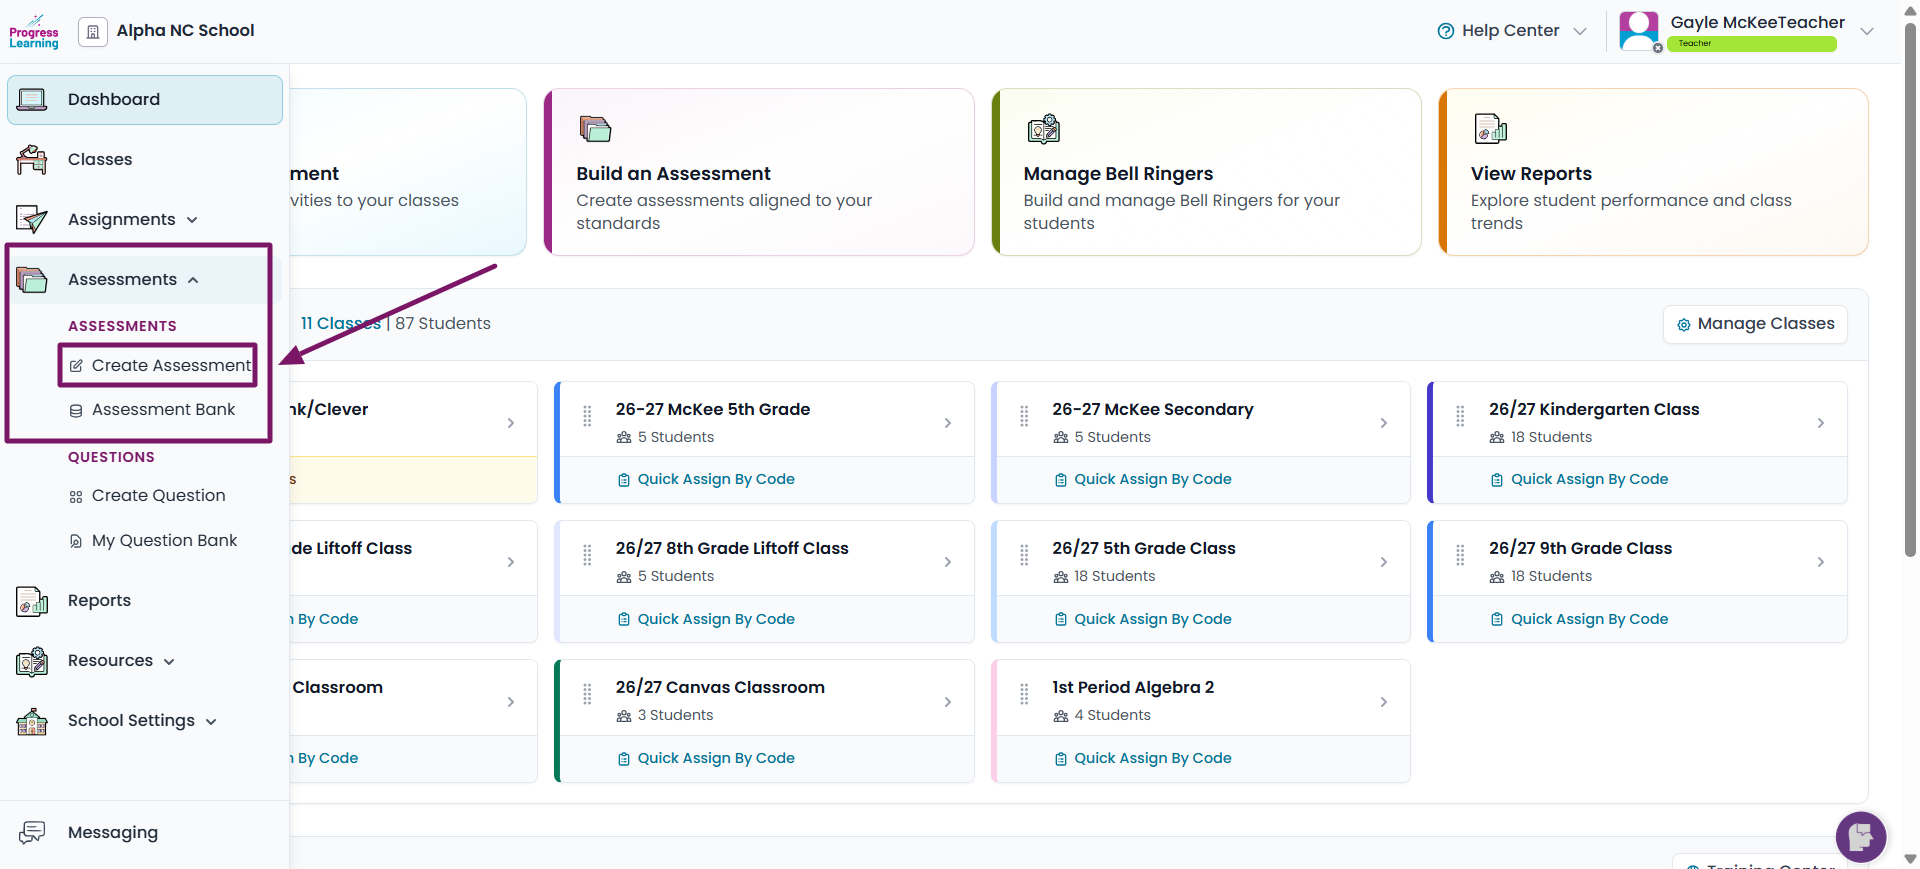
- From the left side menu select Assessment and click on Create Assessment
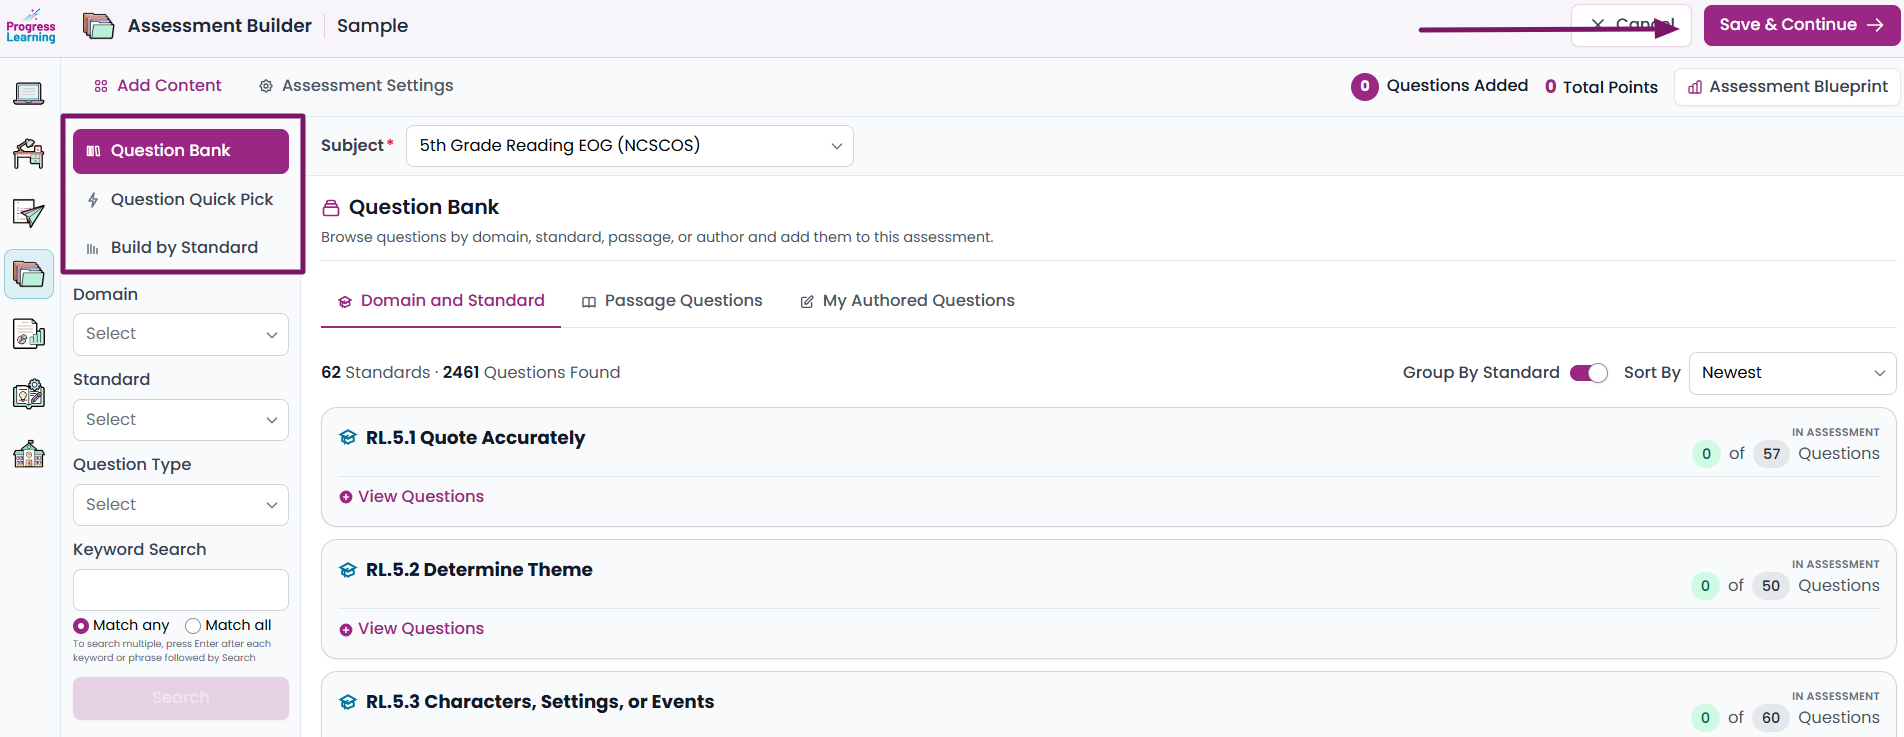
- Build content for the assessment by using the Question Bank, Question Quick Pick or Build by Standard options. Once you have selected all of your questions click Save and Continue.
For more instructions on how to Create an Assessment, click here.
- In the Assessment Settings, click on Sharing and Permissions on the left side. Where it says Shared Assessment, toggle the button in the on (blue) position. Click Save and Assign to assign it now or Save Assessment to use at a later time.
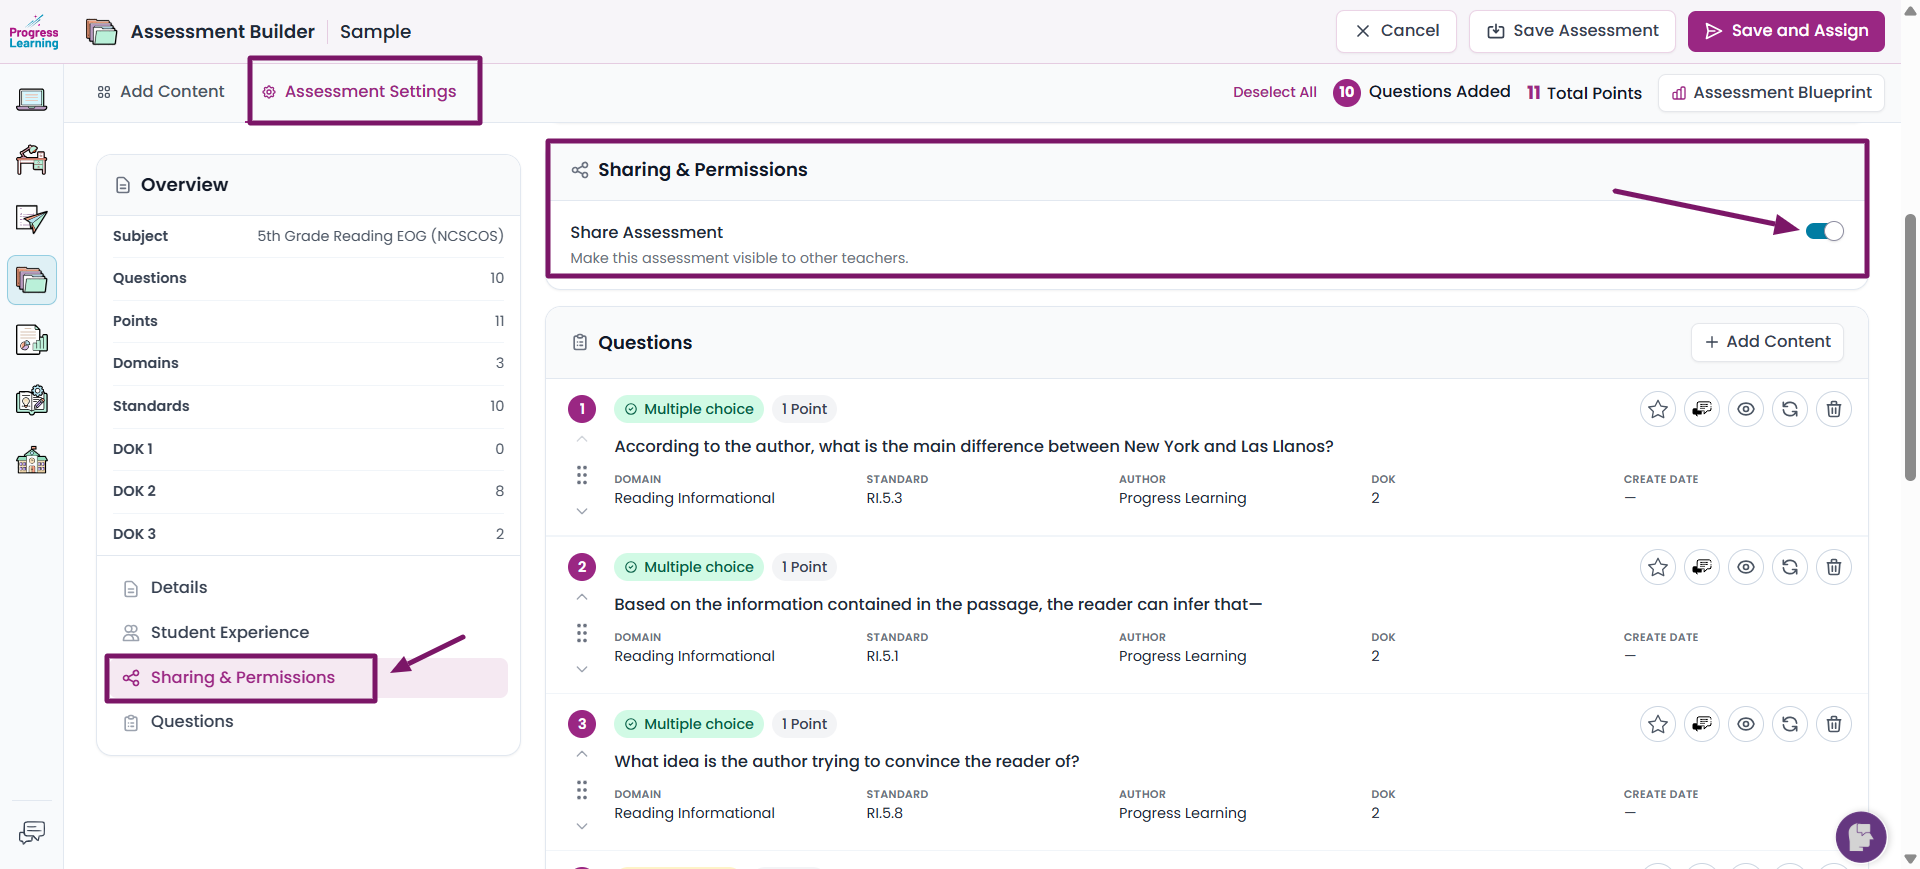
Note: "Share Assessment: Yes" is the default setting. If you do NOT want to share the Assessment with other teachers in your school, click "No."
Finding a Shared Assessment
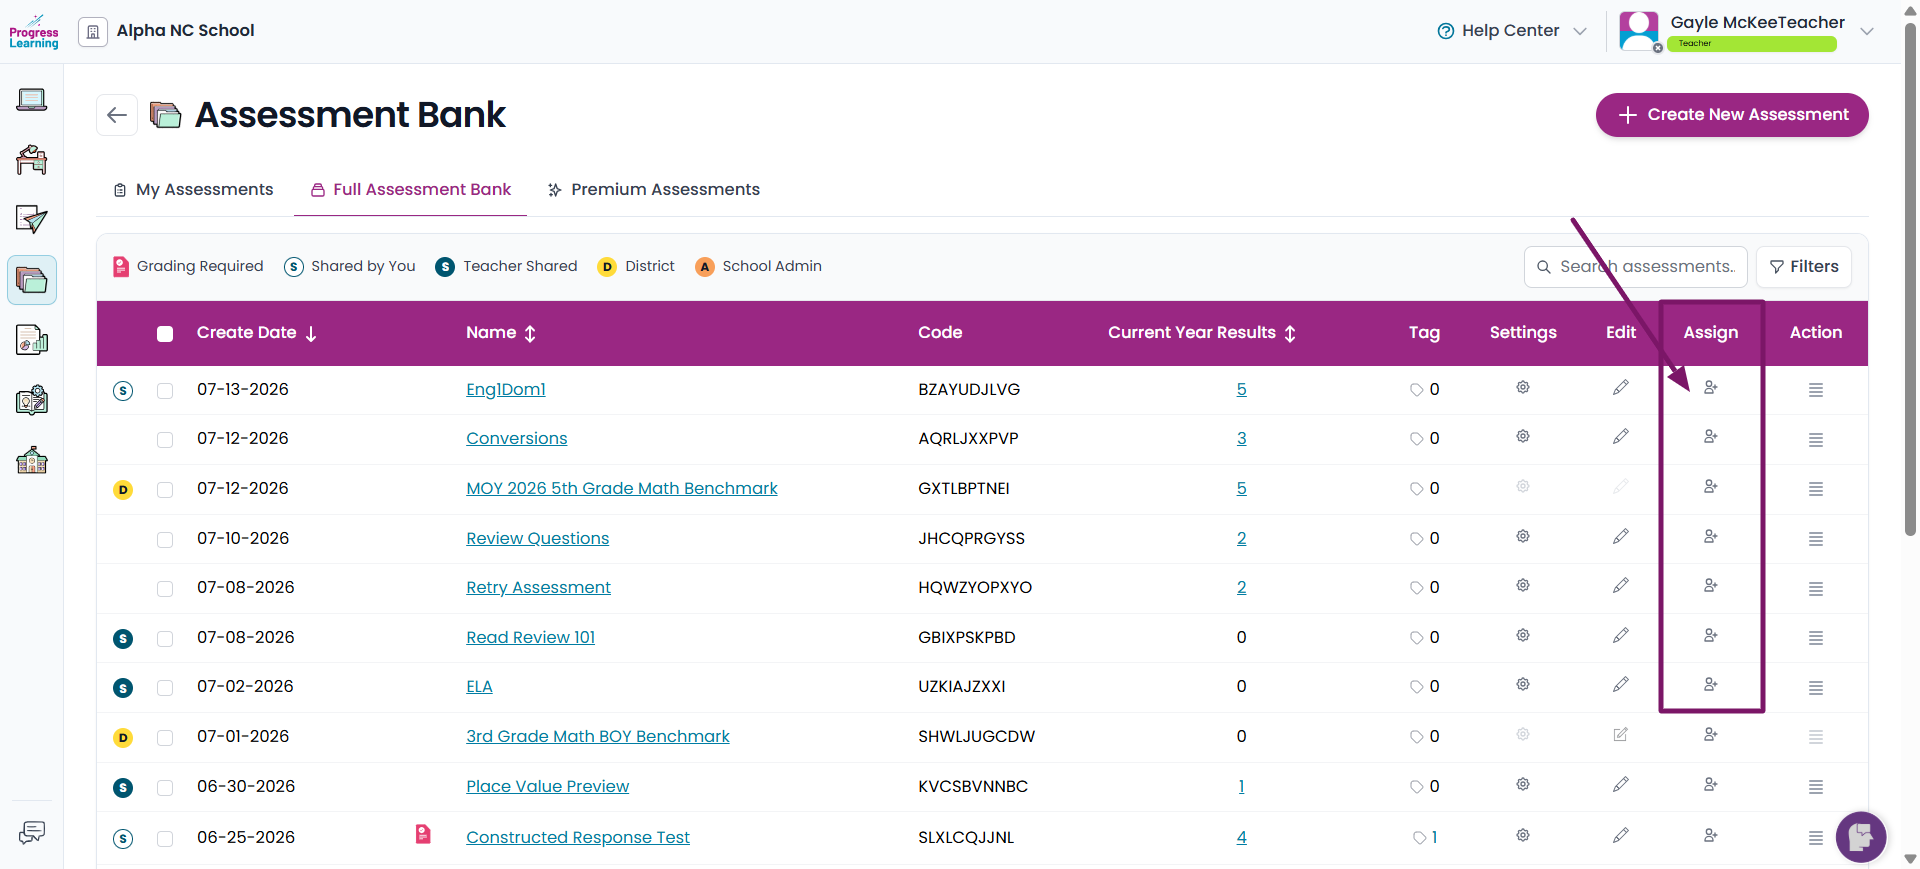
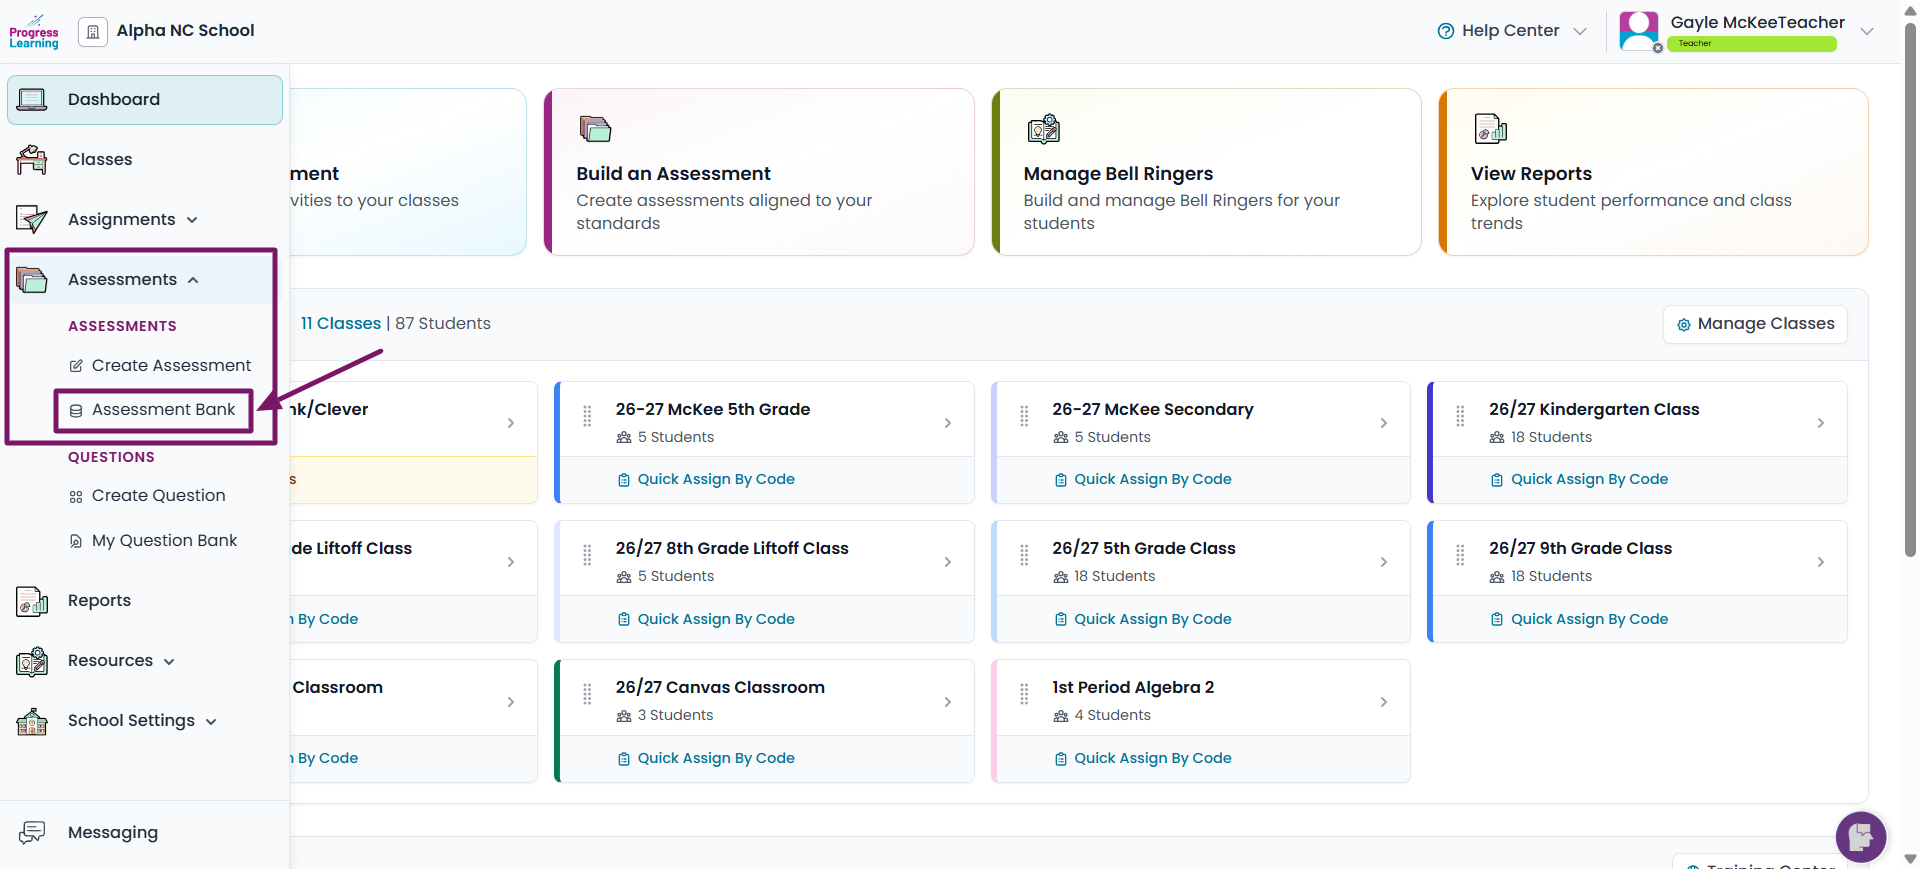
- From the left navigation menu, select Assessments and click on Assessment Bank
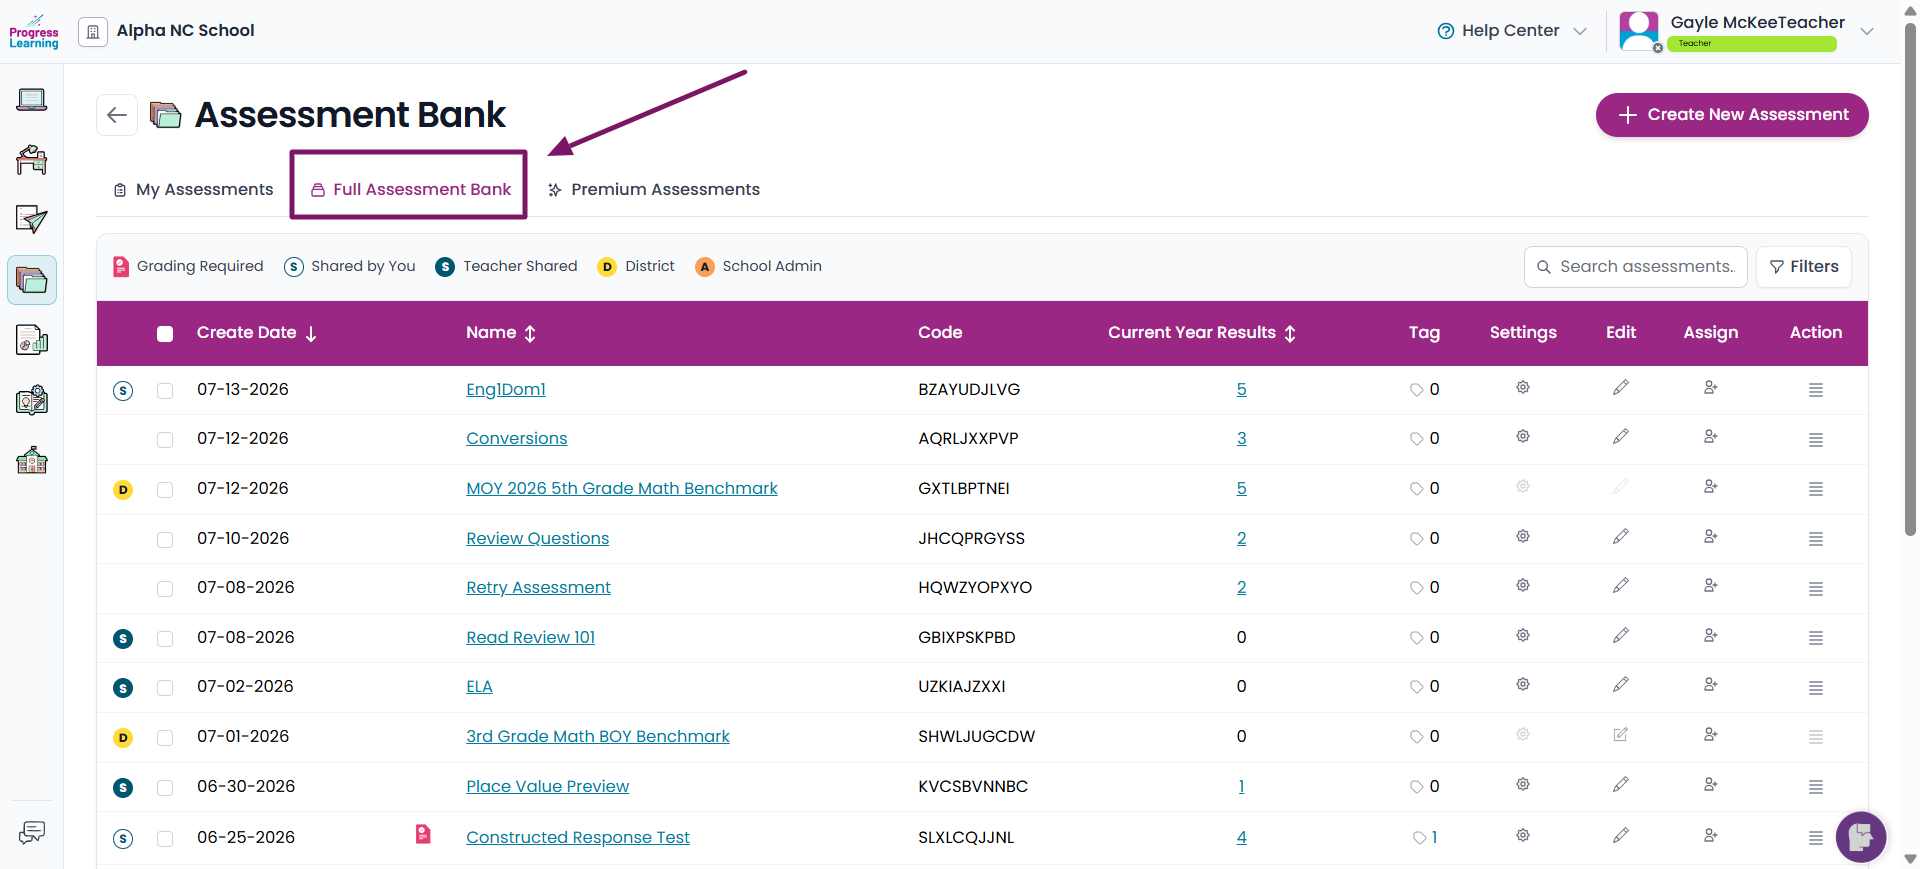
- Click on the Full Assessment Bank tab.
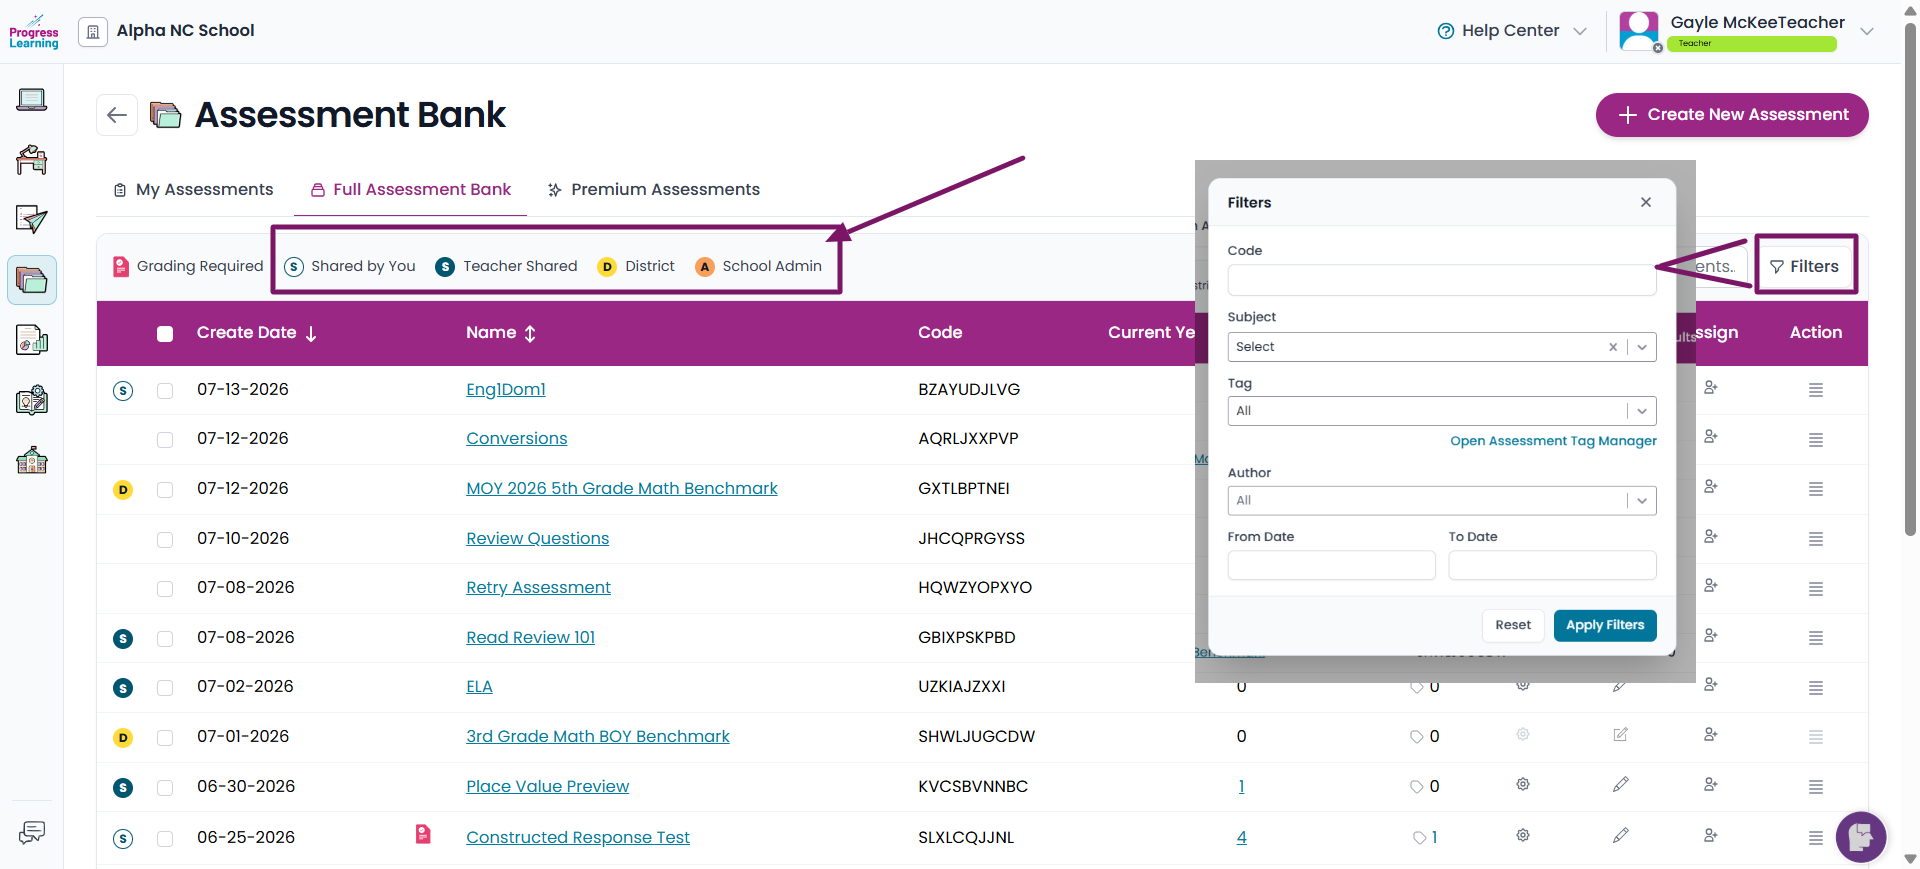
- Here, you can see all assessments that have been shared campus-wide. An icon to the left of the assessment name indicates who shared the assessment: District Admin, School Admin, Teacher, or yourself. The legend can be found at the top to the Right. Click on Filter to view the drop-down menus to search for assessments.
- Click on the Assign icon next to the assessment to assign to your students.