How do my students get started with Liftoff?
 Updated
by
Gayle McKee
Updated
by
Gayle McKee
How to Enable Liftoff for Students
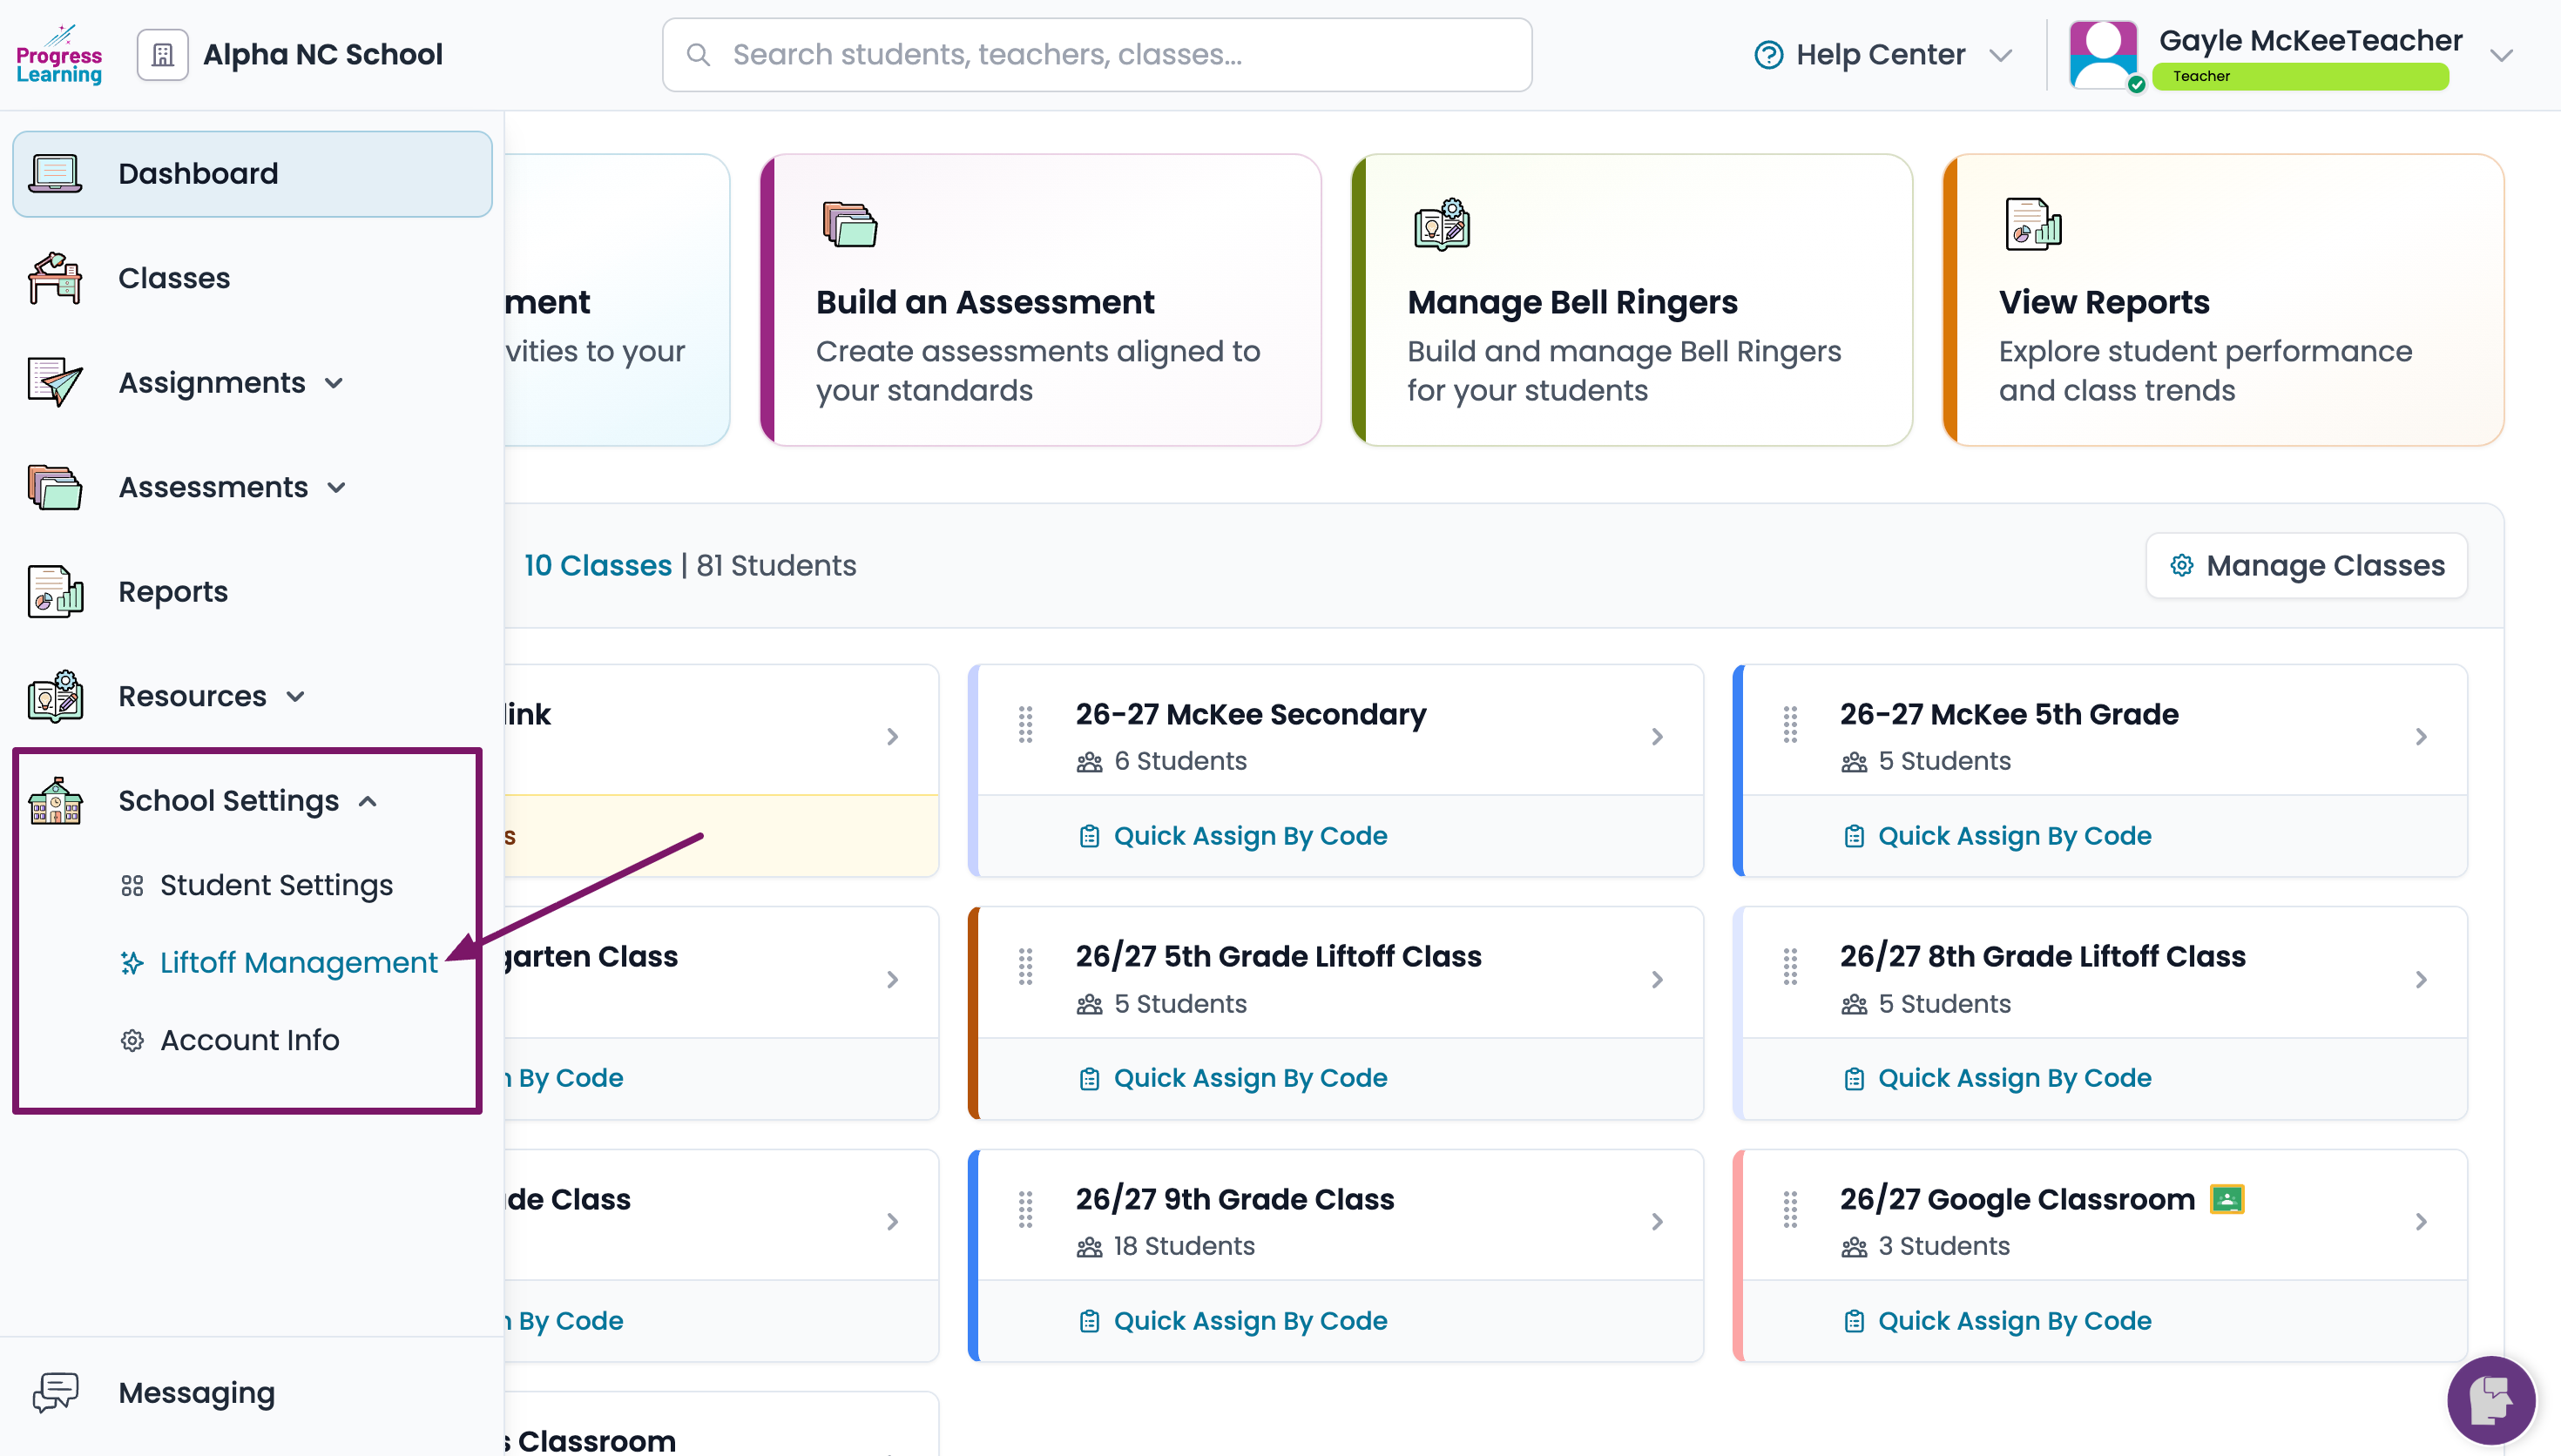
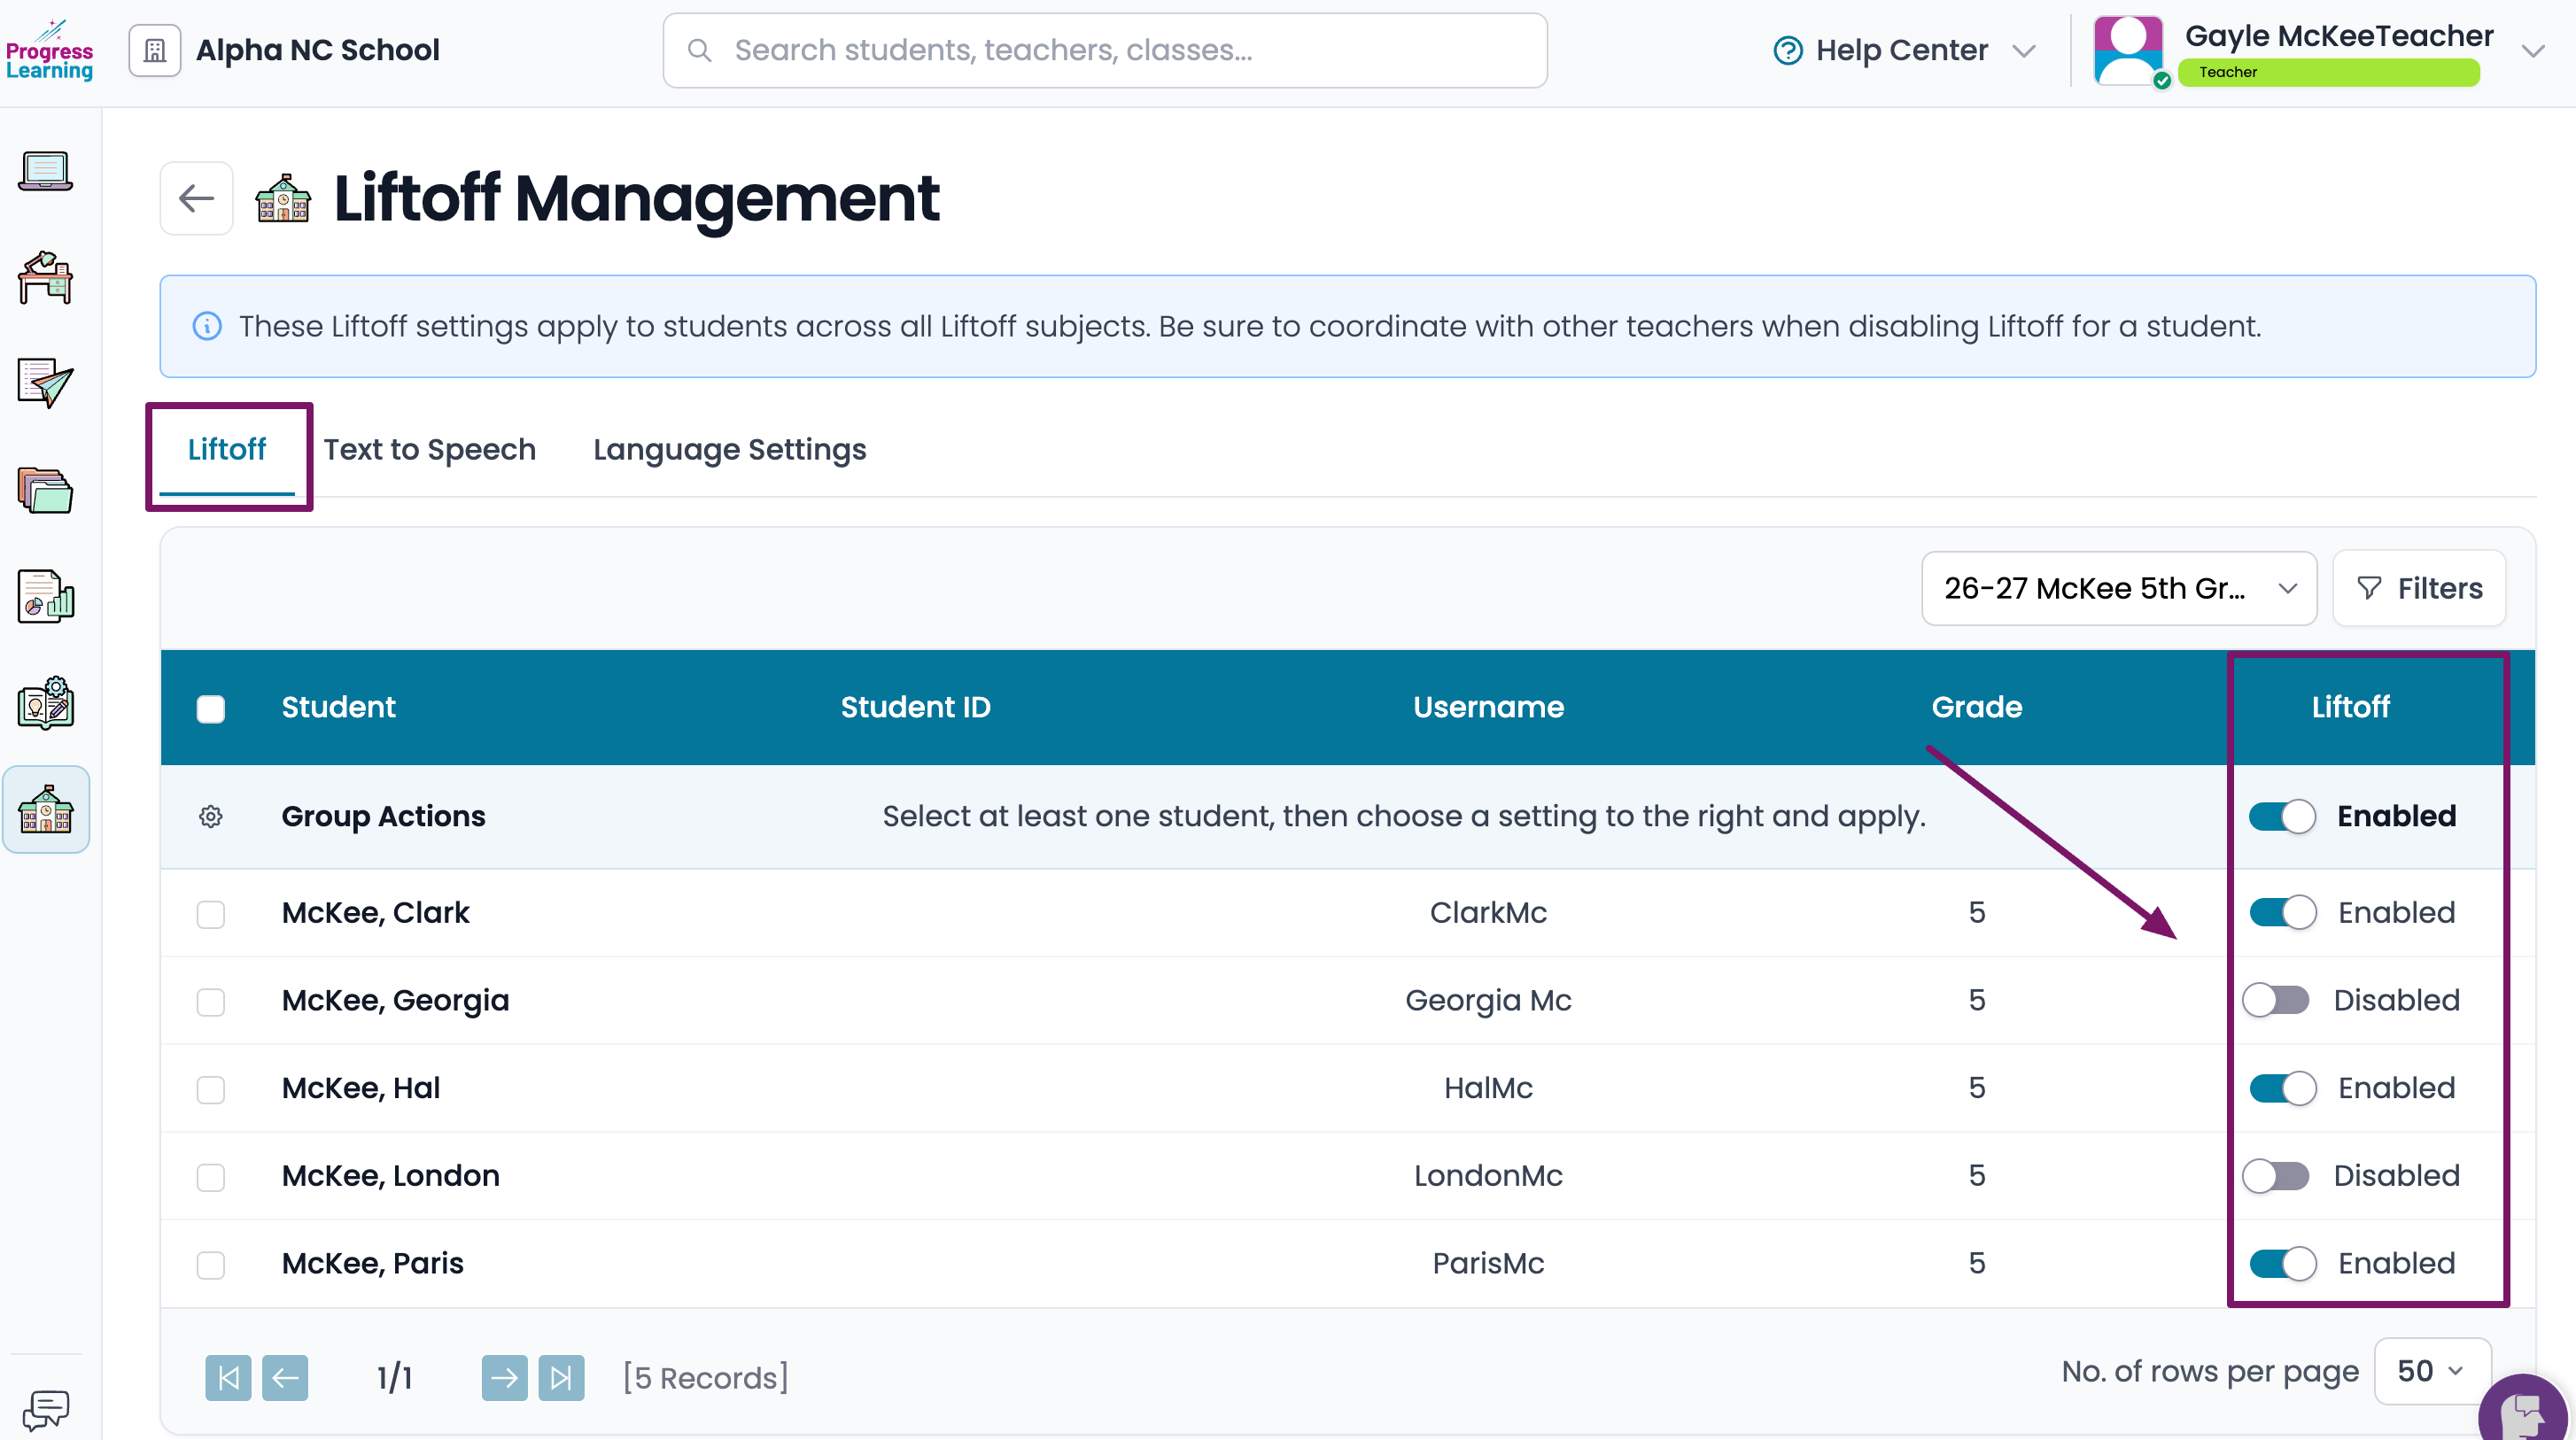
- From the left side menu, click on School Settings and select Liftoff Management from the dropdown menu.
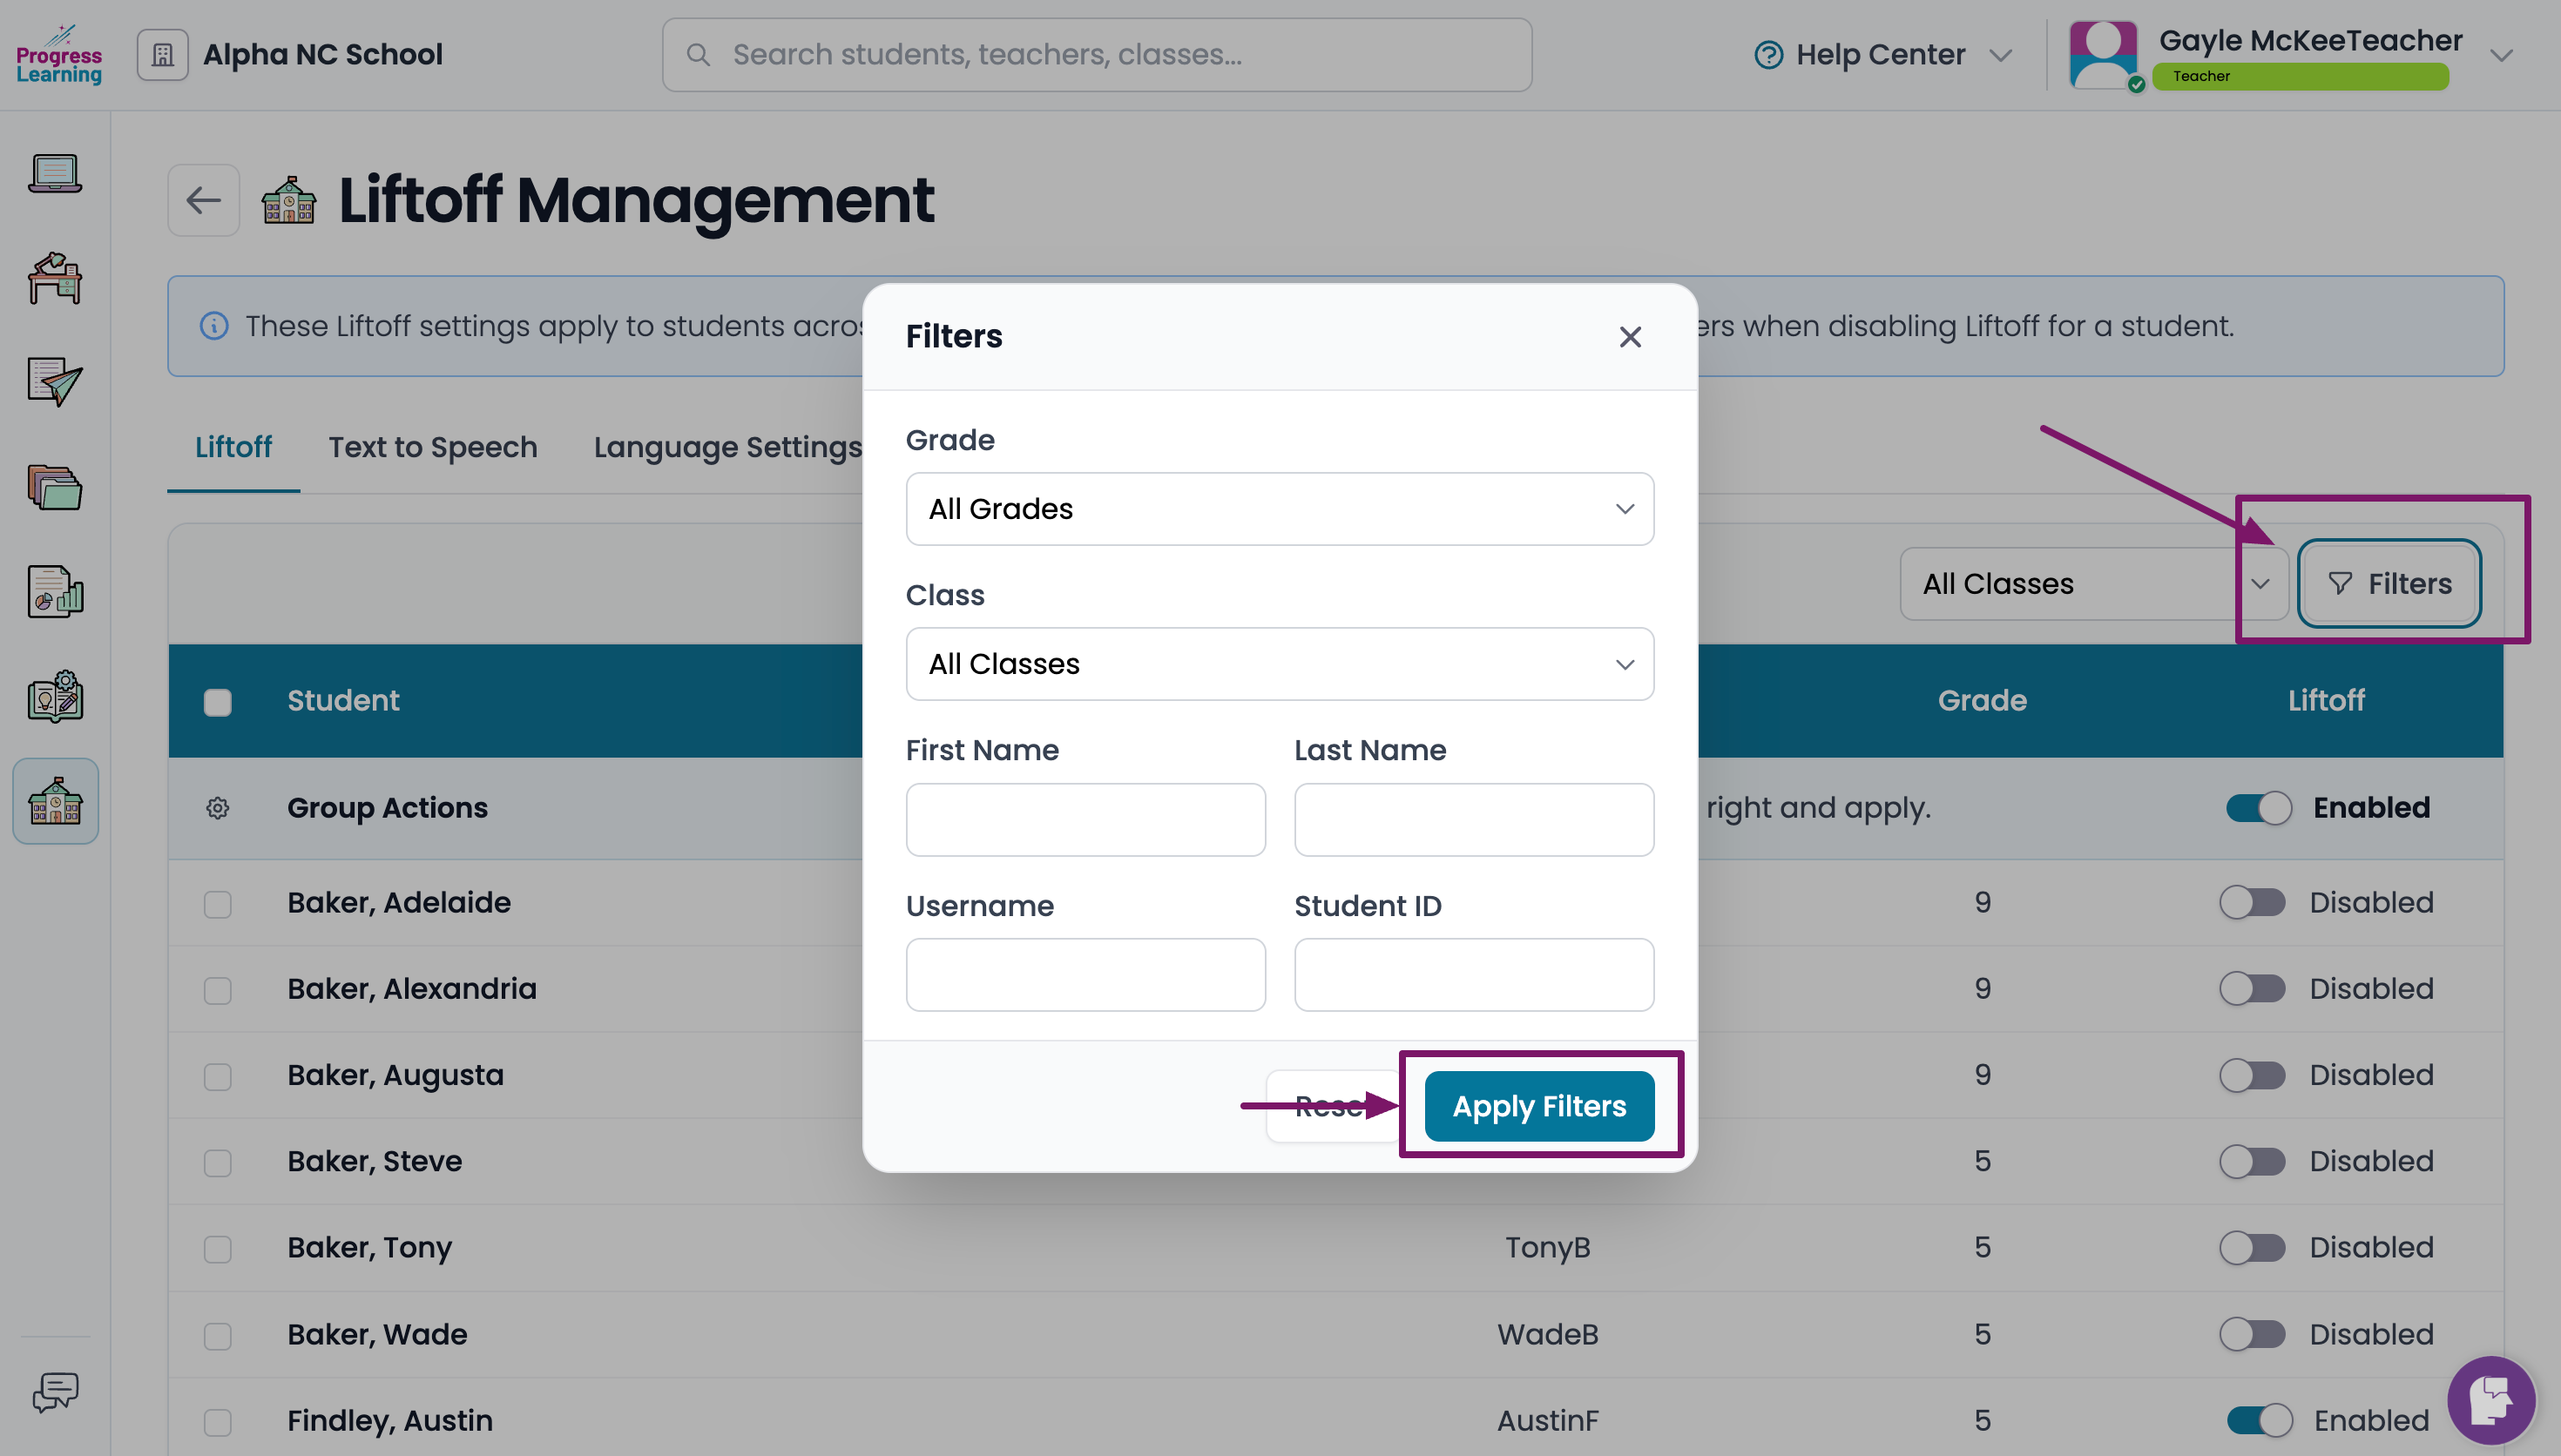
- You can choose one of your classes from the Classes dropdown menu or you can use the Filter option to select a class, grade, or specific student.
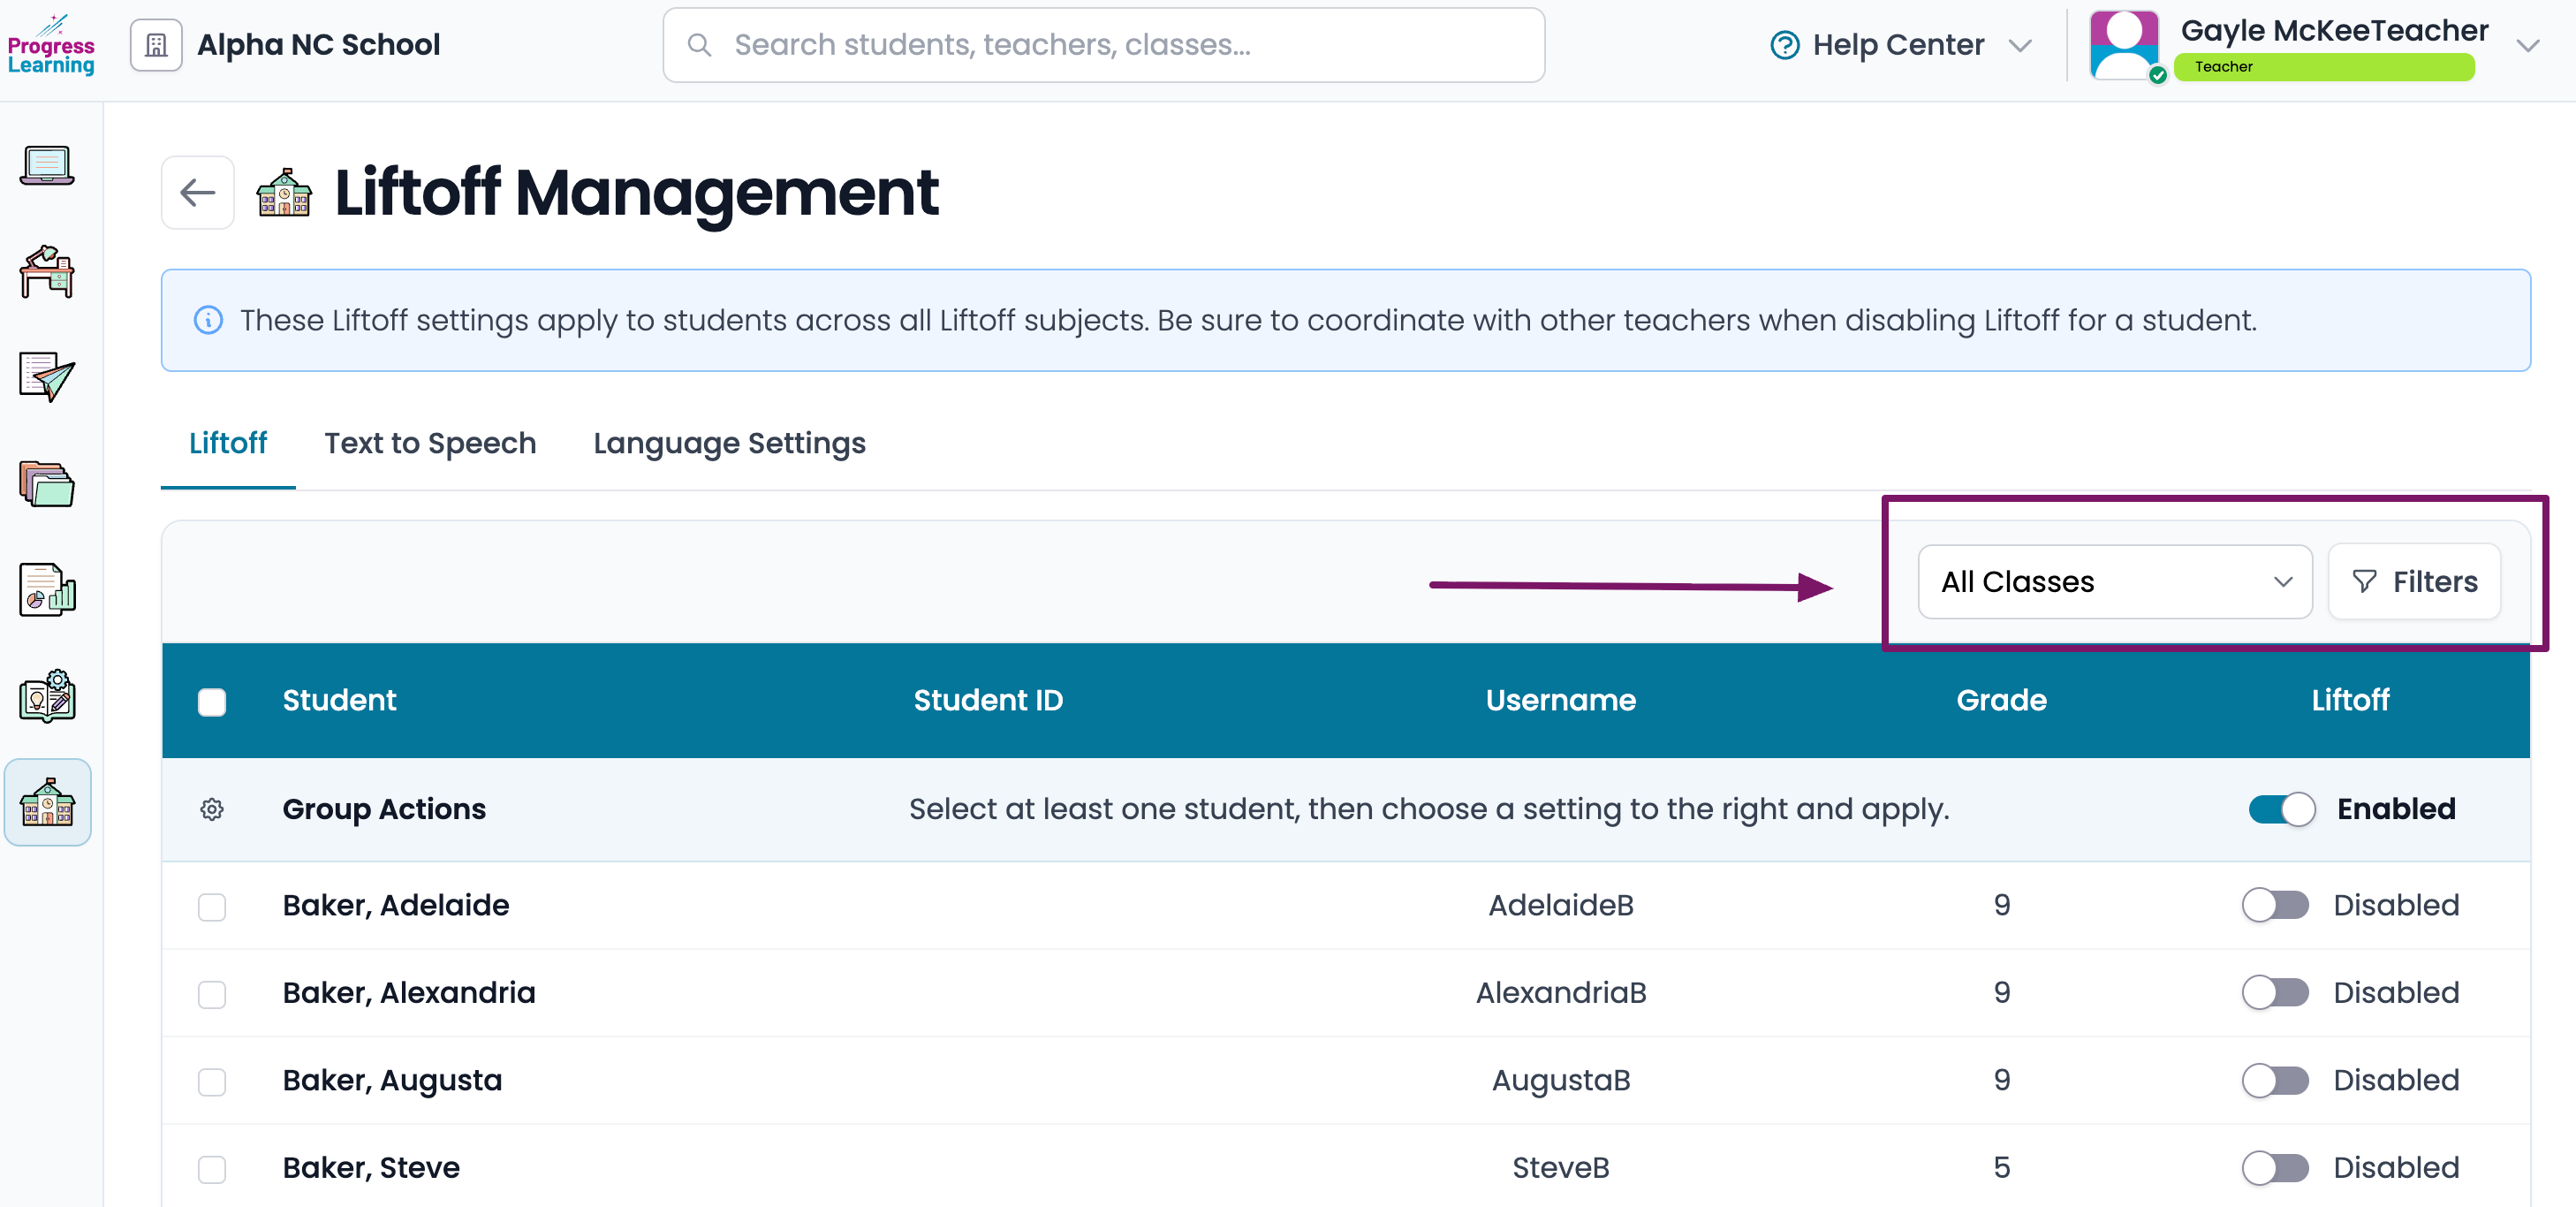
- To enable Liftoff, toggle the button on the far right hand side to the on (blue) position. You will see the word "Enabled" if you've correctly toggled the button on.
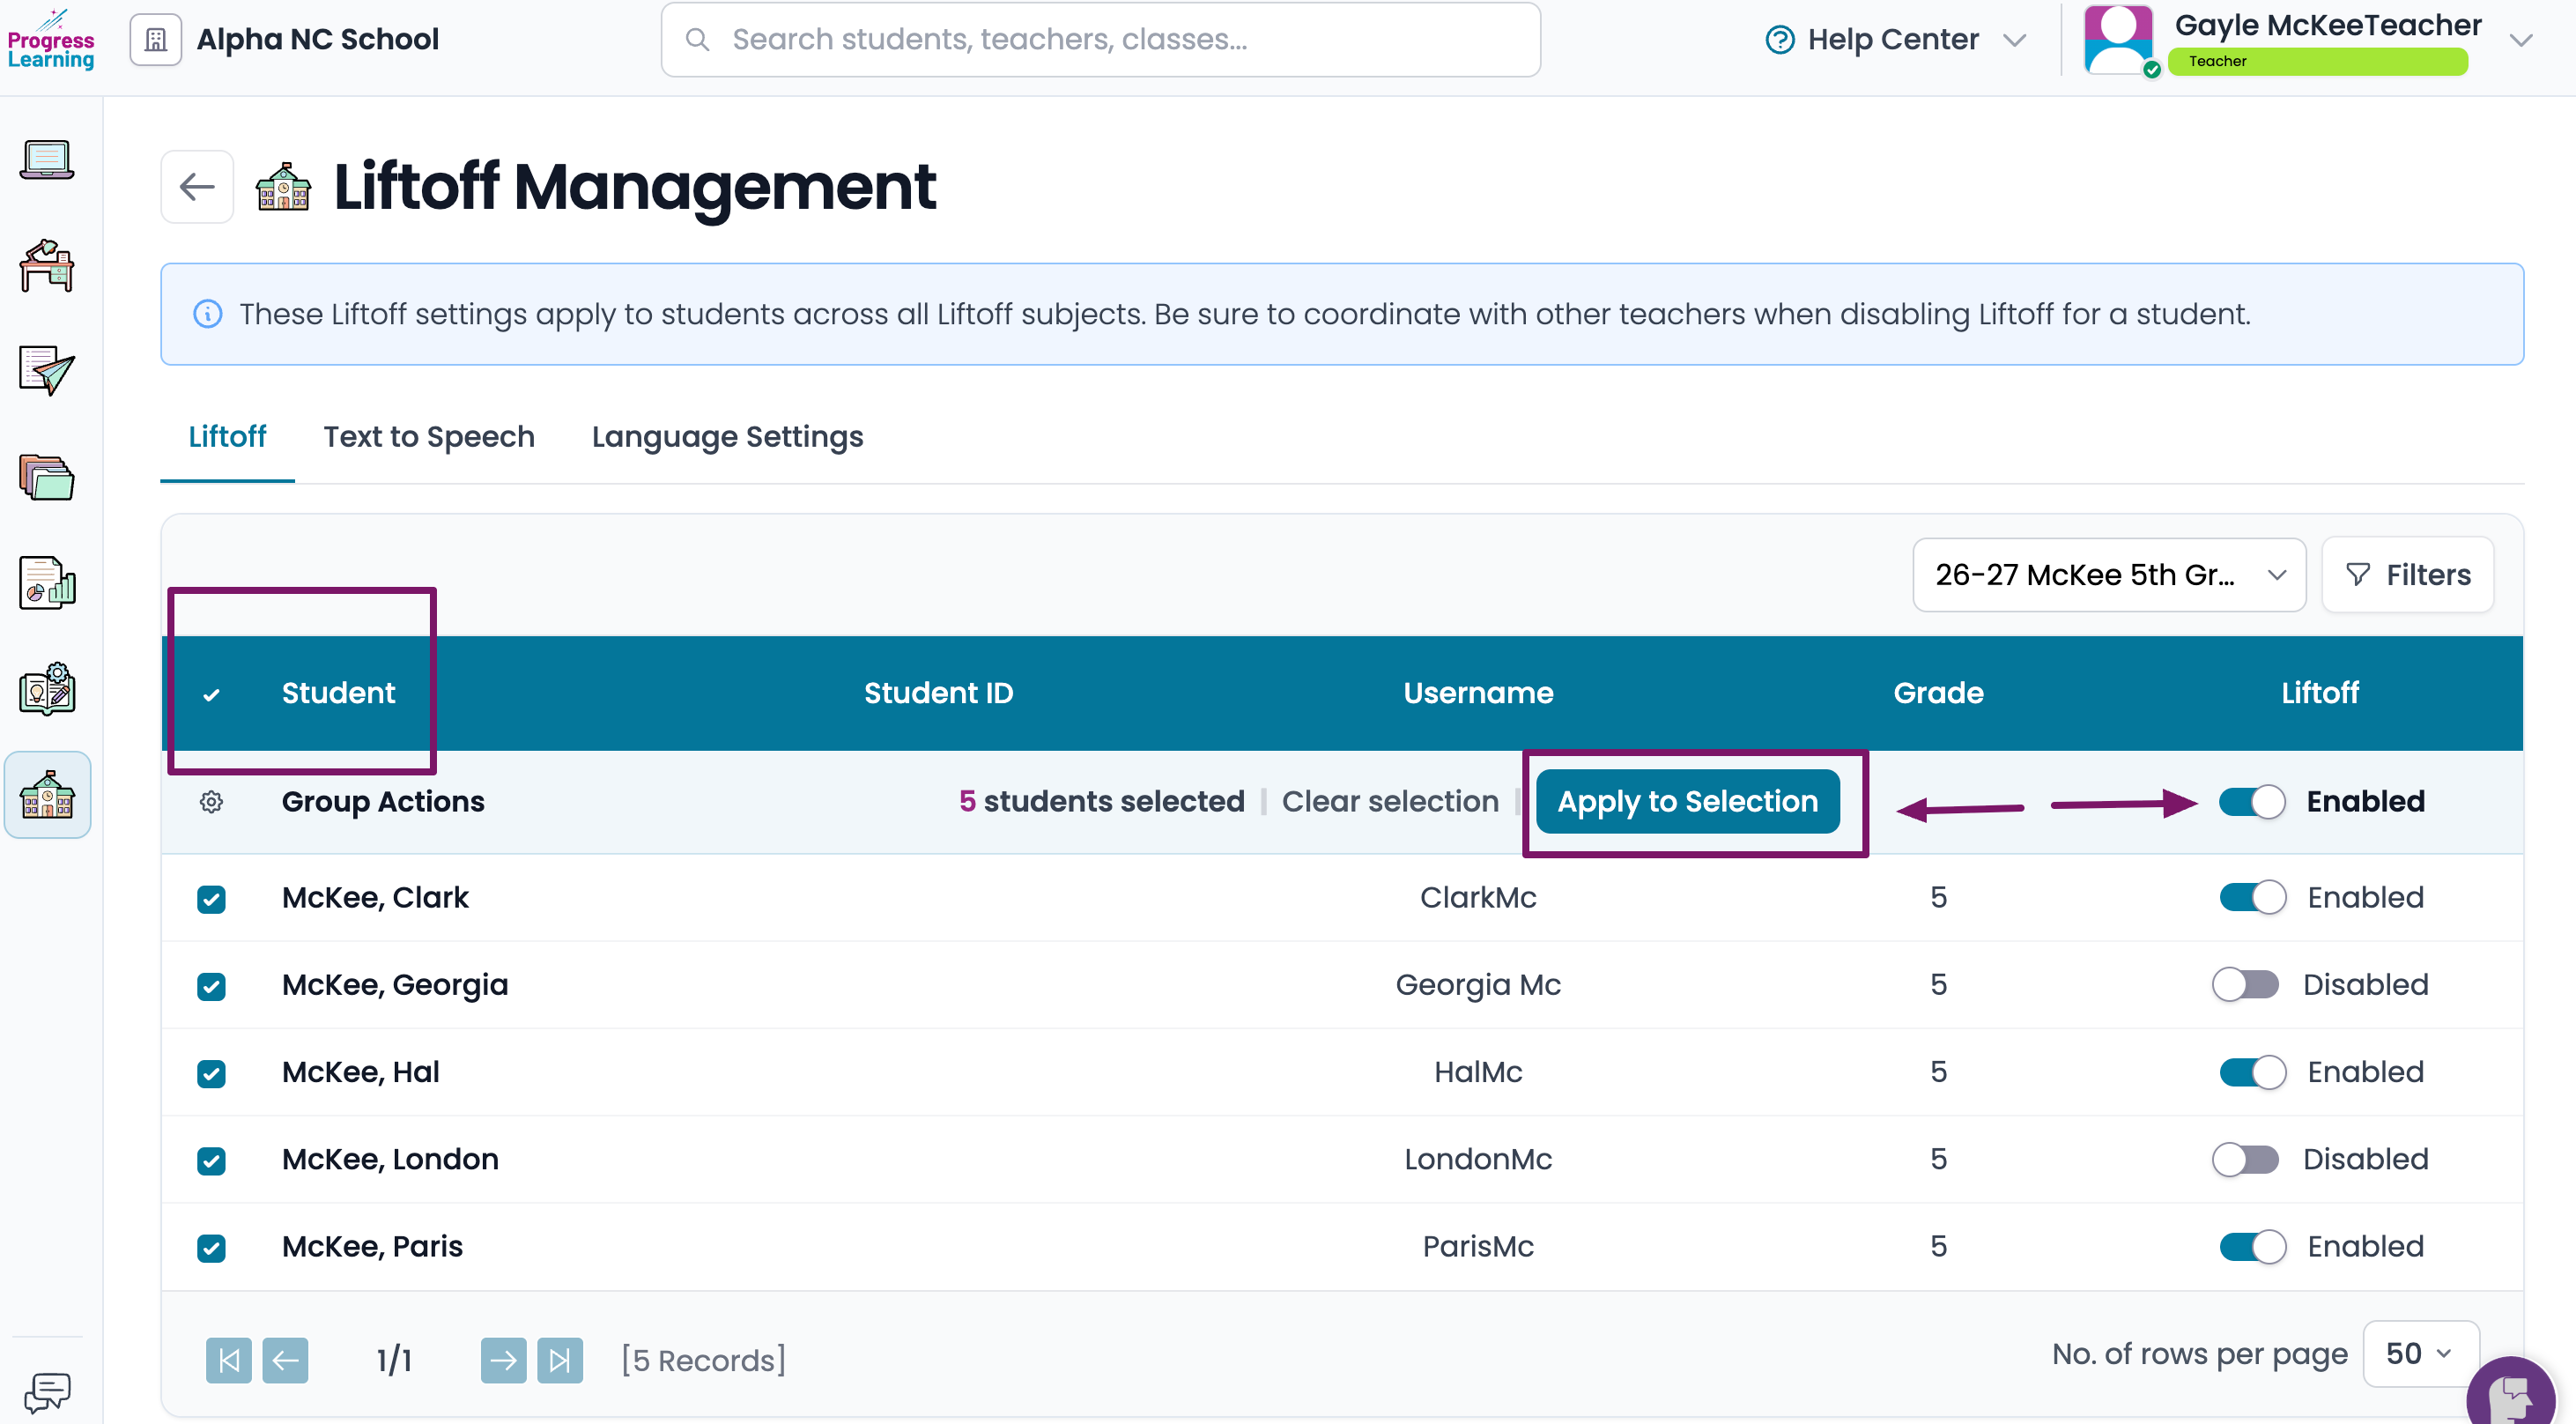
You have the option to enable Liftoff for the entire class by ticking the box next to the word Student in the blue bar and clicking on Apply to Selection
- From the Text to Speech tab, you will enable or disable Text to Speech in Liftoff.
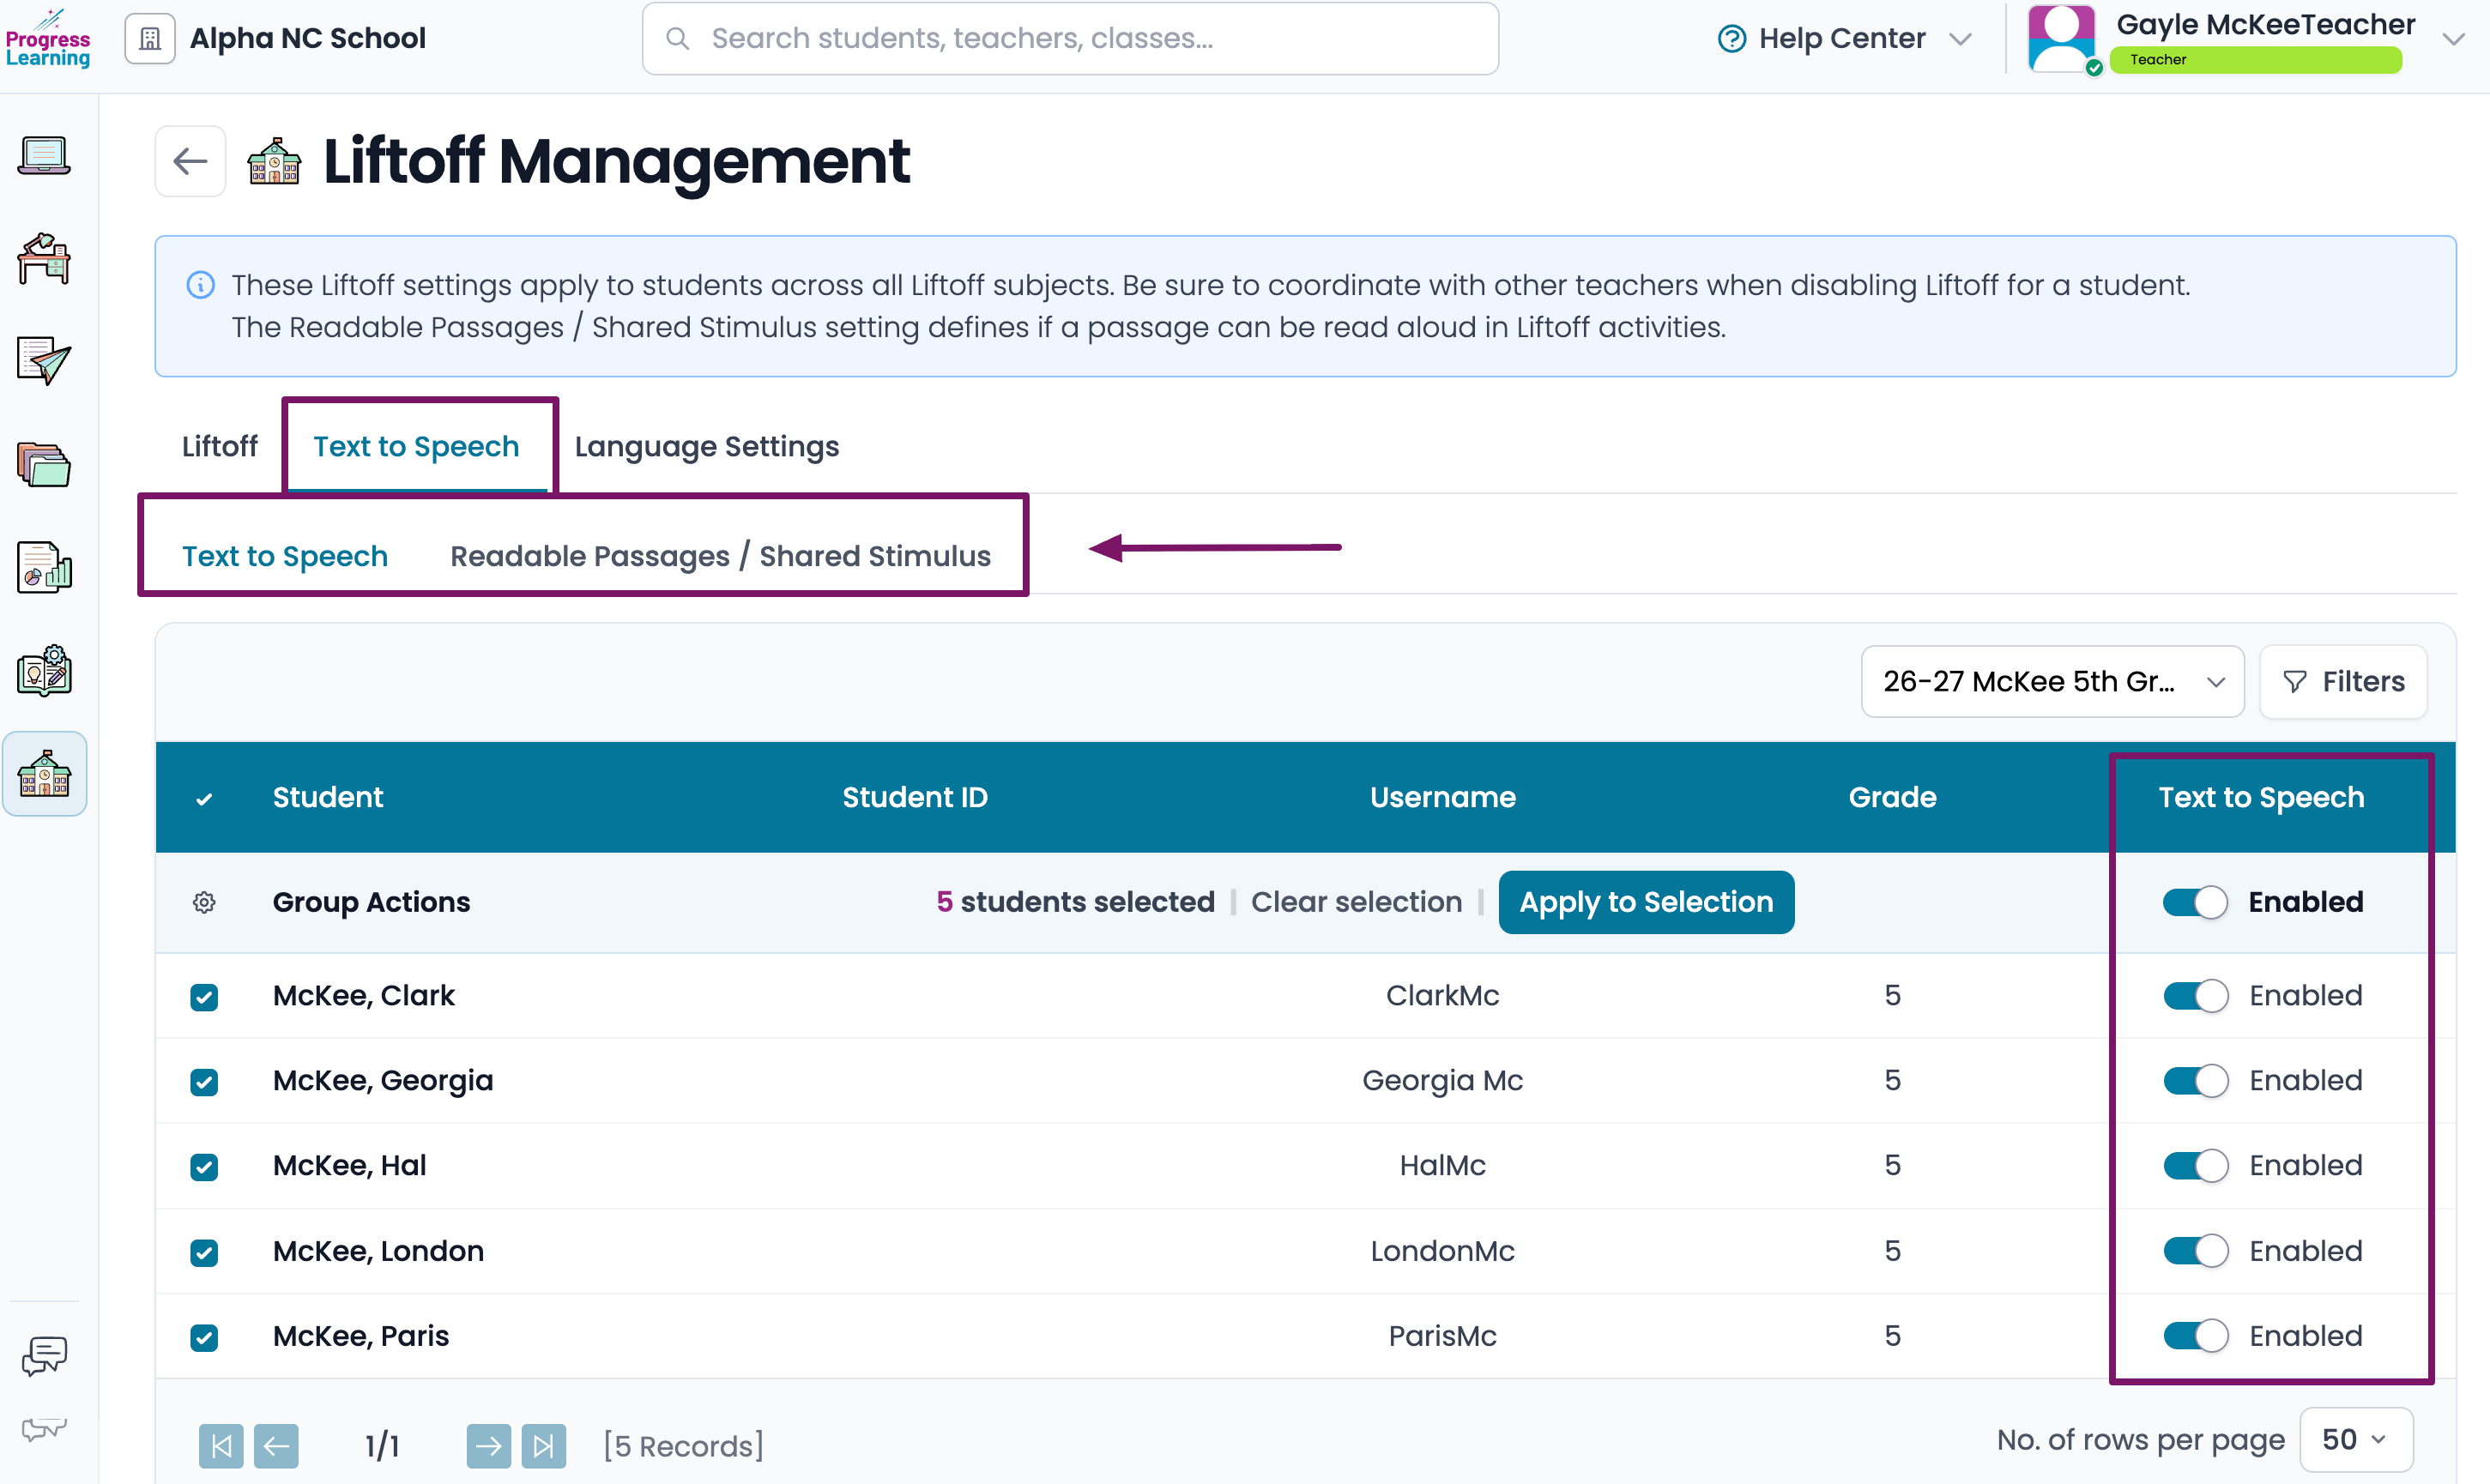
- You can also set Text to Speech for Readable Passages/Shared Stimulus.Turning this setting in the off or disabled position will not read passages to the student.
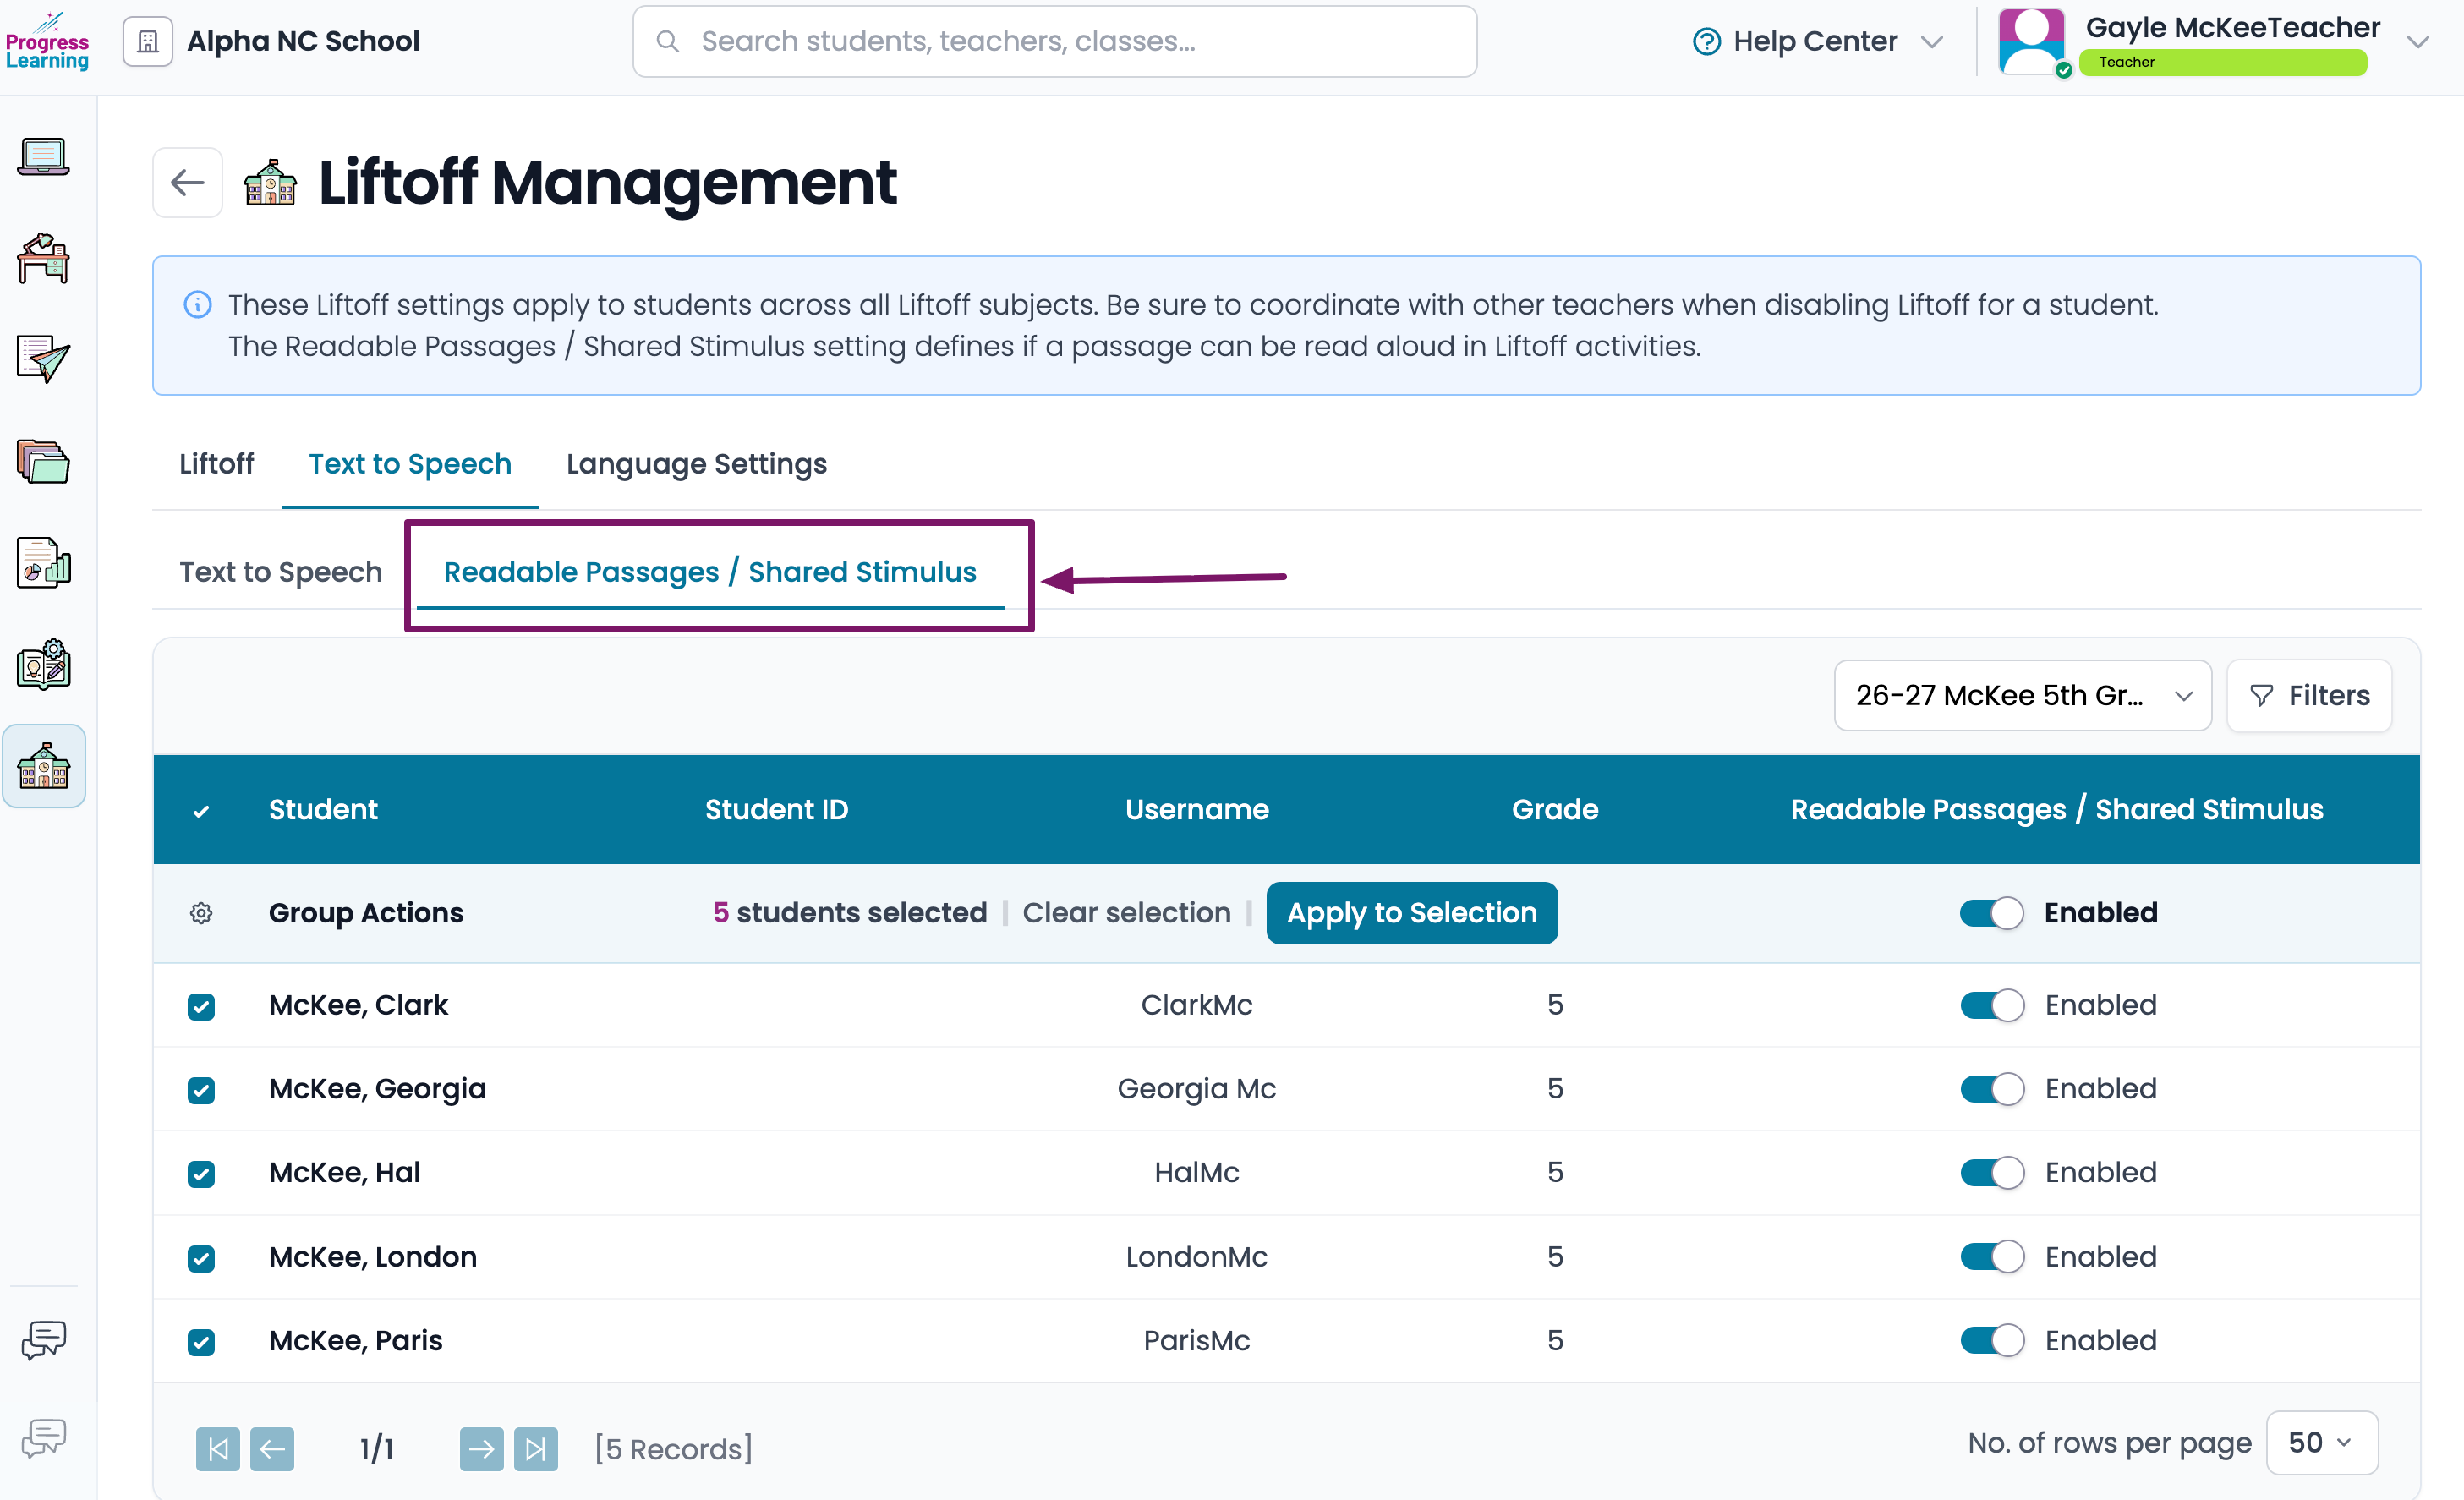
- You can also set Text to Speech for Readable Passages/Shared Stimulus.
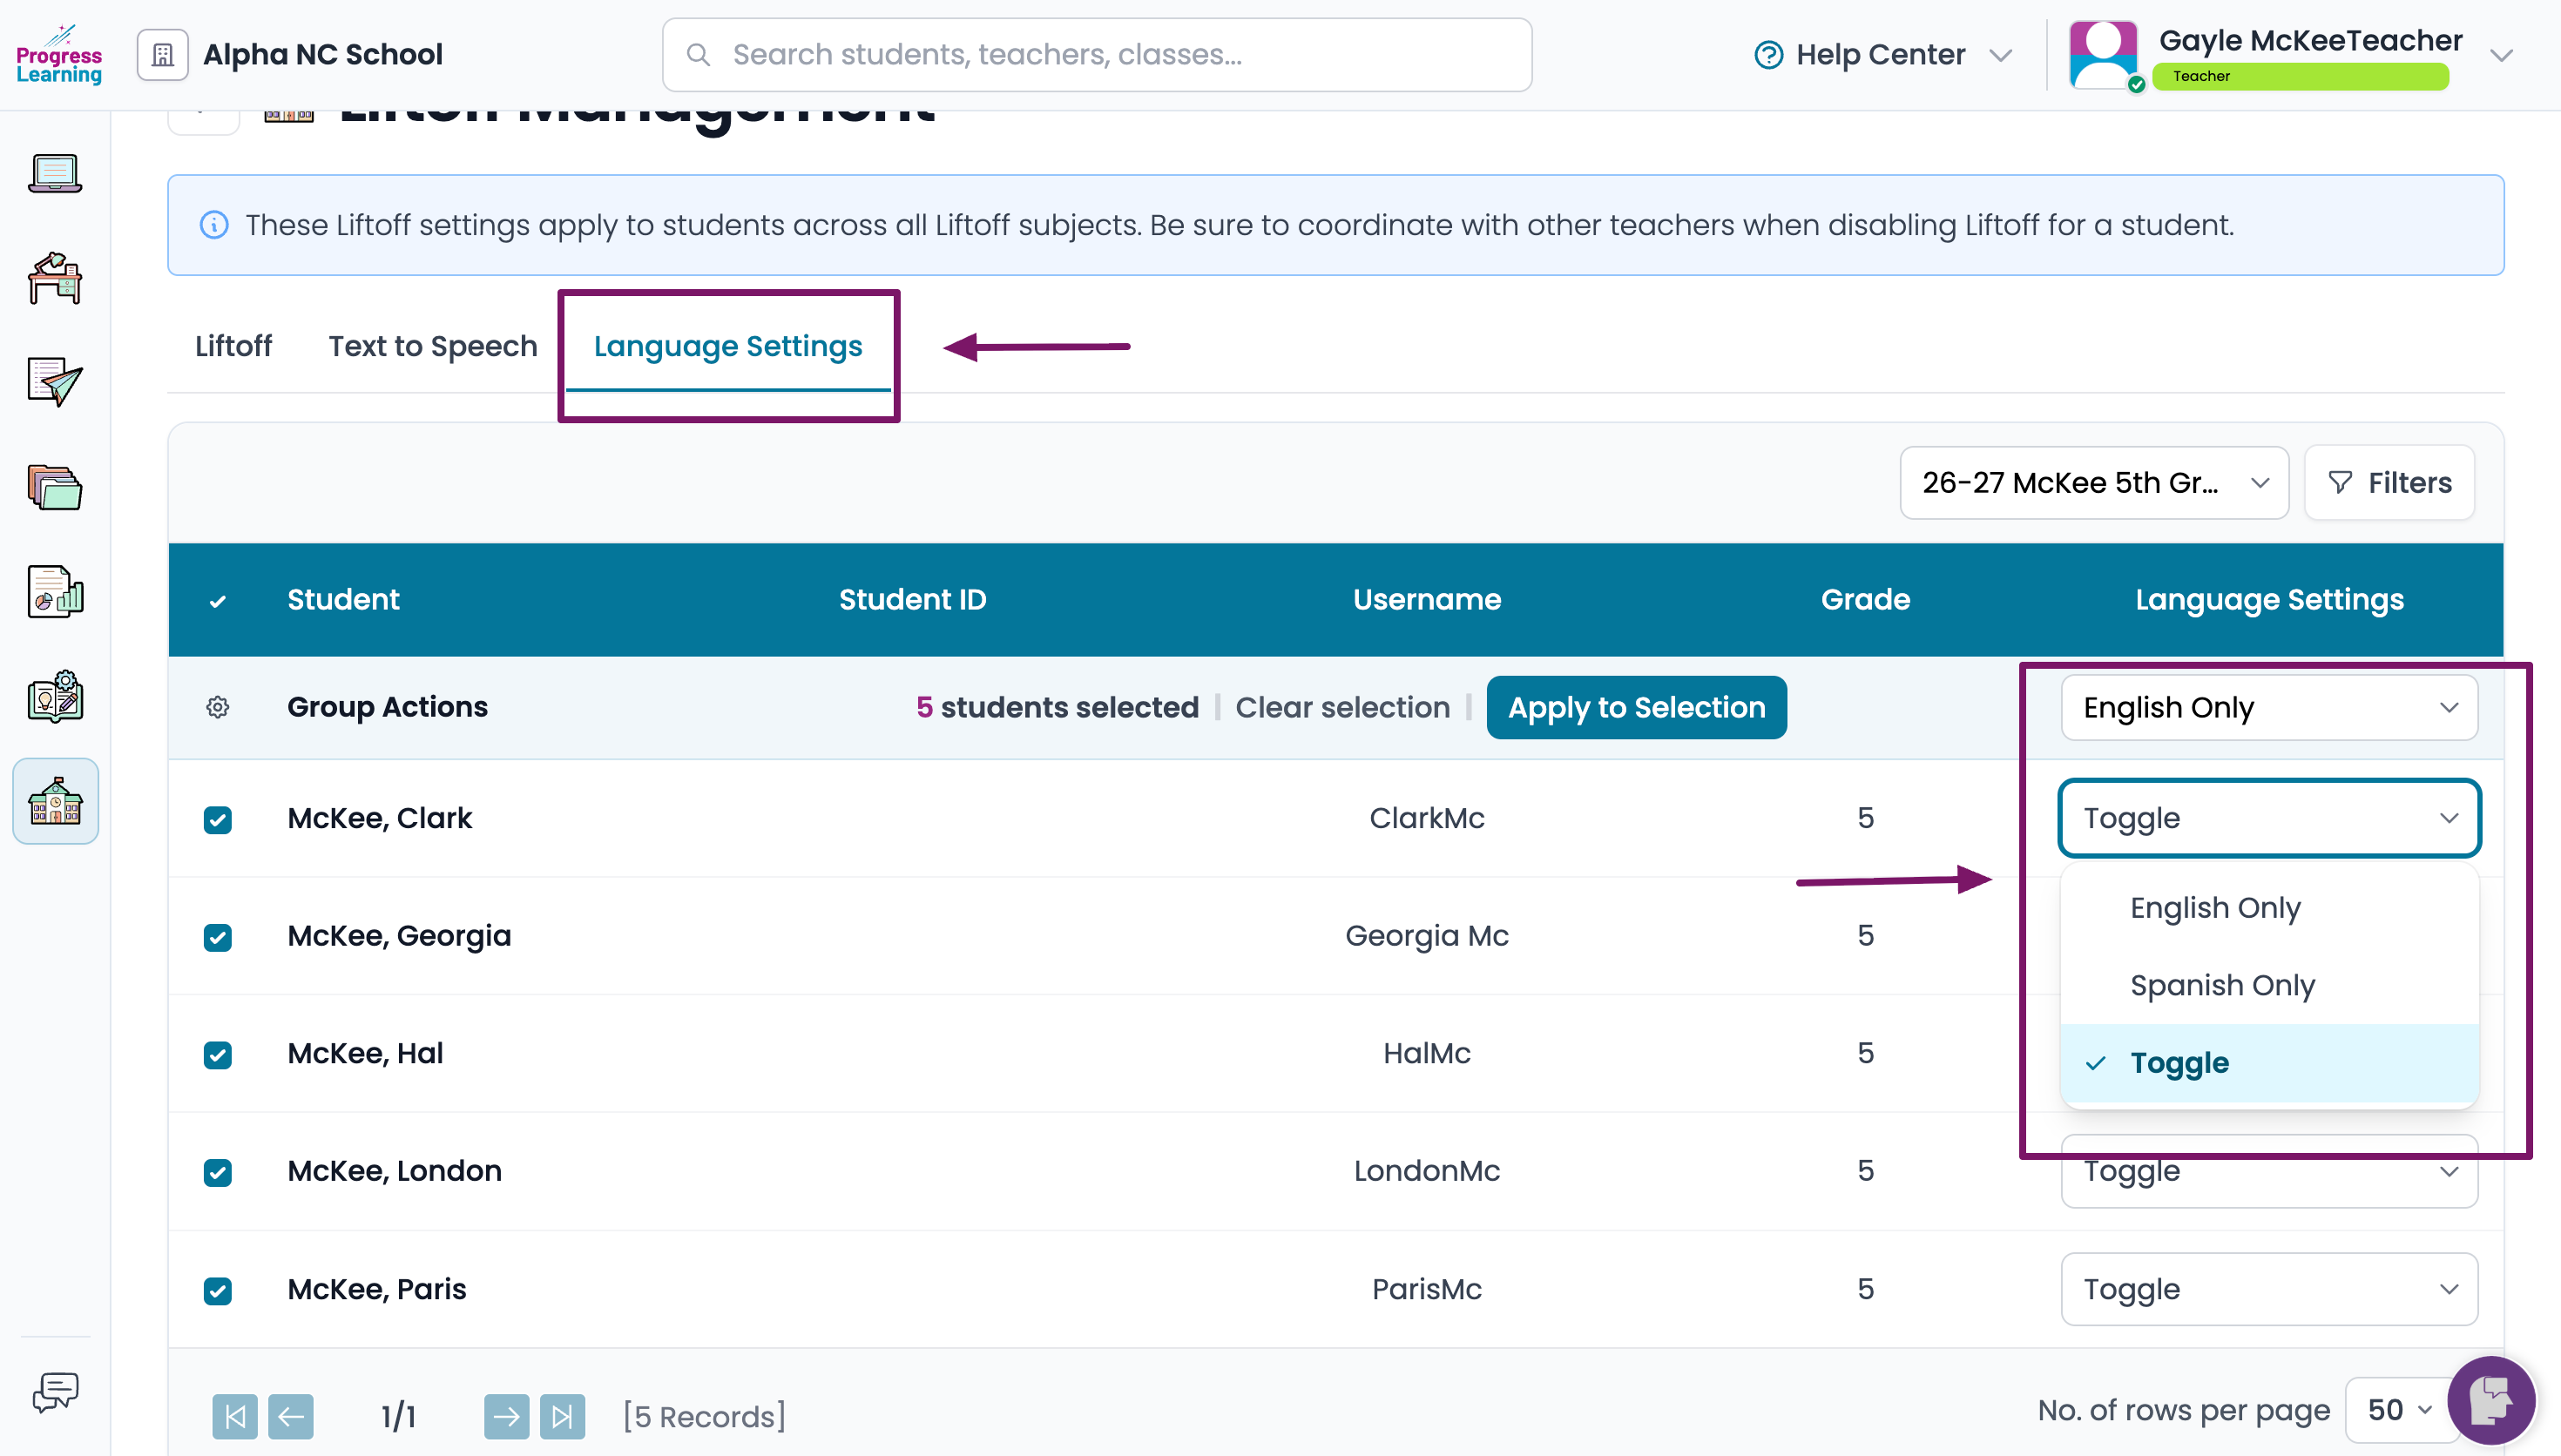
- From the Language Settings tab, select the appropriate radio button.
- Toggle allows the student to choose English or Spanish before they begin a set of questions.
- Spanish Only translates the entire Liftoff platform into Spanish, including the questions.
- English Only provides the student with English language throughout the Liftoff platform with no option to view questions in Spanish.
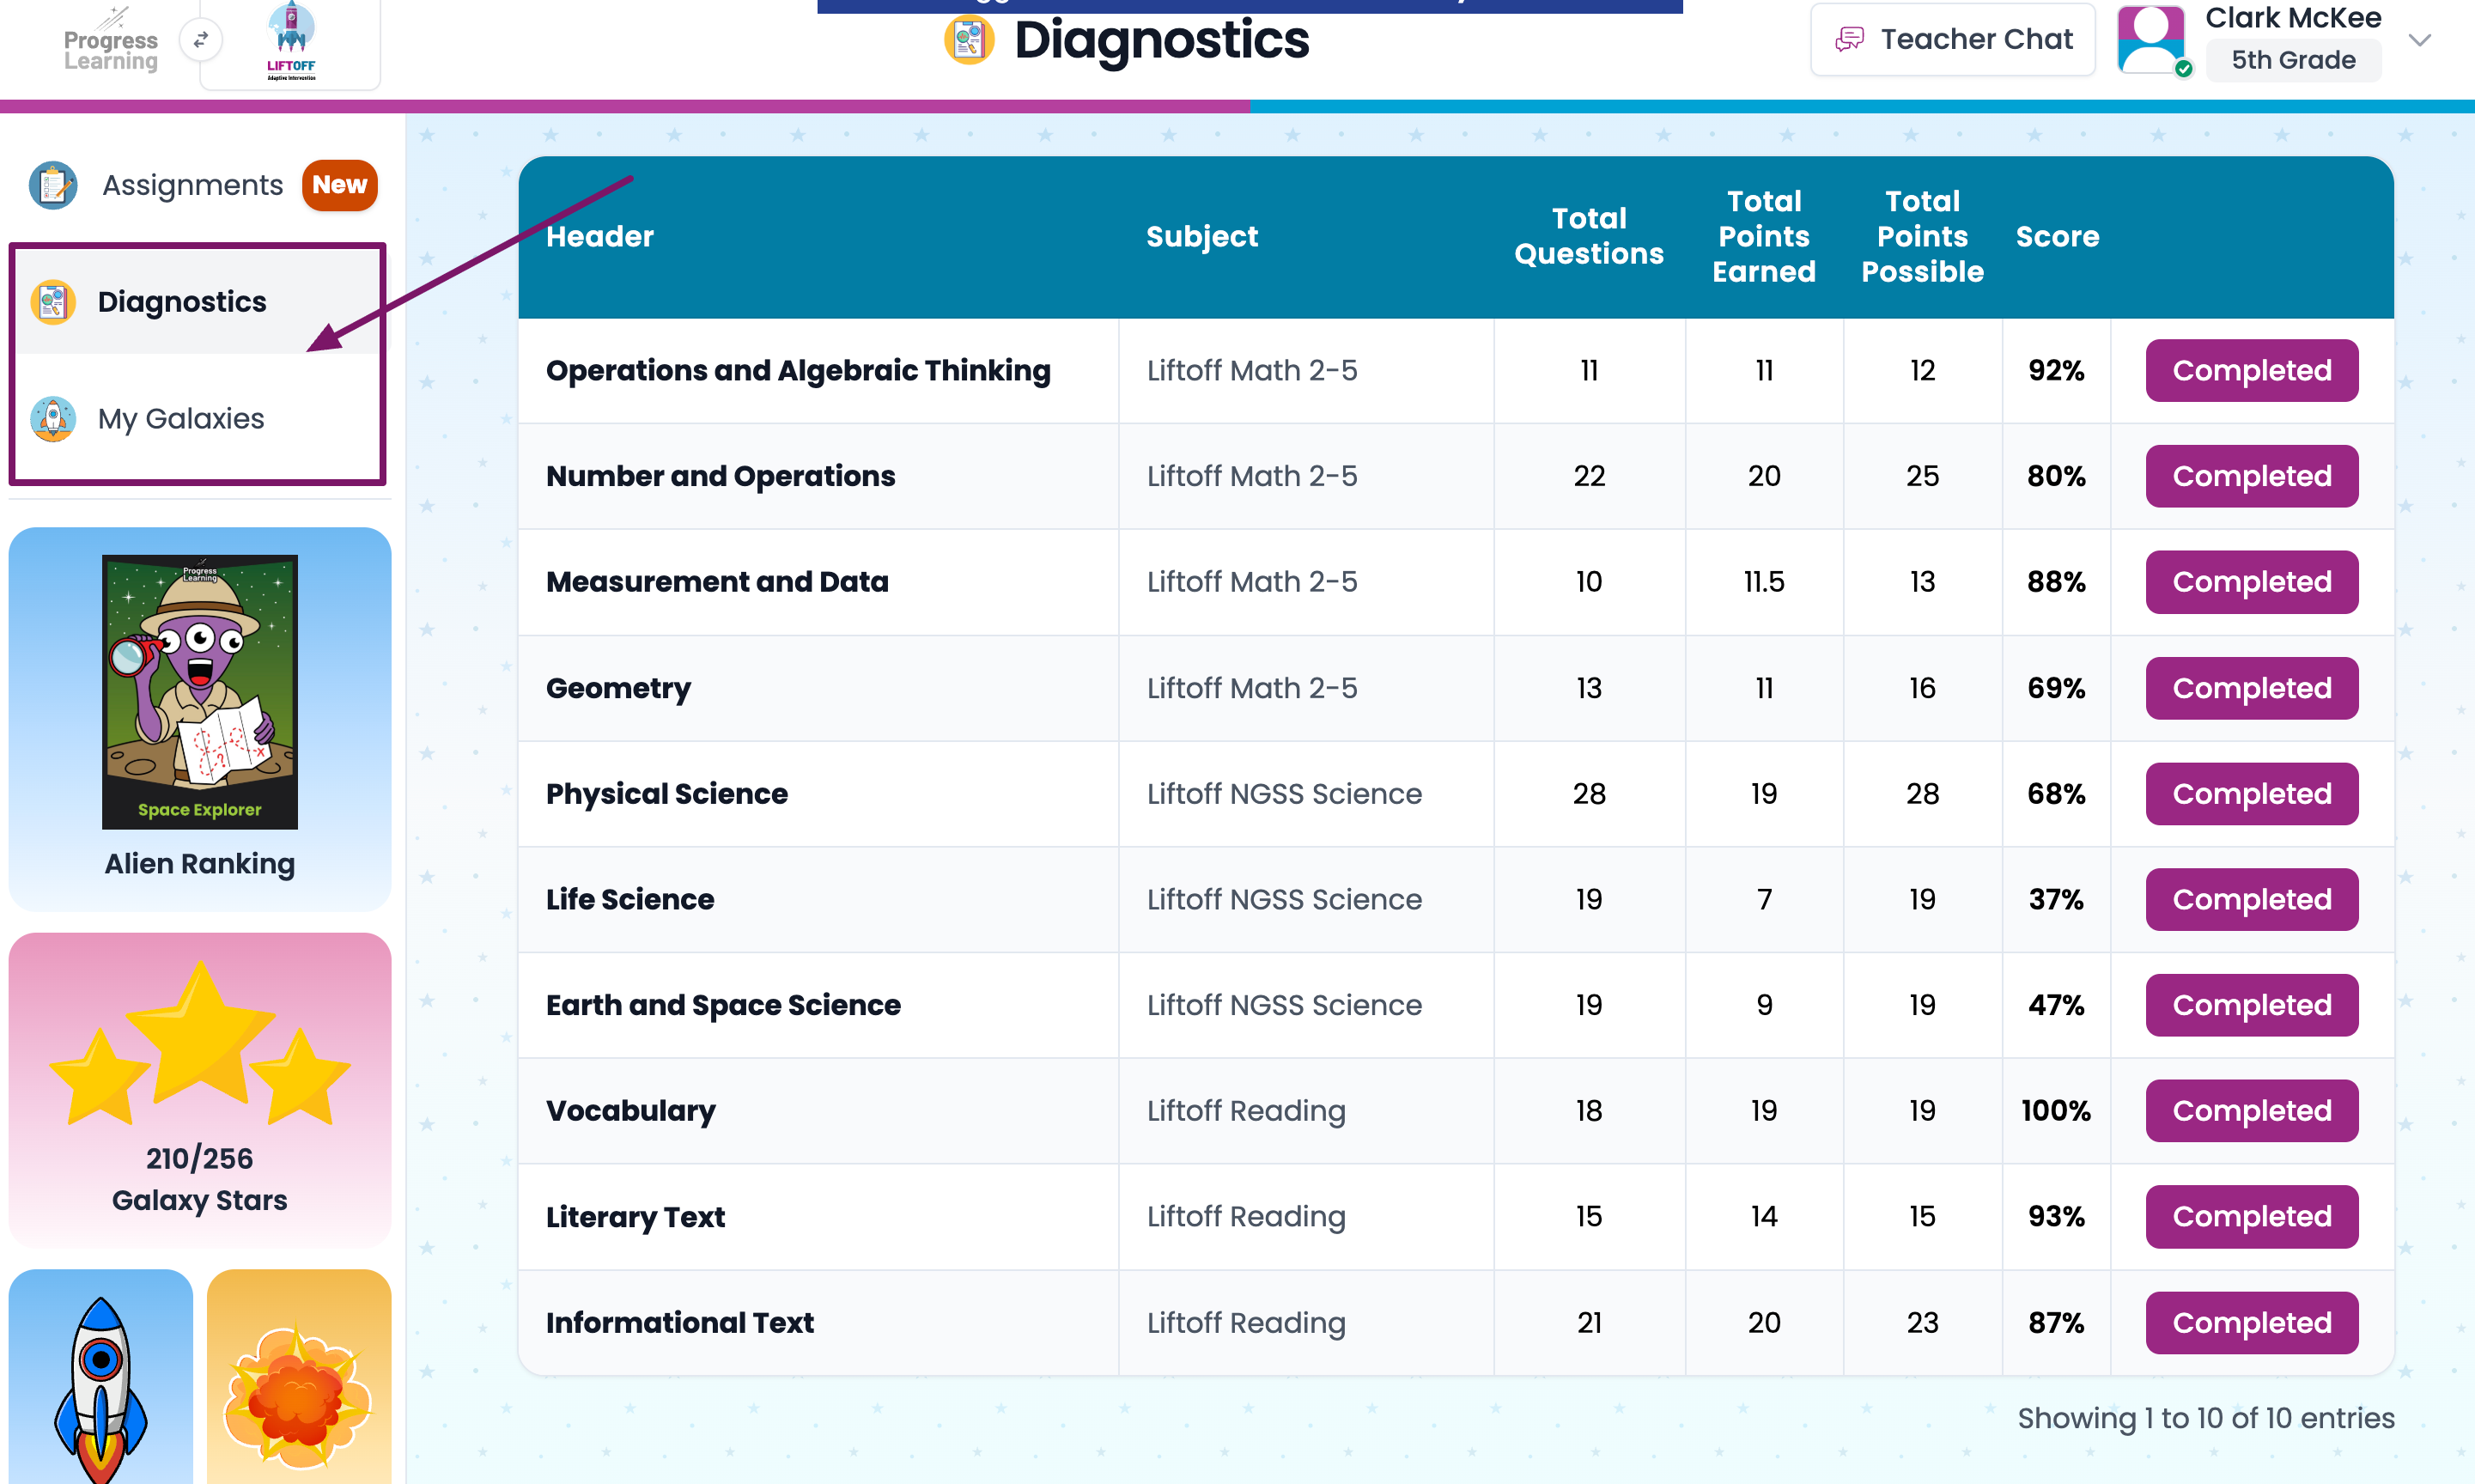
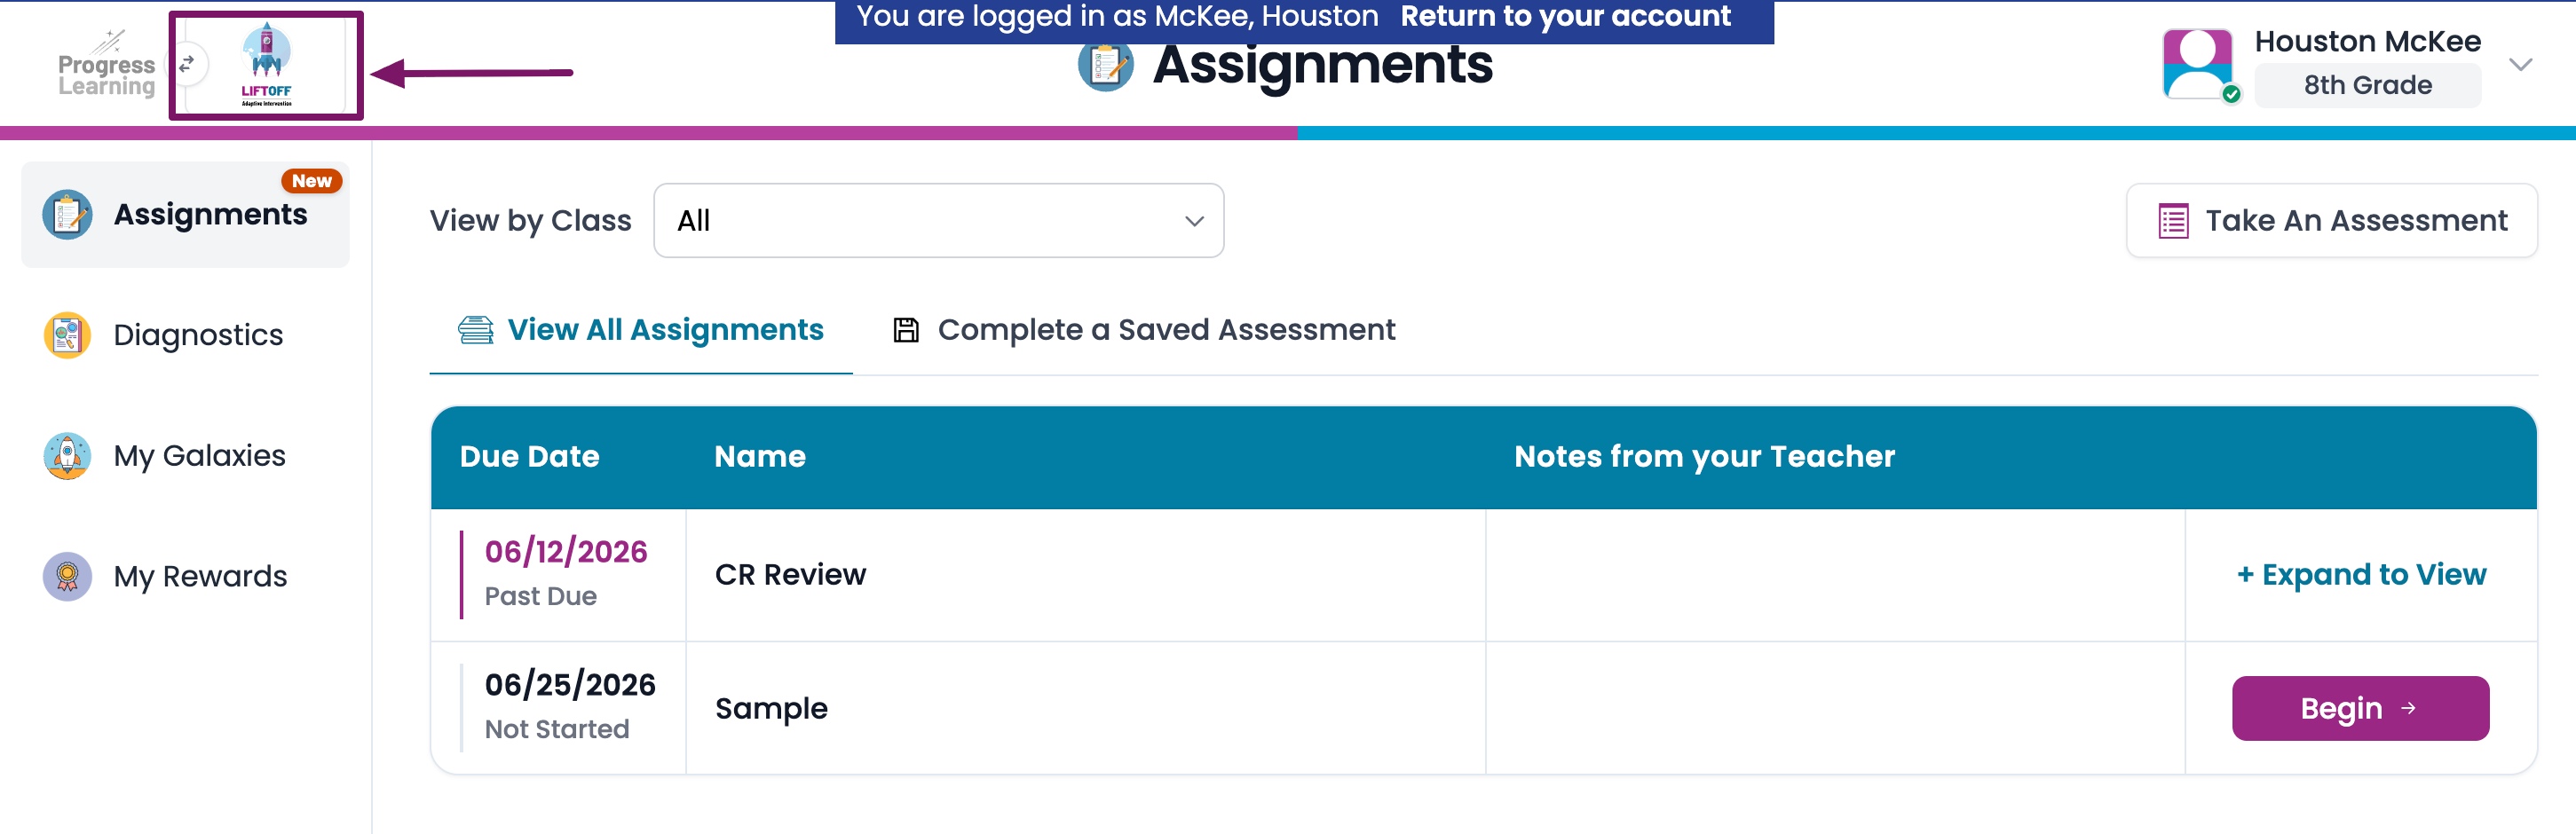
Enabling Liftoff will allow your students to select the Liftoff Icon in the top-left corner of their dashboard.
In Liftoff, students need to complete at least one diagnostic test in order to get started on their individualized learning path called My Galaxies. If your student has taken the NWEA MAP test and your school imports those scores, then your student will not need to take a diagnostic test. Instead, they can get started right away in My Galaxies.