How do I add a co-teacher to my class?
- From your homepage, click on Go to Class for the class you want to add a co-teacher.

- From the Teachers tab, click the Add Teacher button on the right.

- Search for and select any teacher(s) with which you would like to share the class. Add as many teachers as you need to. Only teachers with accounts at your school will appear in this list. Then click Add Teacher.

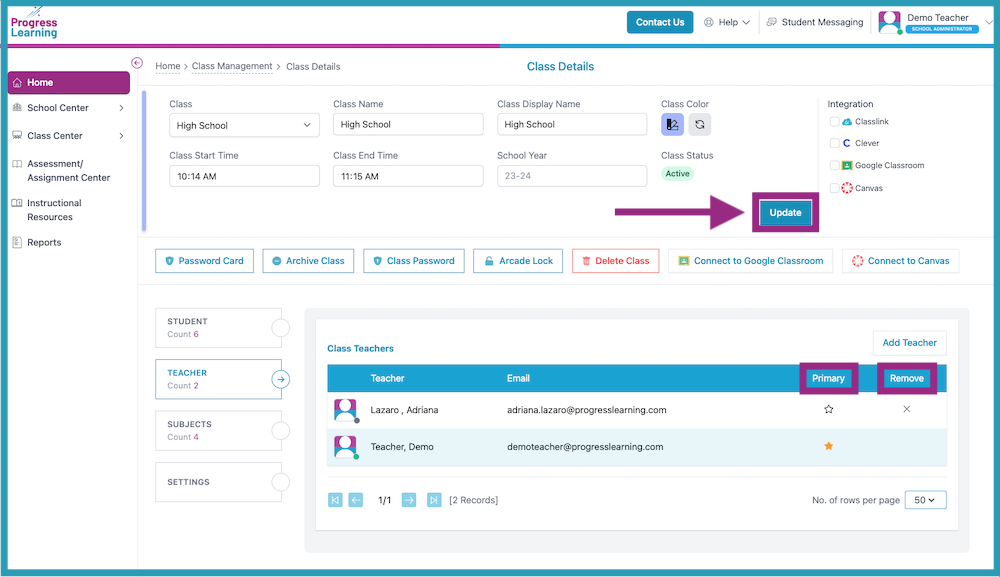
- You will see any teacher(s) you added. The Primary teacher will be represented by a gold star. To remove any teacher with whom the class is shared, click the "X" under the Remove column. To complete the process, click the Update button.

Co-teachers who are added to a class are able to create assignments and send them to students. Co-teachers can also pull data and reports associated with that specific class. Co-teachers cannot change students' settings like text-to-speech or Spanish translations, nor can they add or remove subjects connected with a class.
Only Primary teachers are able to delete a class. The original owner (Primary teacher) of the class can transfer ownership to one teacher to become a Primary teacher.
Primary teachers are able to add as many co-teachers as necessary to a class.

