How do I complete the setup of my Clever or Classlink classes?

Primary teachers:
Only Primary teachers are able to edit the class settings listed below.
Co-teachers:
Any changes to your Clever or ClassLink integrated classes must be made by your data admin for your roster server. Co-teachers are able to create assignments and send them to students. Co-teachers can also pull data and reports associated with that specific class. Co-teachers are unable to change the settings of individual students like text-to-speech or Spanish translations. Co-teachers are also unable to add or remove subjects connected with a class.
Click here to learn more; How do I add a co-teacher to my class?
- Find the Progress Learning icon in Clever or ClassLink and click on the button that logs you into your account.
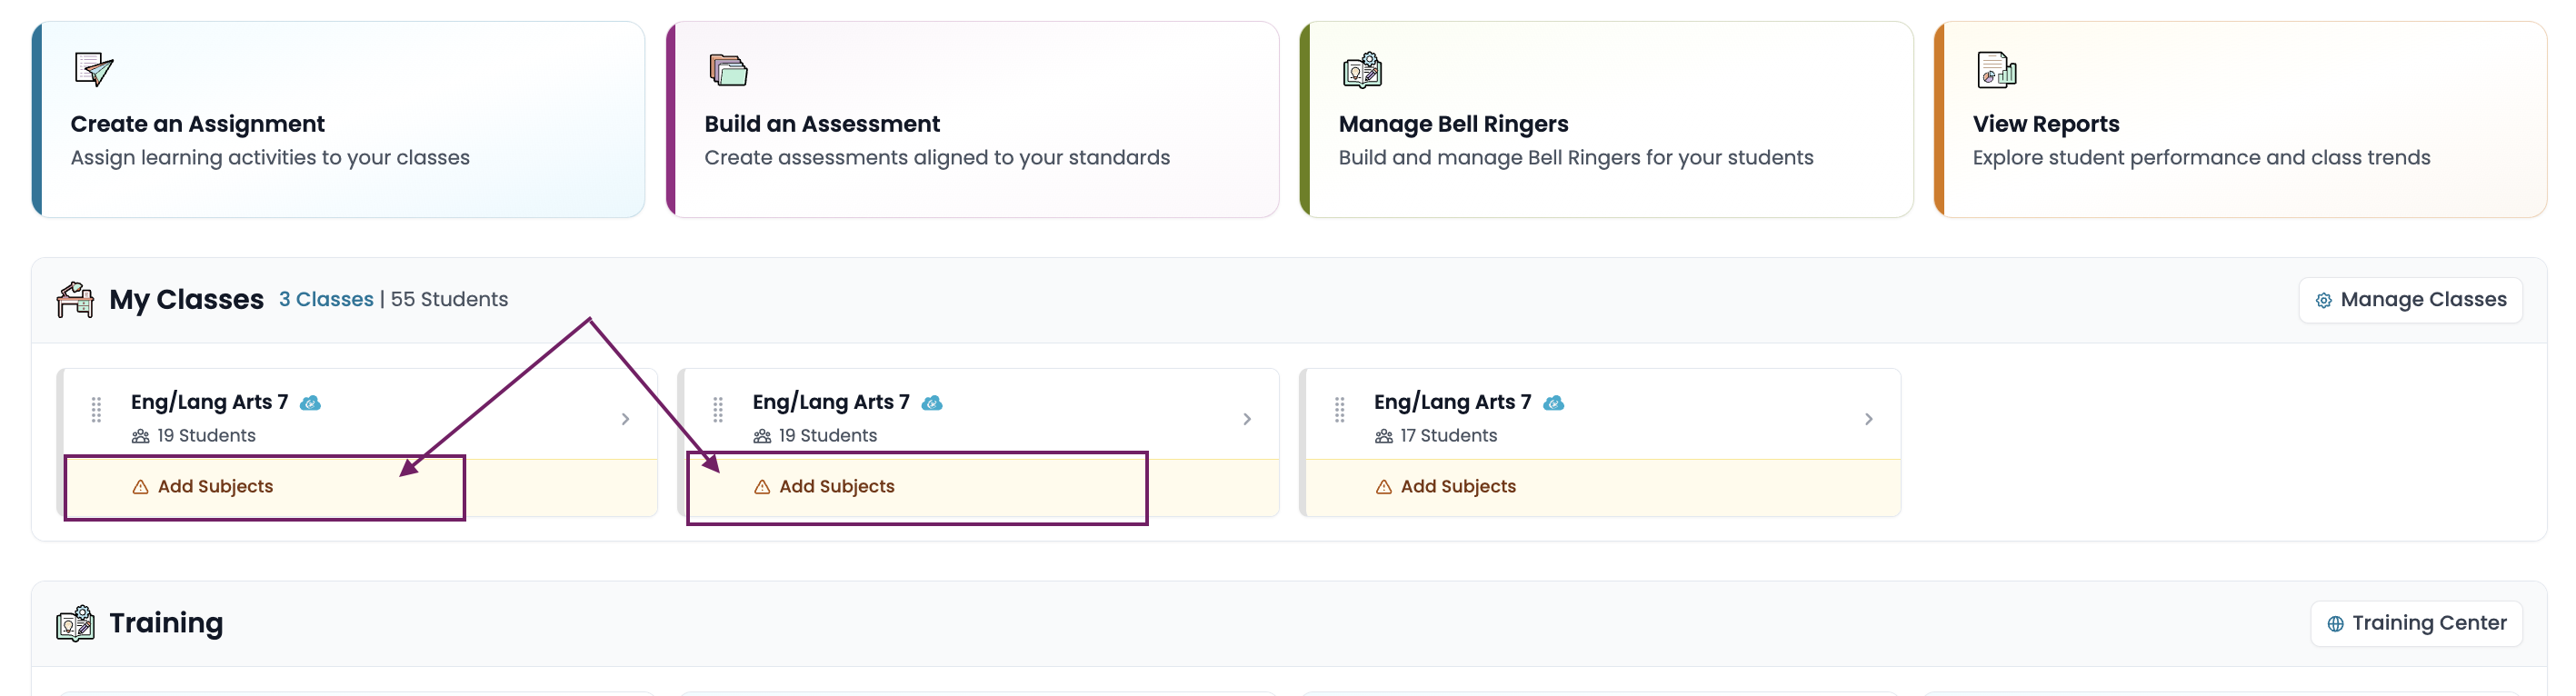
- Once logged into your account, you will see your class list with a notice saying Add Subjects. Click on the red text.
- You will be brought to the Class Details page. From this page, you will see an alert indicating that class setup is incomplete. You will need to select the Subjects tab on the left and click "Add Subject" box. Only the Primary Teacher can add/change subjects associated with a Class.
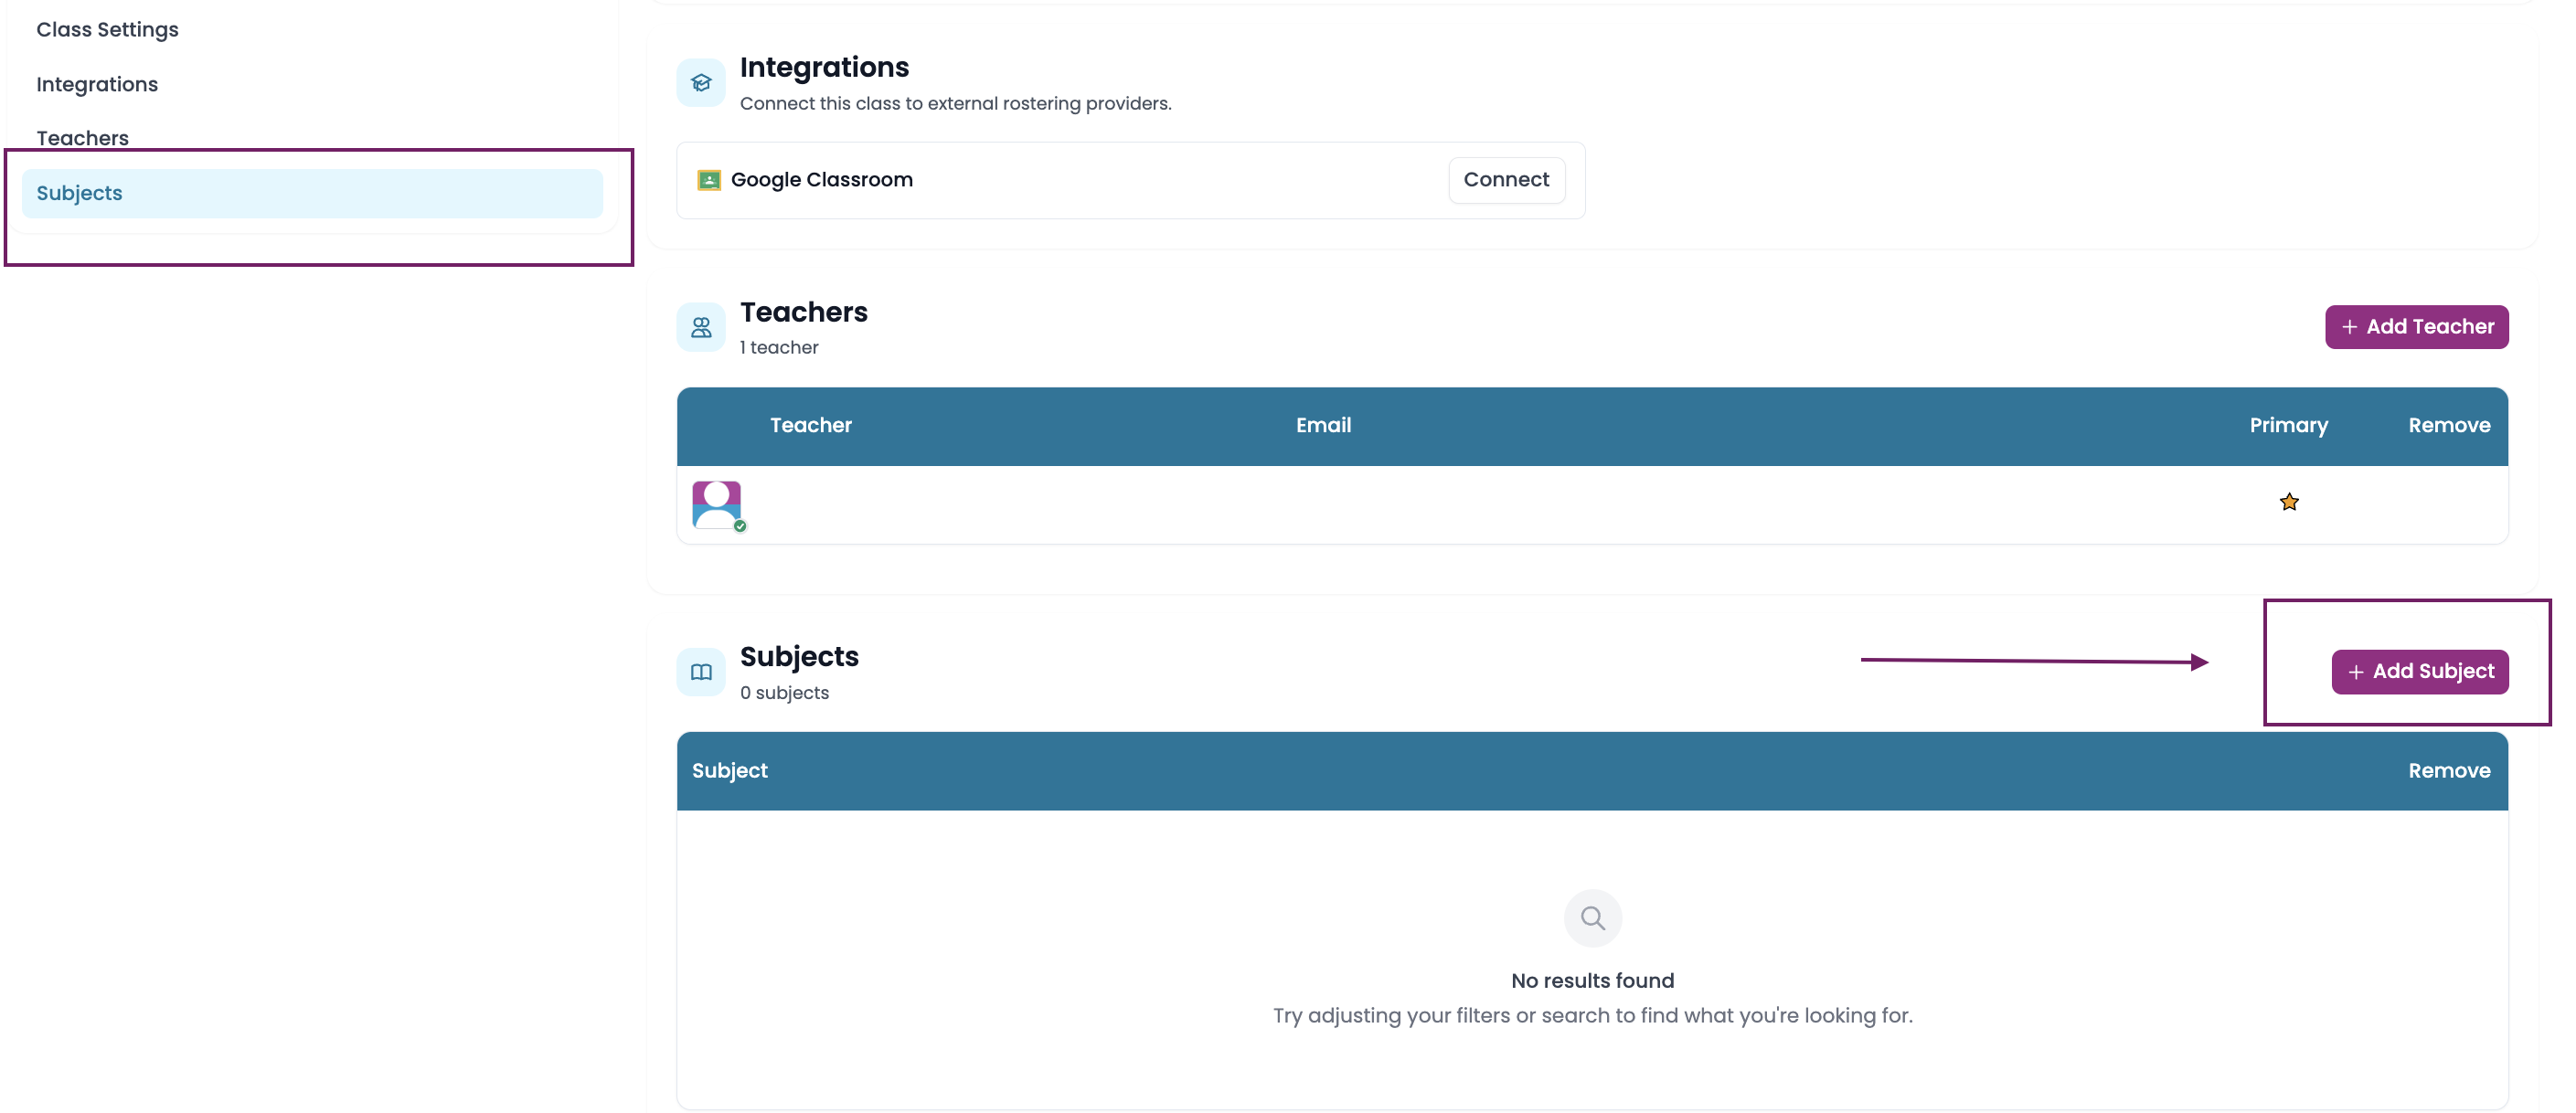
- Once you have clicked on Add Subject, you will be sent to a window that has a list of all the subjects your school has access to:
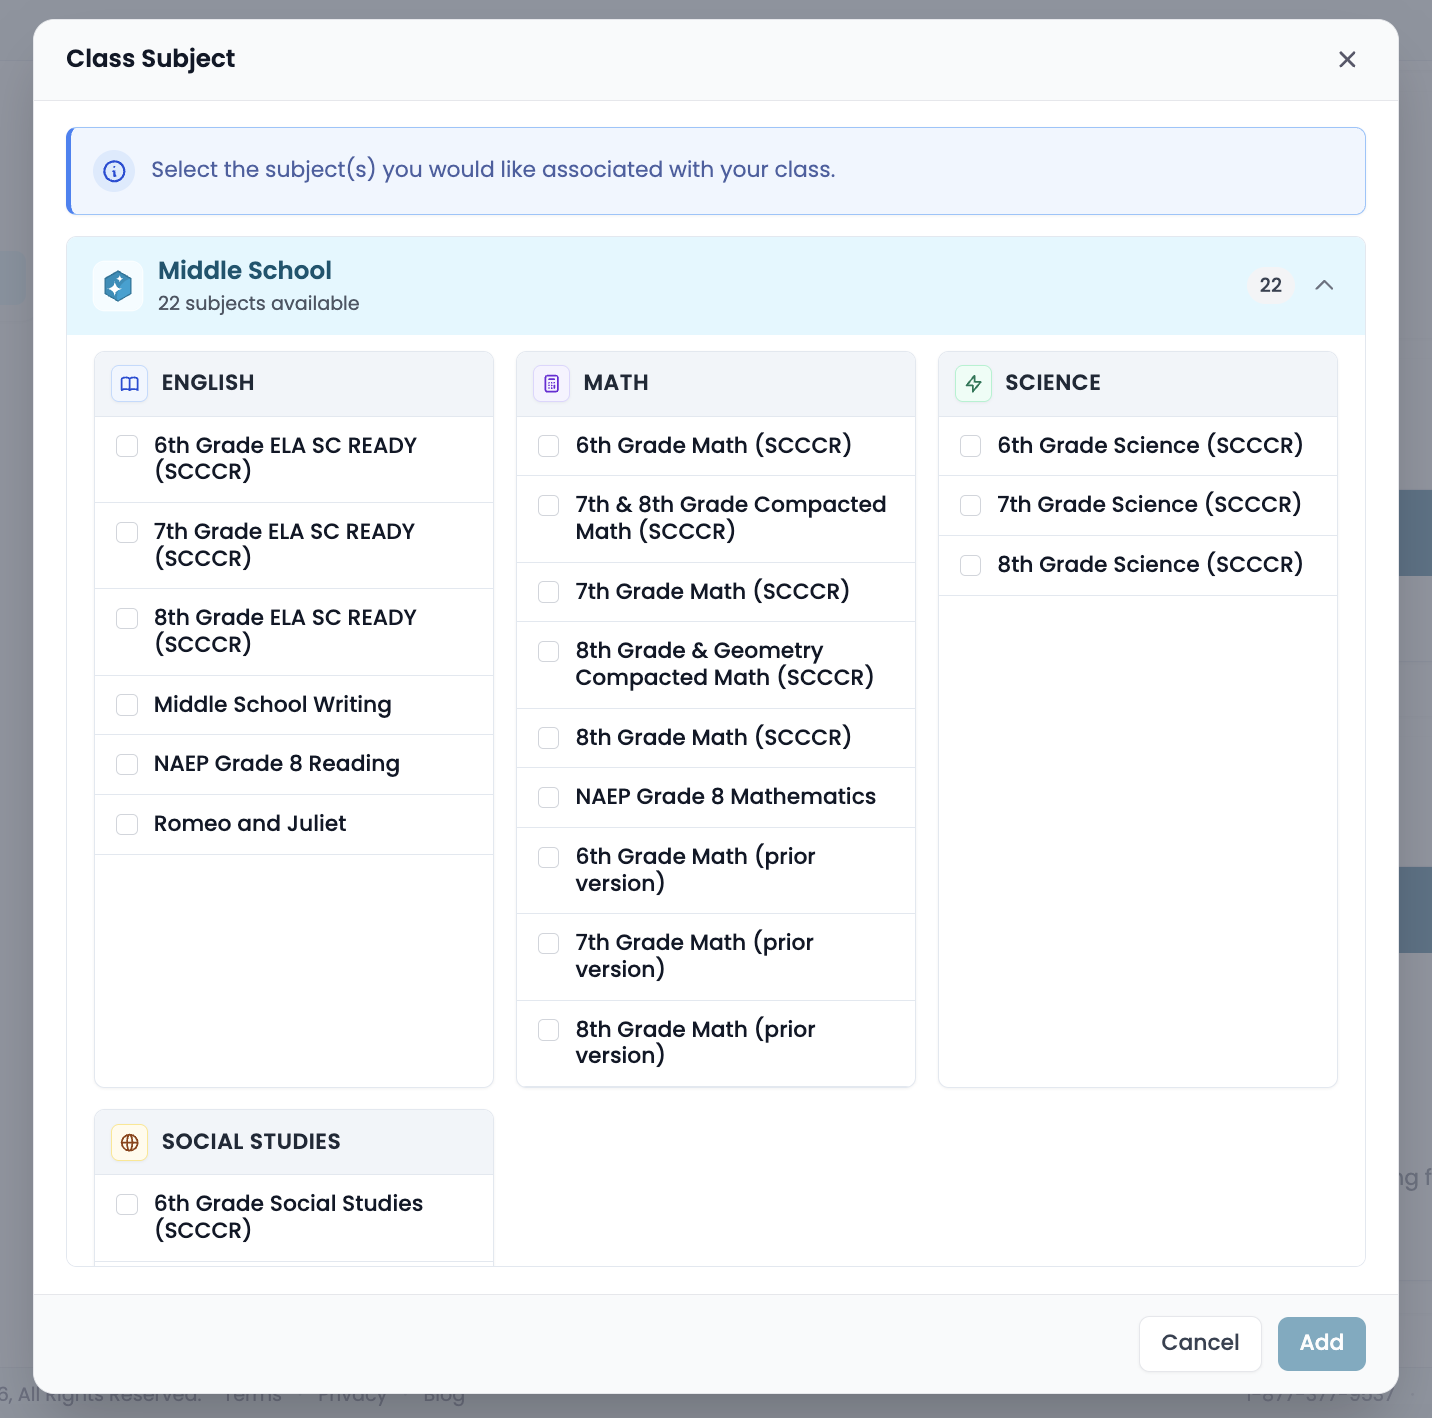
Find the content or subject area that correlates with this particular class and select it by clicking in the box to the left of the subject area and then selecting the blue box in the bottom right-hand corner of the window that says Add.