How do I create an Assignment?
 Updated
by
Gayle McKee
Updated
by
Gayle McKee
How to Create an Assignment
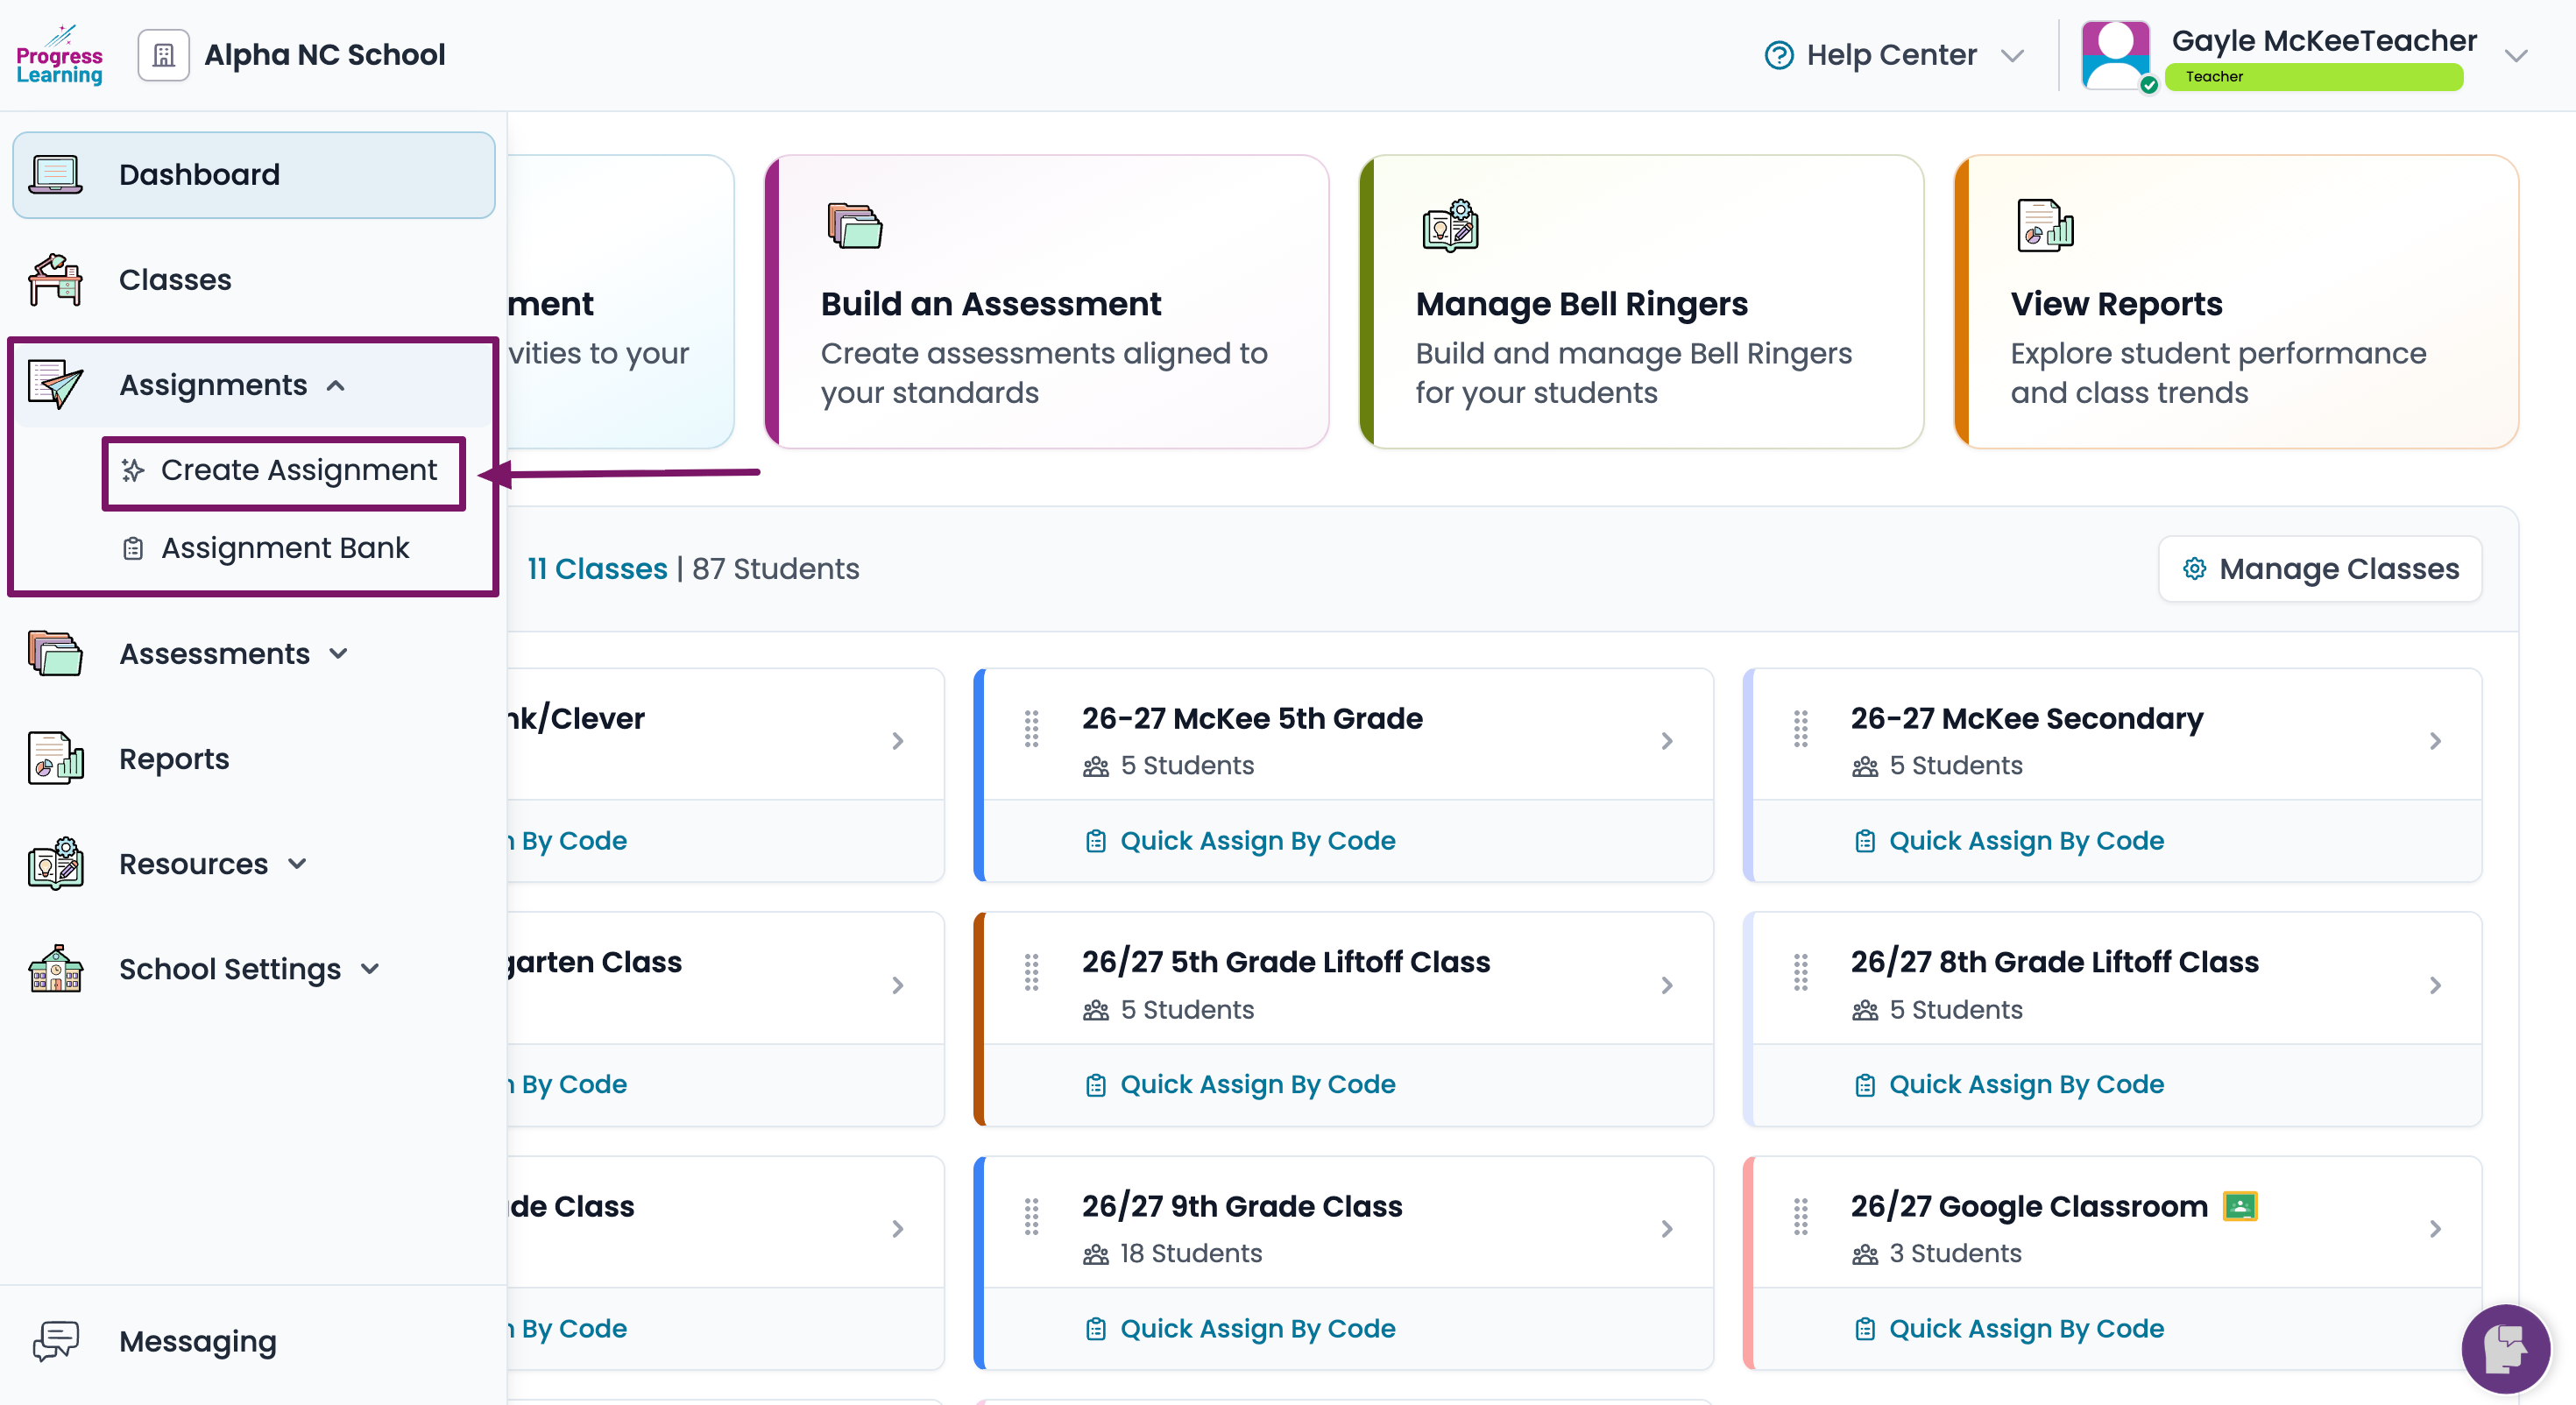
- From the left-side menu, select Assignments and click on Create Assignment
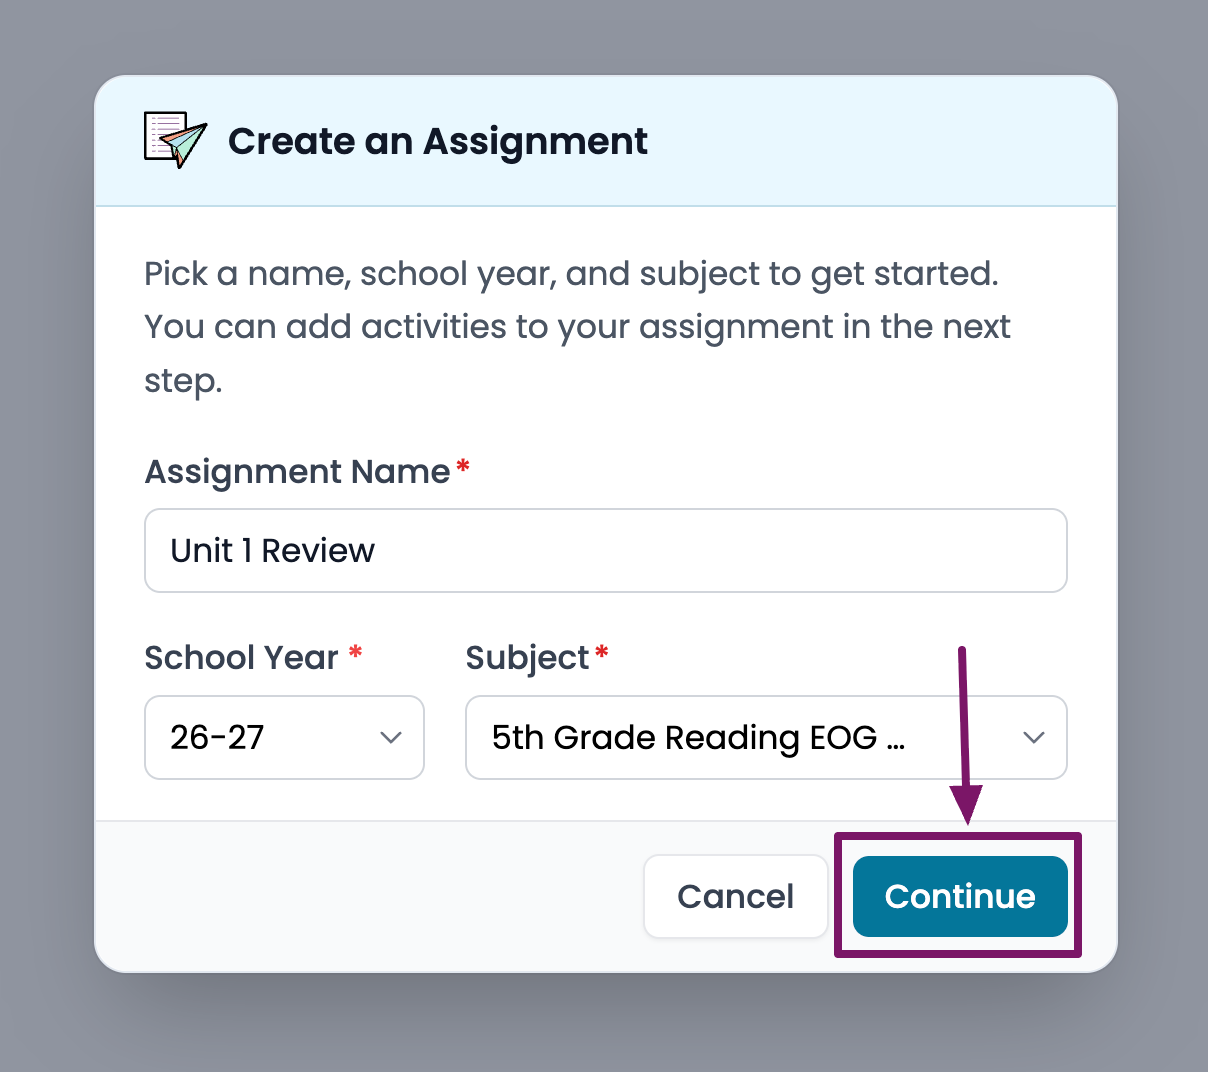
- Give your Assignment a name, select a subject and click on Continue
- Build the assignment by selecting the desired components from any of the five content options: Assessments, Summative and Domain Tests, Practice Questions, Video Lessons, Constructed Response.
Content Tab
Assessments
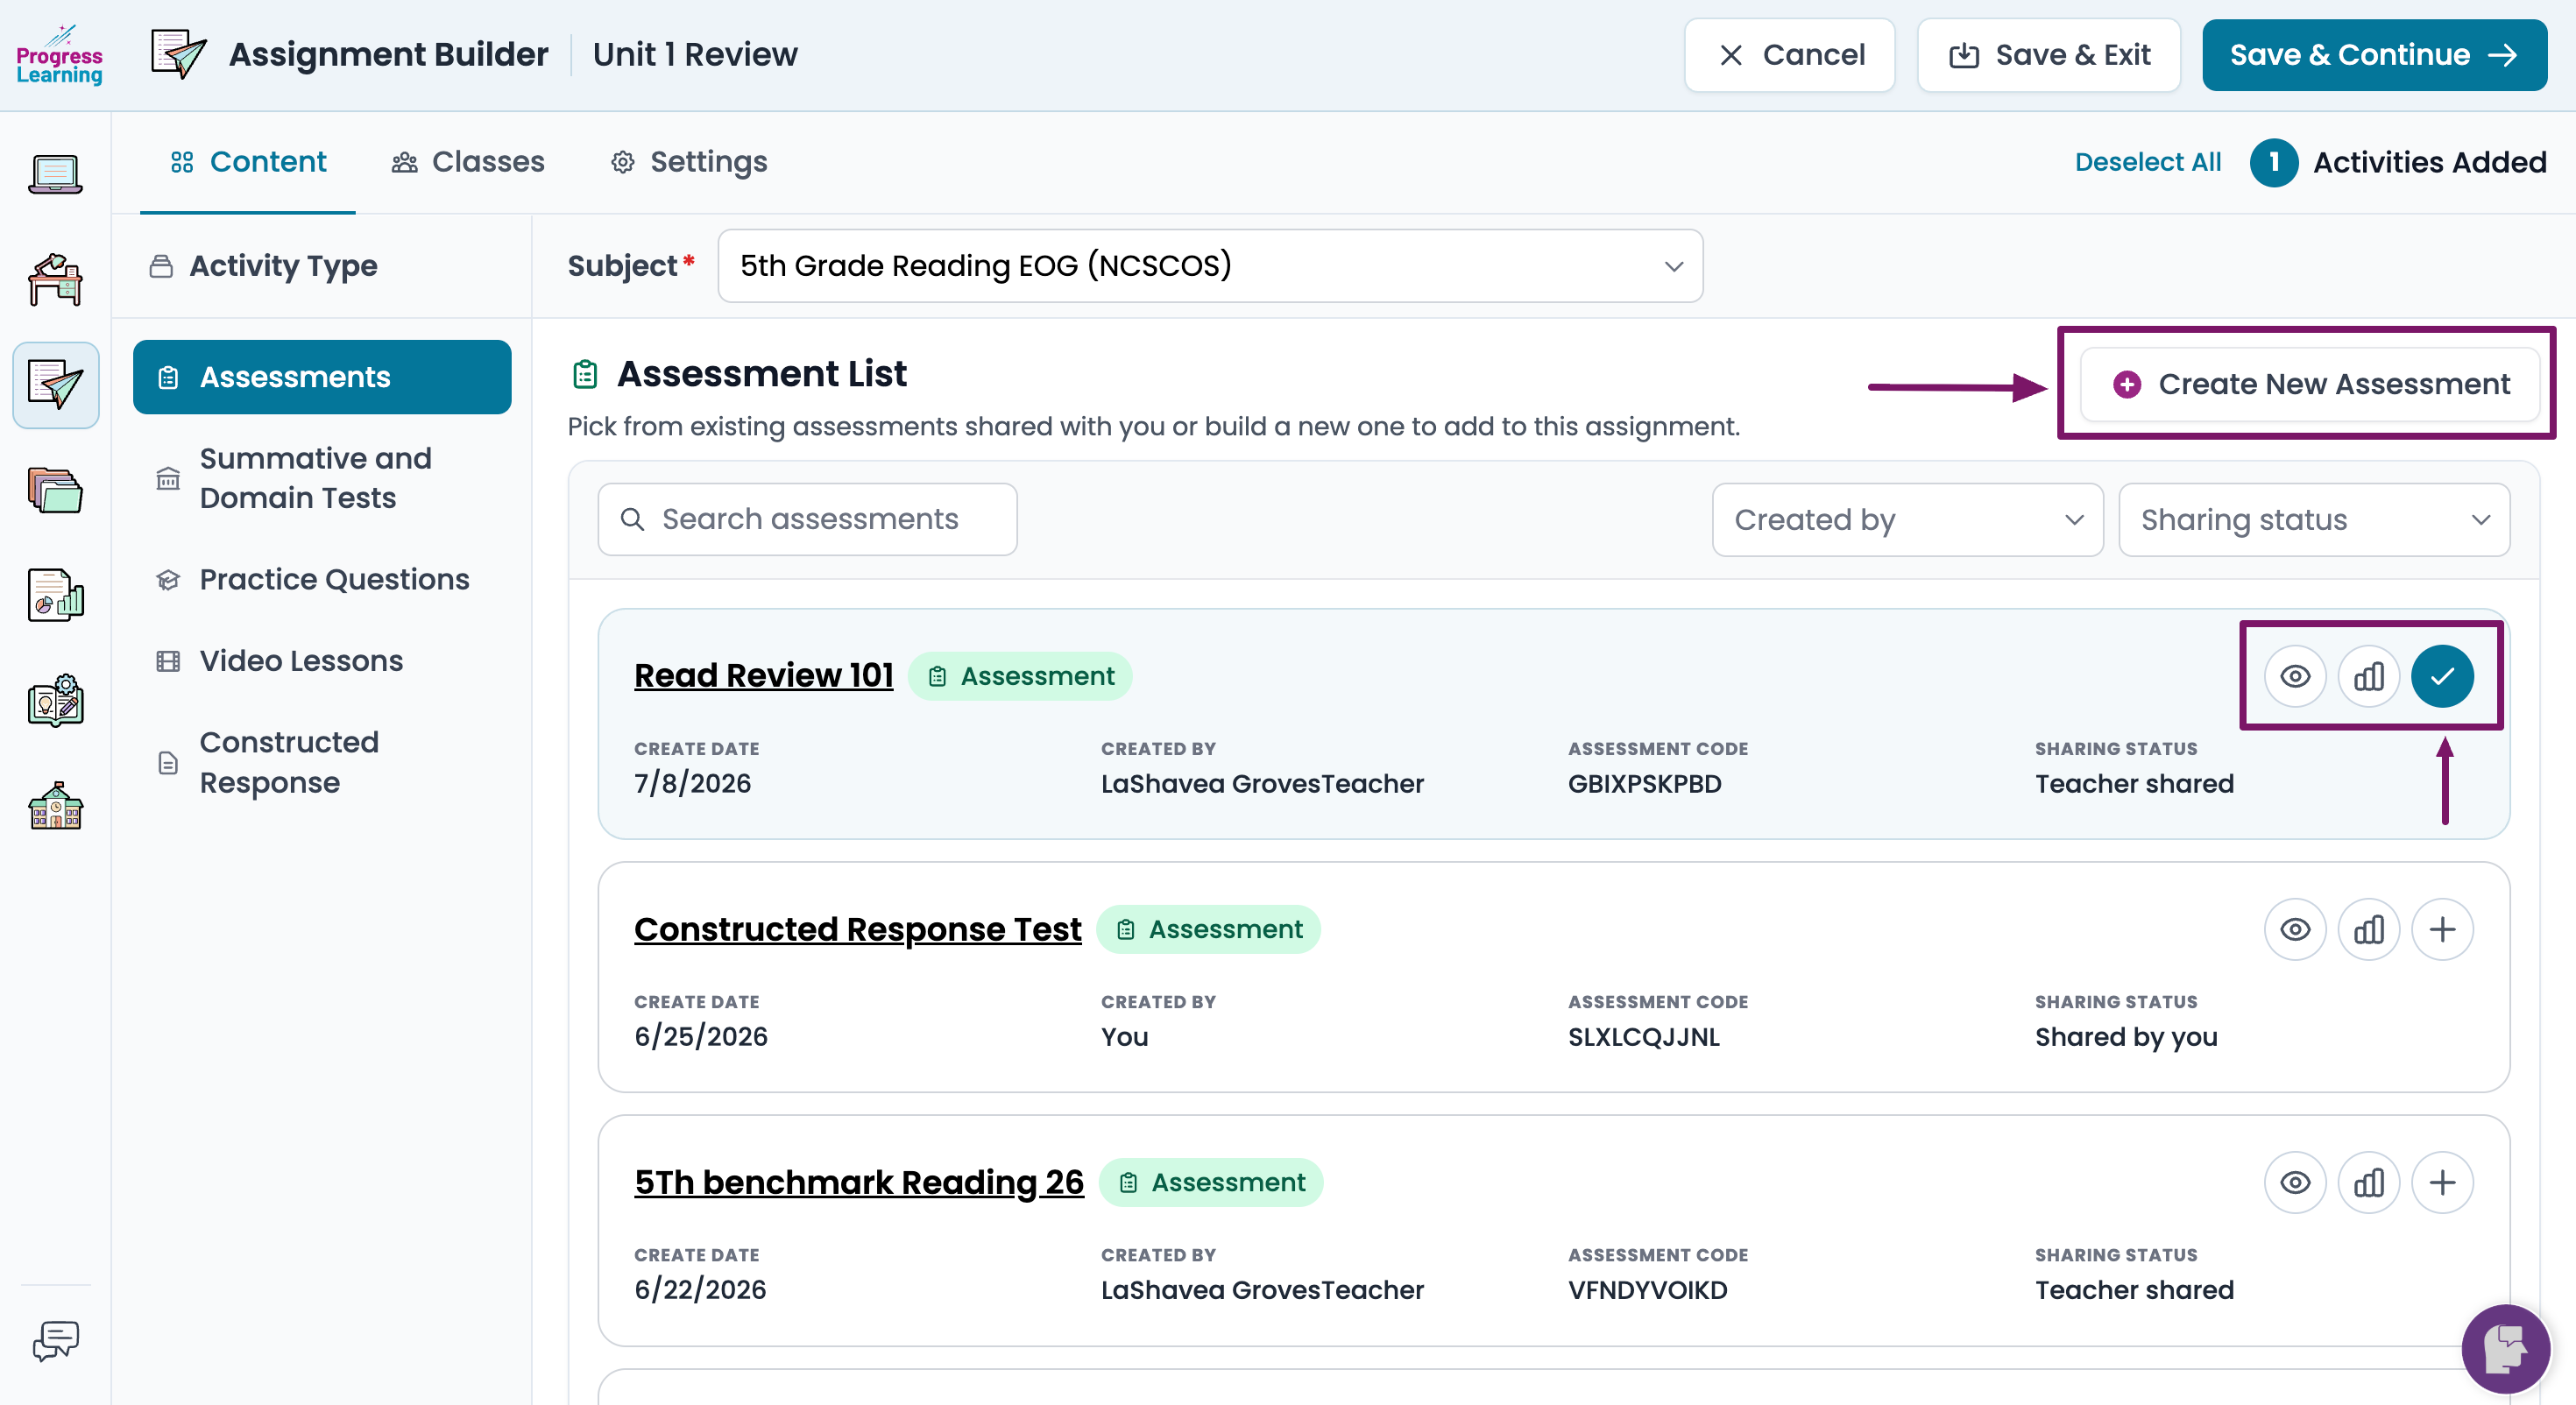
- This allows you to include a pre-built Premium Assessments (* where available) or any assessment that you've created or another person has shared. Click the plus sign to add an assessment.
- You may also Create a New Assessment from this screen if you'd like to create a new Assessment.
Digital Worksheets
- Only available for ACT/SAT content and in Texas math content areas that take a state (STAAR) assessment
- This option assigns 20 questions on the chosen skill and the teacher is able to preview the questions ahead of time.
Summative and Domain Practice Tests
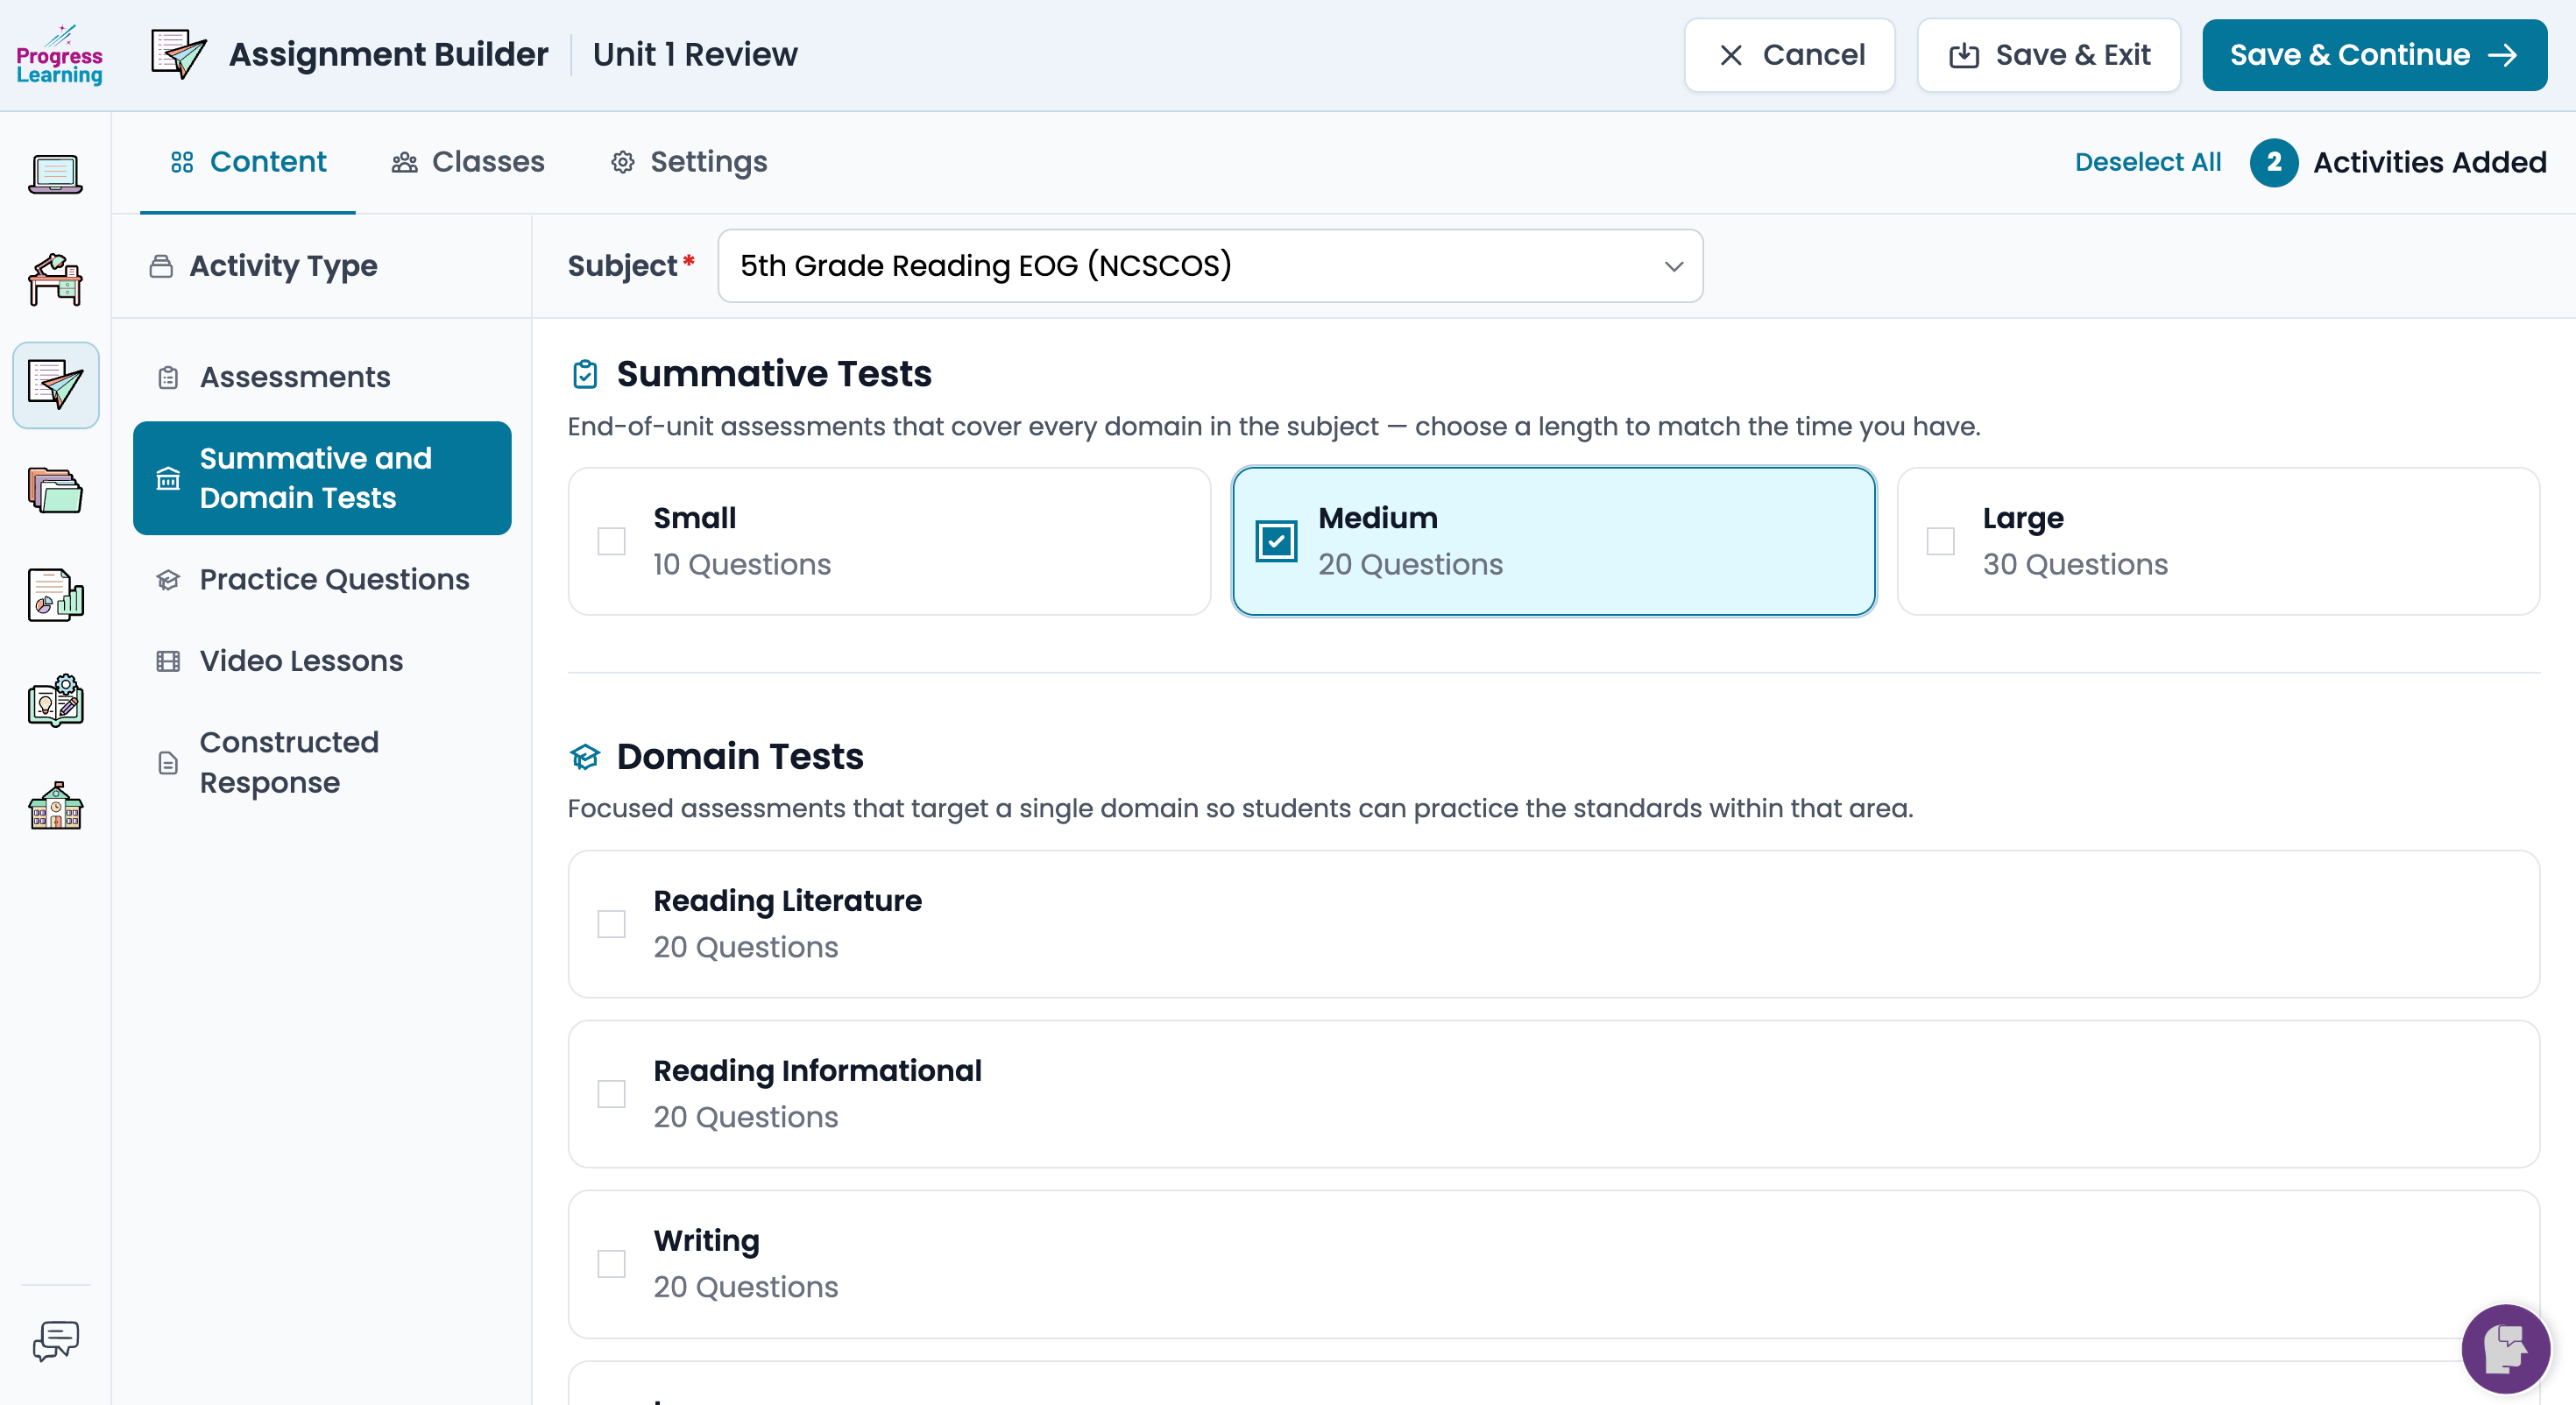
- This option allows you to include auto-generated tests. You can choose to include any of the following:
- Summative Tests - select a Small, Medium, or Large summative test.
- Domain Test - assign a Domain-specific test.
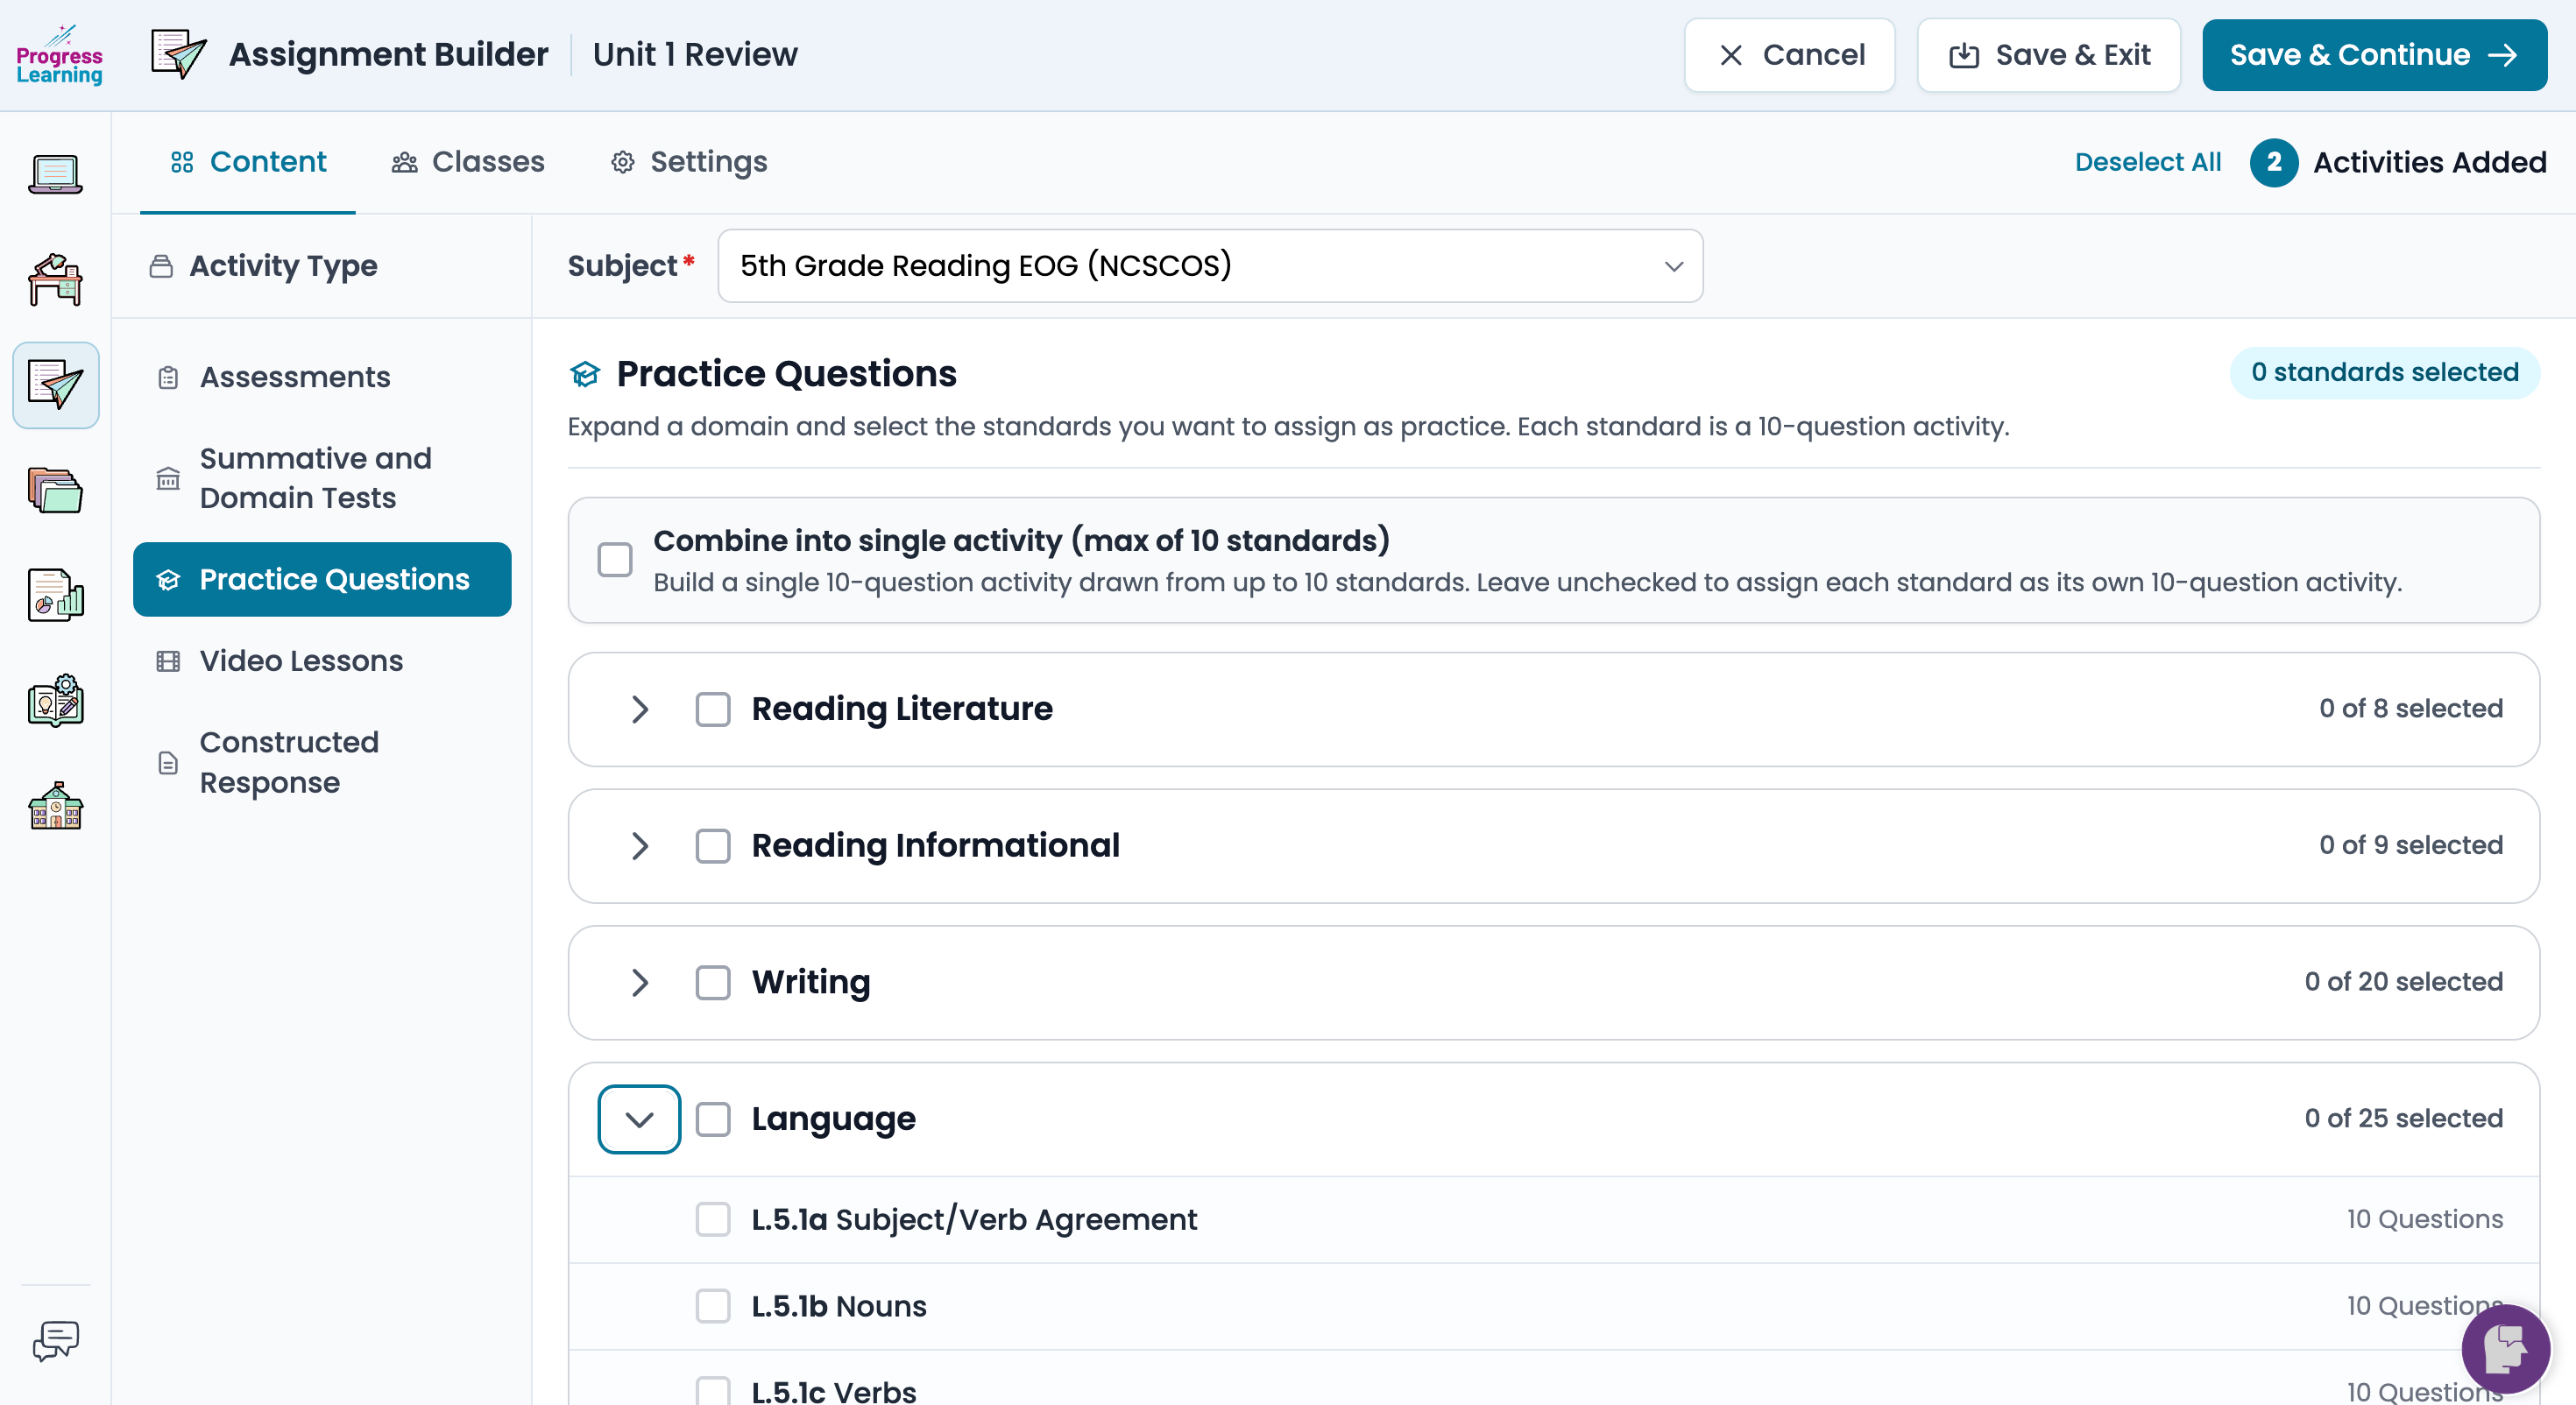
Practice Questions
- This option assigns a set of 10 randomly selected practice questions from a specific standard. Pick one or more Domains. Then select the Standard(s) you want to be assigned.
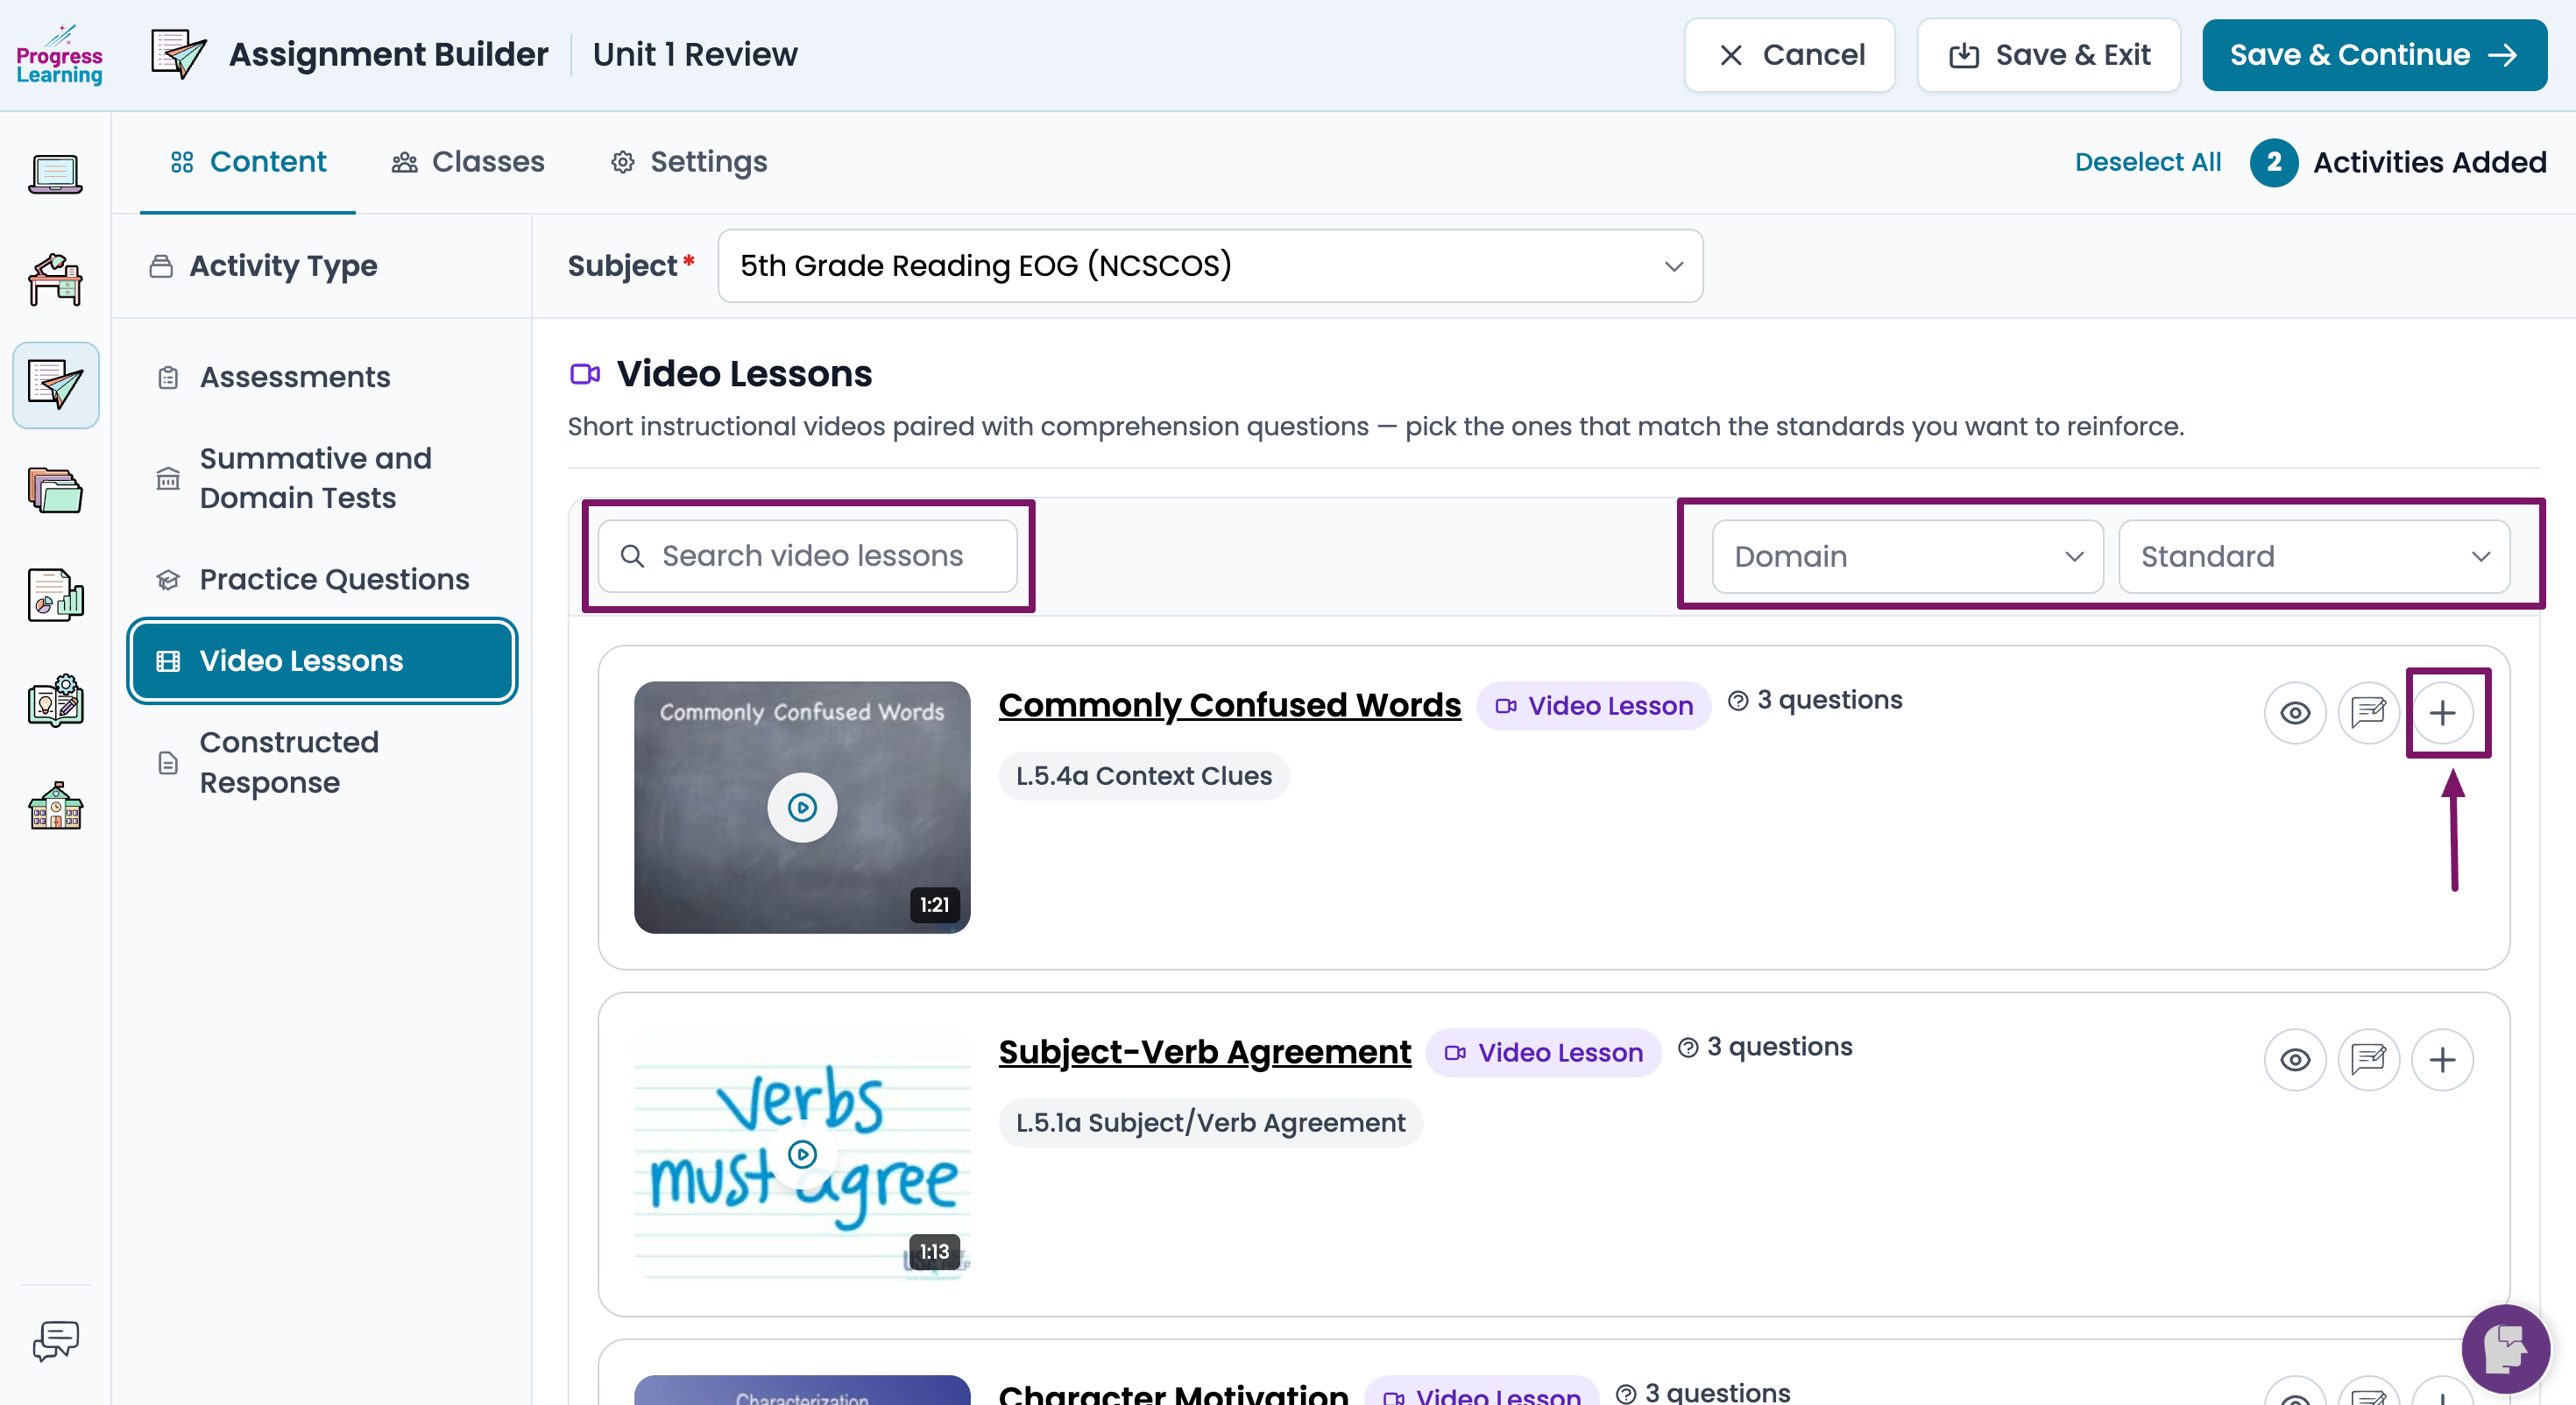
Video Lessons
- You can select one or more of our instructional videos to include in your assignment. Search for videos by Domain and Standard or keyword. Select any video(s) you would like to assign by clicking the plus sign beside the video.
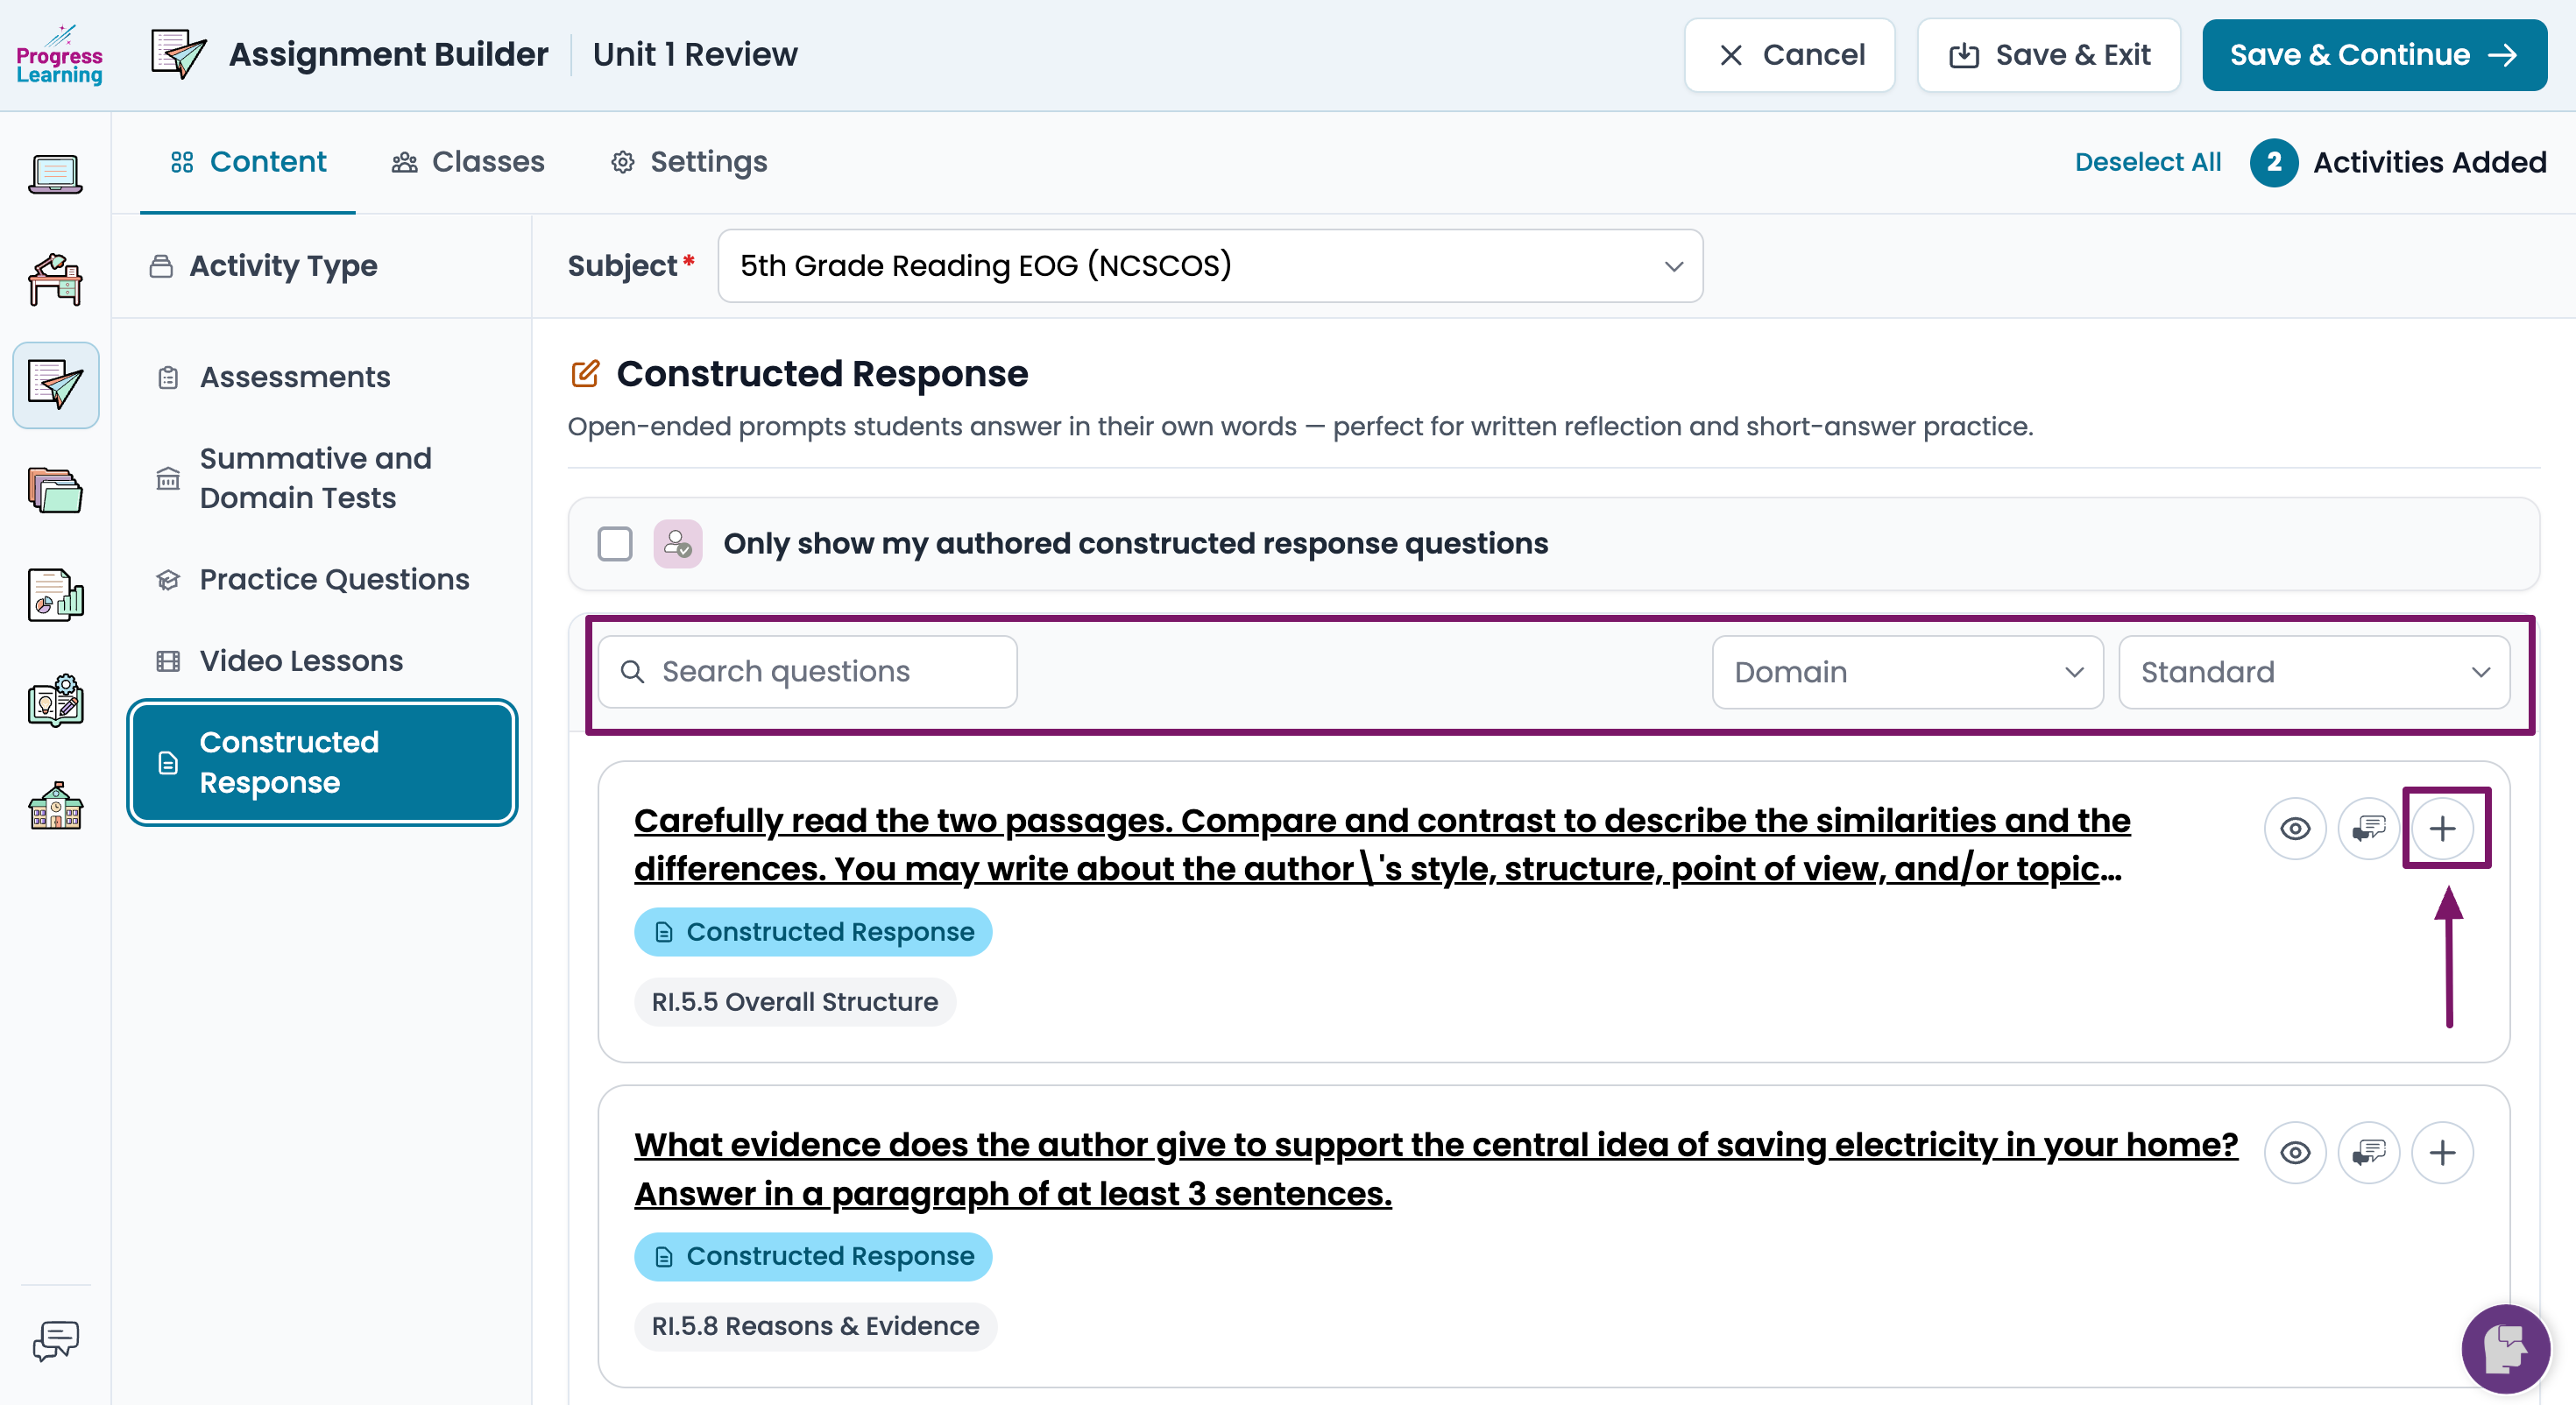
Constructed Response
- You can add one or more constructed response questions to your assignment. Search for constructed response questions by Domain and Standard or Keyword. Click on the plus sign to add the question to your assignment.
- To search for just your authored questions, check the "Only View My Authored Constructed Response Questions" box.
- Click on the blue question title link to preview the question.
- Click on the Key icon to generate a suggested answer key to help you grade the students' work
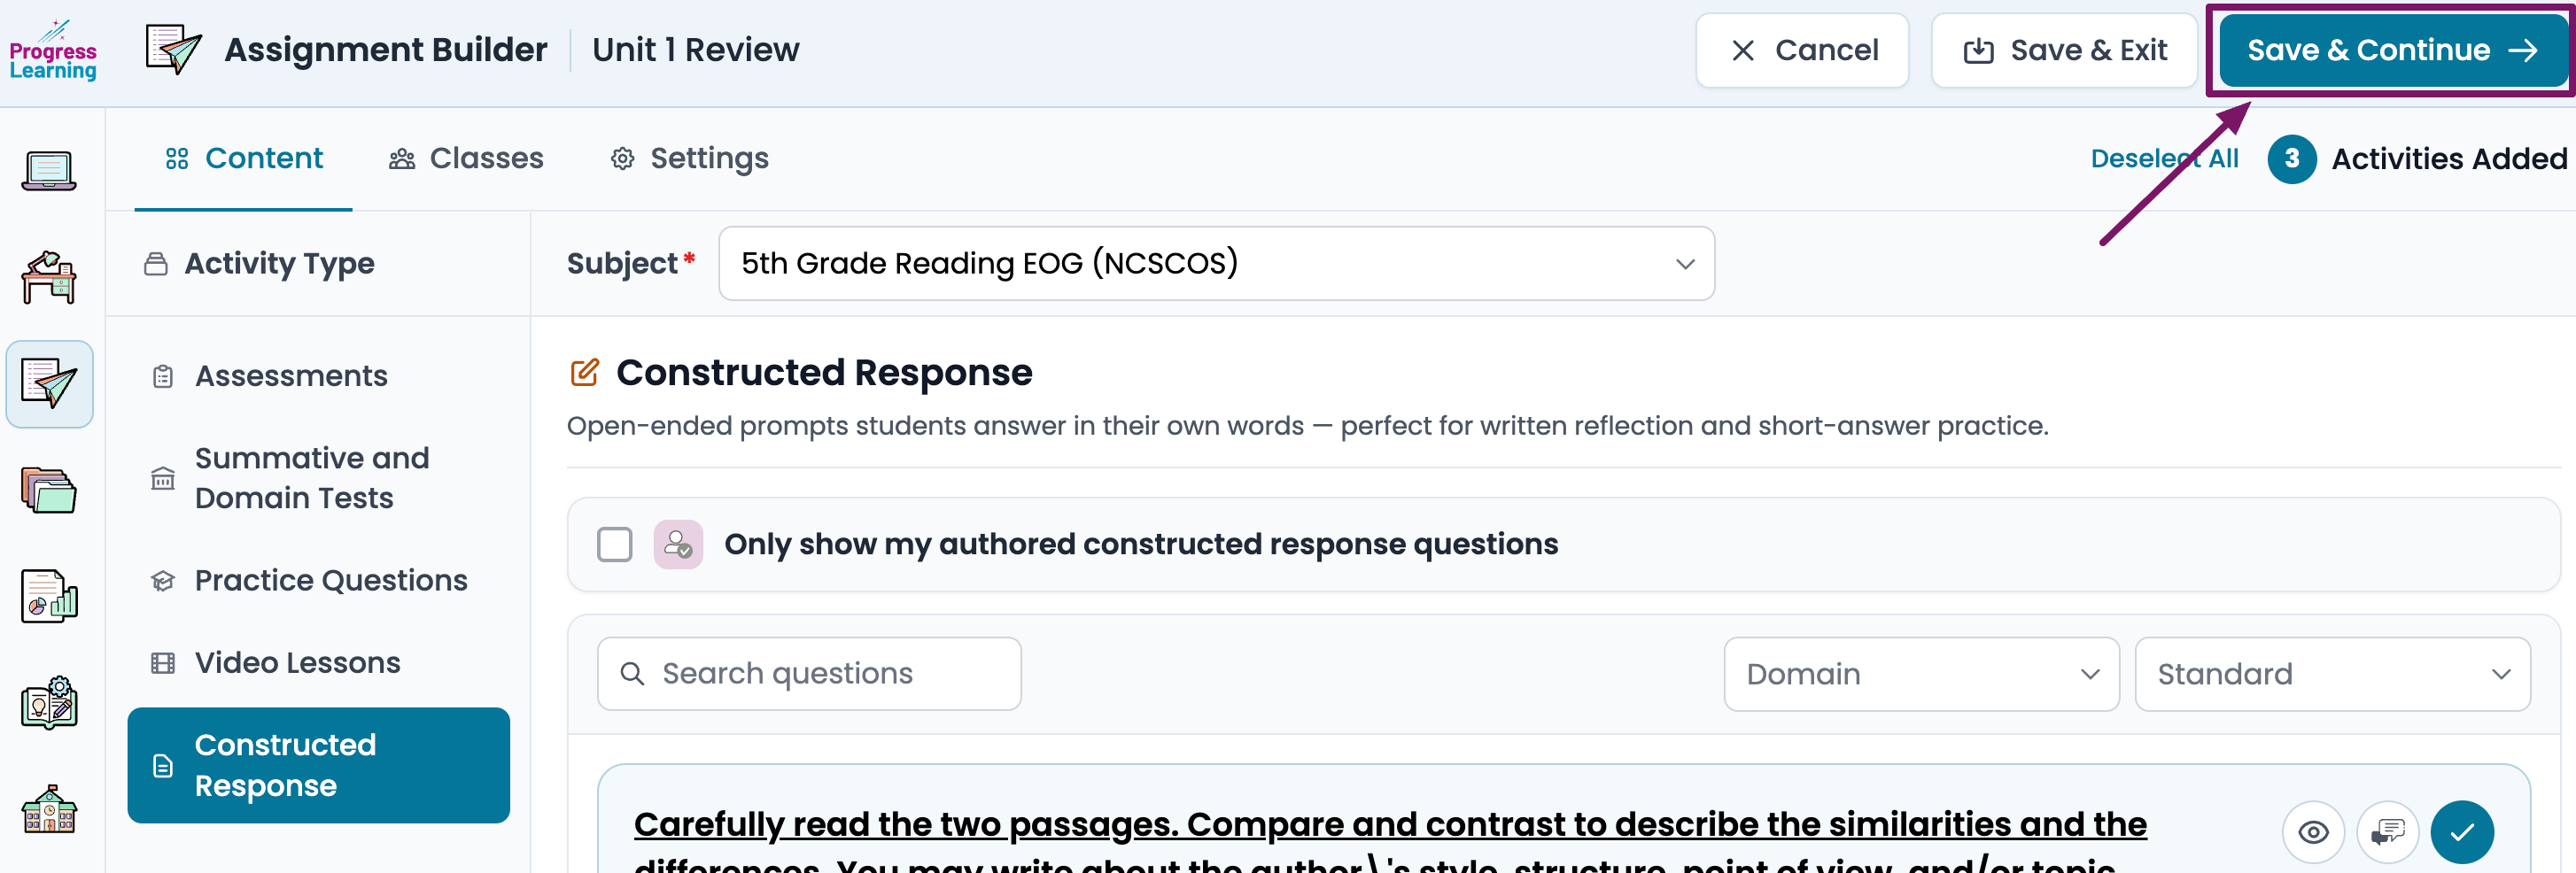
- When you have made all of your selections, scroll up and click Save and Continue.
Classes Tab
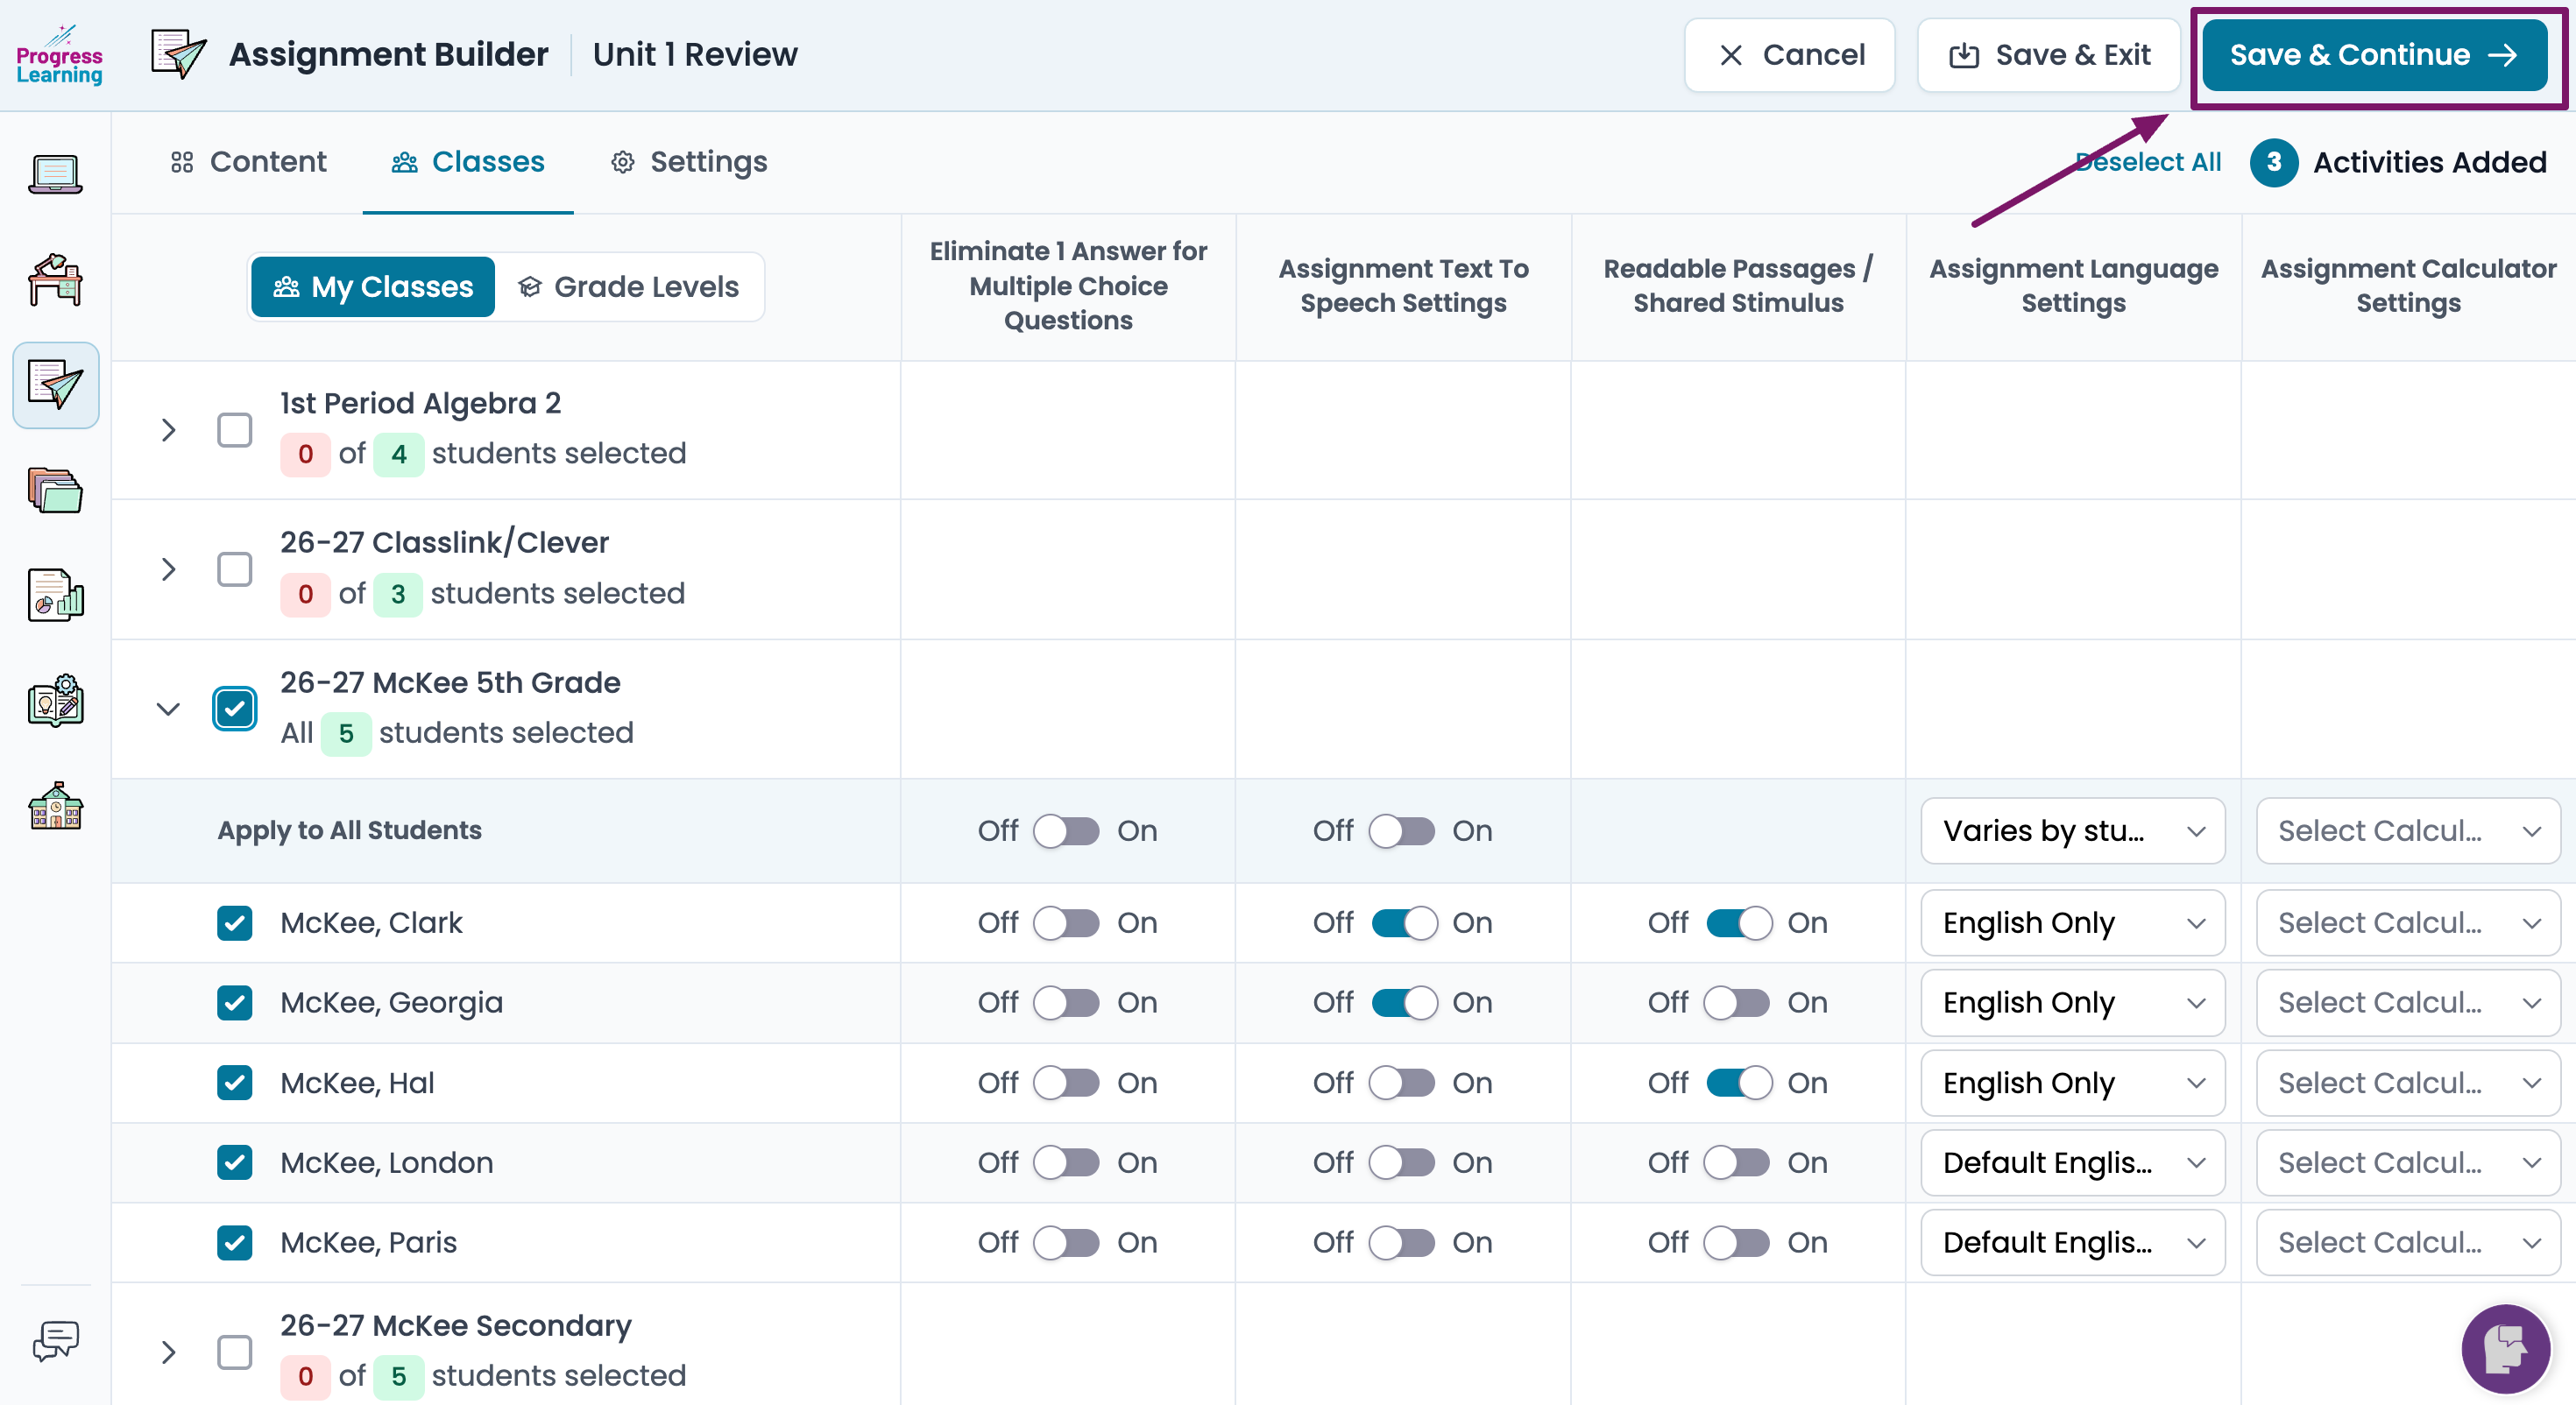
On the Classes tab, select the class(es) and/or individual students that will get this assignment. Click on the plus sign next to a class to expand the menu and see the students' names.
- You also have the option to save the assignment without assigning it at this time by checking the box next to Create Assignment without assigning to a Class.
- You can choose to enable accommodations for this assignment only of reduced answer choices, text-to-speech, Spanish/English language translation and override Calculator settings.
- Click "Save and Continue" to save your selections before moving on to the next step.
Settings Tab
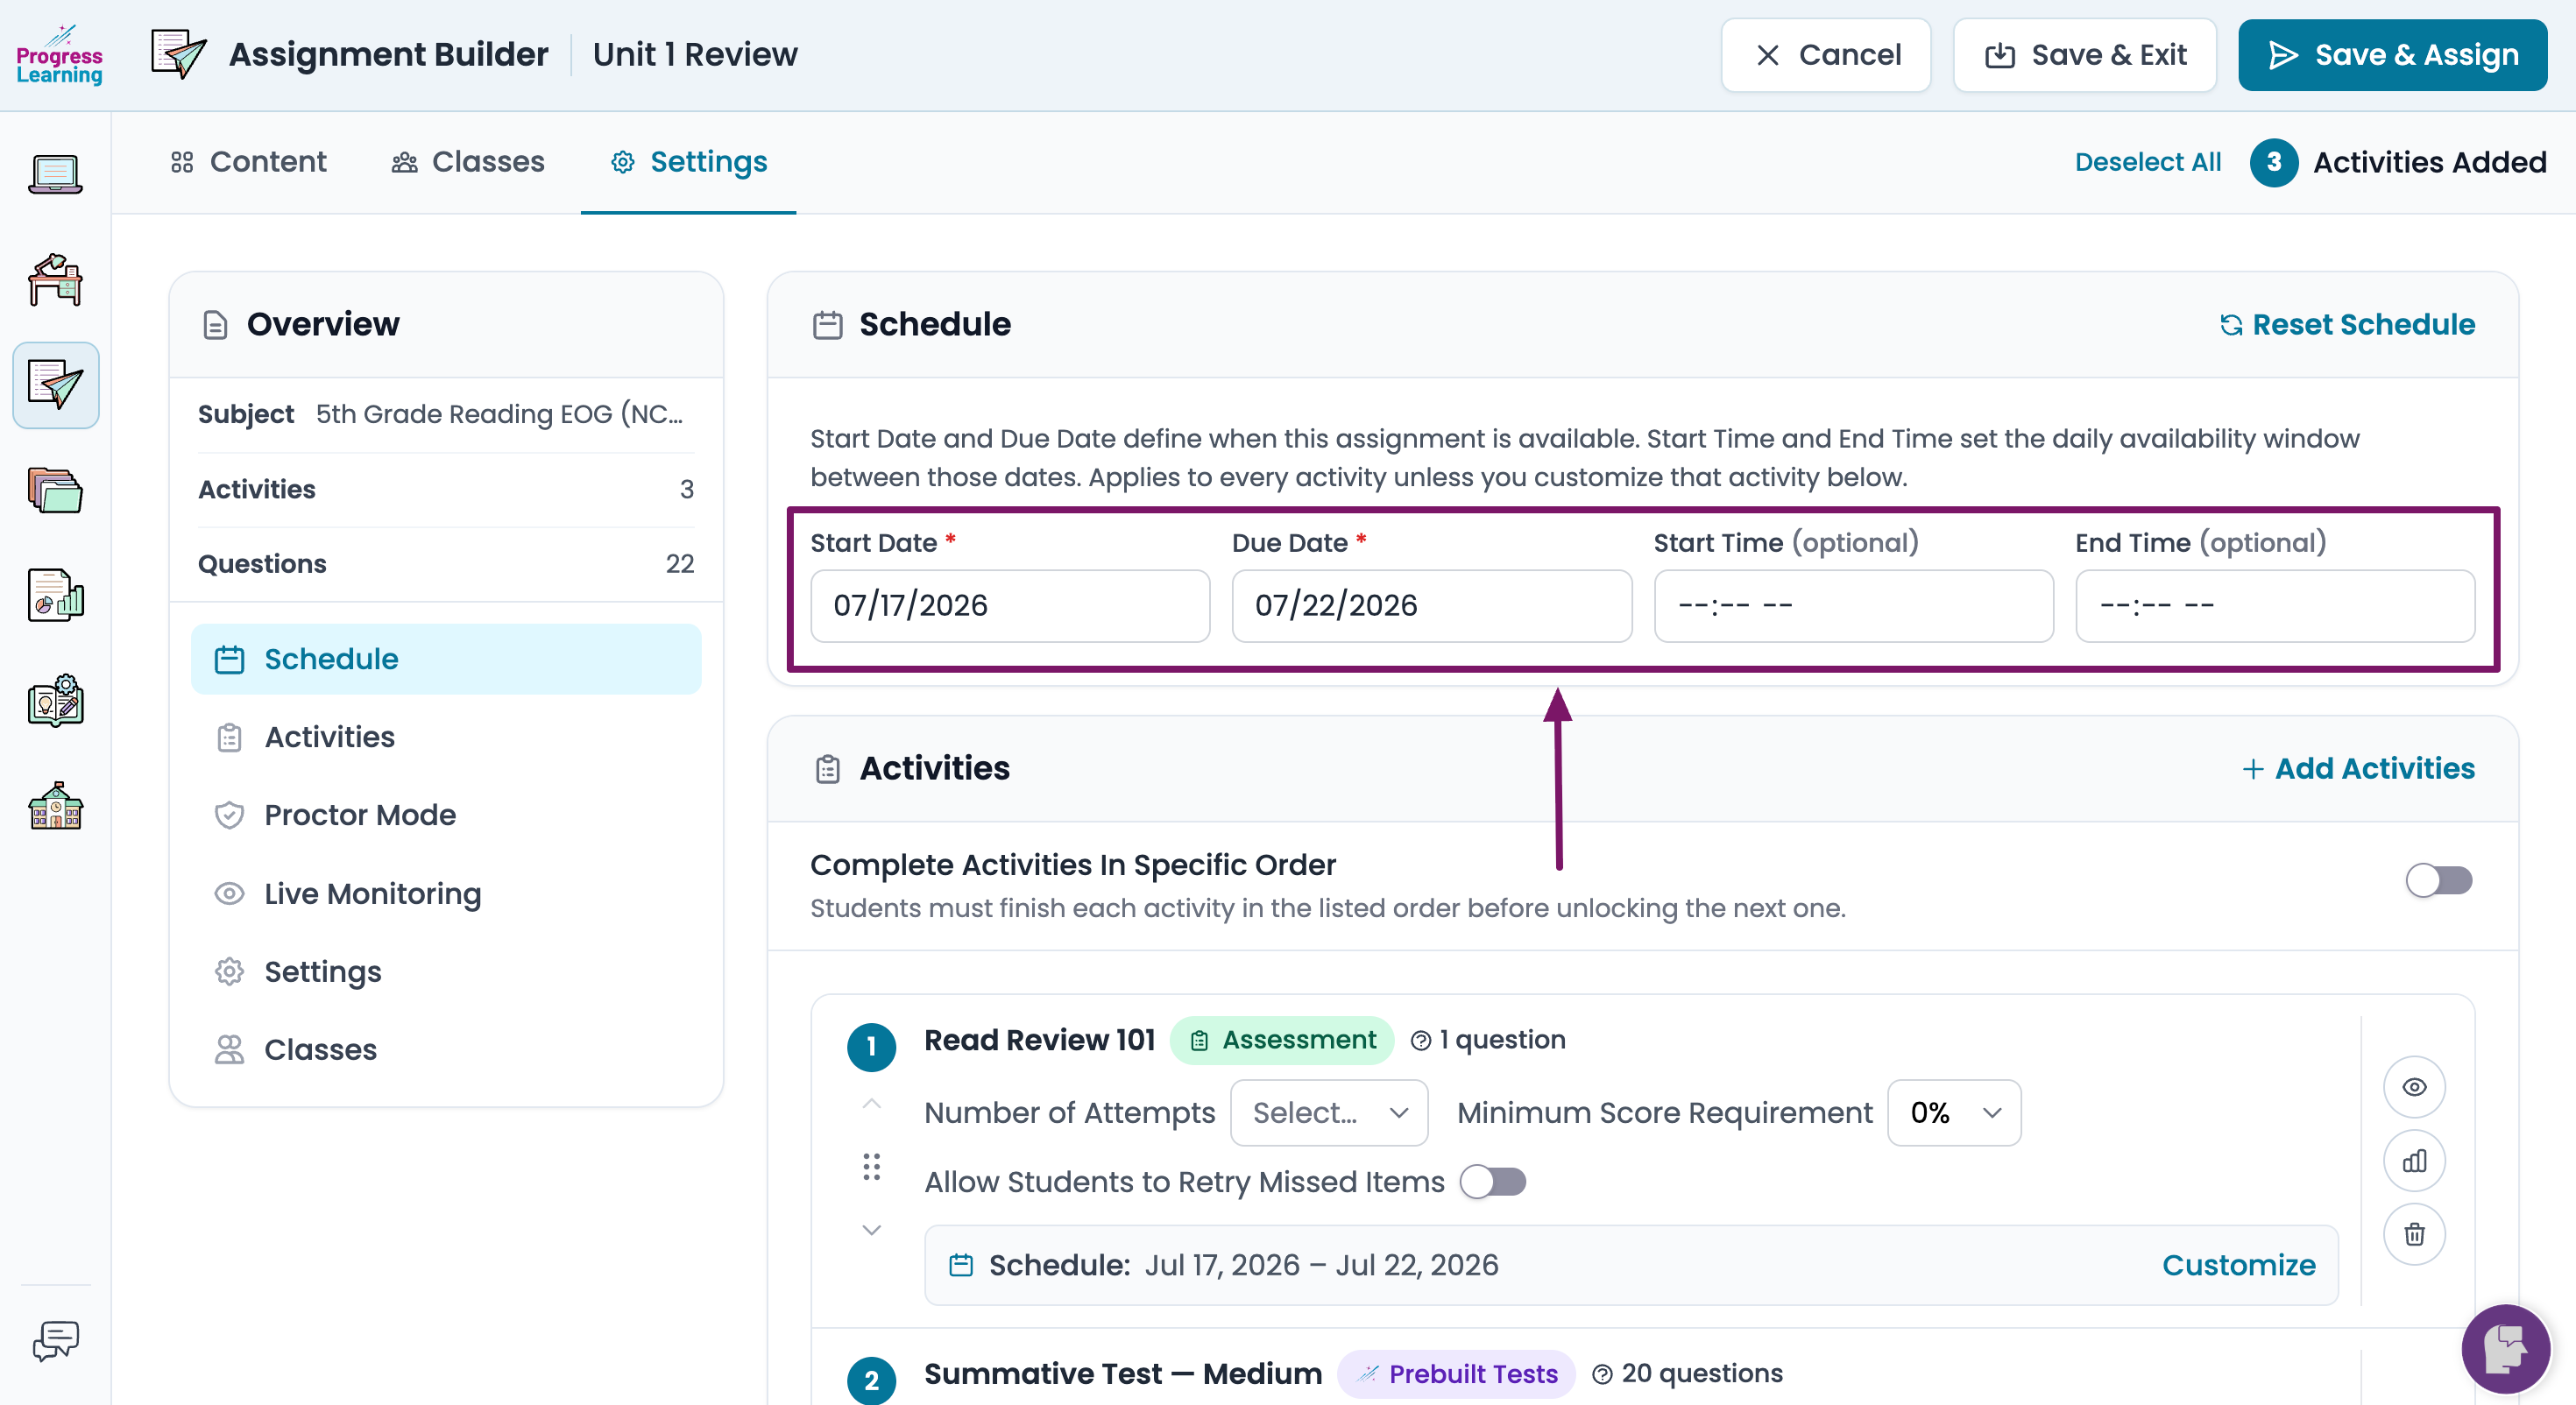
Schedule
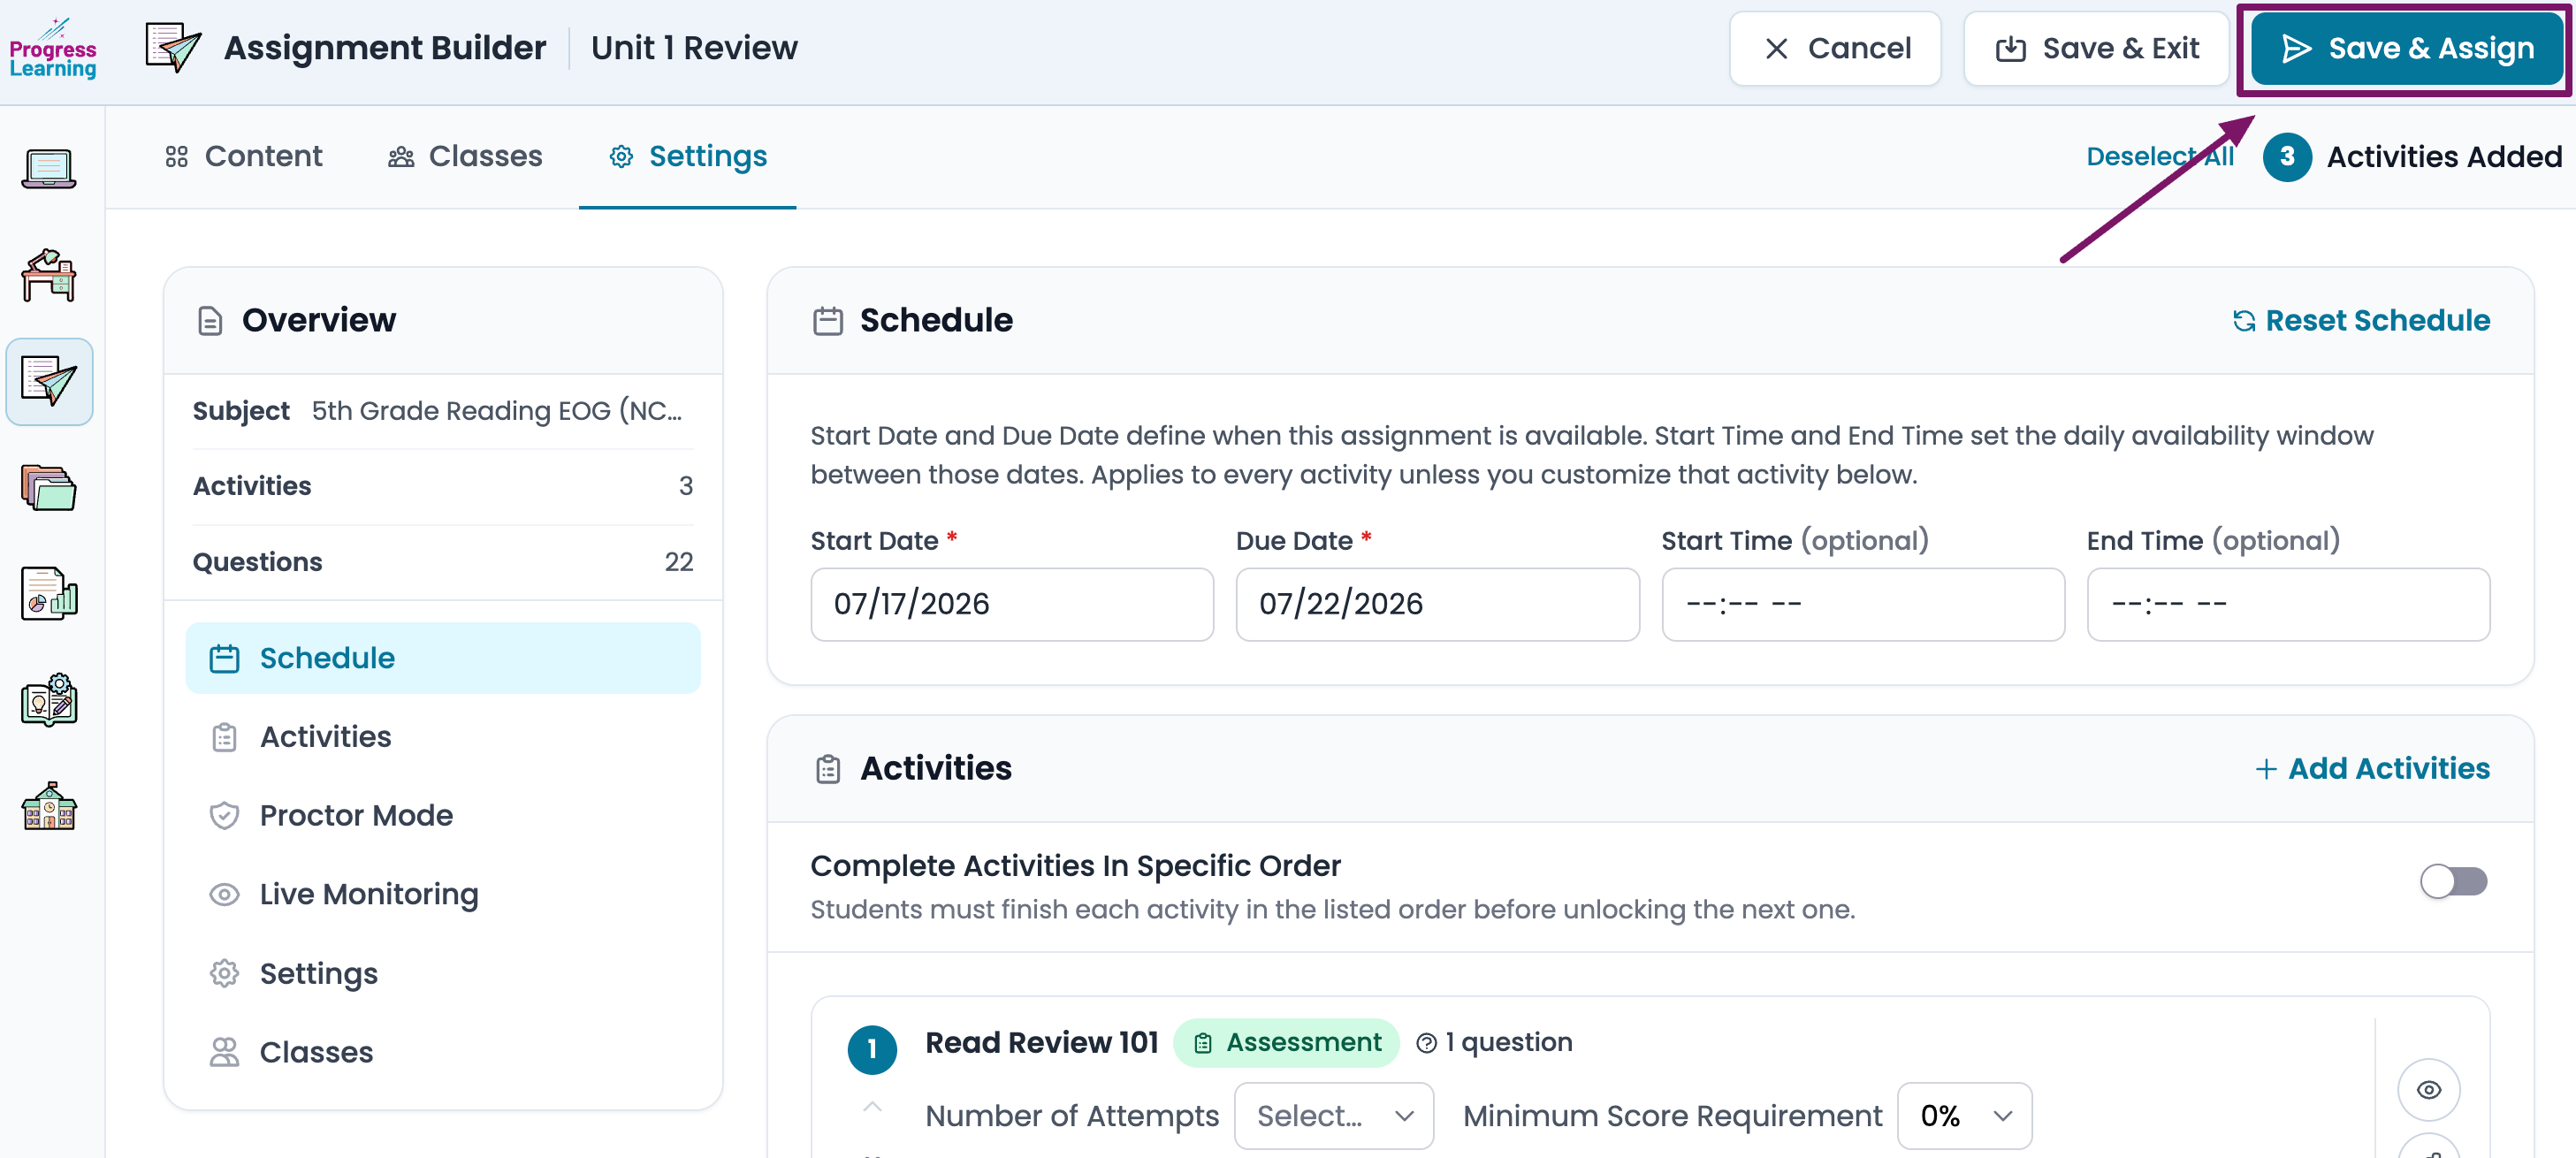
Set a Start Date and a Due Date. You have the option to also set a start and end time.
Activities
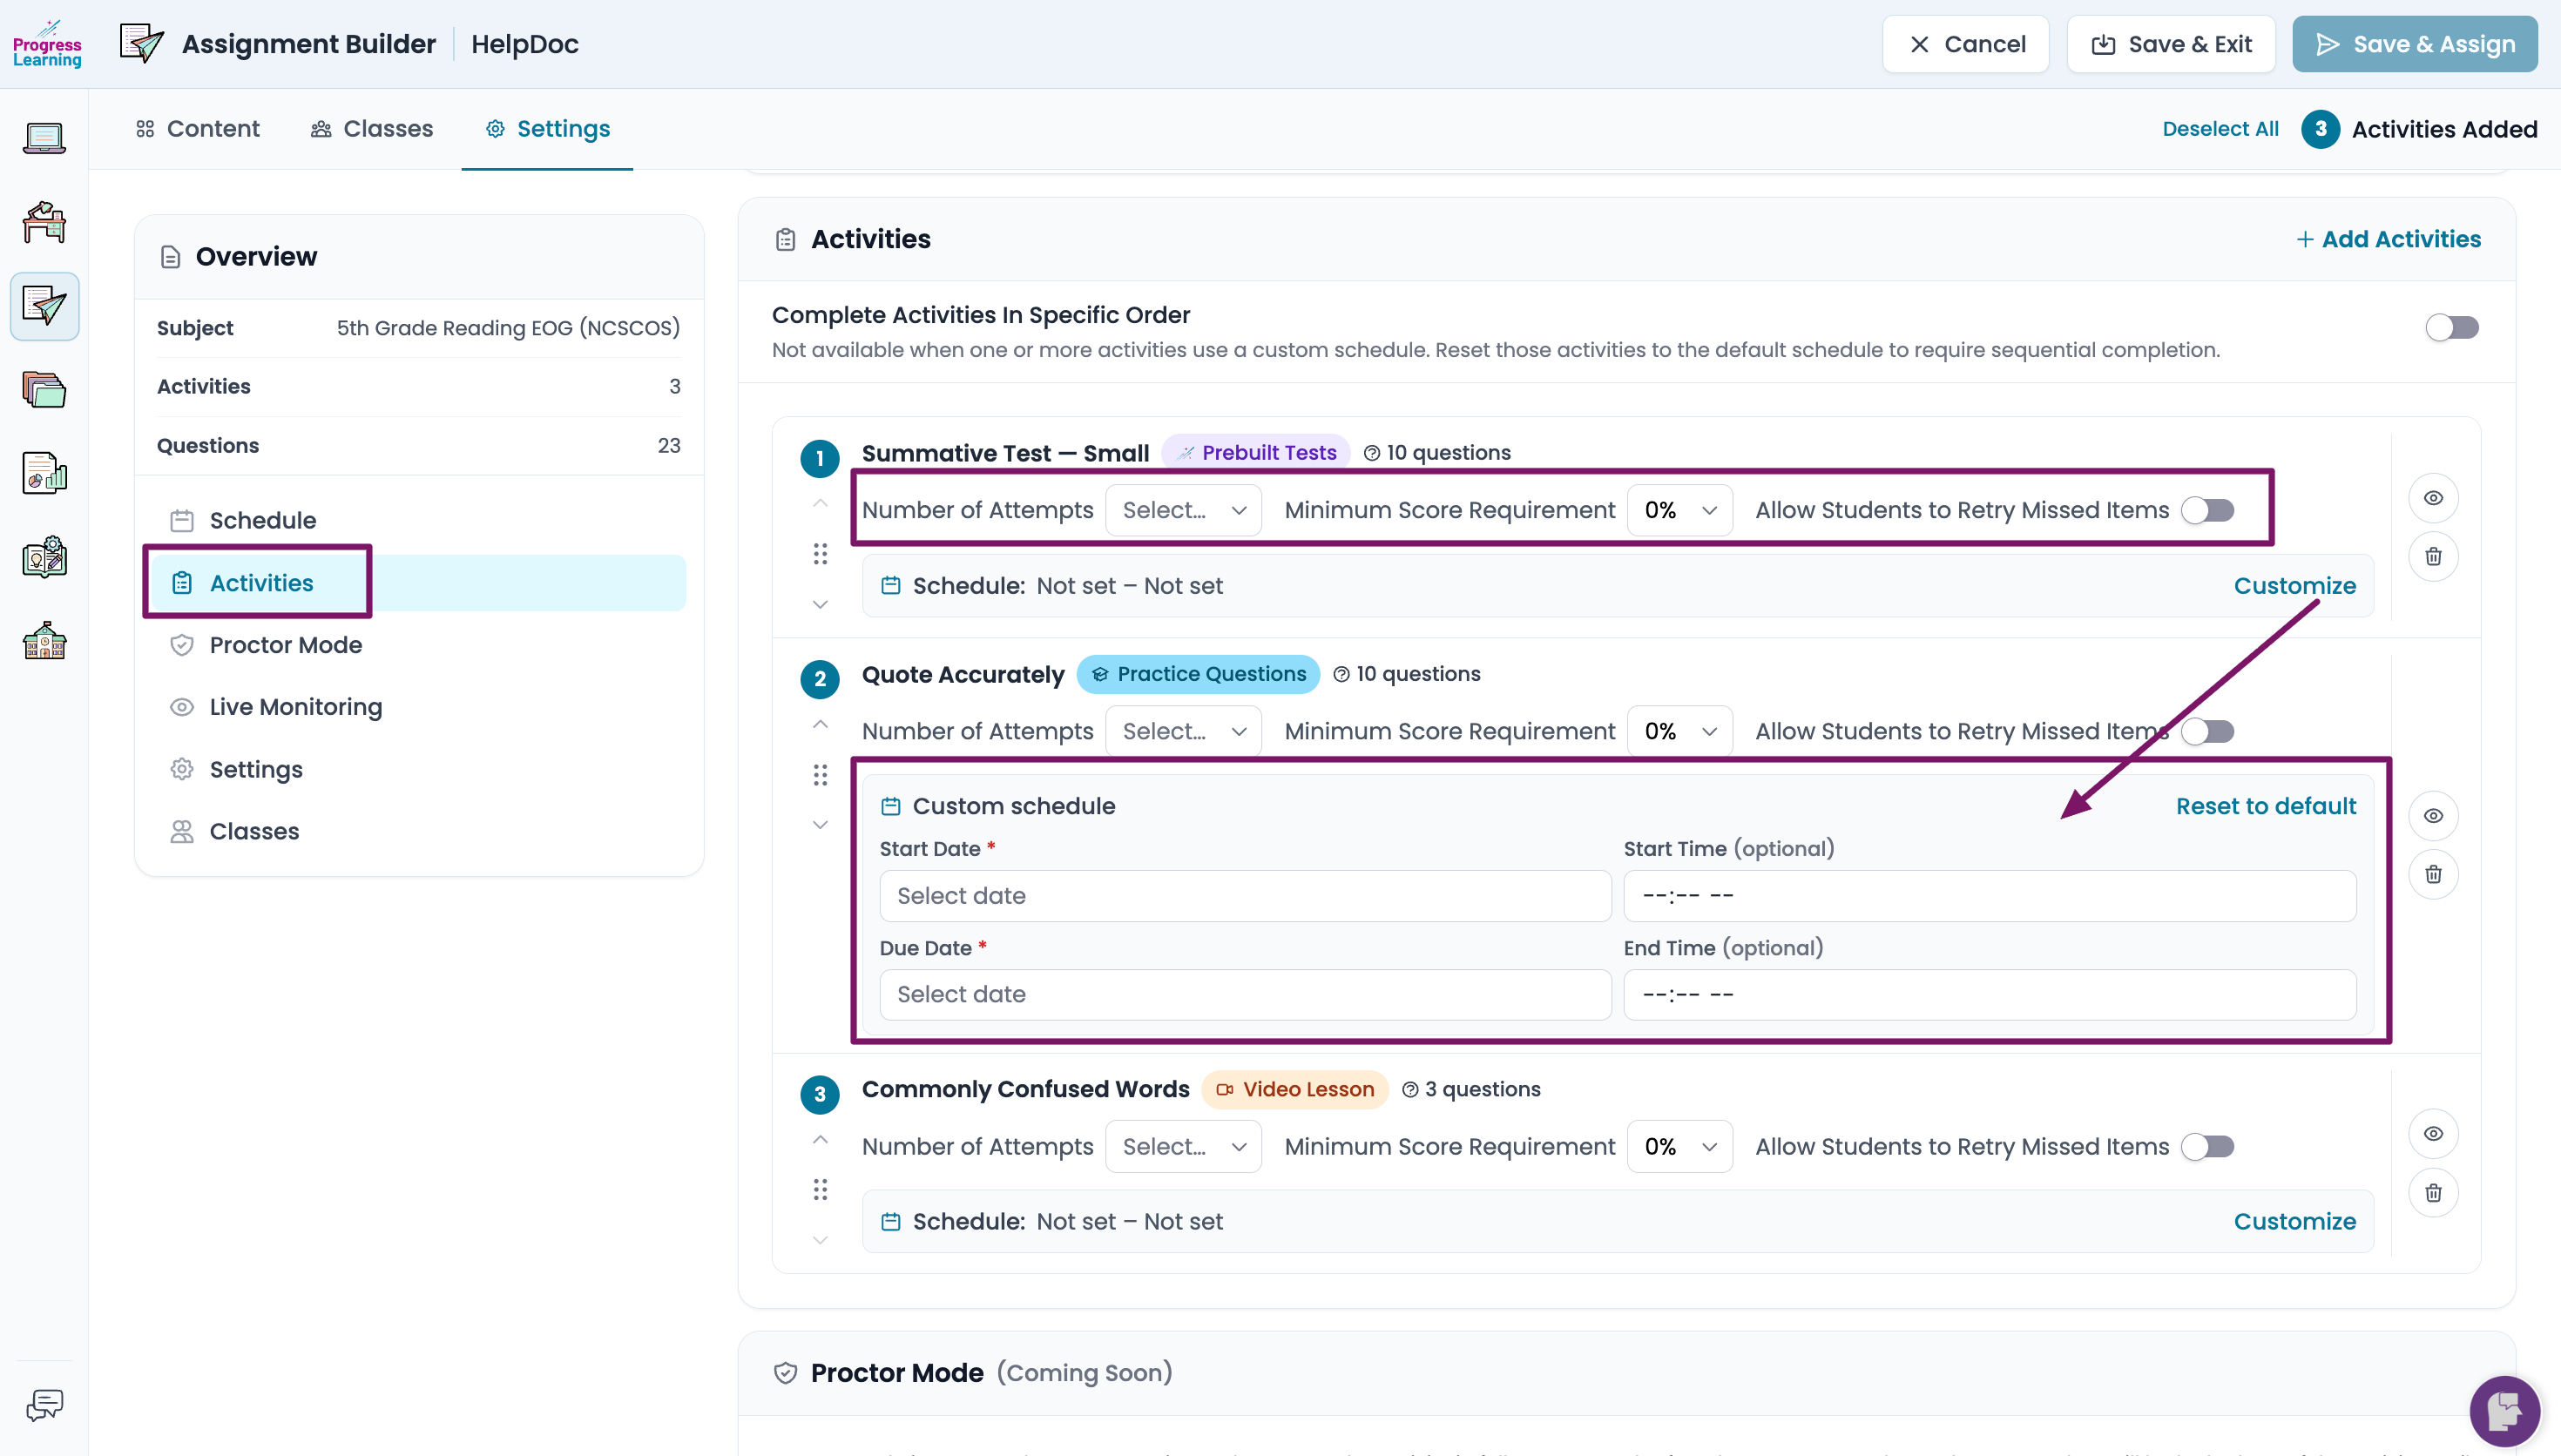
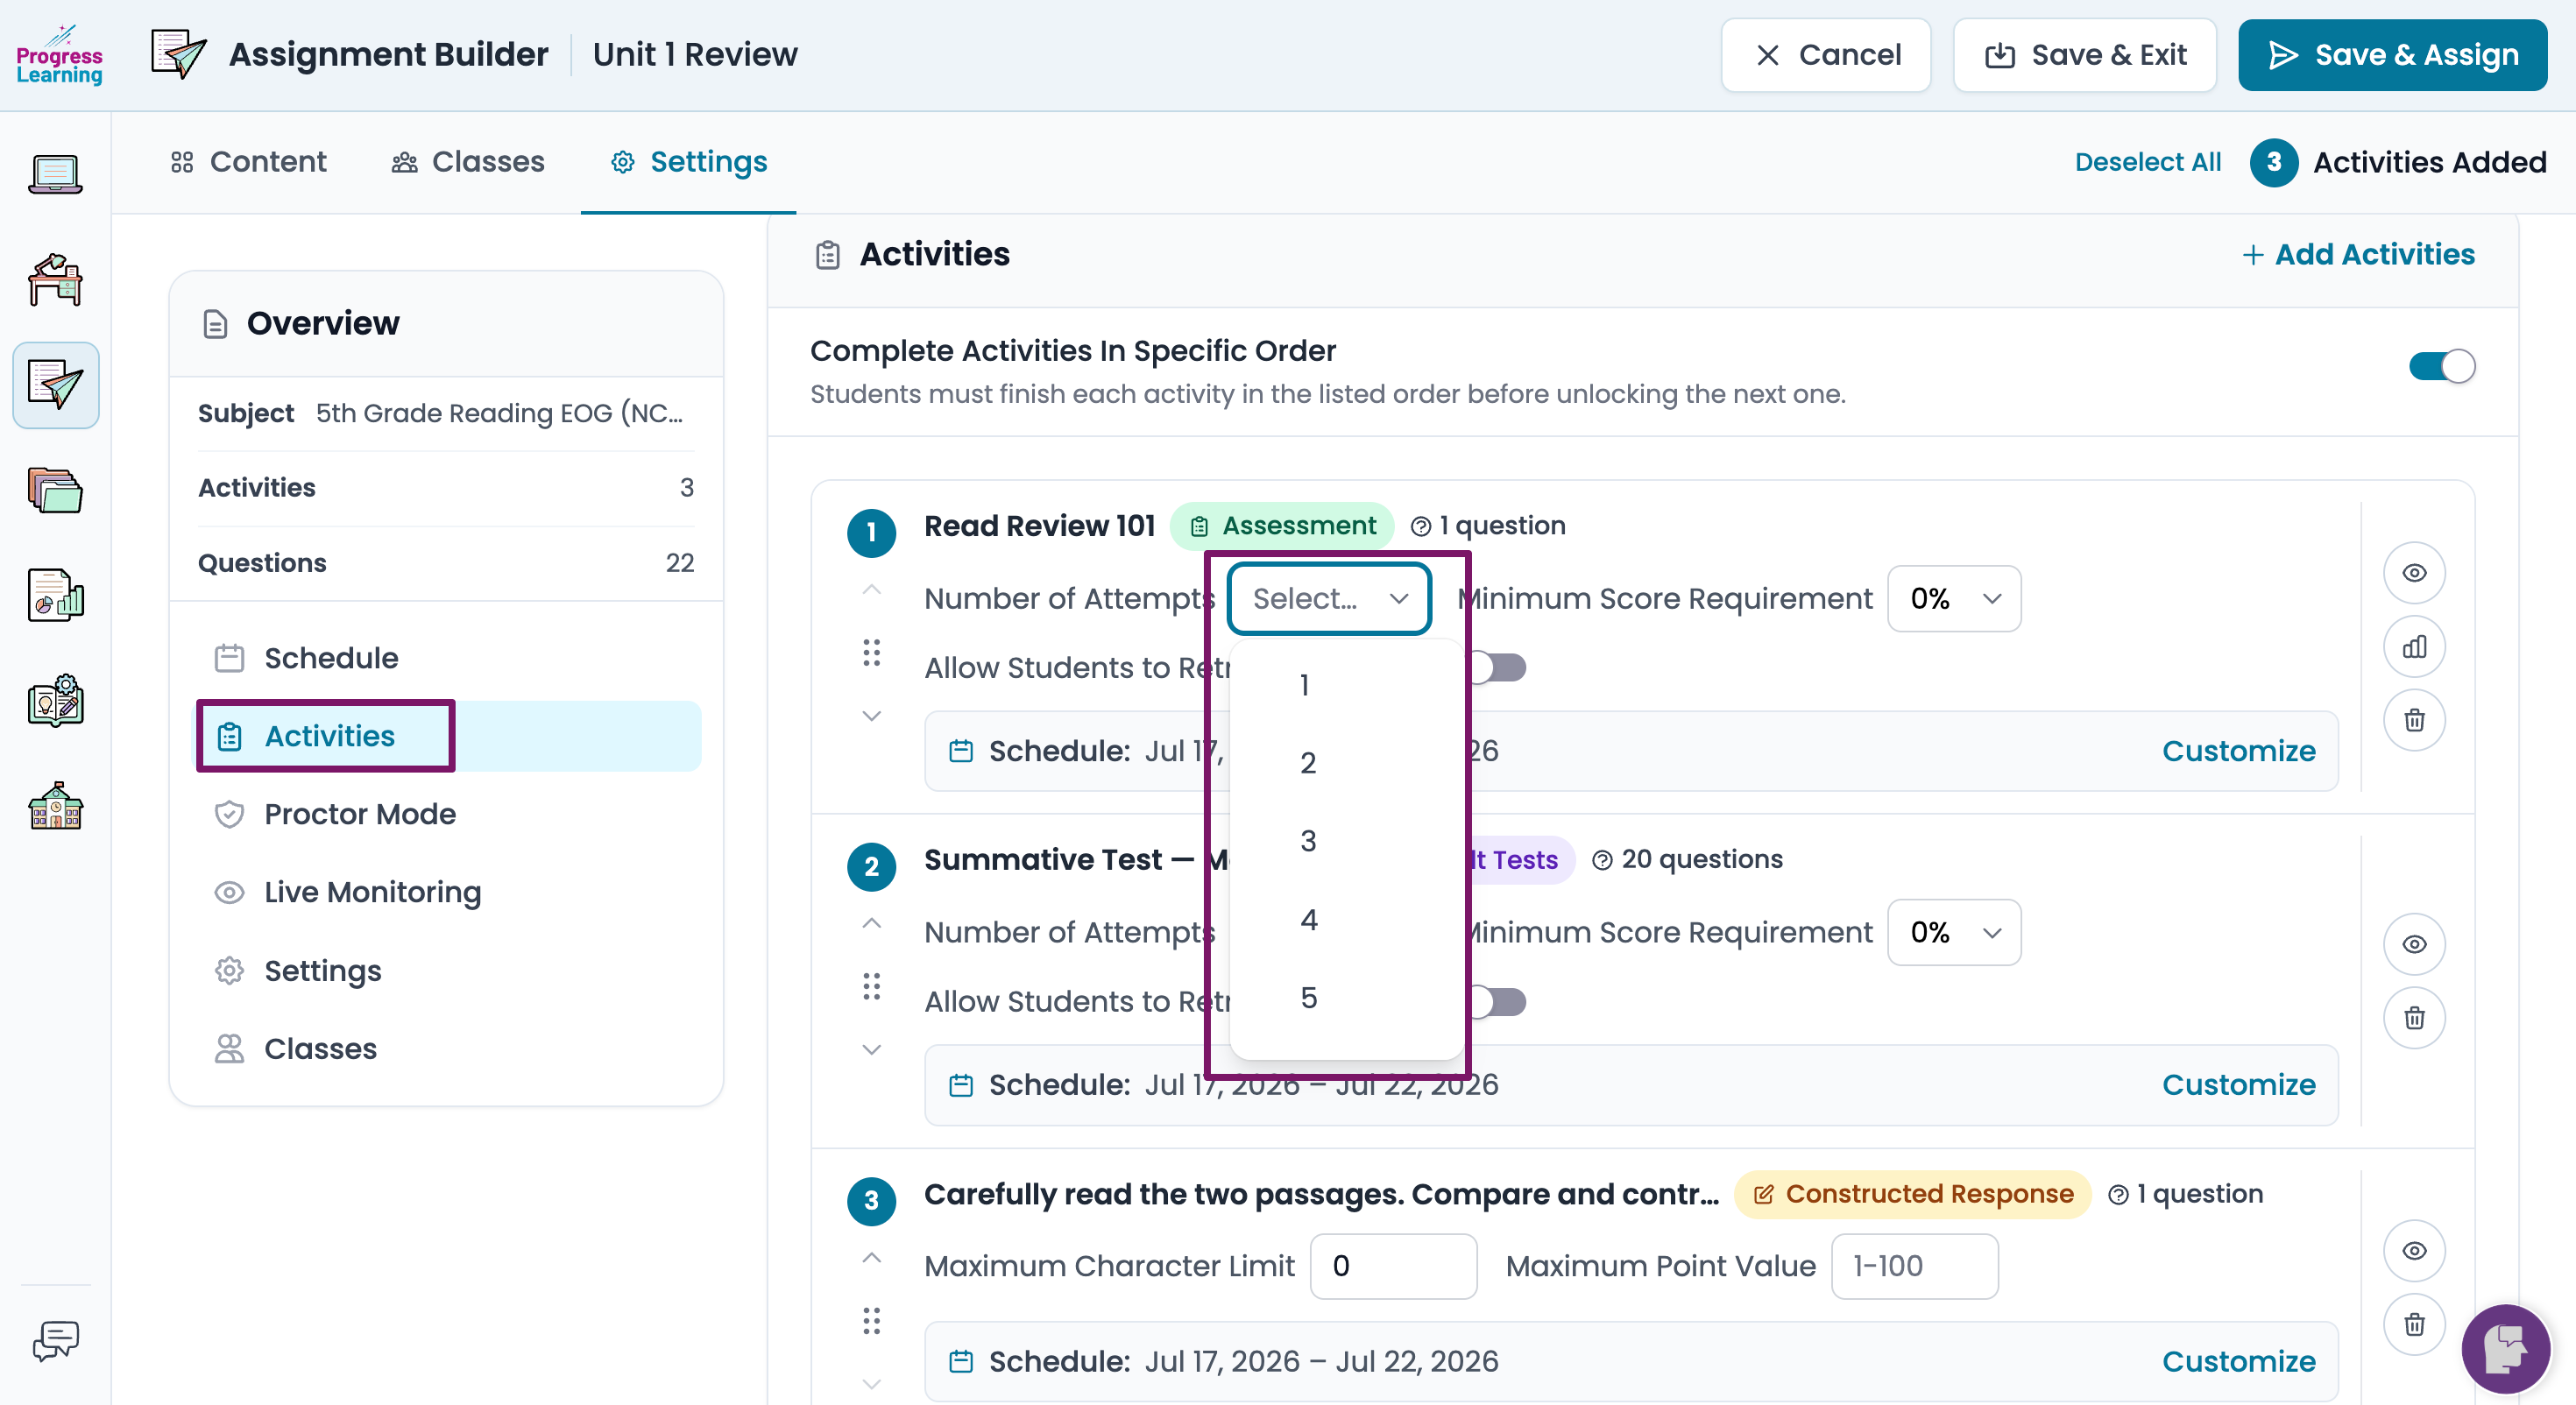
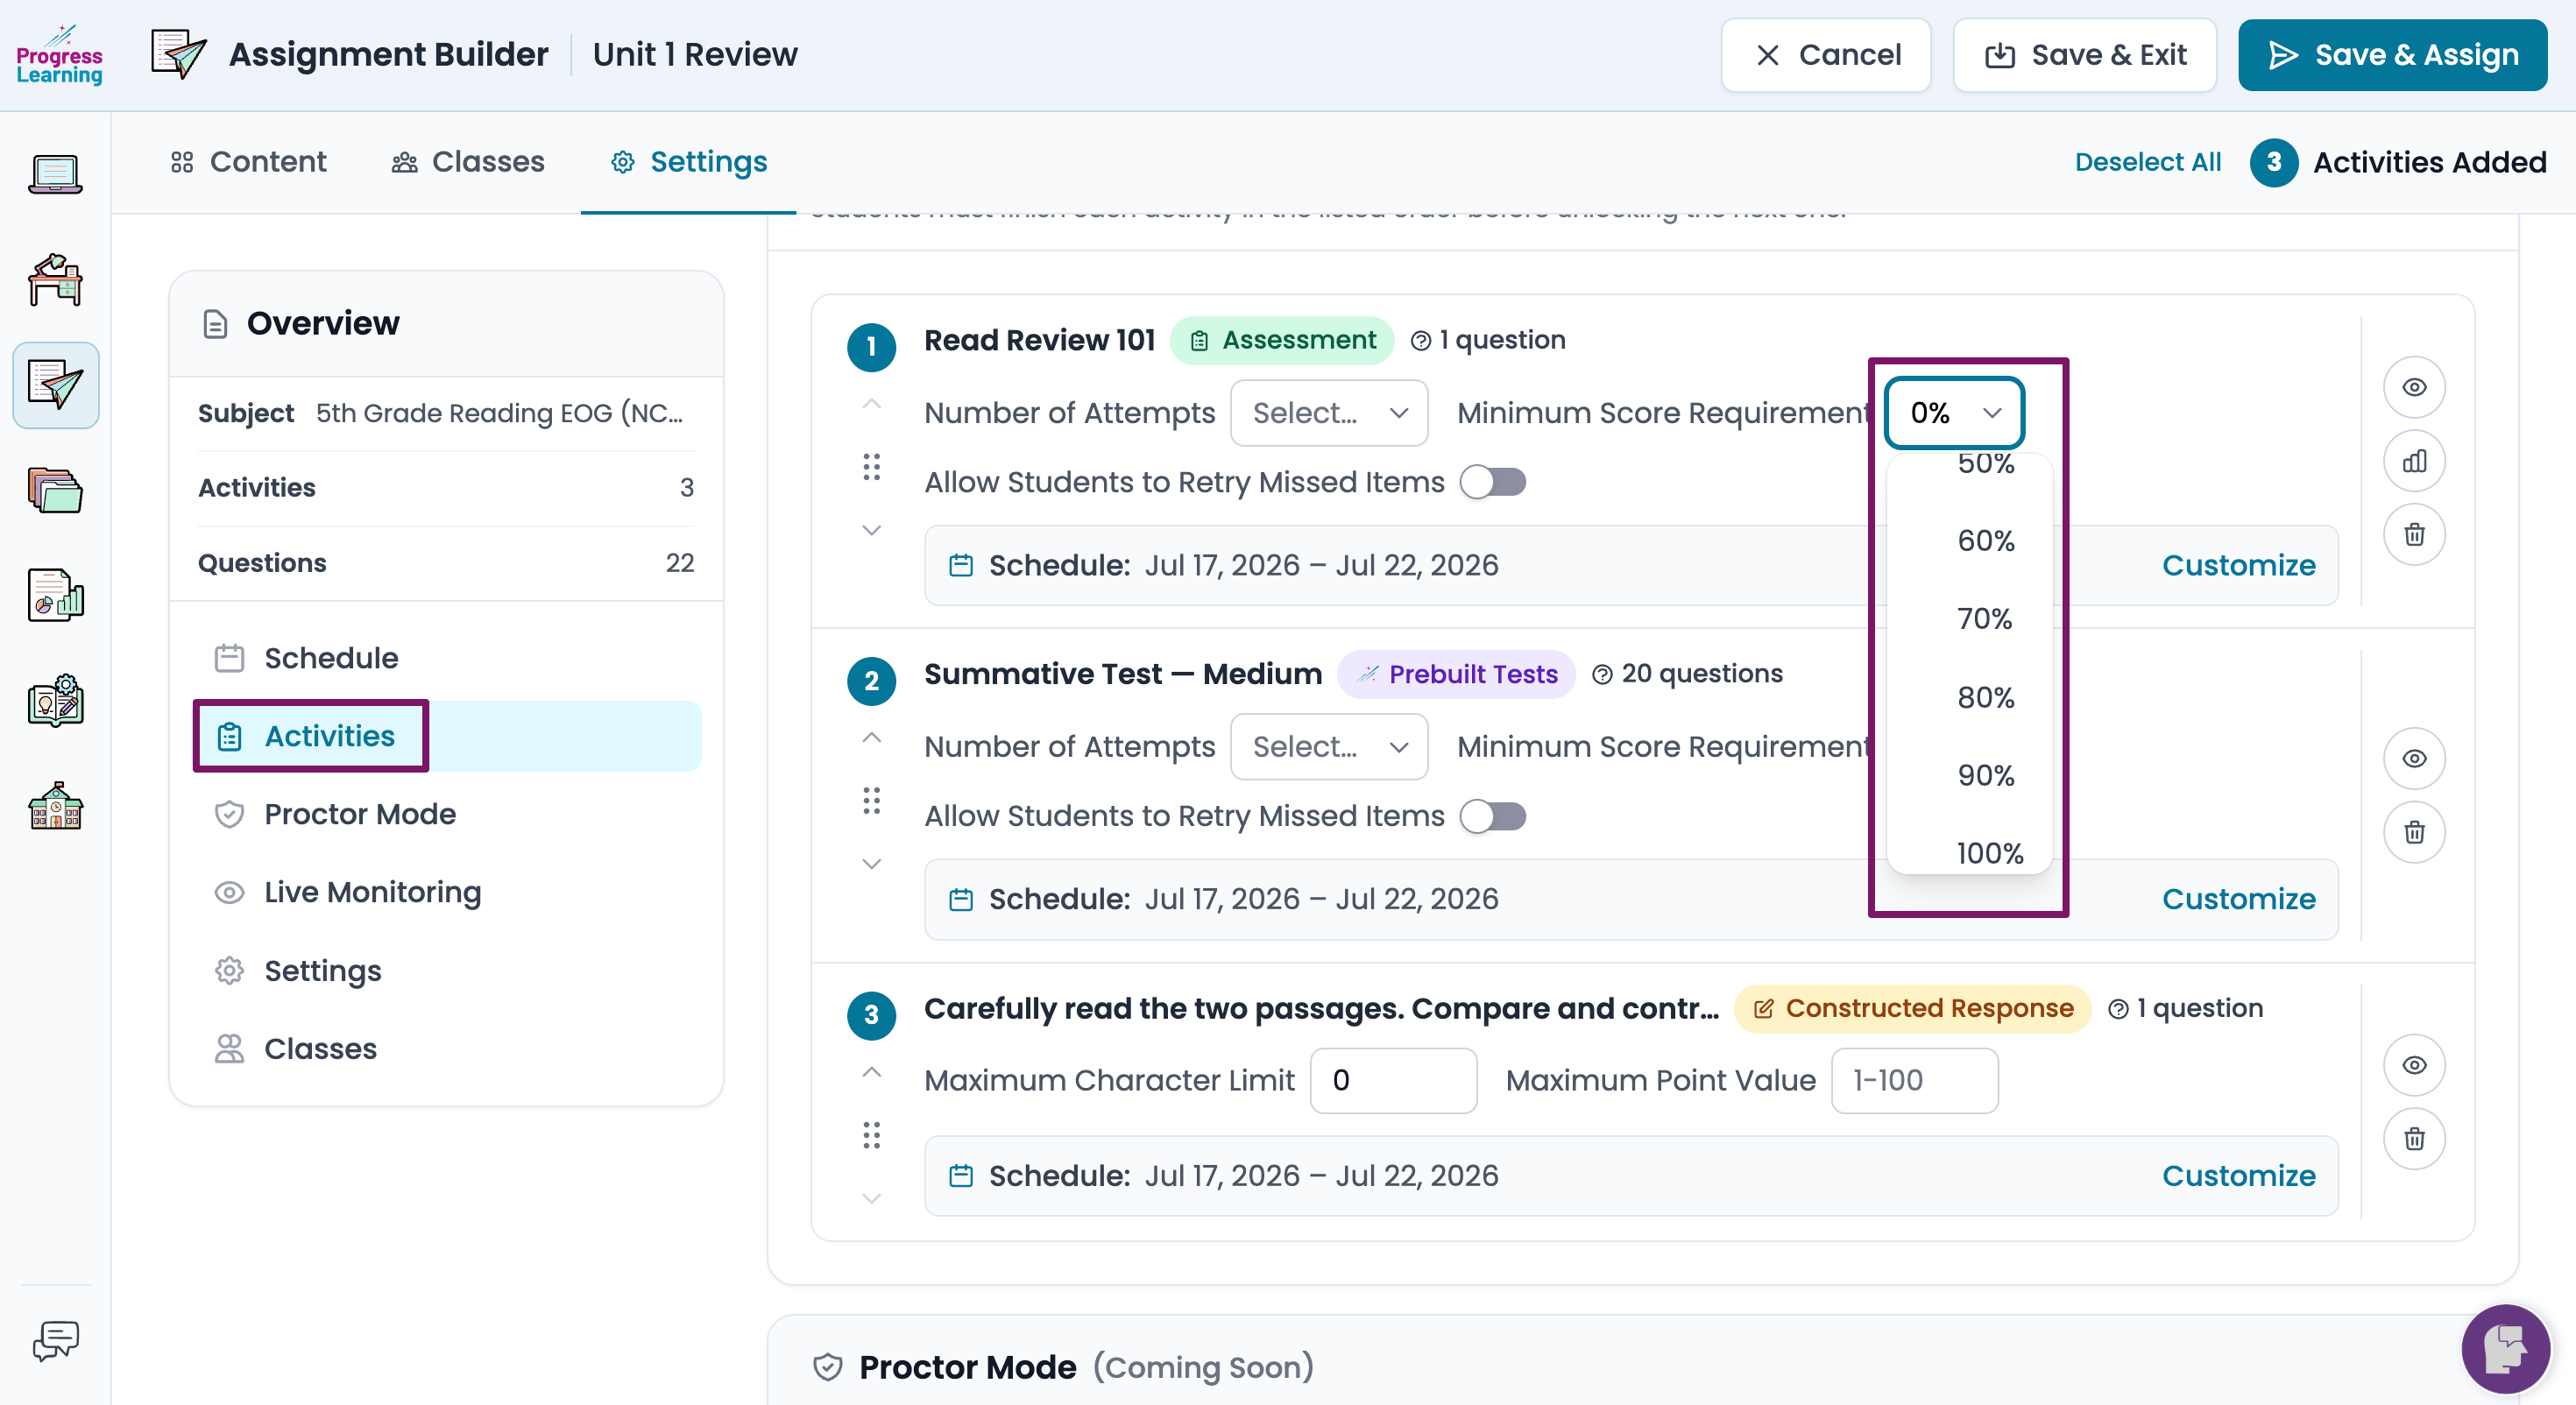
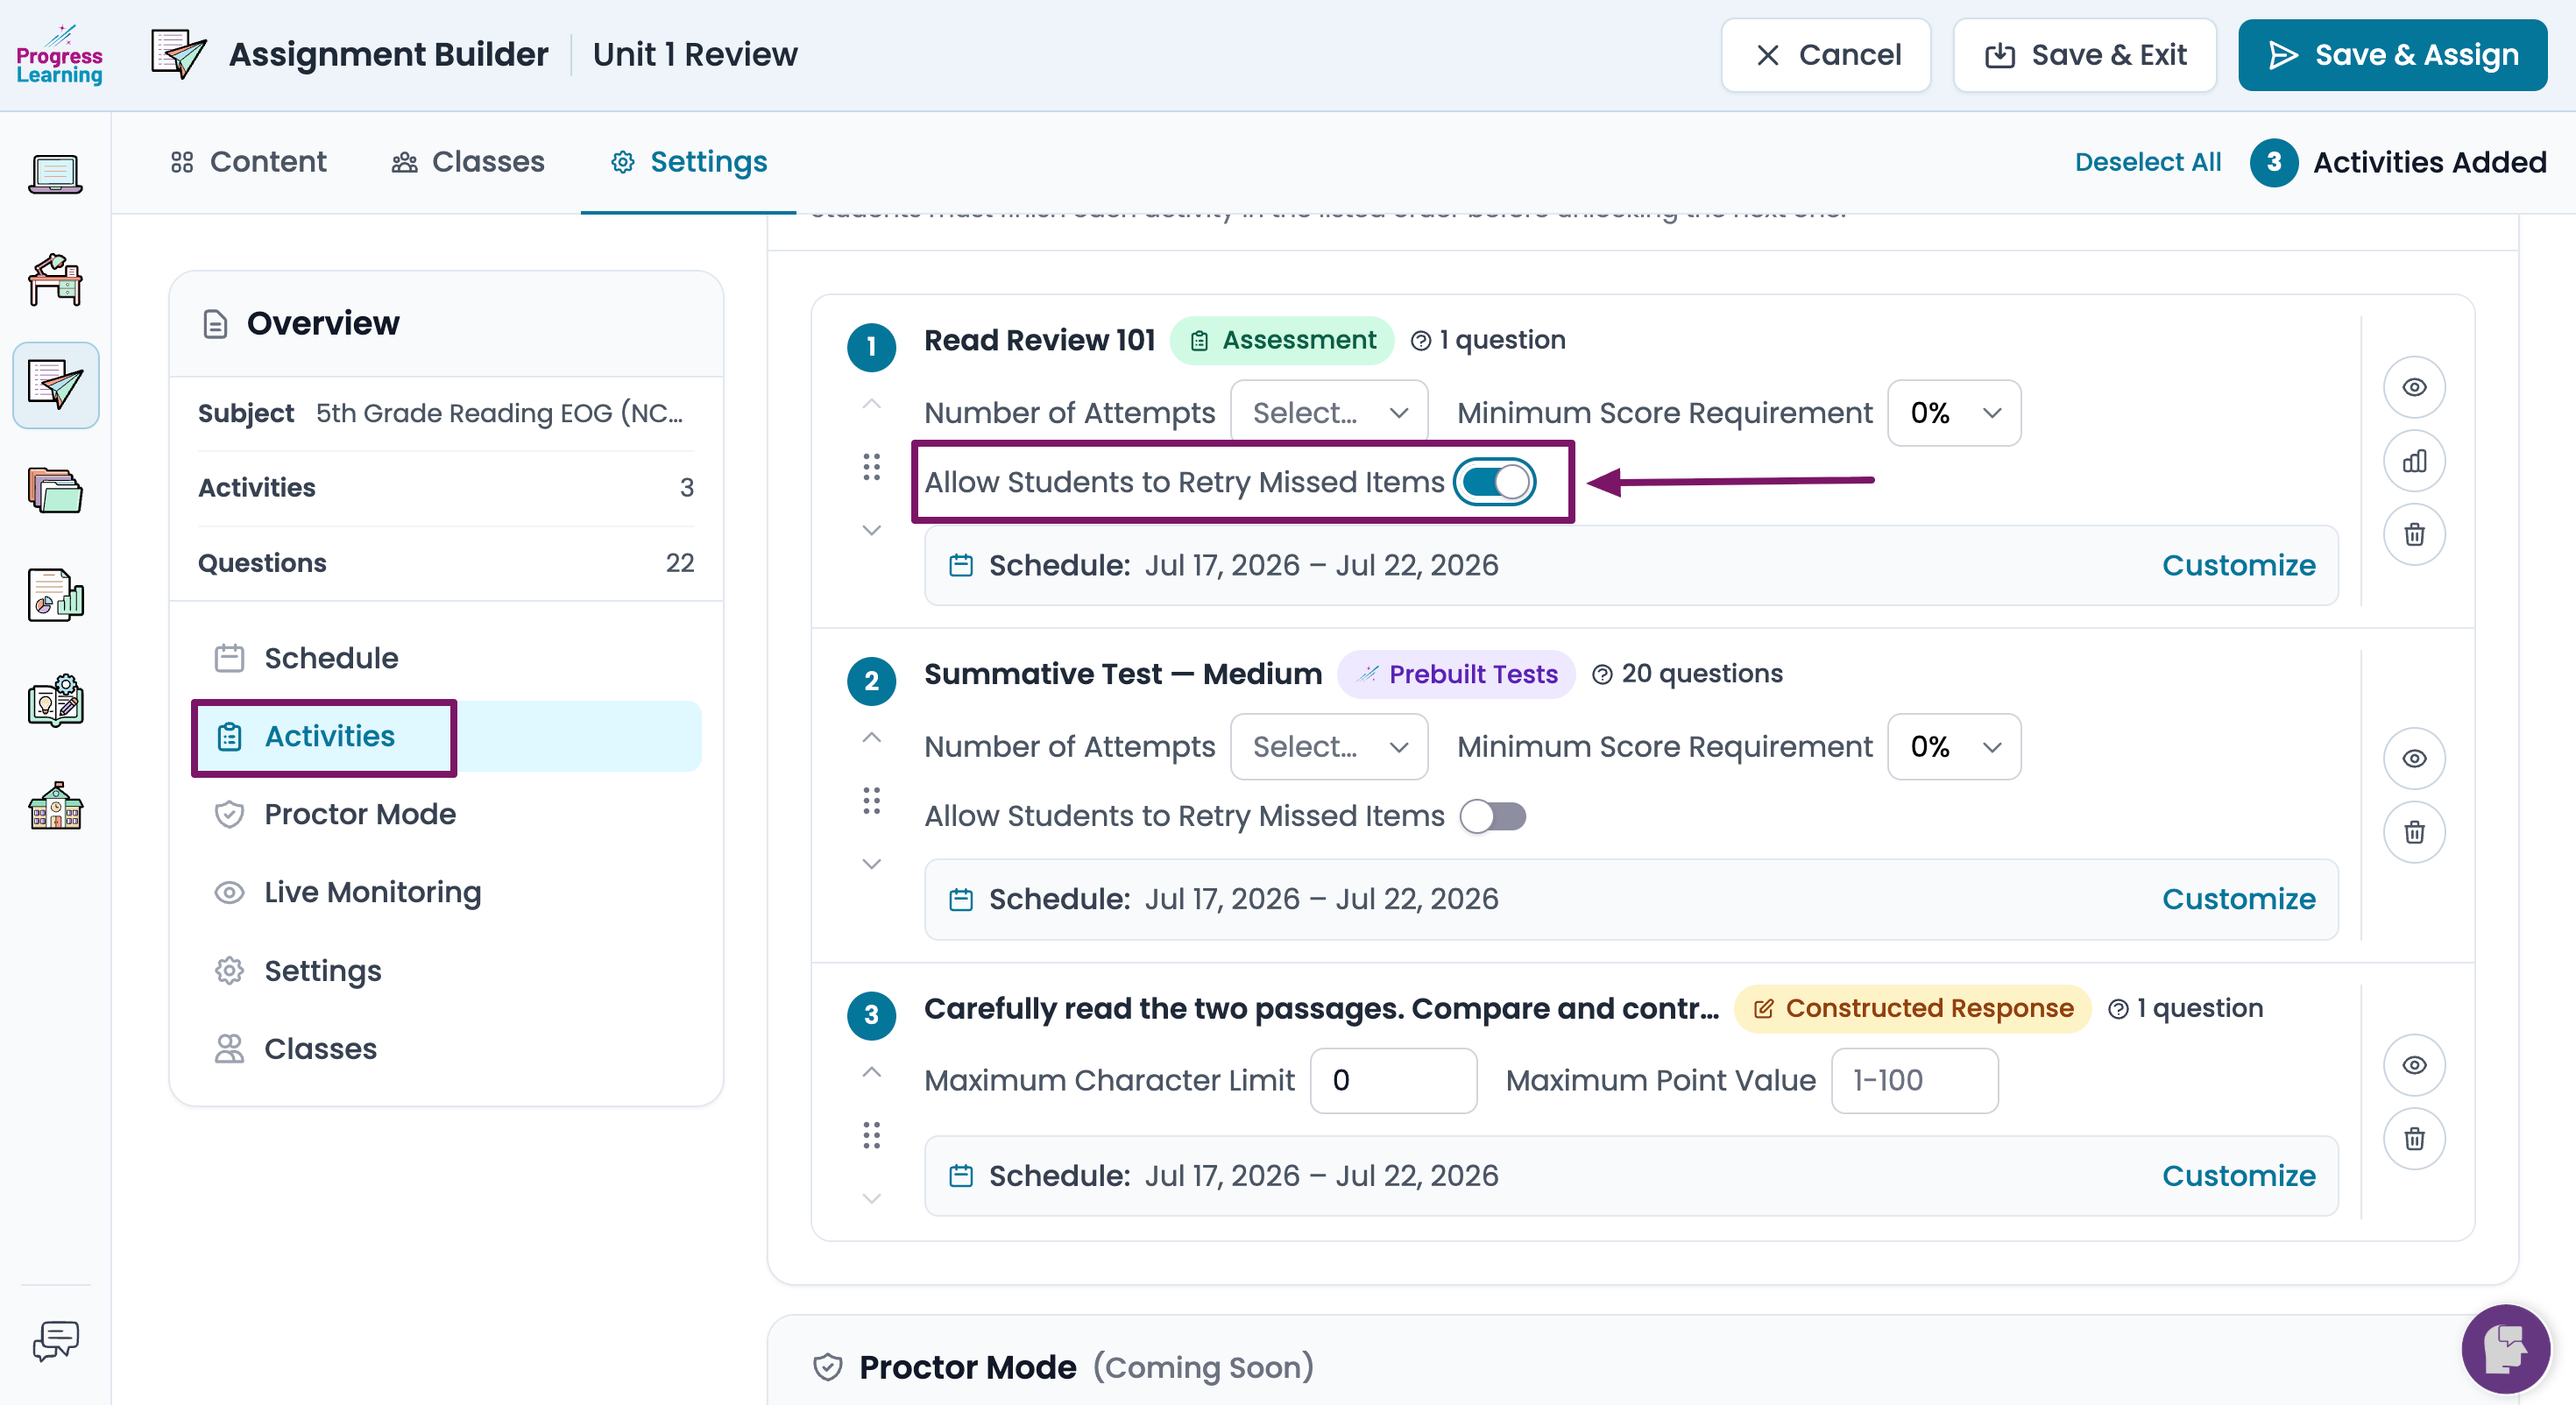
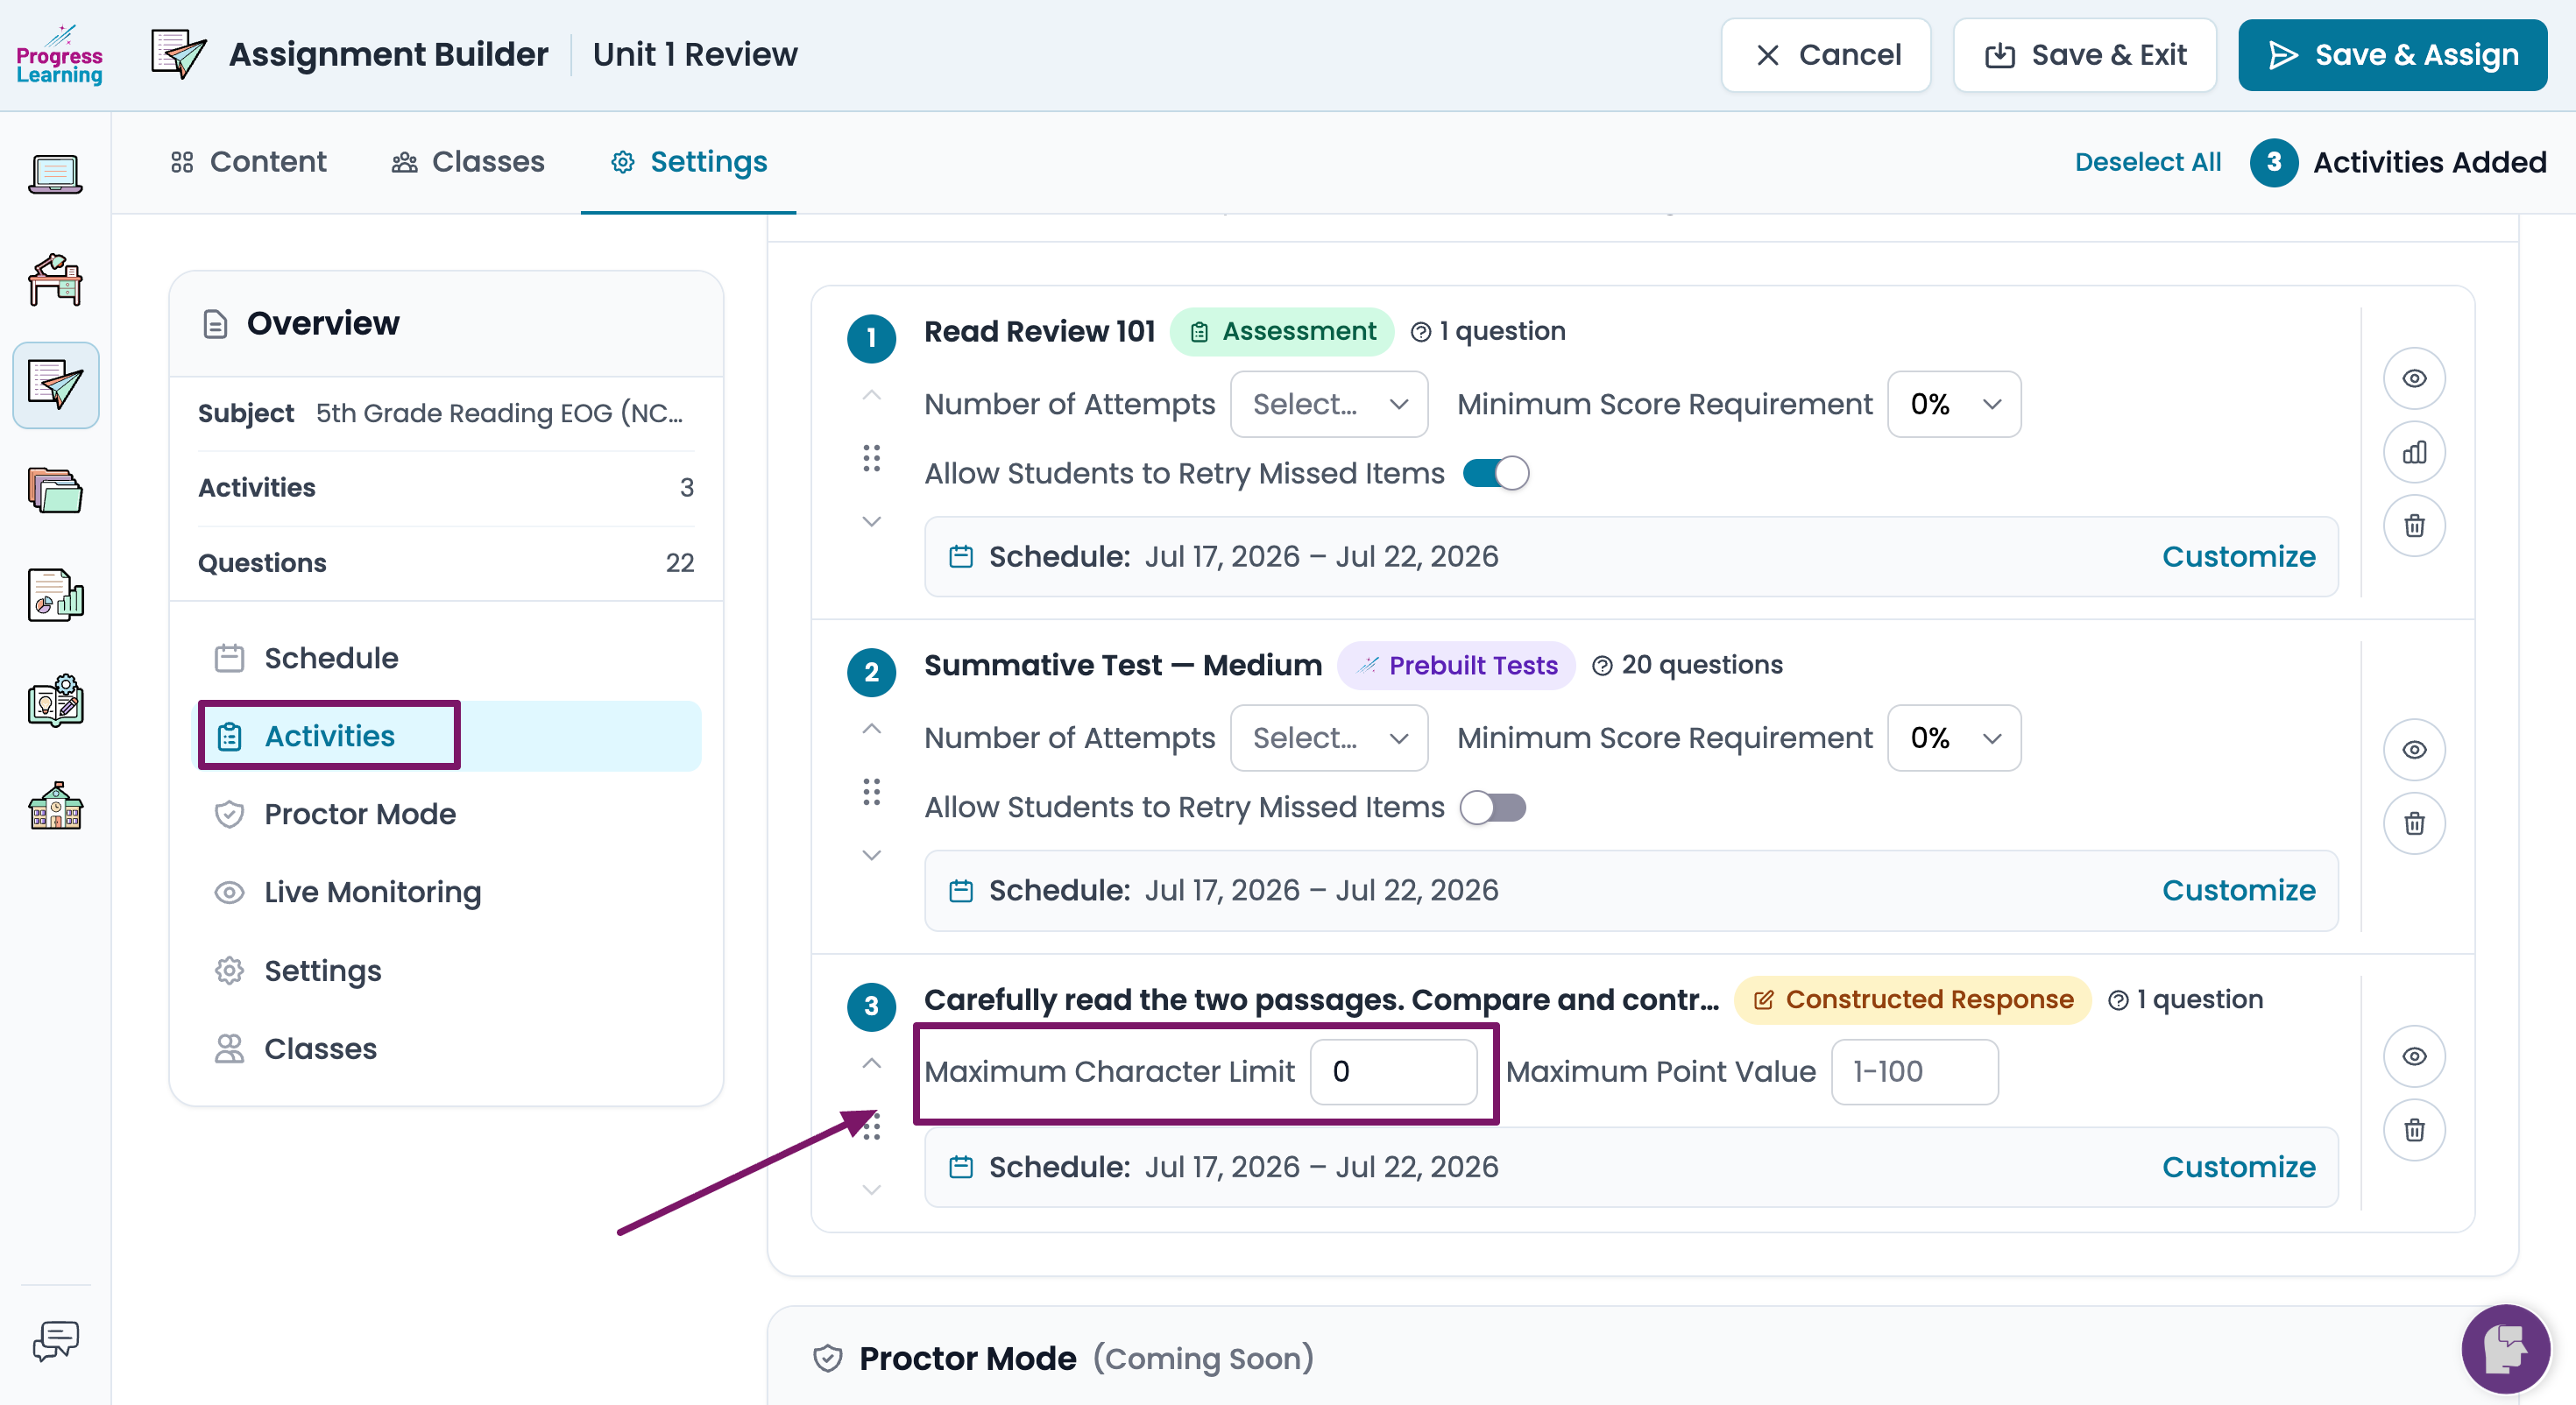
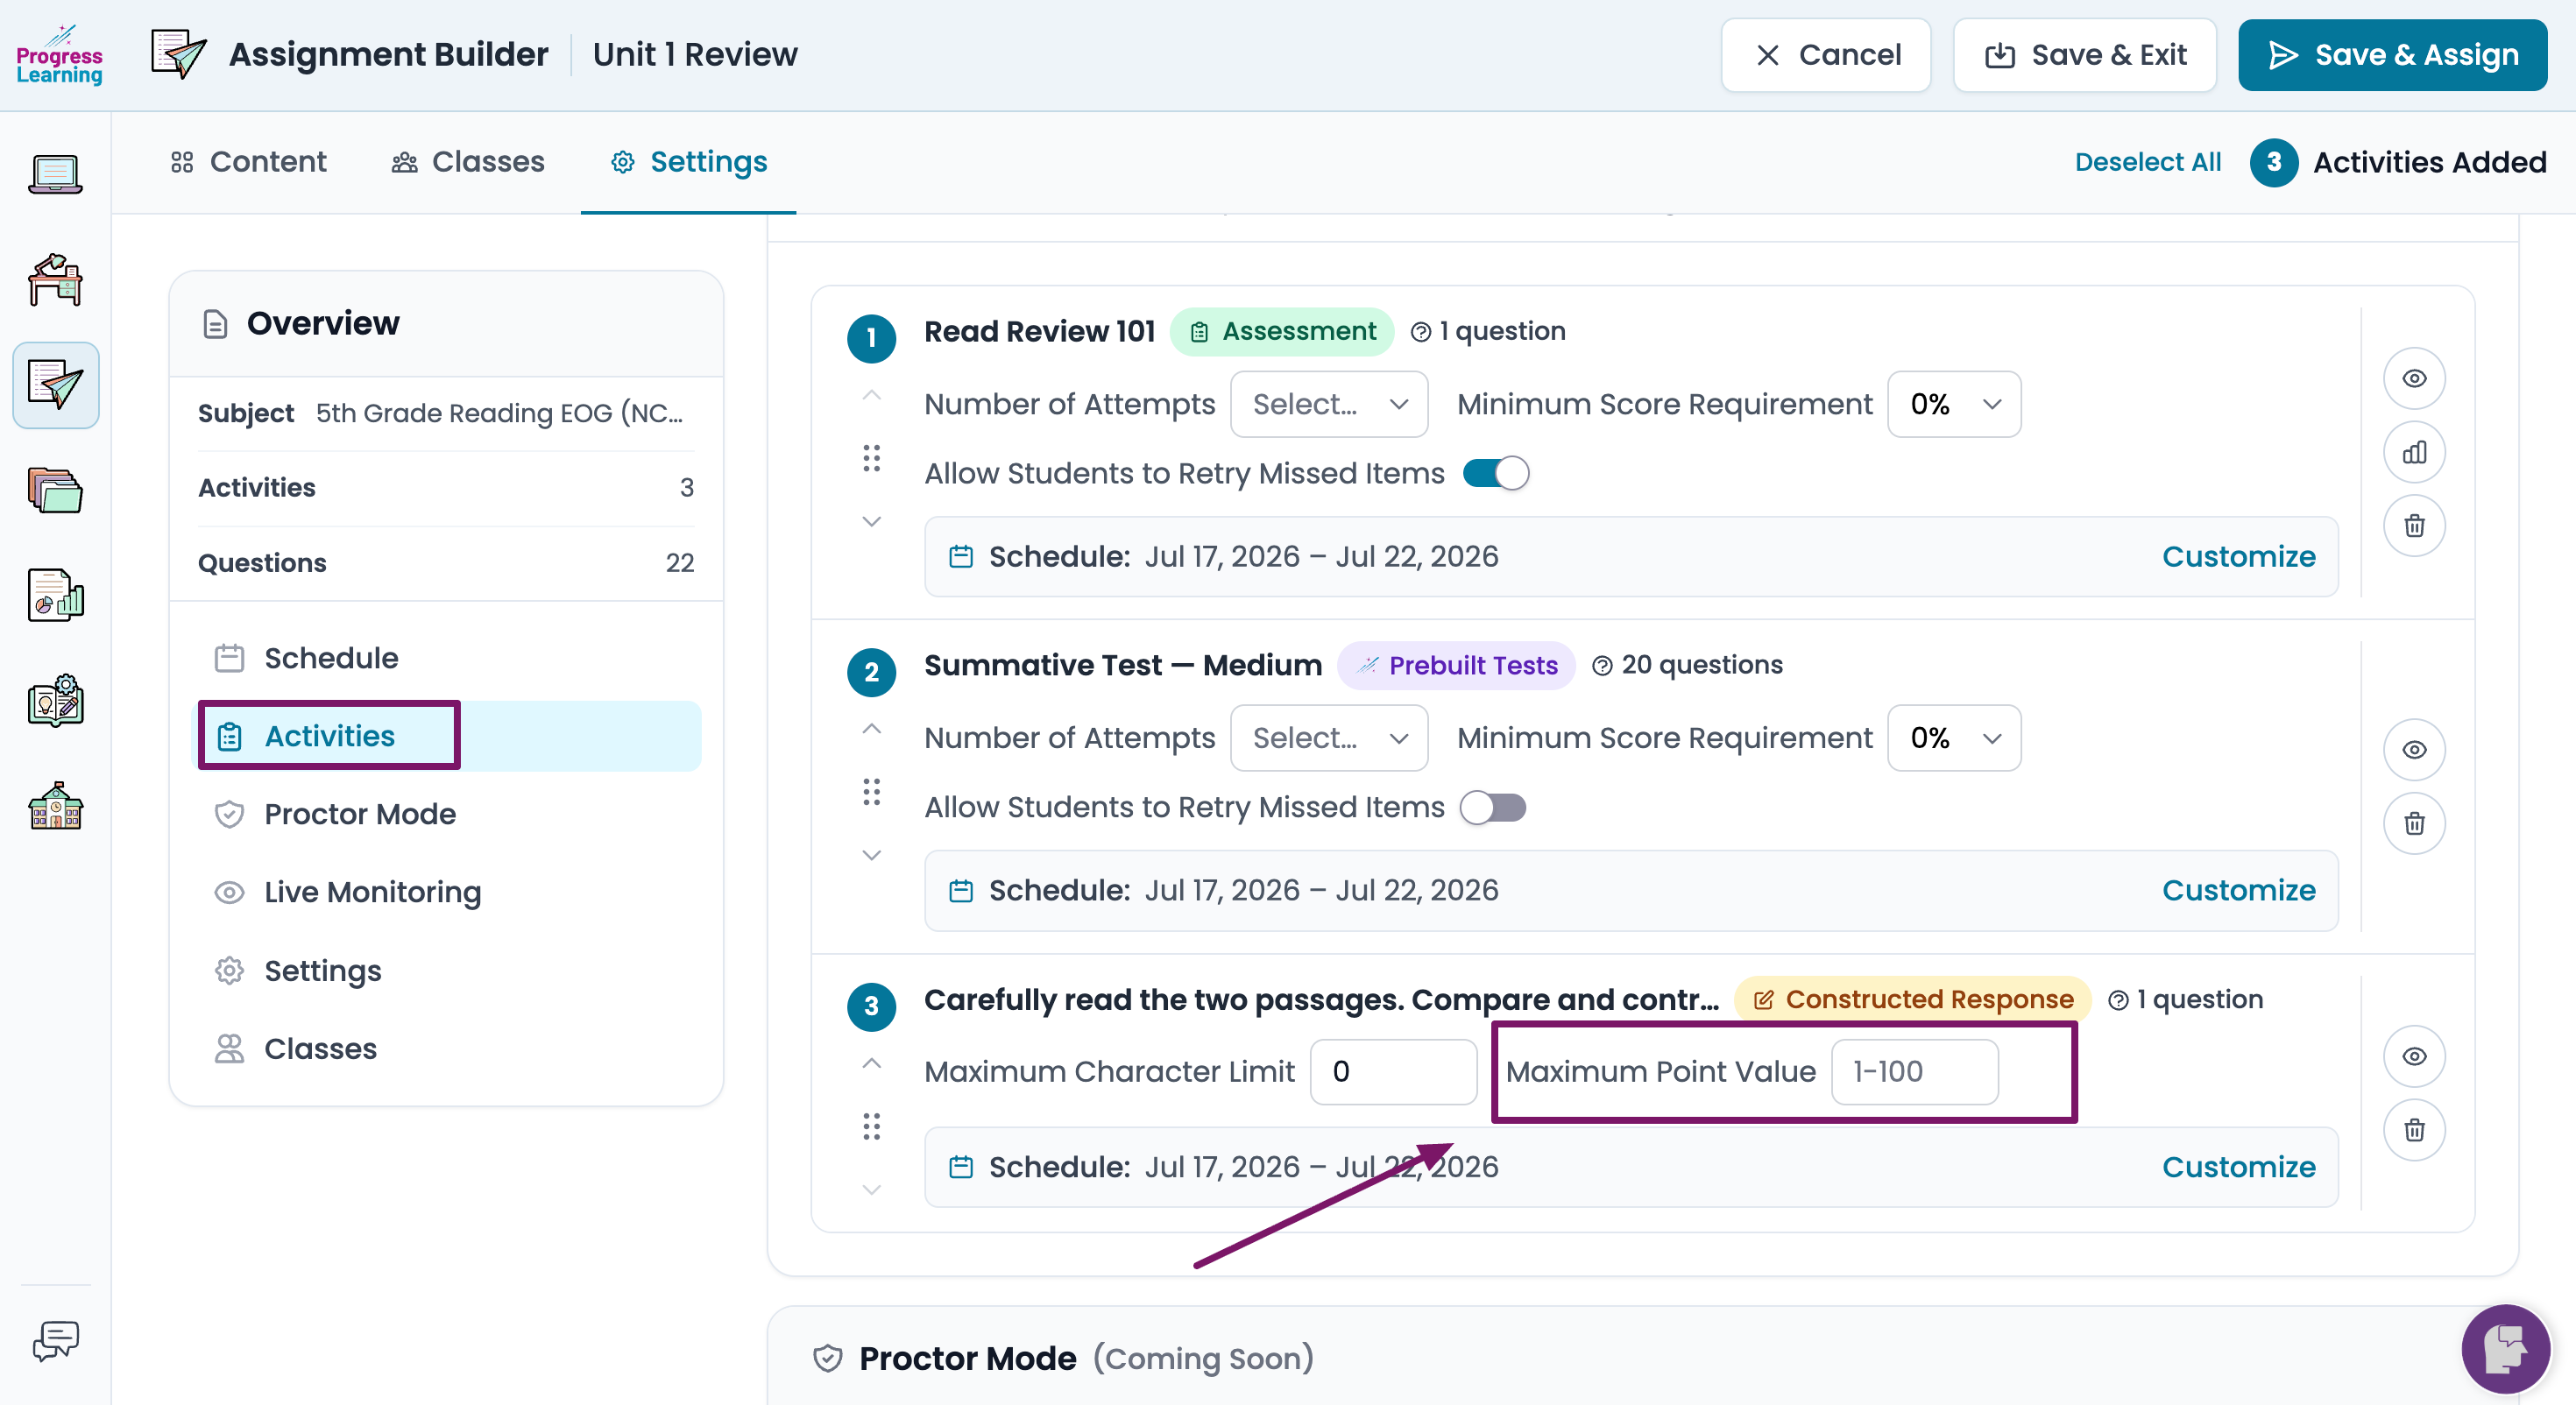
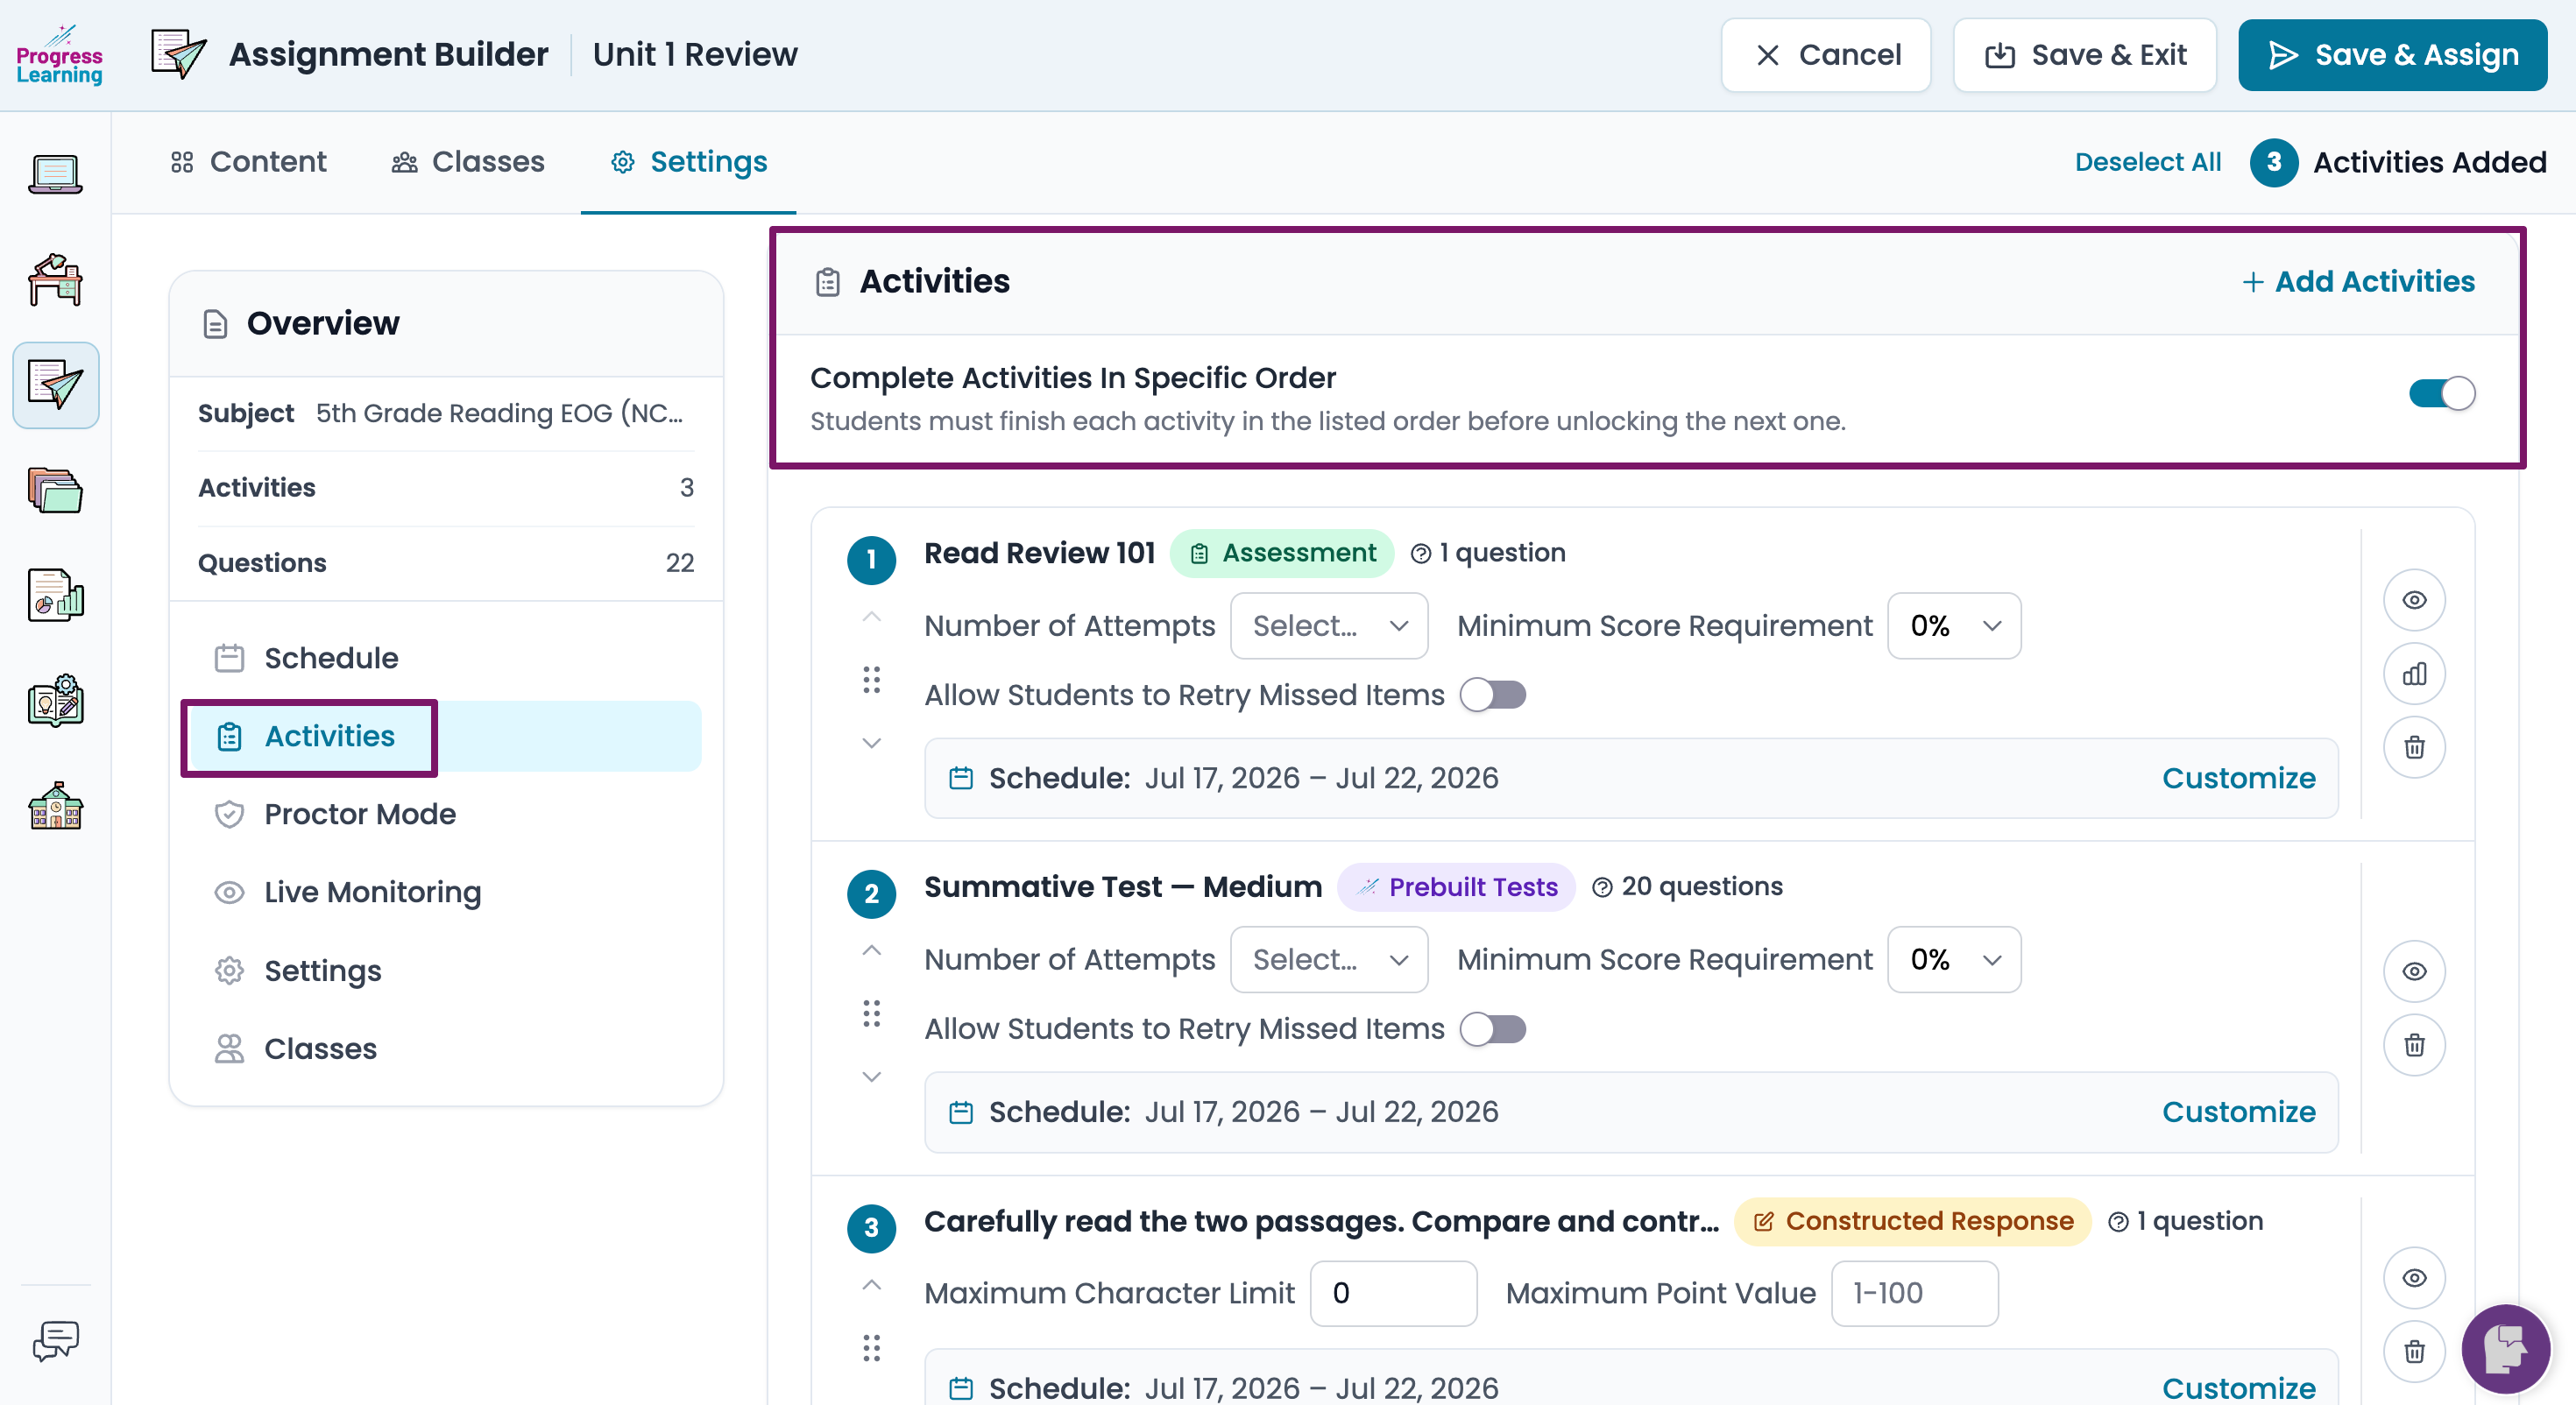
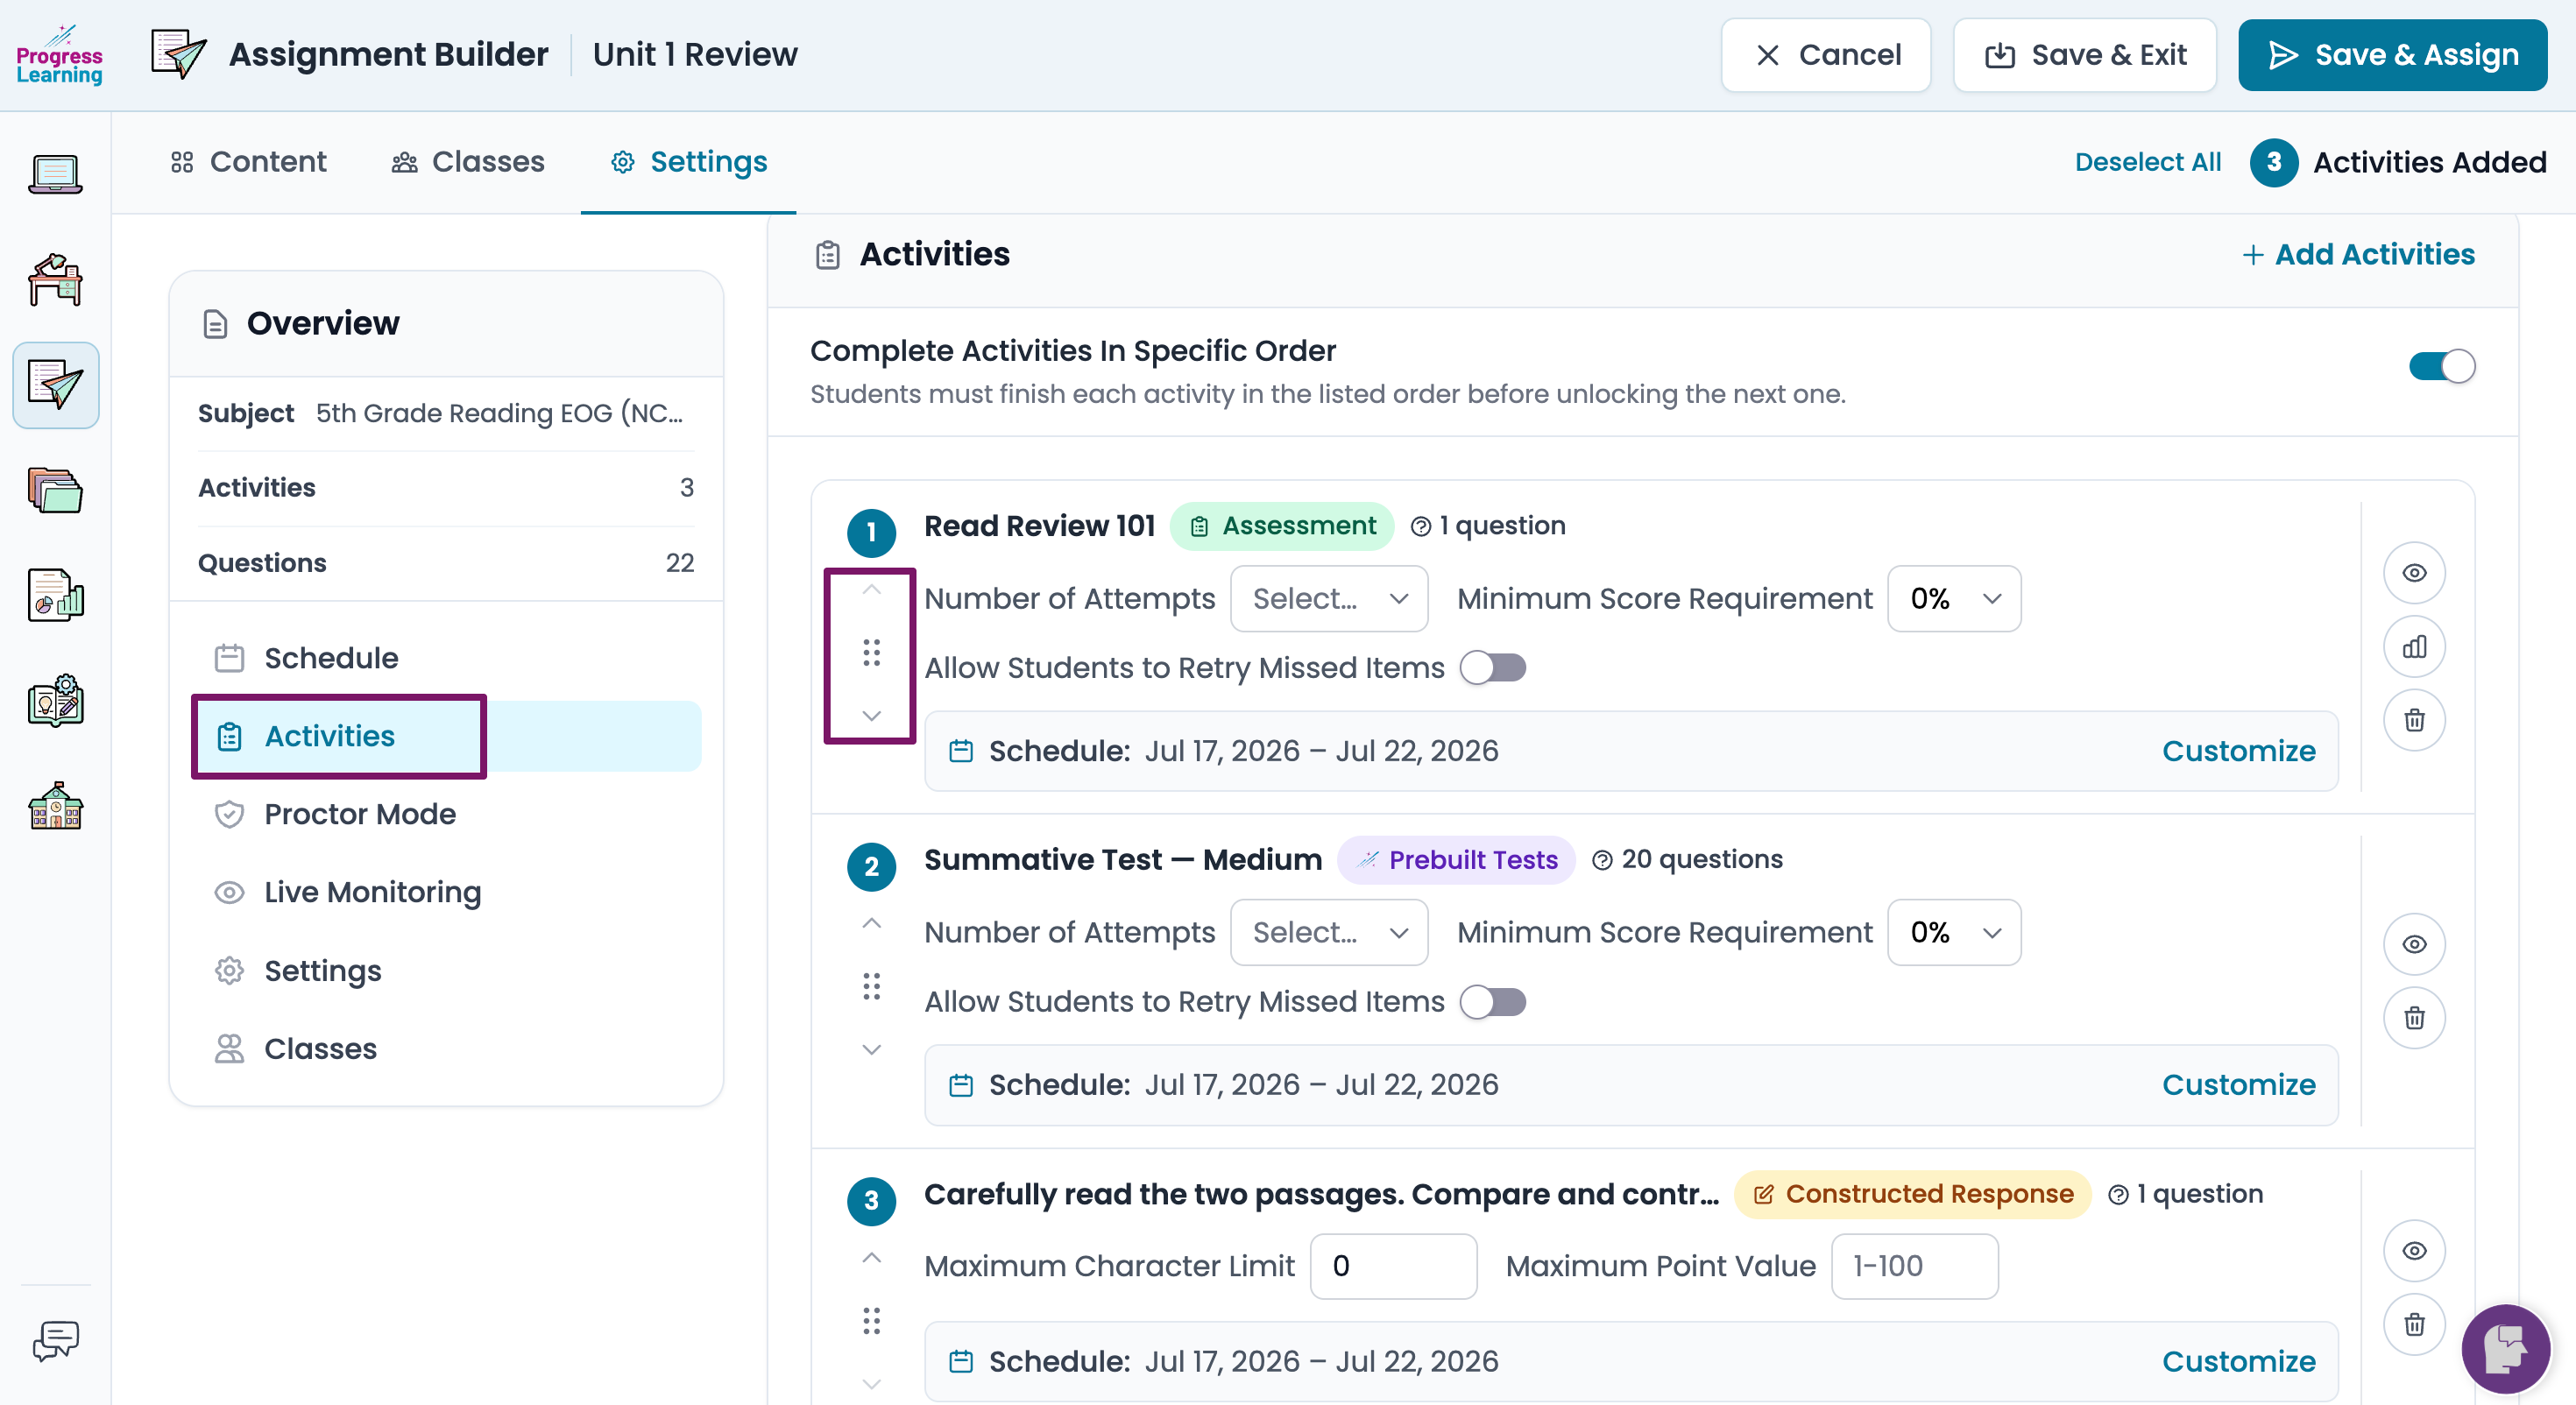
In this section, you are able to set the number of attempts the students have, a minimum score requirement, and the ability to allow them to retry the missed items. You may also set start and end dates and times for each individual activity. If you've assigned a Constructed Response question, you are required to assign a point total.
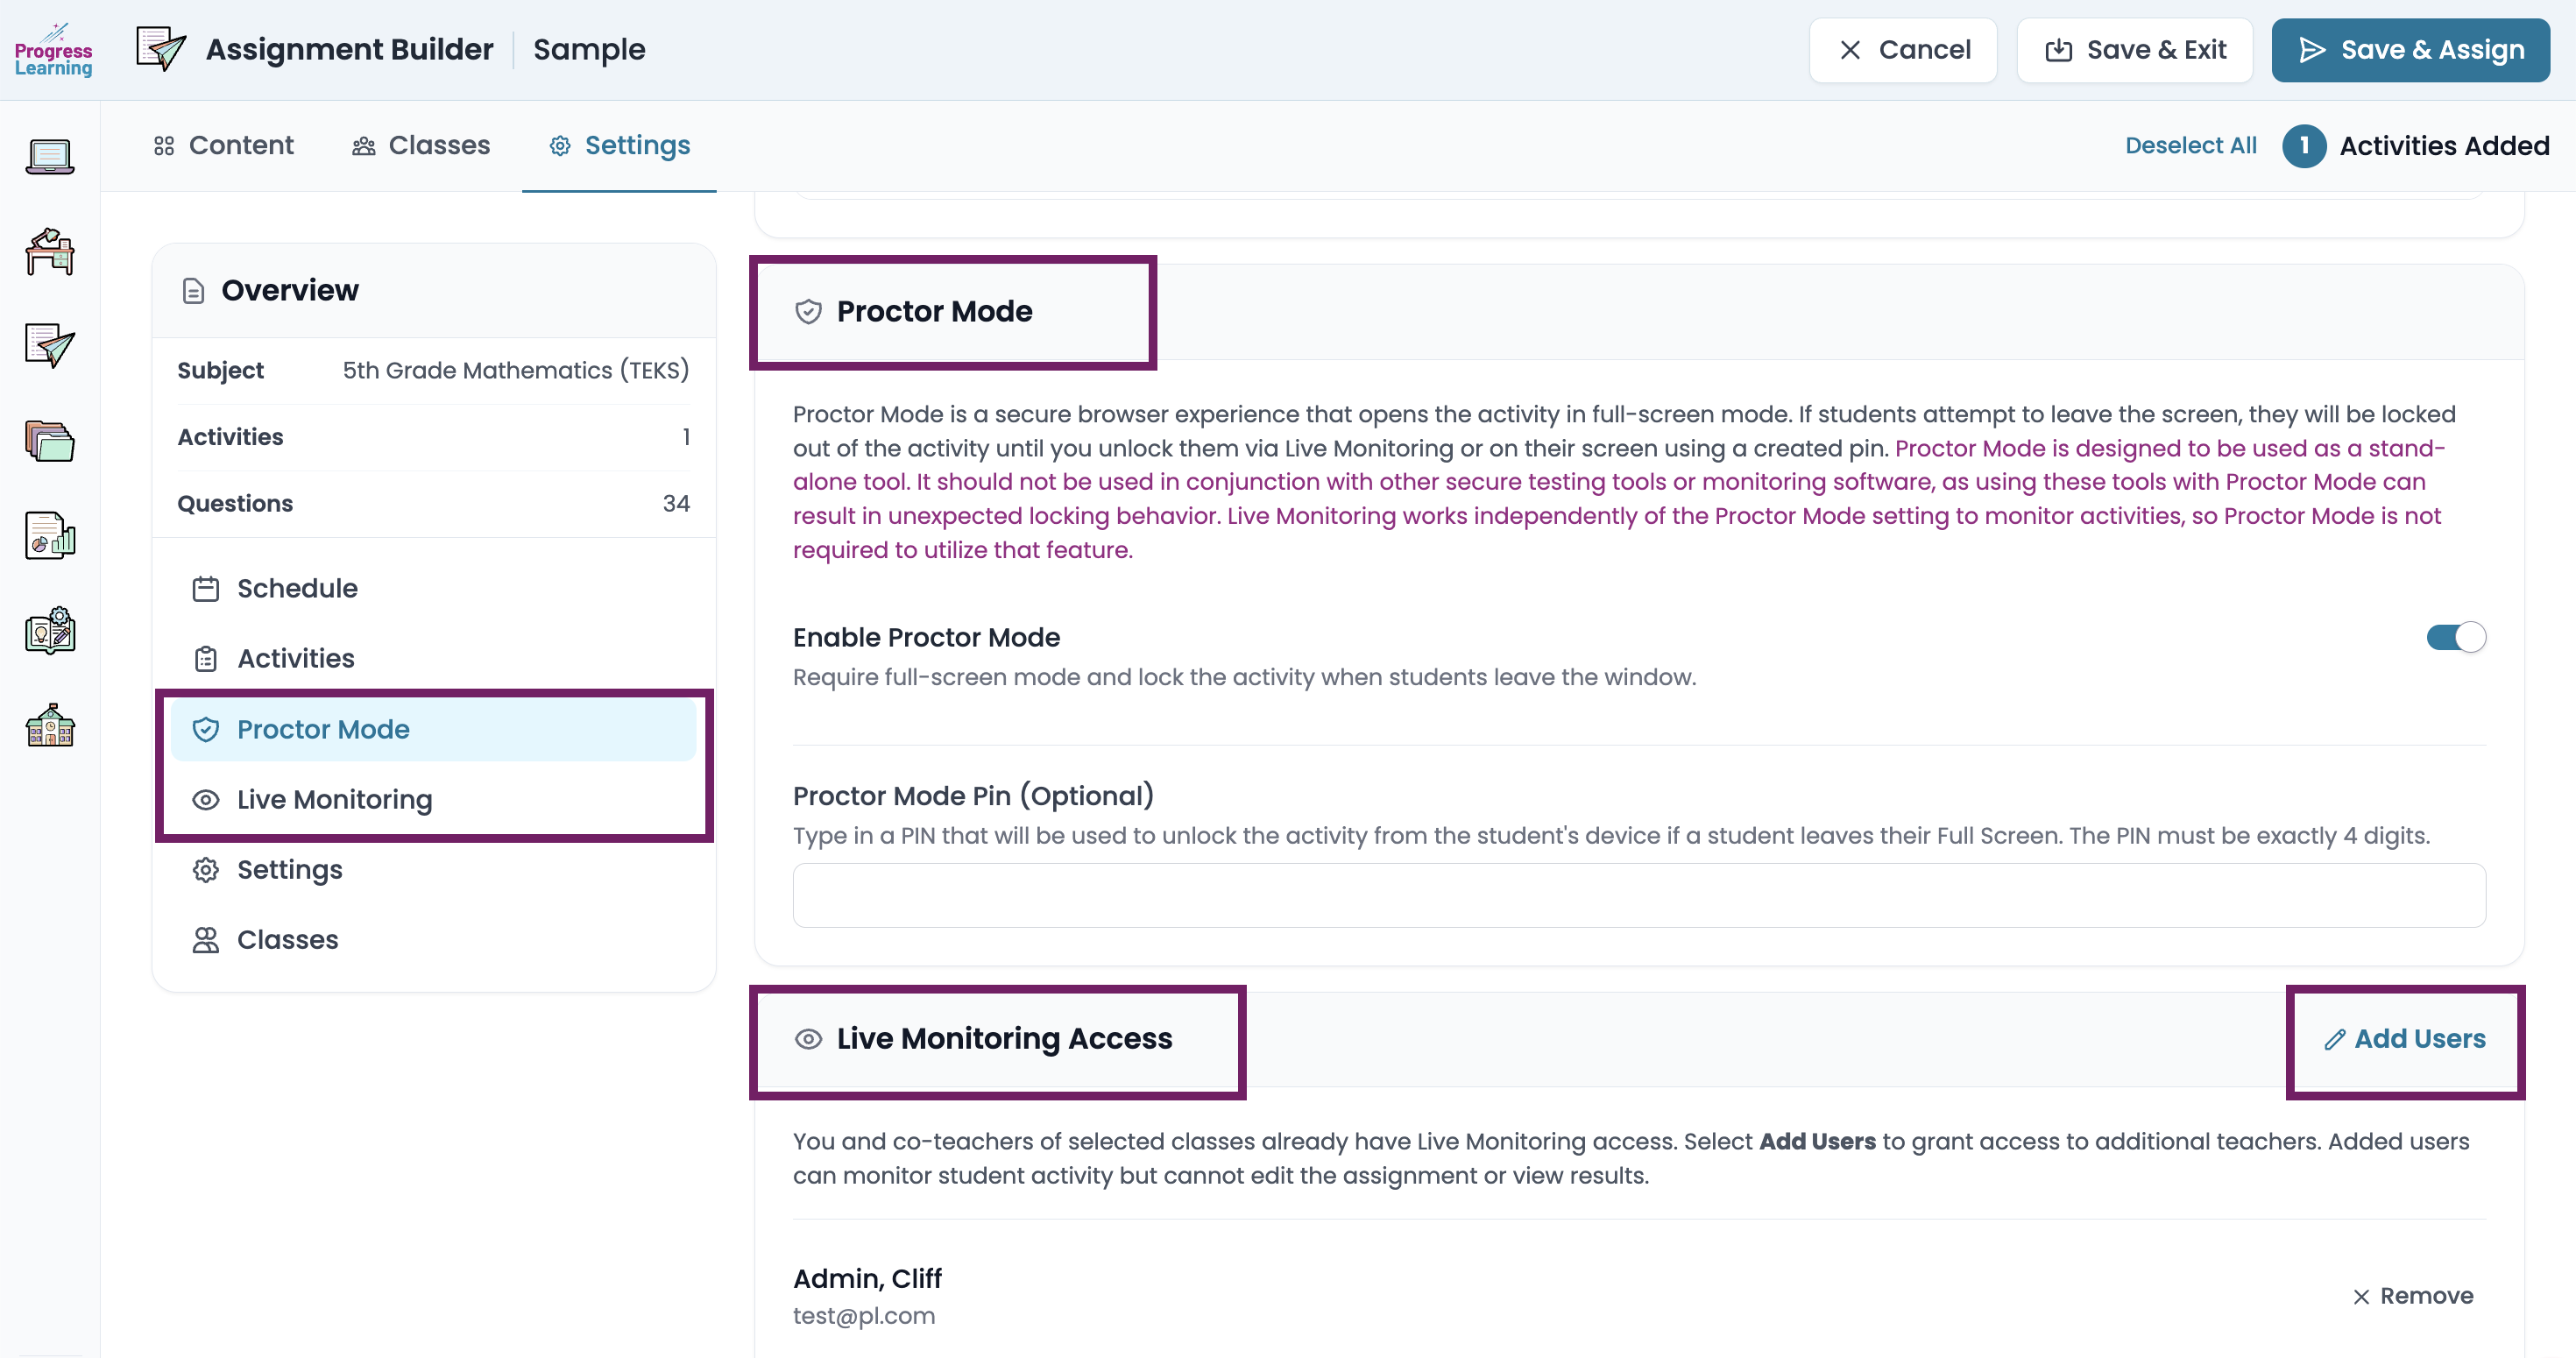
Proctor Mode and Live Monitoring
Here you have the option to place the assignment in a secure Proctor Mode by toggling the button in the on (blue) position. You can also add other teachers to this assignment to enable them to use Live Monitoring while students are working on the assignment.
Proctor Mode and Live Monitoring serve different purposes: Proctor Mode creates a secure testing environment, while Live Monitoring provides real-time visibility into student activity, pacing, and progress. Live Monitoring can be used with or without Proctor Mode. For additional information, please visit the articles linked below.
- For Live Monitoring Access: You and co-teachers of selected classes already have Live Monitoring access. Select Add Users to grant access to additional teachers. Added users can monitor student activity but cannot edit the assignment or view results.
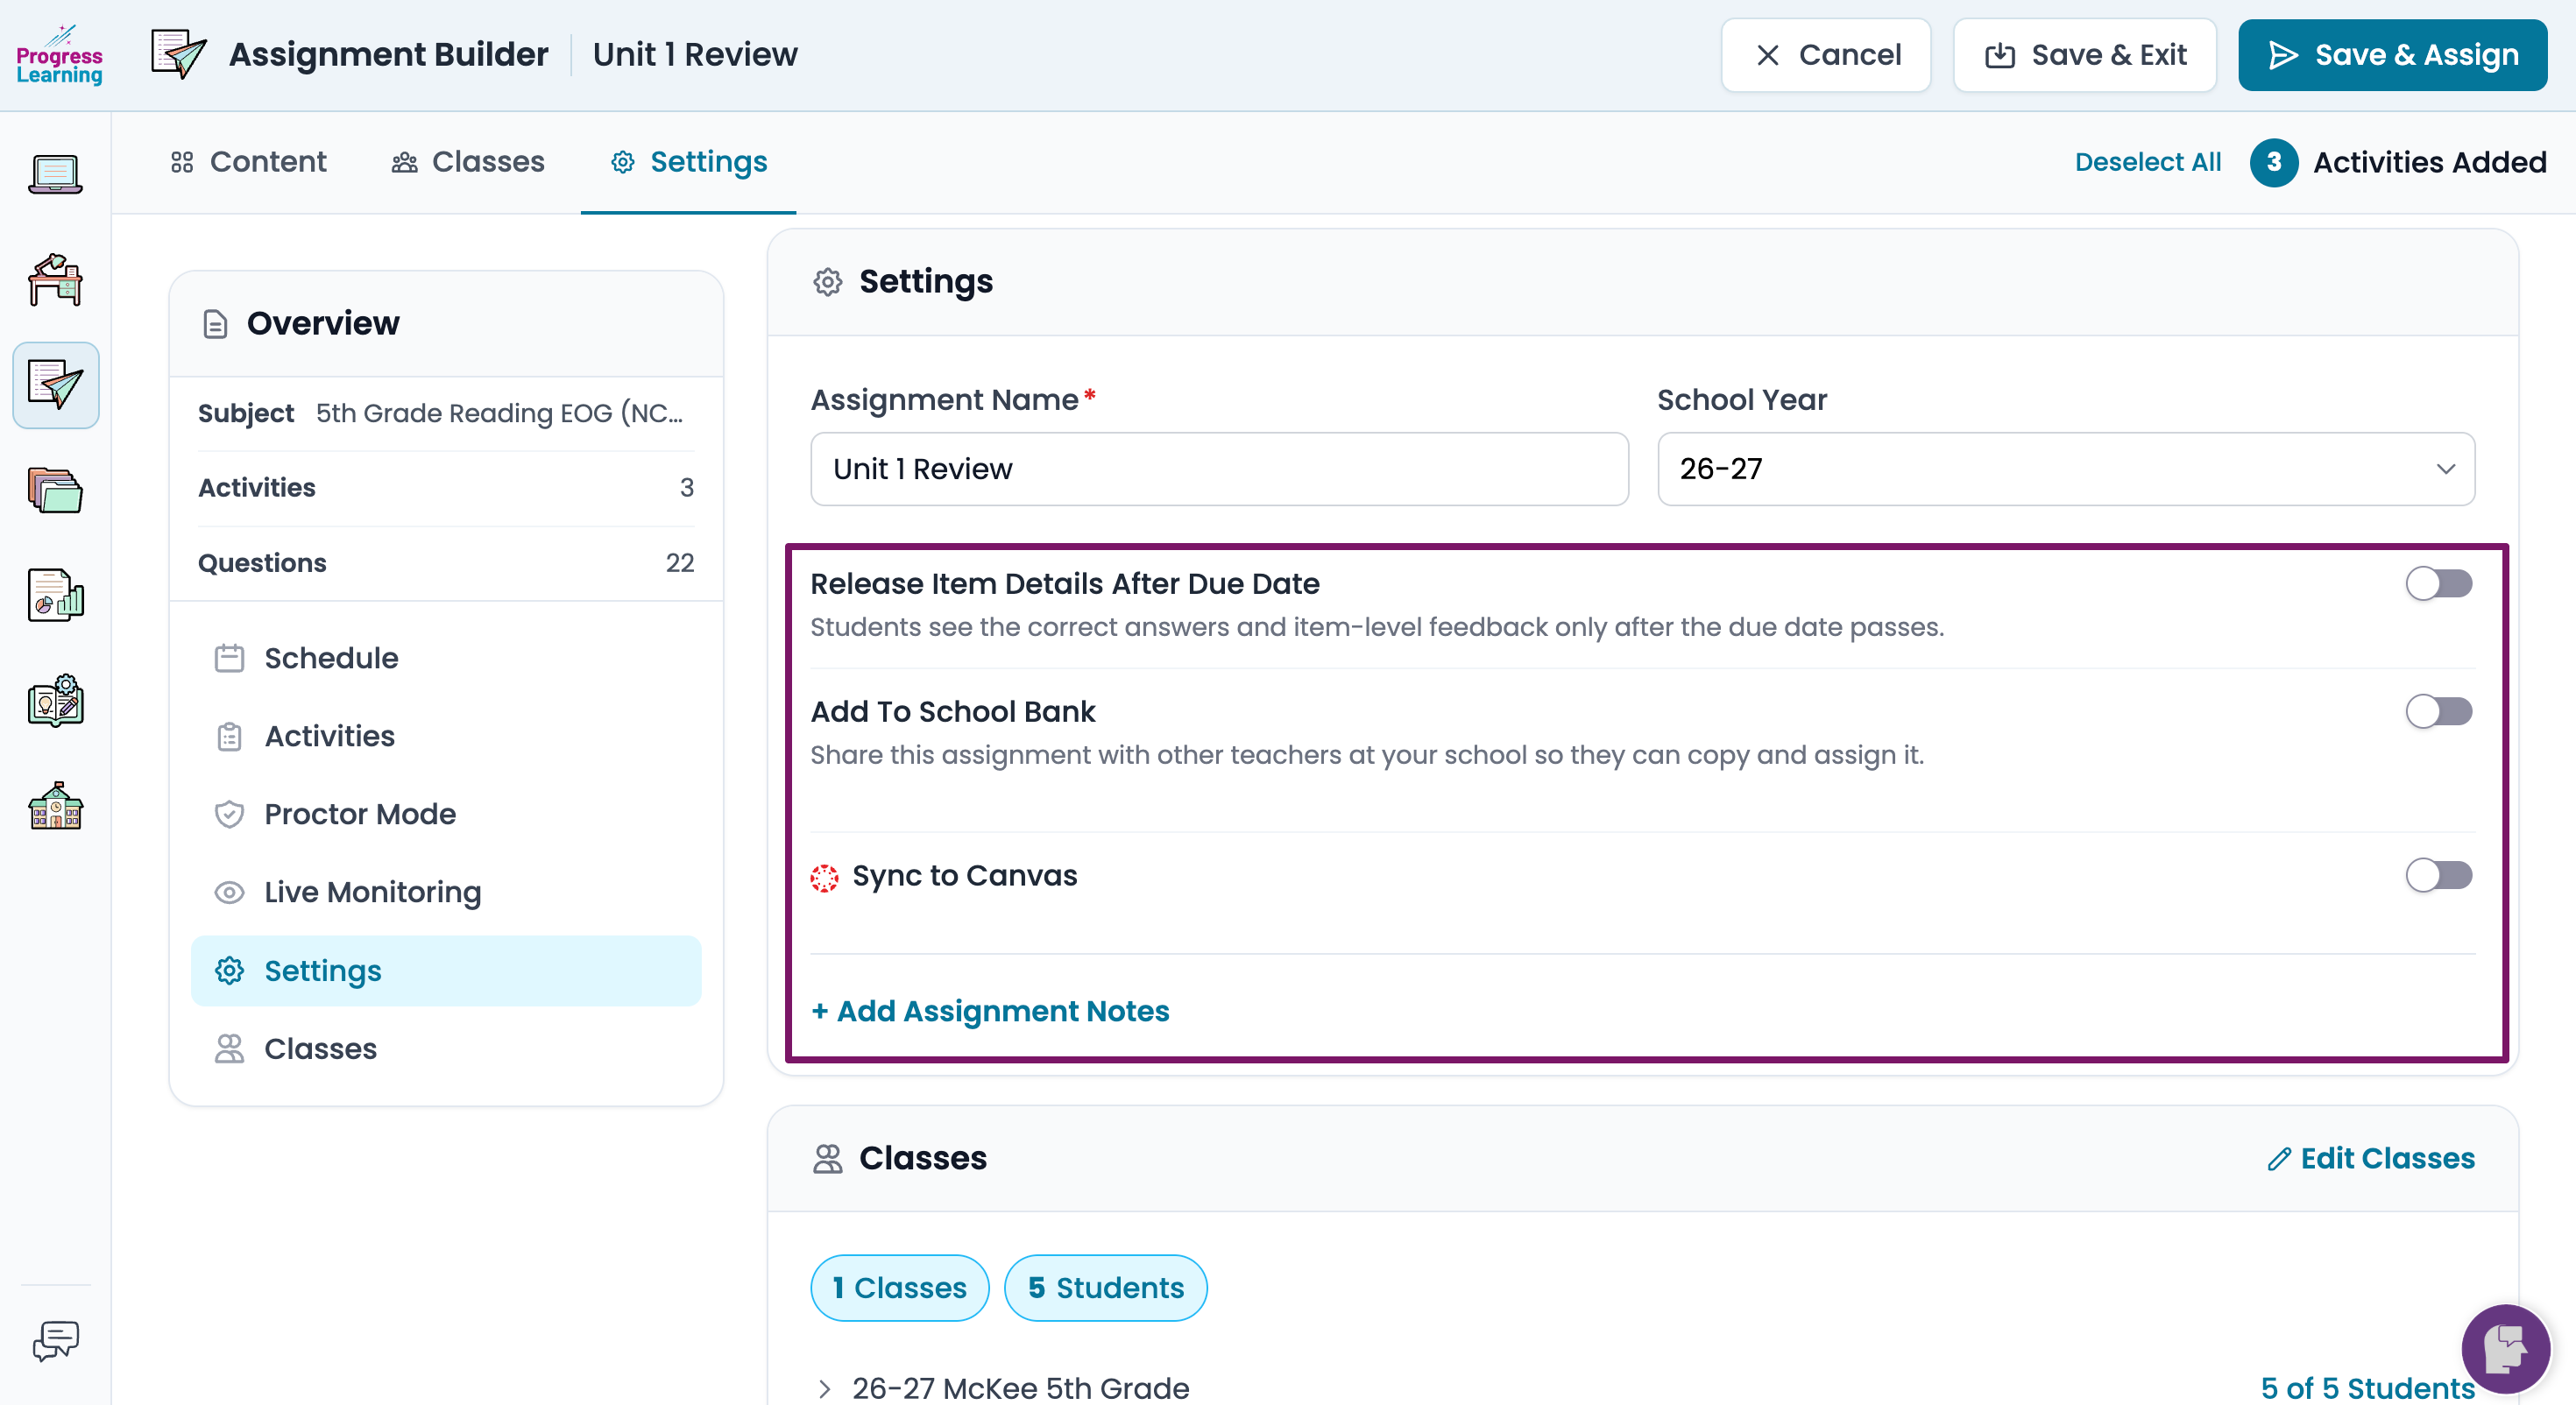
Settings
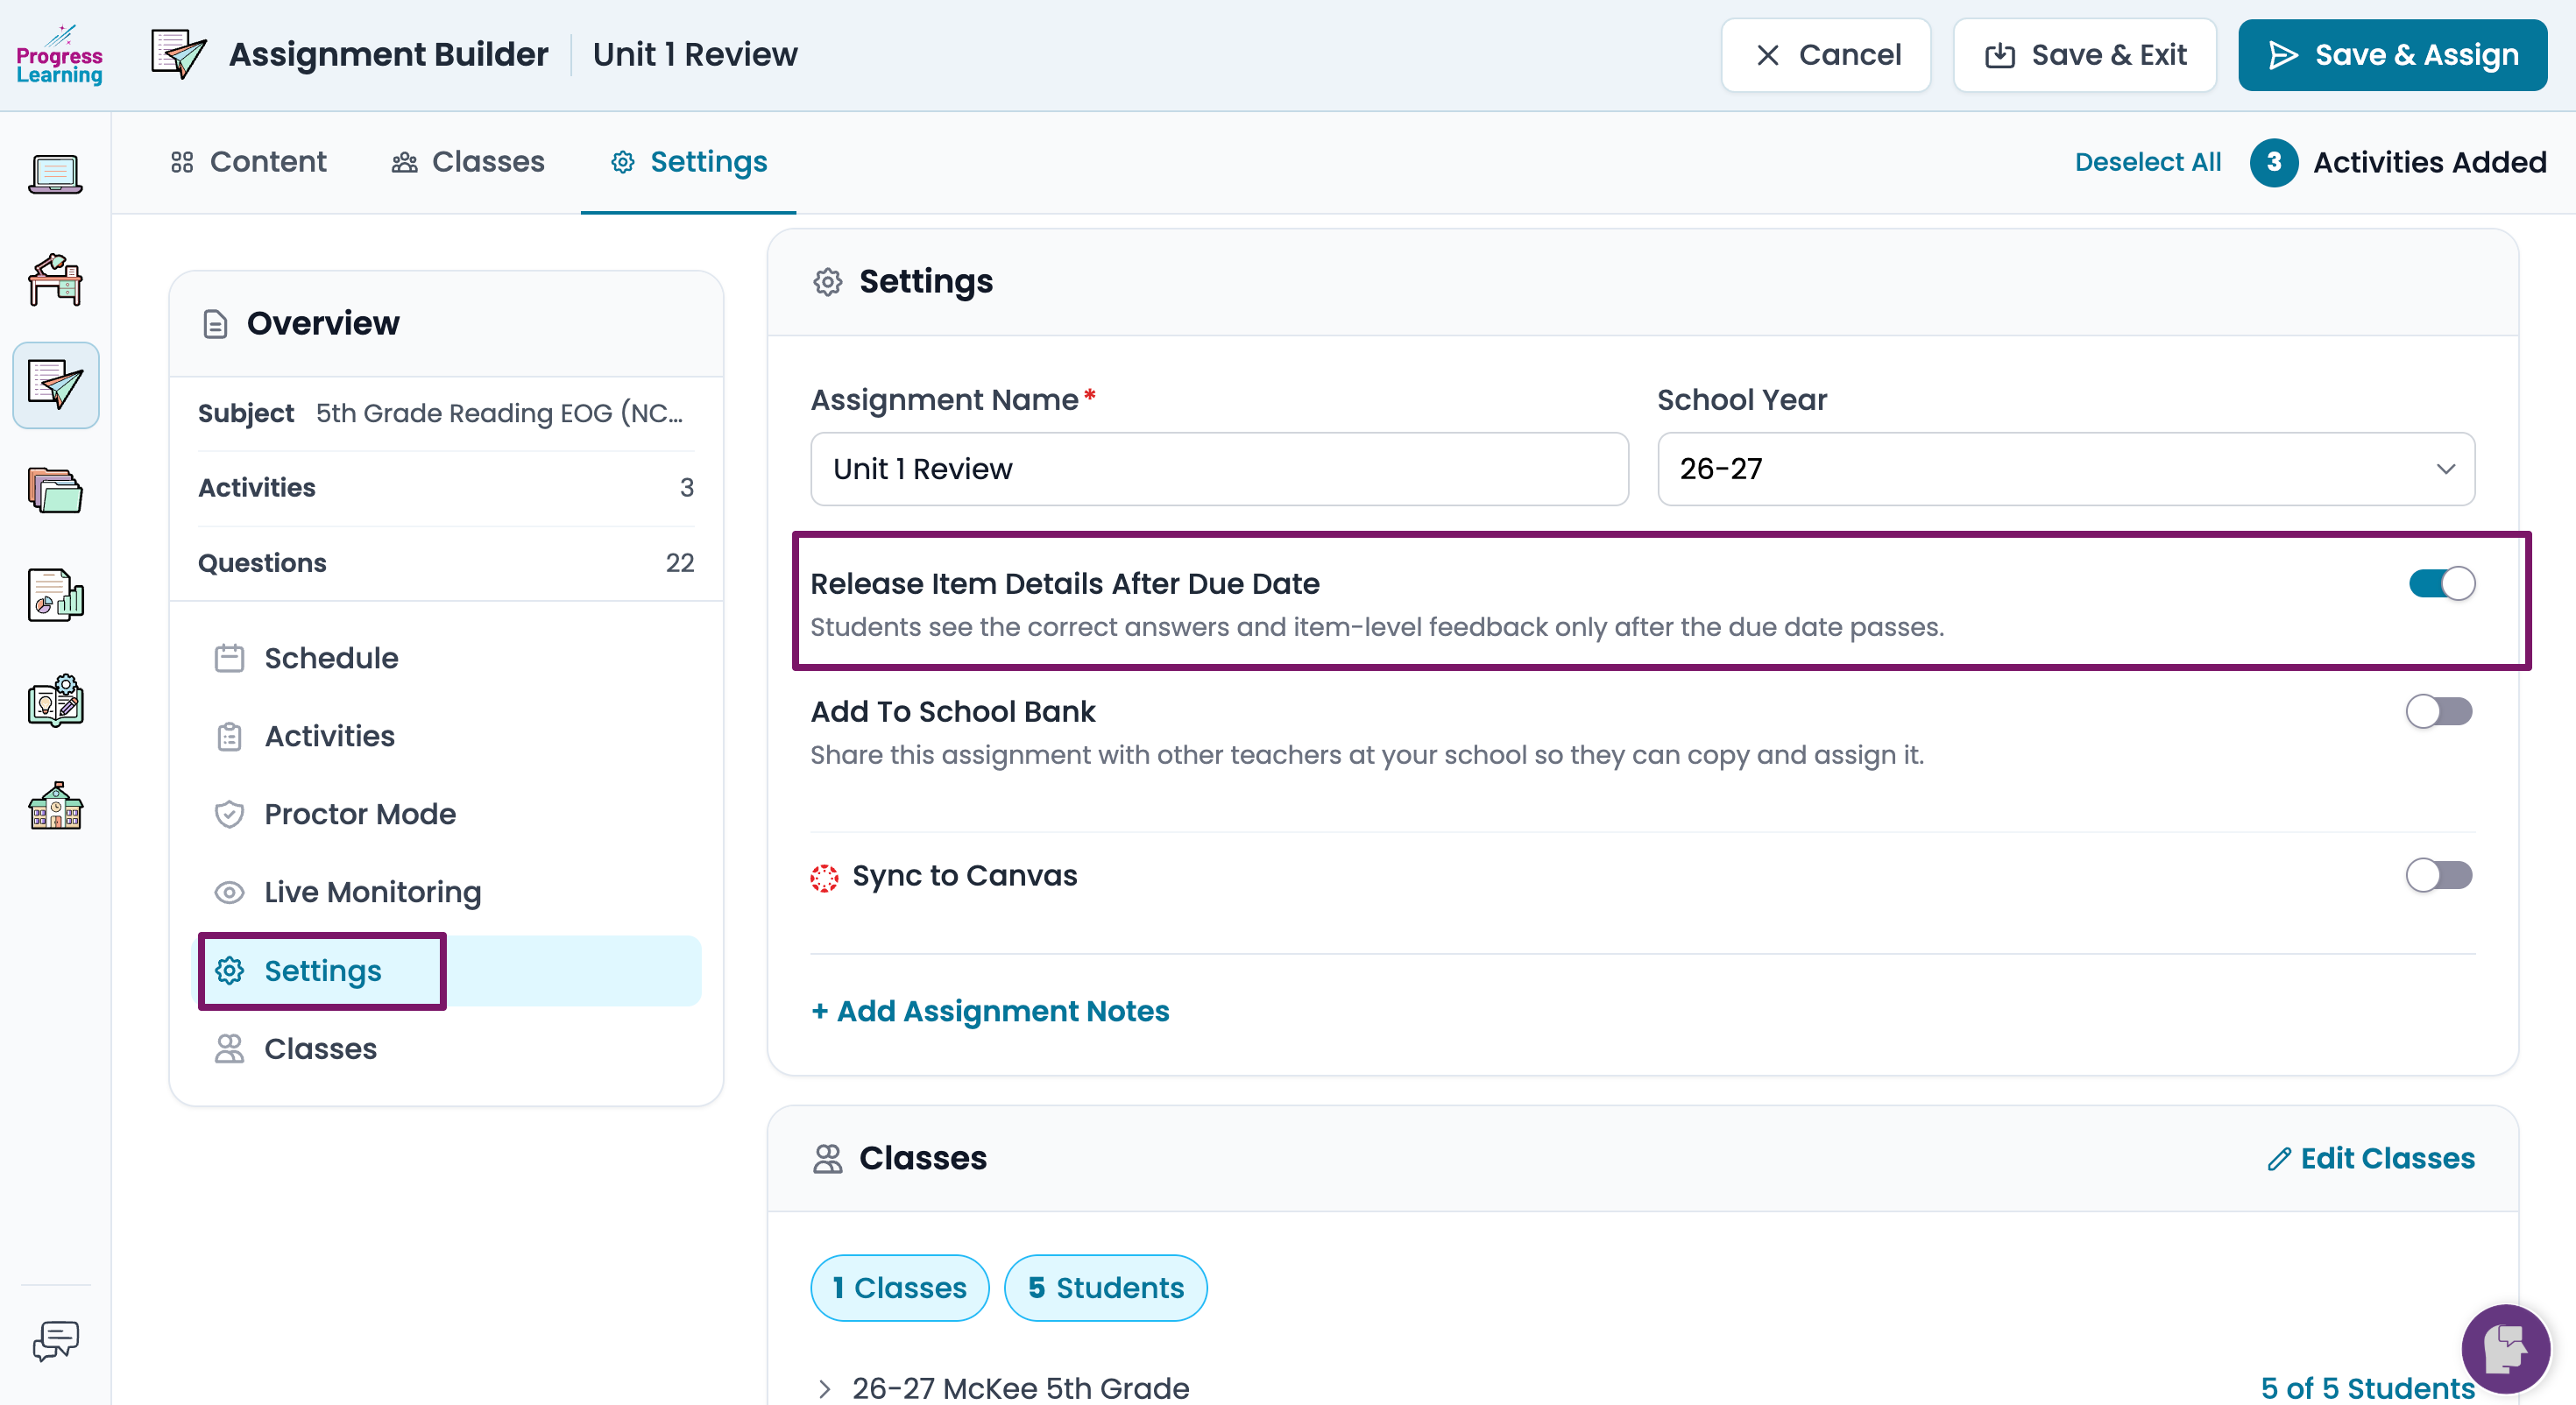
The Settings tab allows you to choose the details that you want to release to students upon submission of the assignment. You can also choose to share the assignment by Adding it to the School Bank. This is also where you can sync to Canvas or Google Classroom, depending on your account.
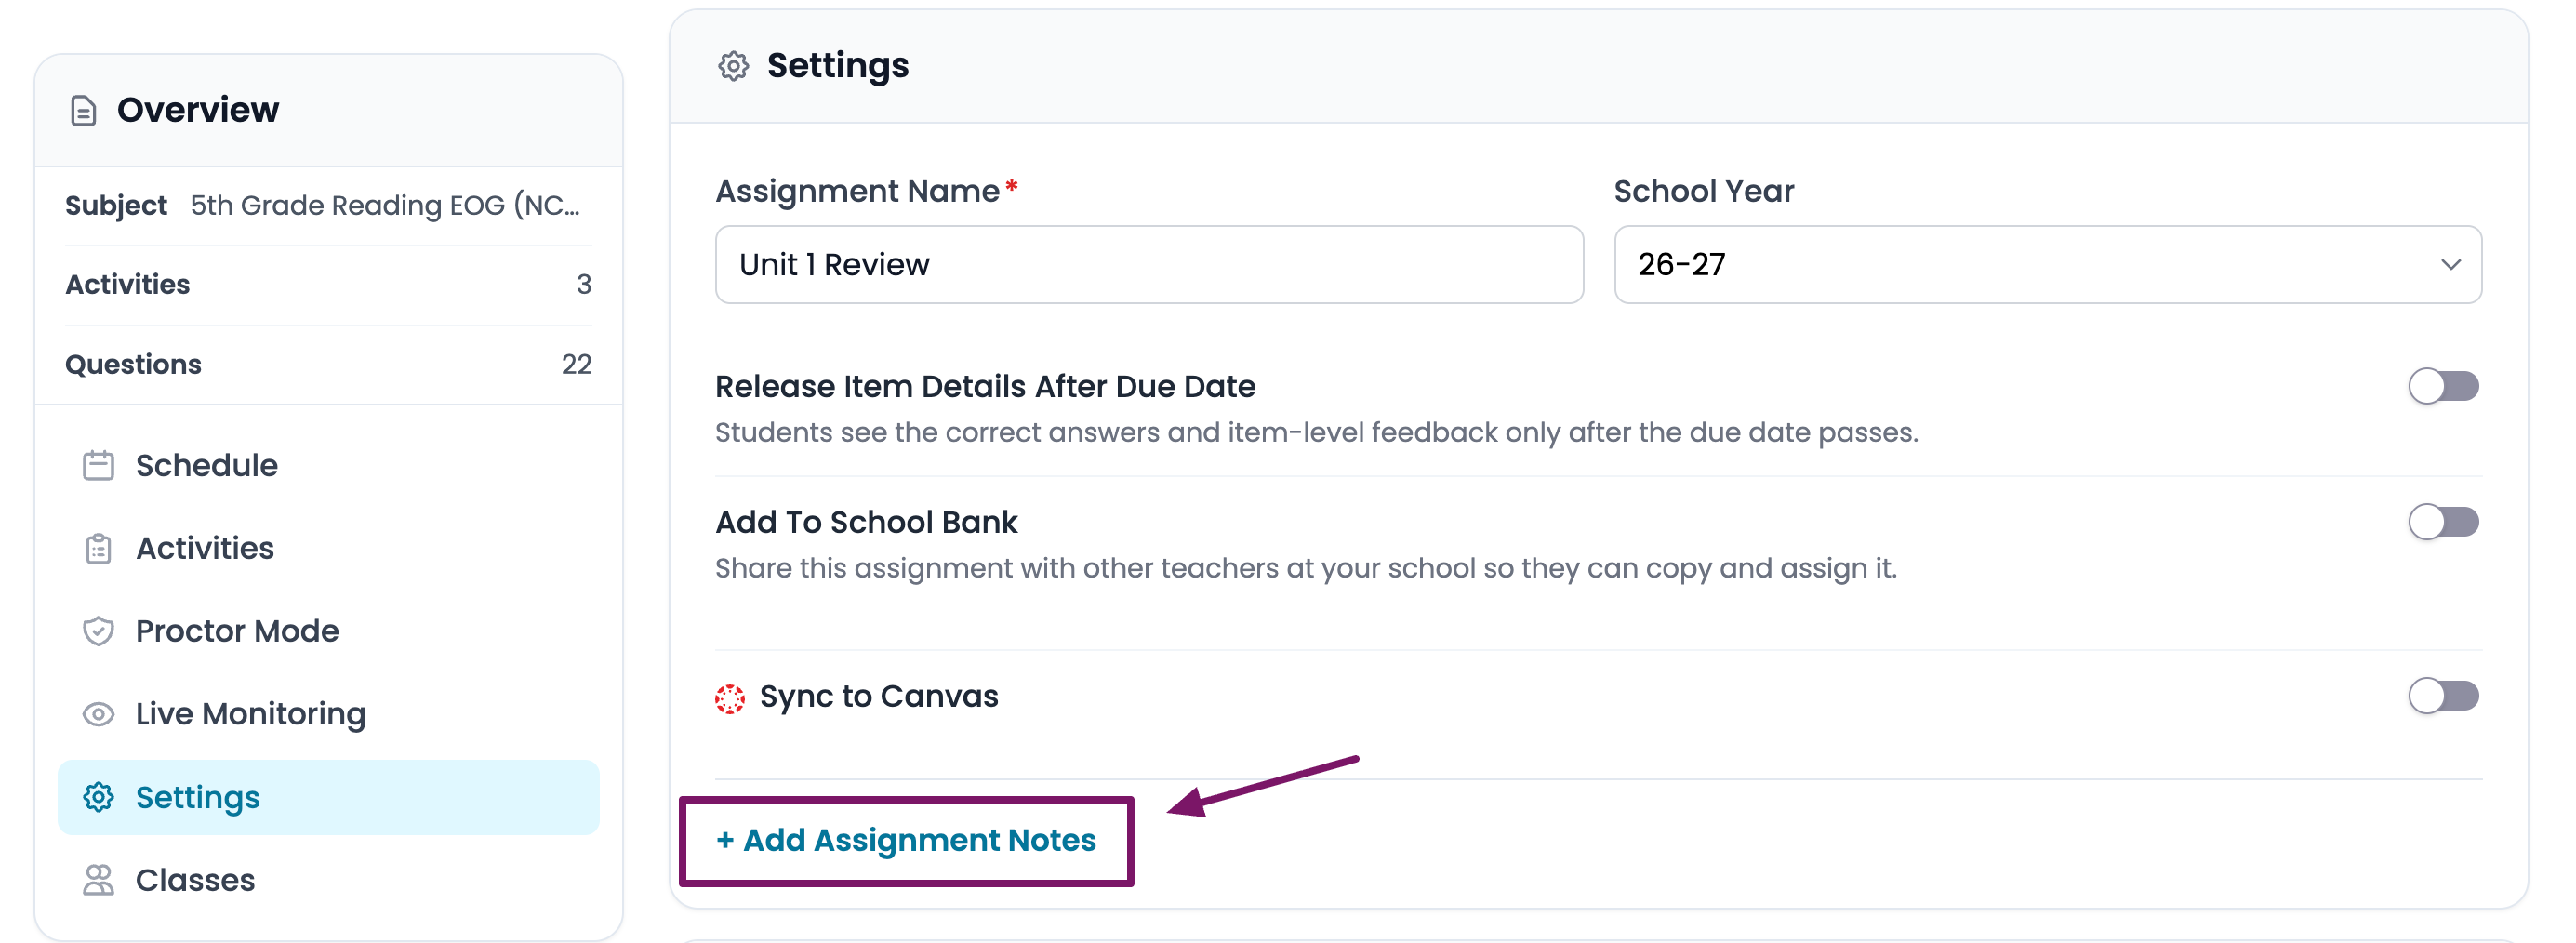
Notes
You have the option of adding Notes to your assignment by clicking on Add Assignment Notes
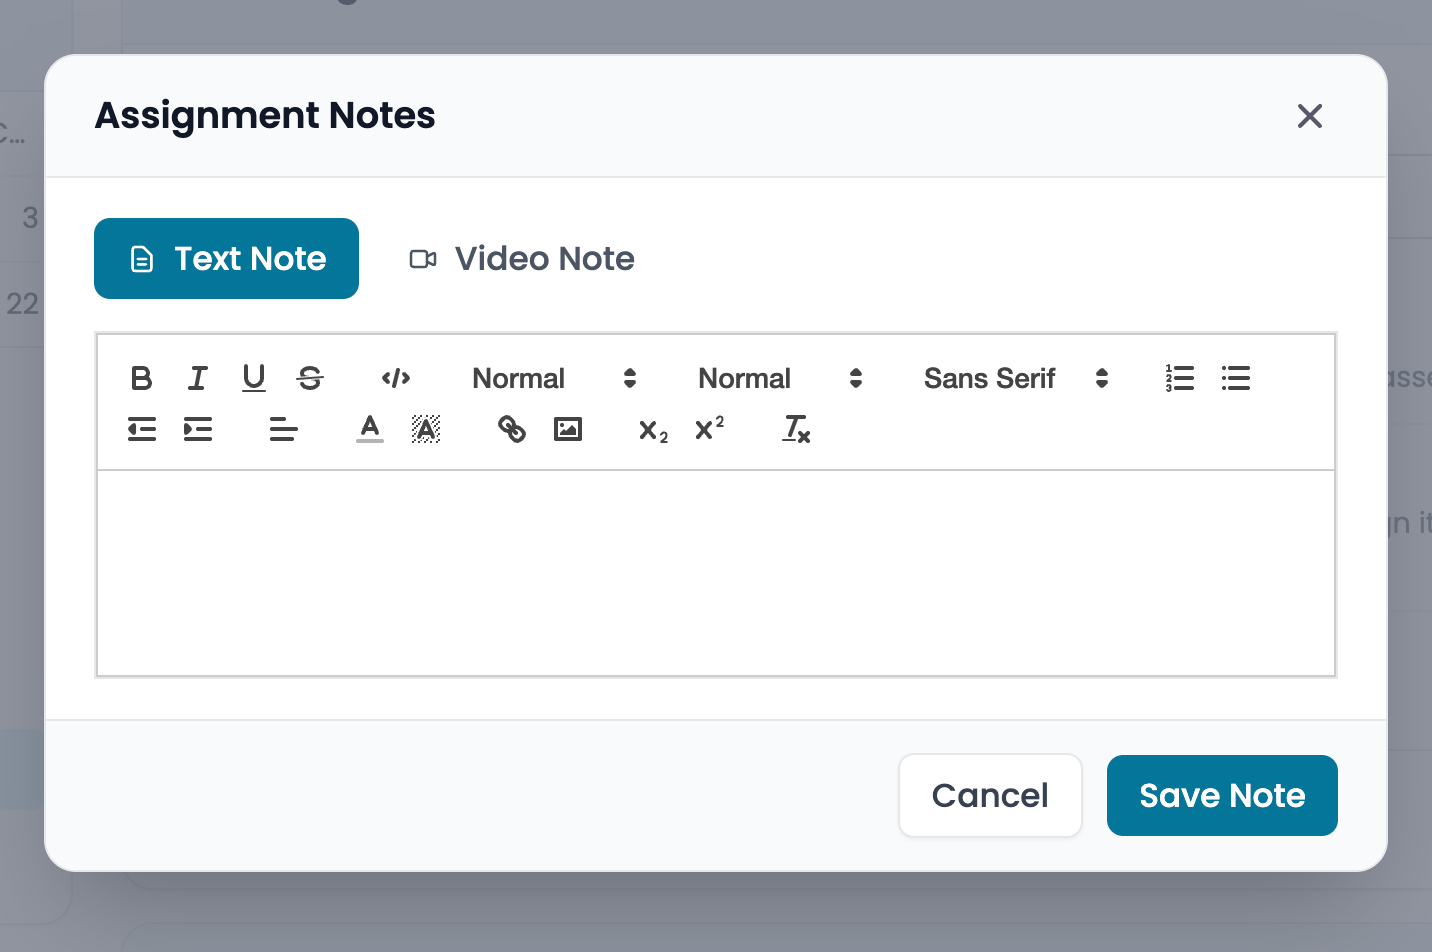
- You will be prompted to add a Text Note or a Video Note. Then click Save Note
- Once your settings are completed, click Save and Assign or Save & Exit if you want to assign it at a later date.
List of Available Assignment Settings:
Save
Be sure to click "Save & Exit" or "Save & Assign" to save your assignment.
