How do I manage manual rostering and promote students for the new school year?
 Updated
by
Gayle McKee
Updated
by
Gayle McKee
If your school or district manages student and teacher accounts manually and you would like to prepare for the new school year by promoting a group of students to the next grade level and creating accounts for new students and teachers, follow these steps:
Note: Staff members must have admin access to complete the steps listed below.
If your school or district is already syncing students via Clever or ClassLink, updating the student grade levels at the end of the school year is not necessary. Your student accounts will be updated automatically.
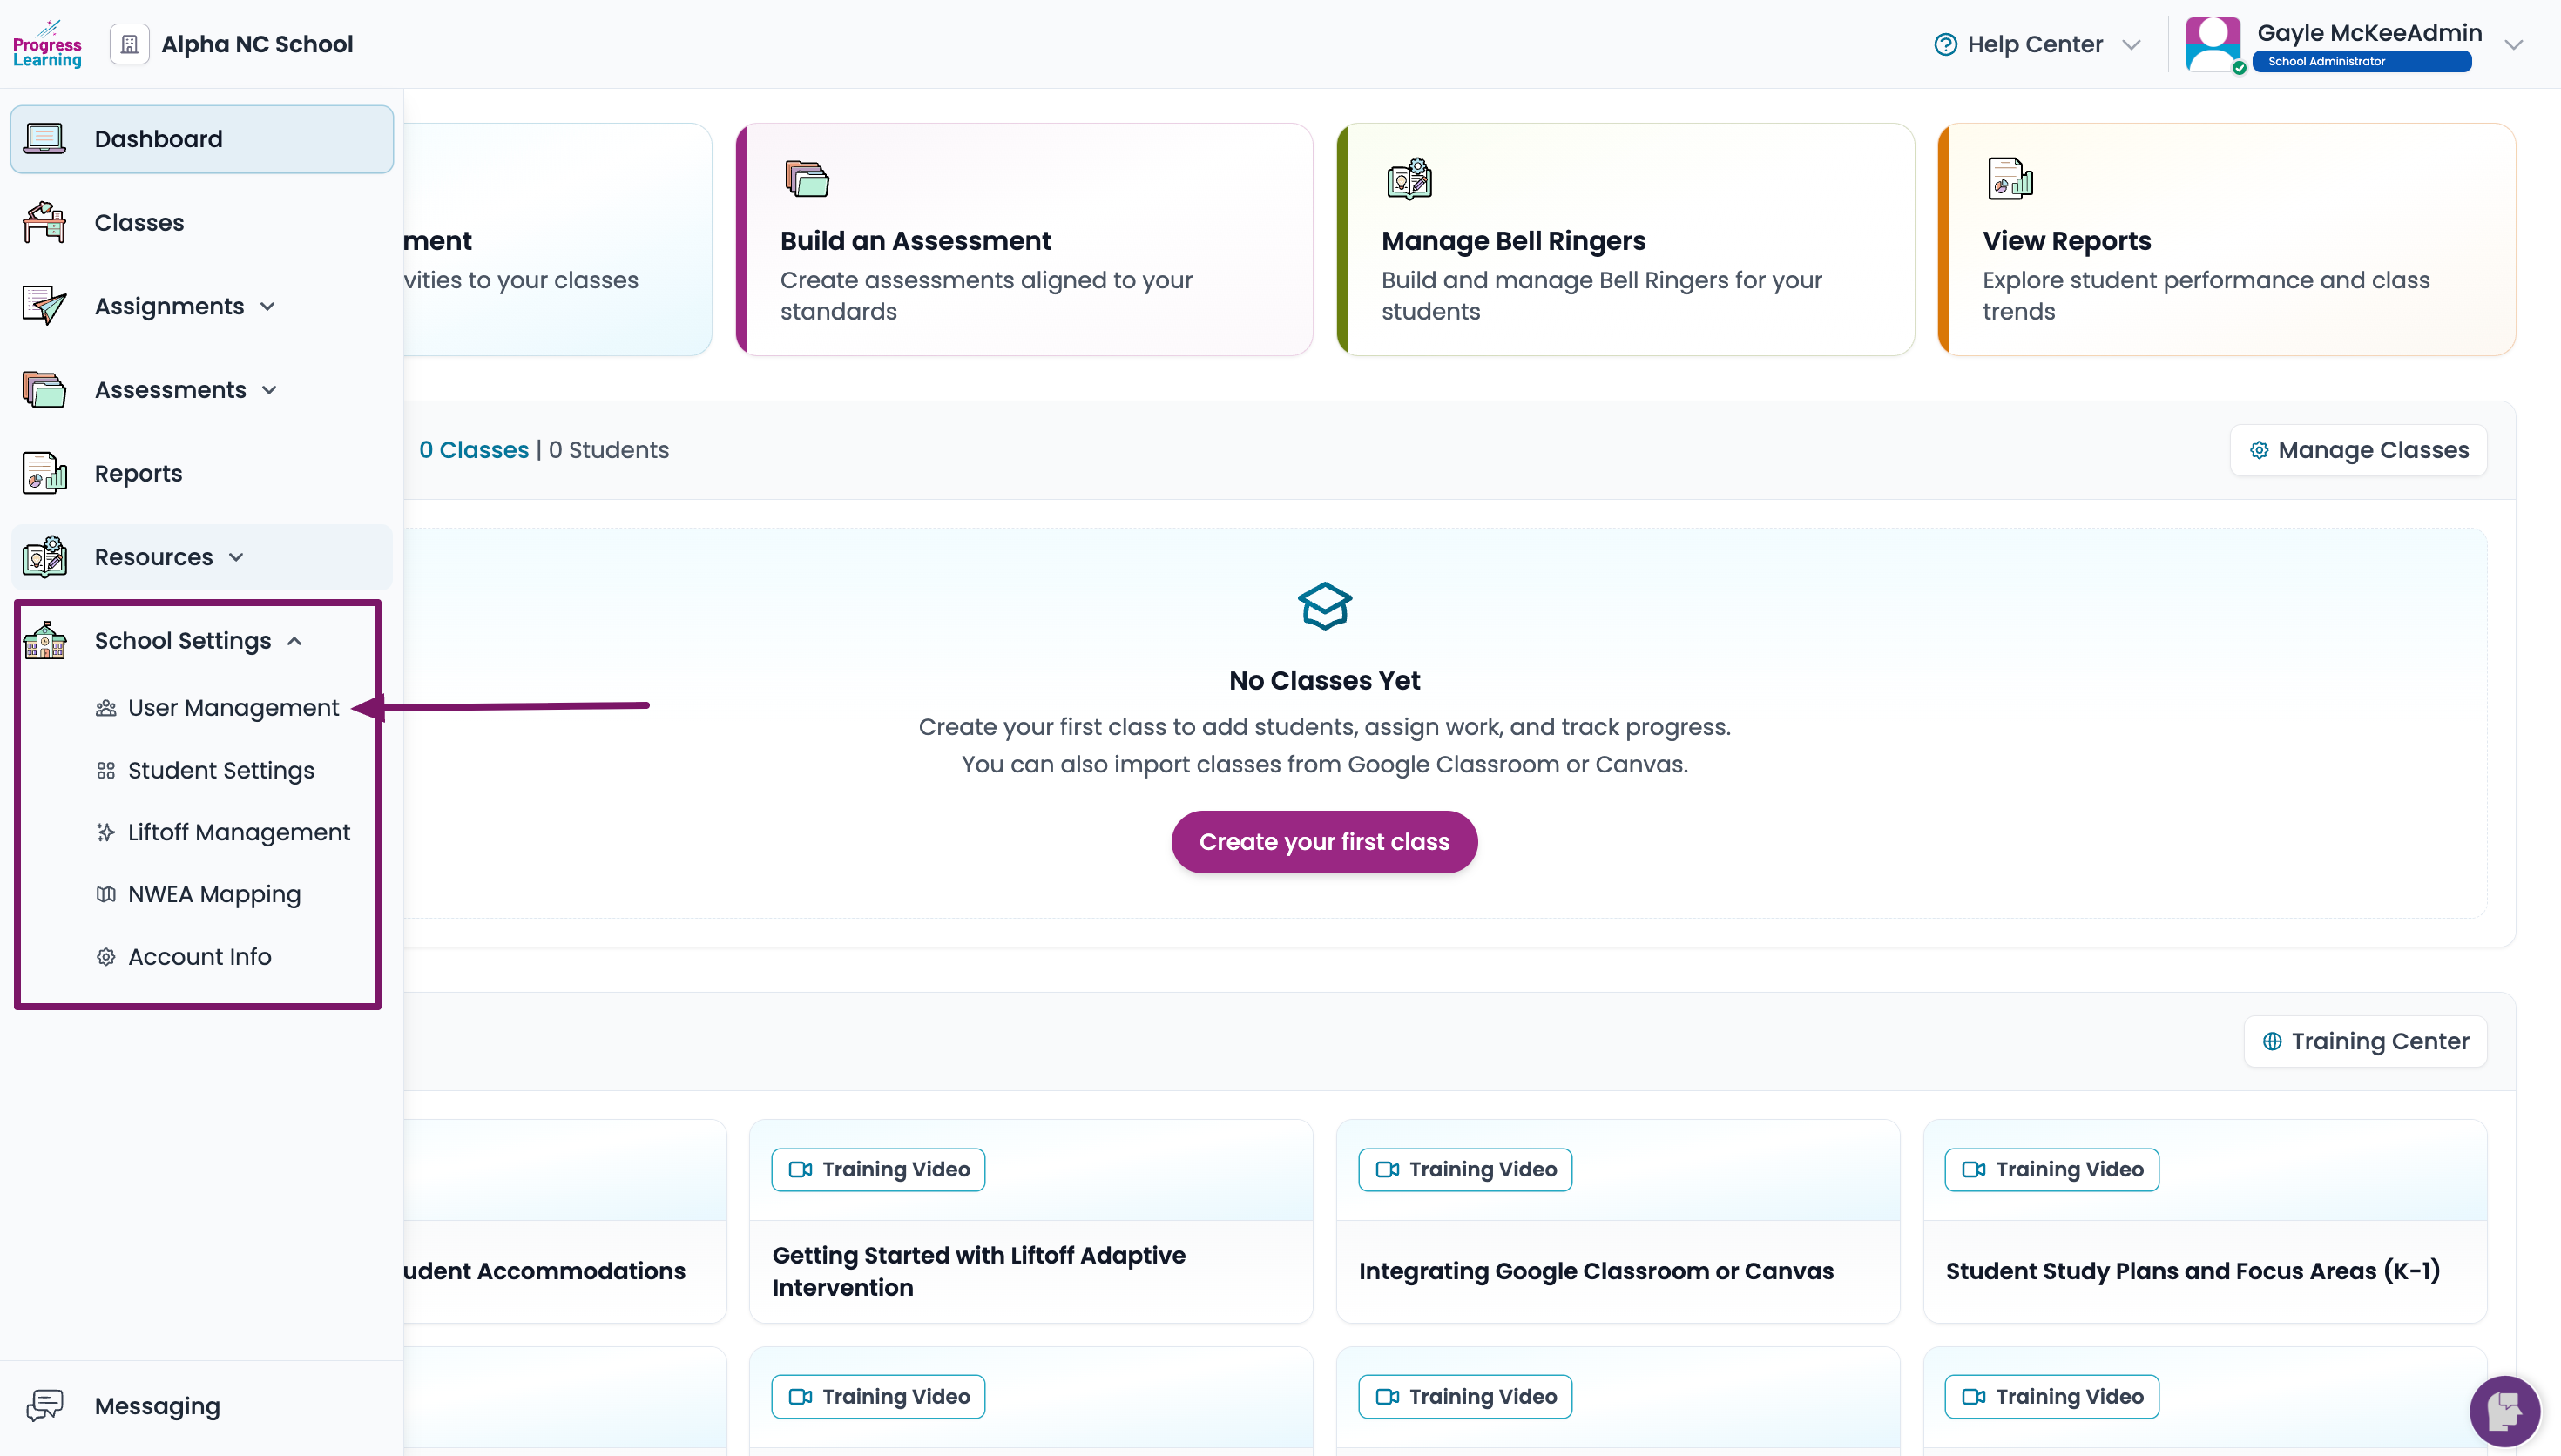
- From the side menu, log in to your School Admin account by clicking on School Center and selecting User Management.
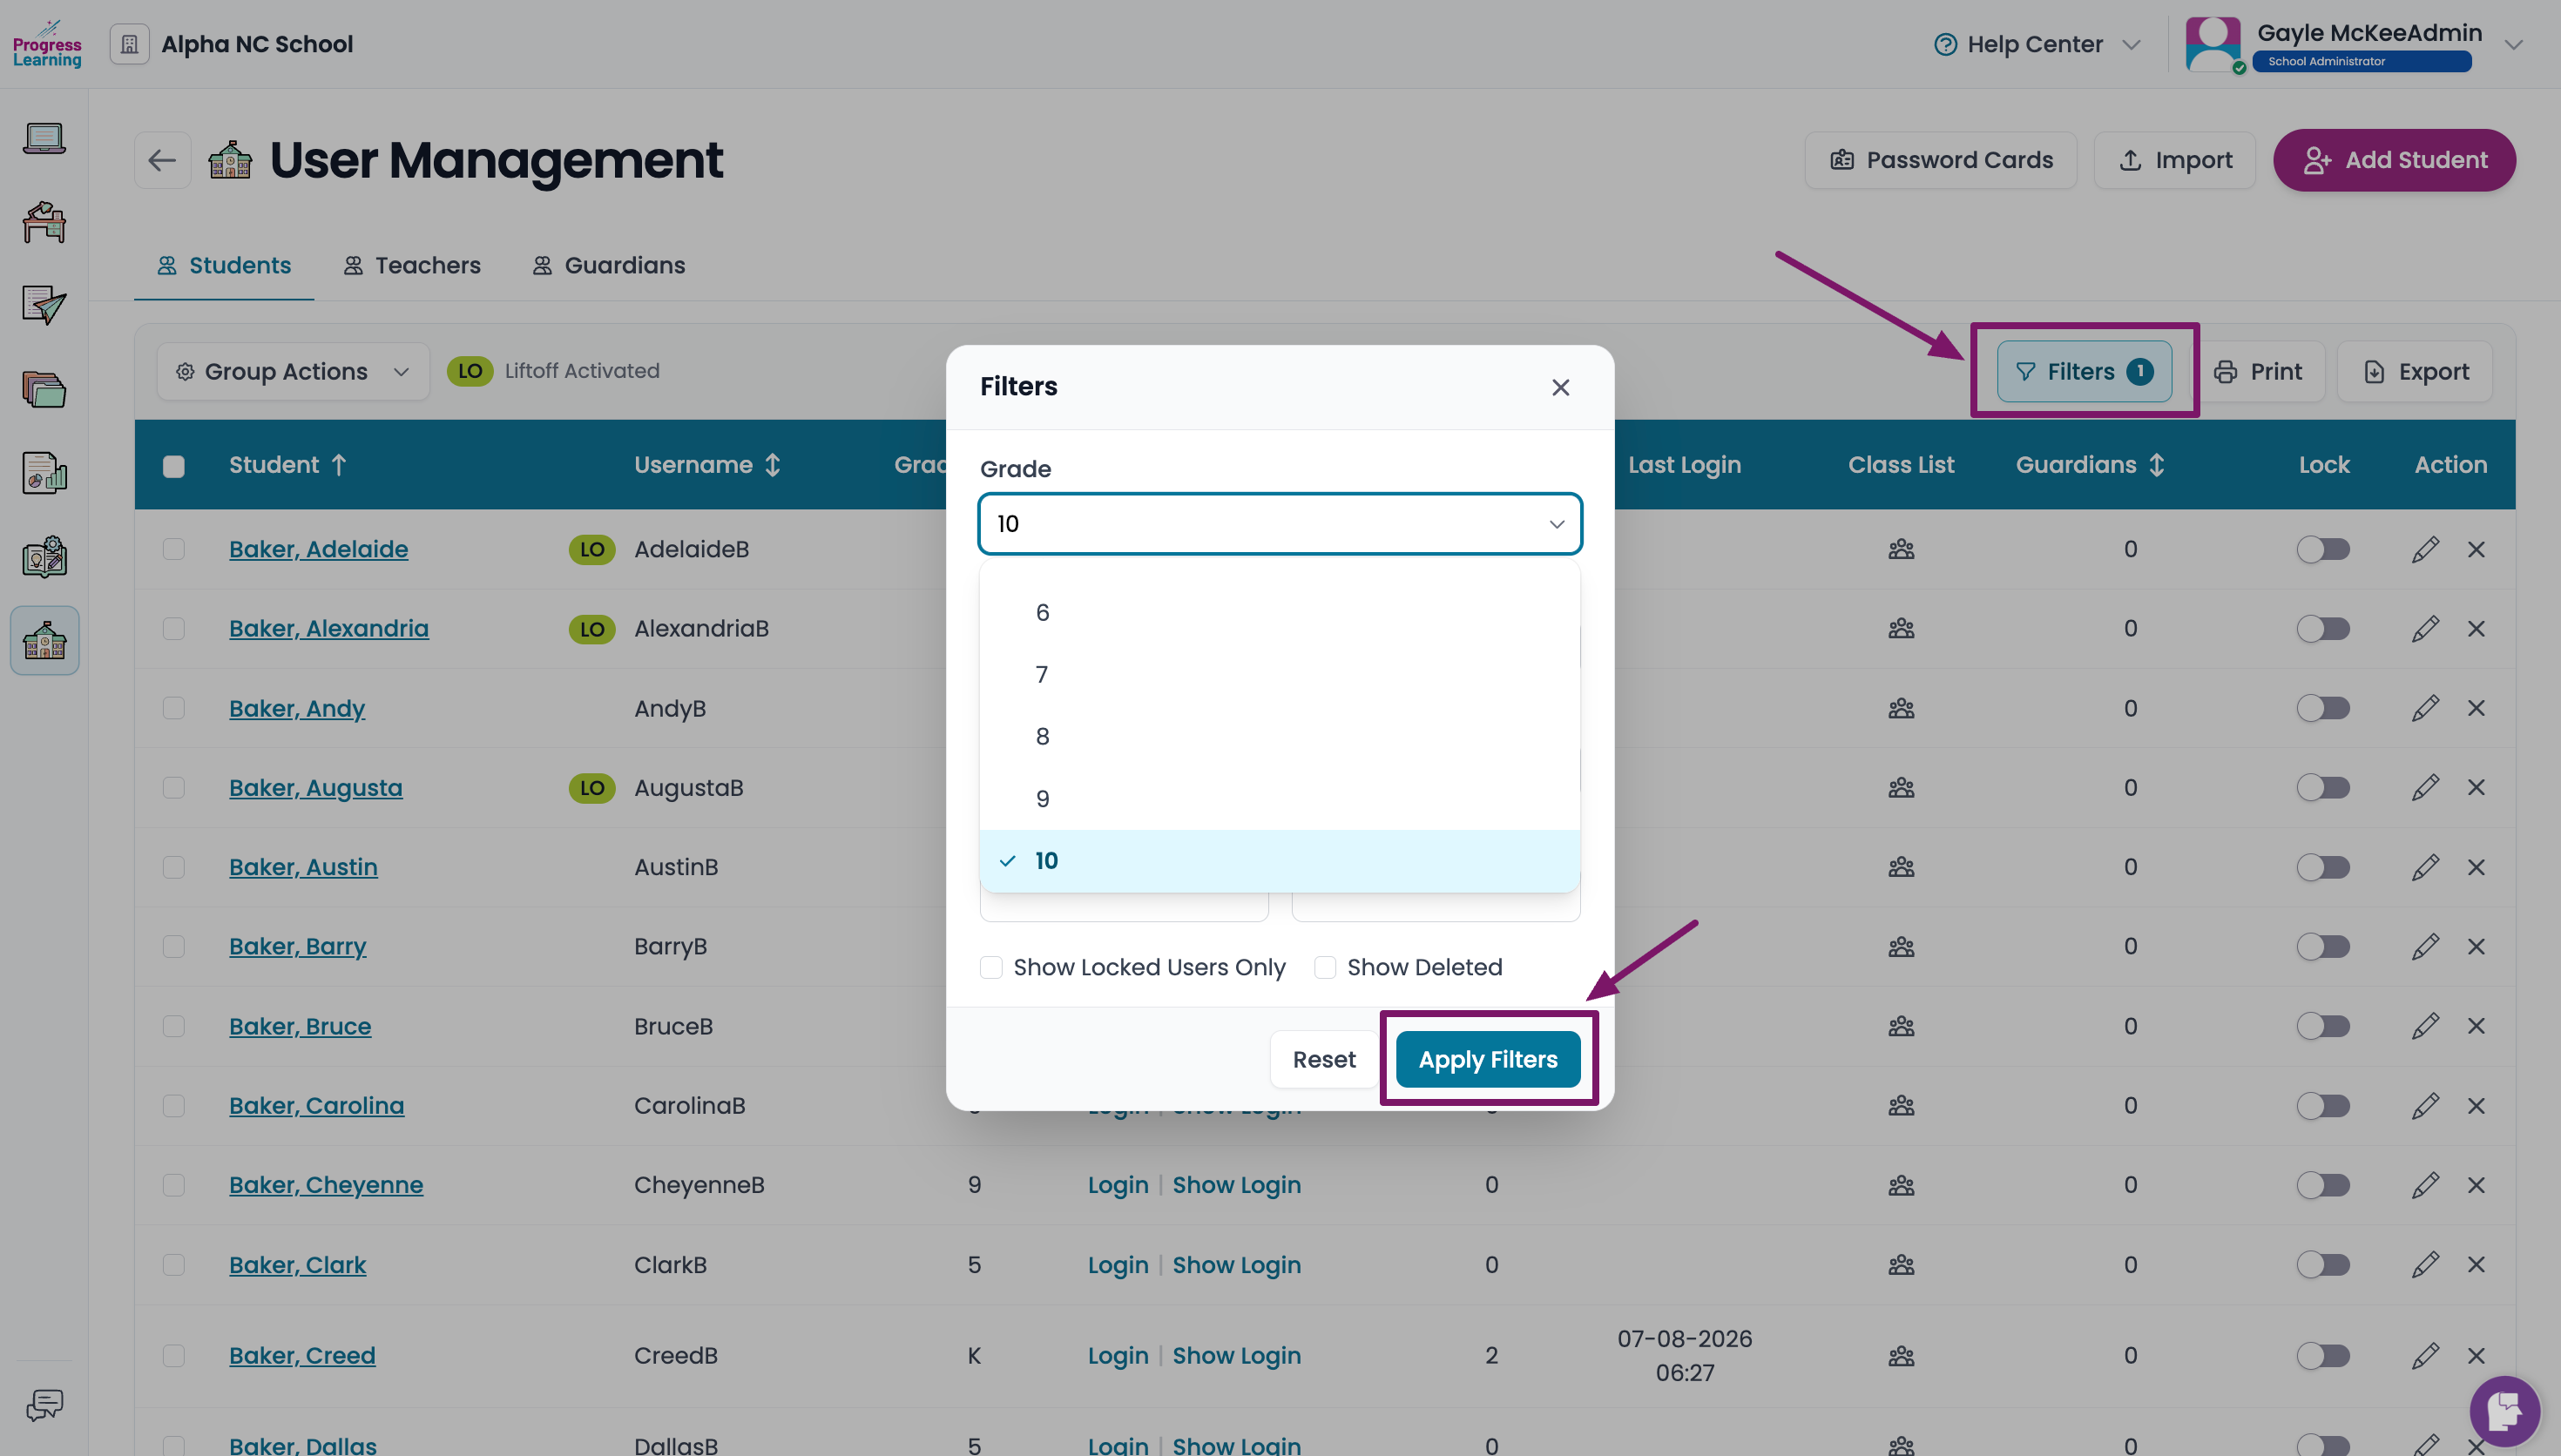
- Select Filter from the top right side. Select the grade level for which you are going to promote students.
 Start with the highest grade in your building and delete your oldest students first – these would be students who have graduated or left your building. For example, if your school has grades 9 - 12, bulk-delete your outgoing 12th graders first before changing the grade levels of the other students.For instructions on how to bulk delete students by grade, refer to our Help Article, "How Do I Bulk Delete Students?"
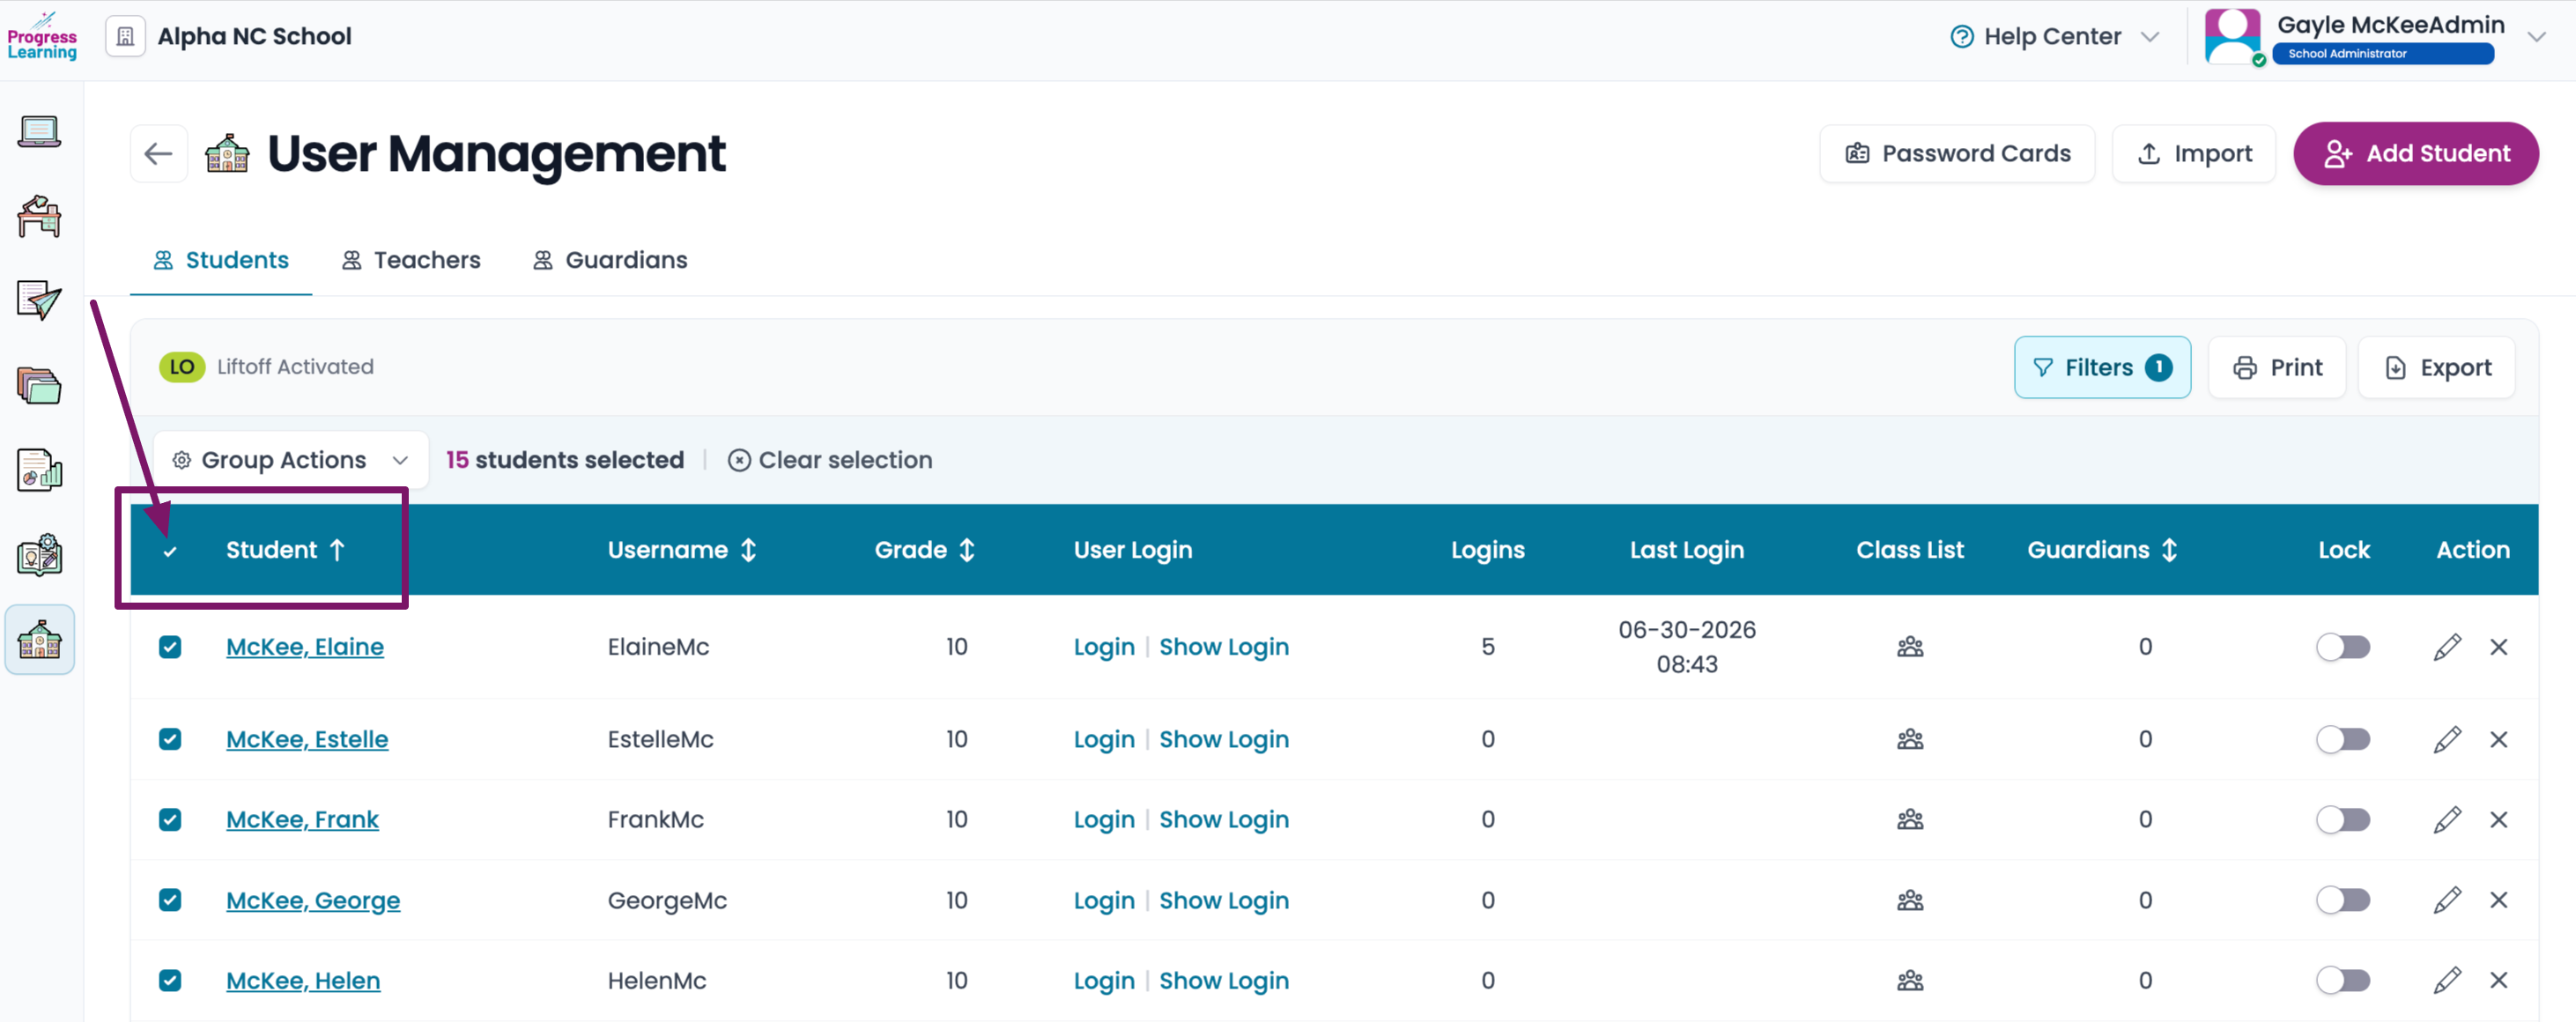
 - Tick the box next to Students in the blue bar across the top of the list. This will select all students.
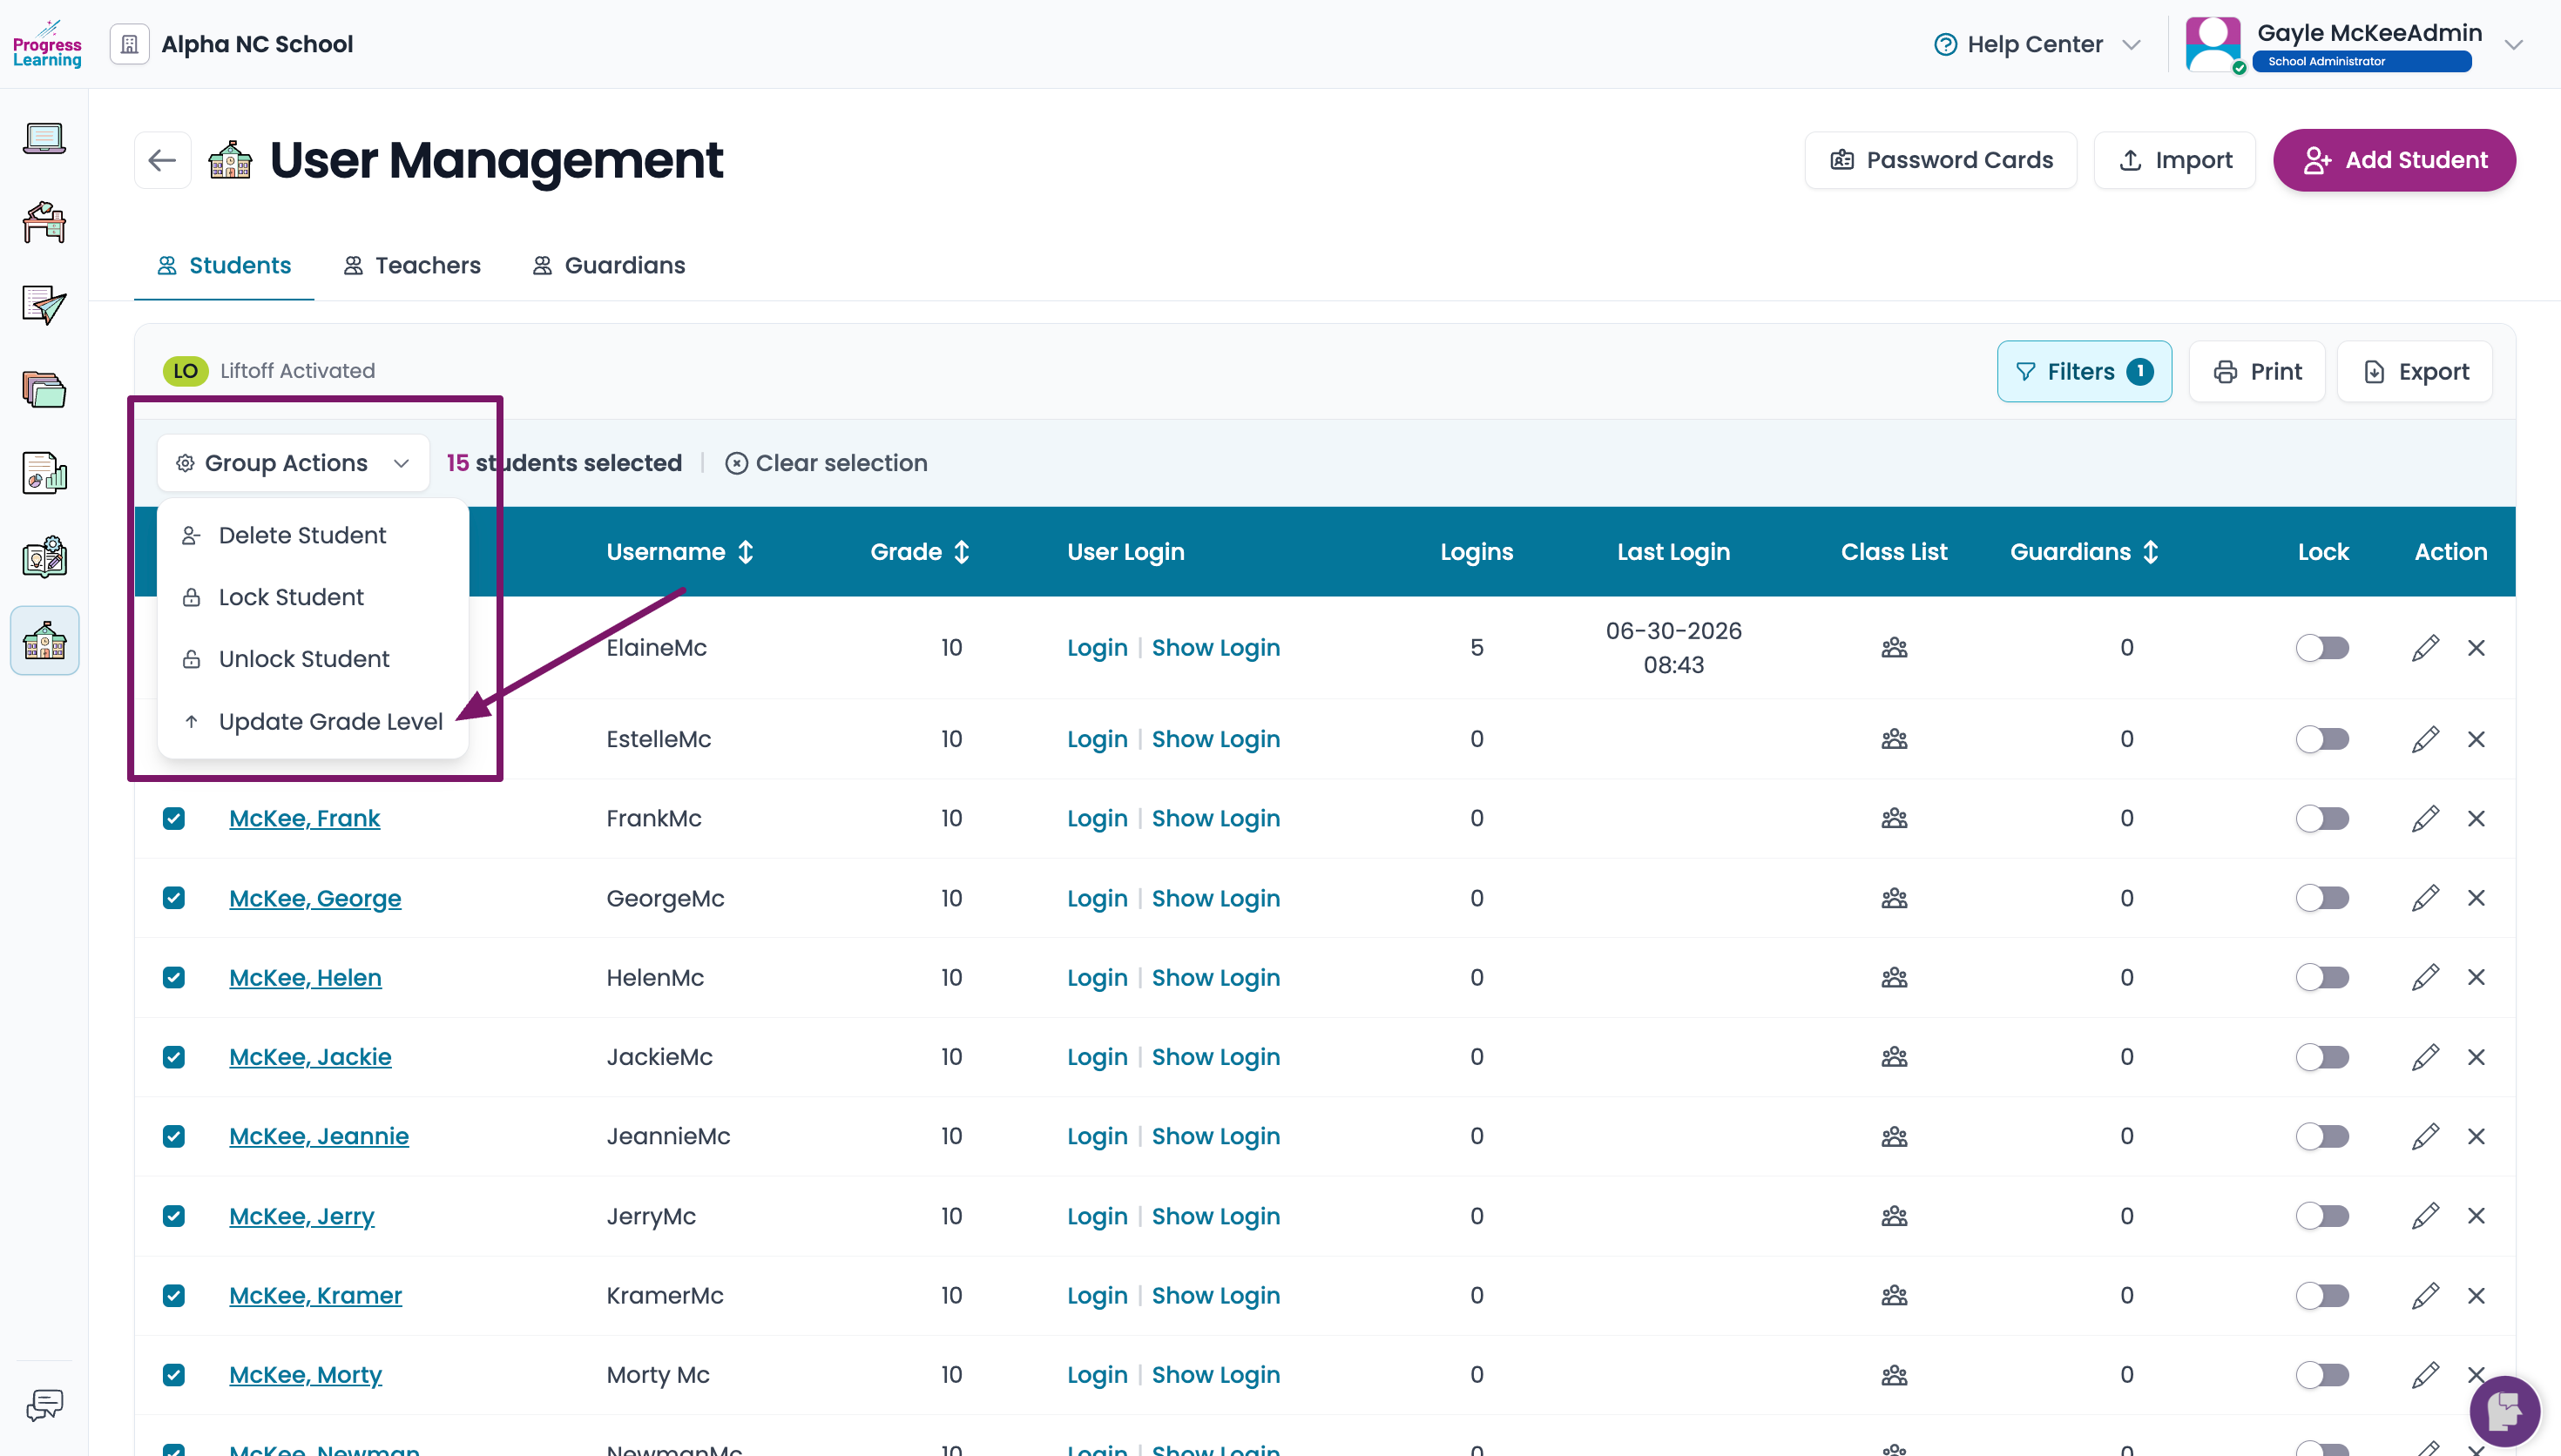
- From the Group Actions box, select Update Grade Level
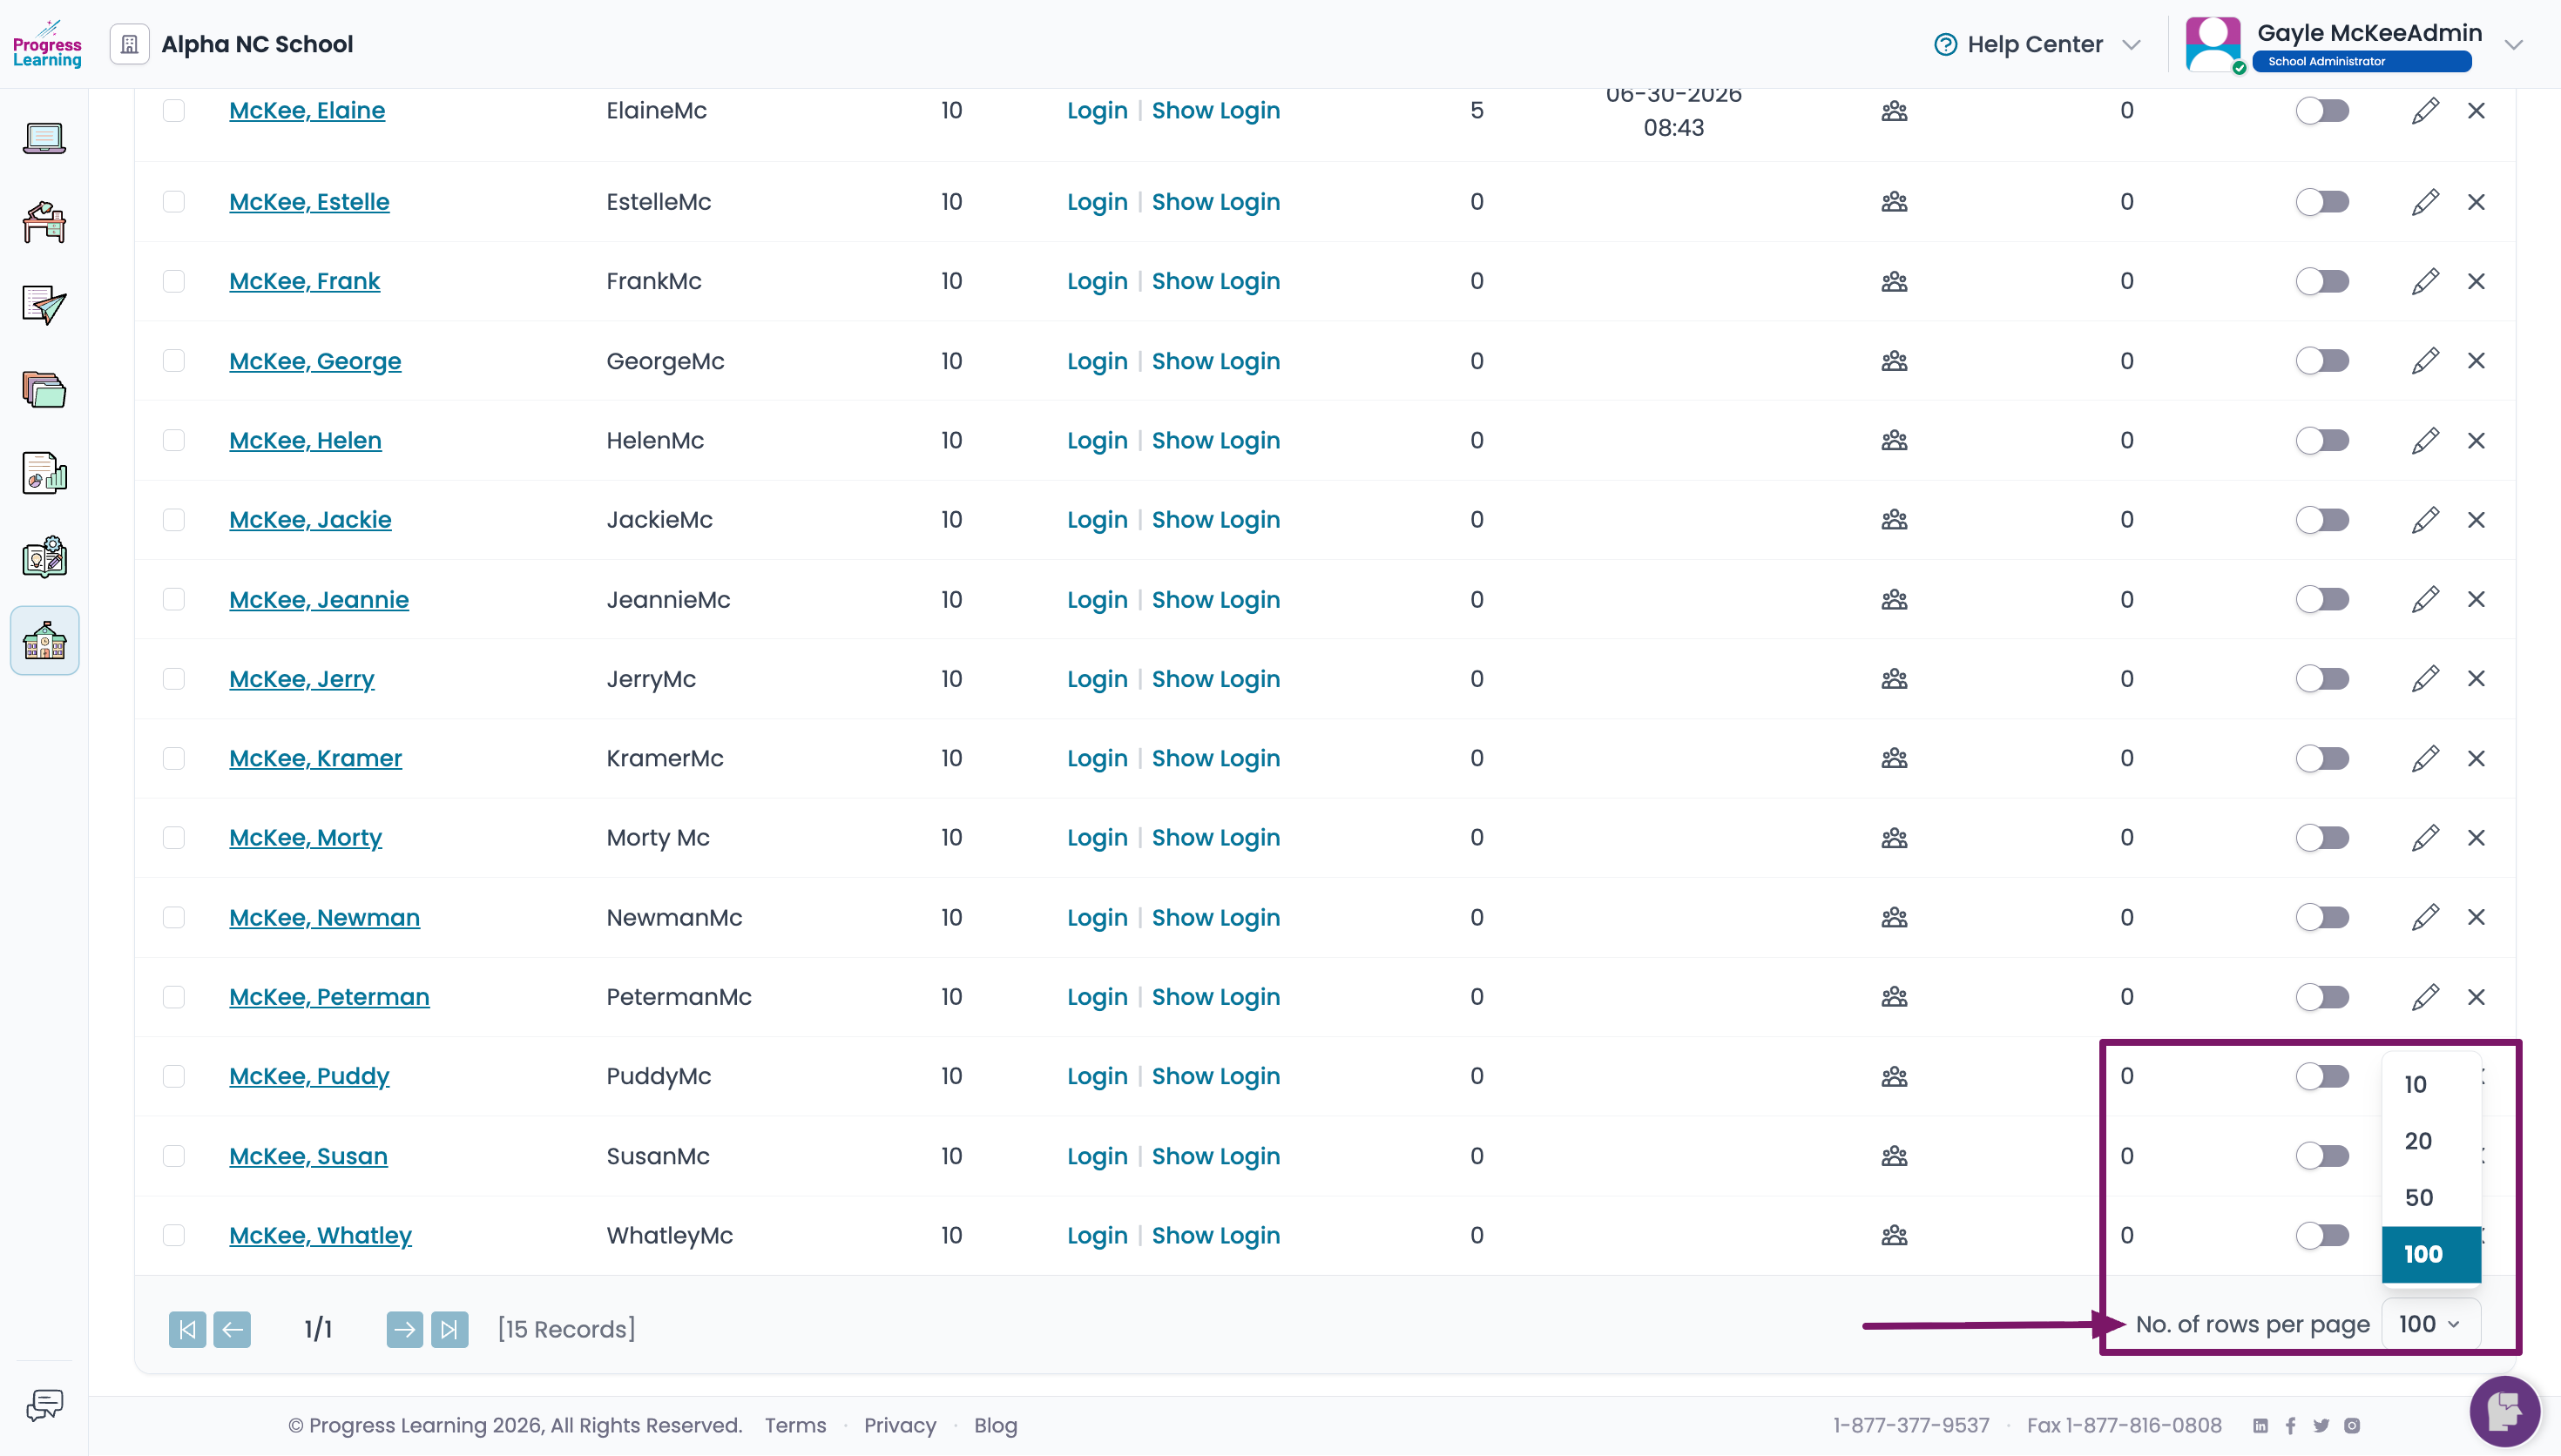
- You can use the No. of Rows Per Page option on the bottom right to display and update up to 100 students at a time. If you are promoting more than 100 students, you must repeat the steps for each page of students.
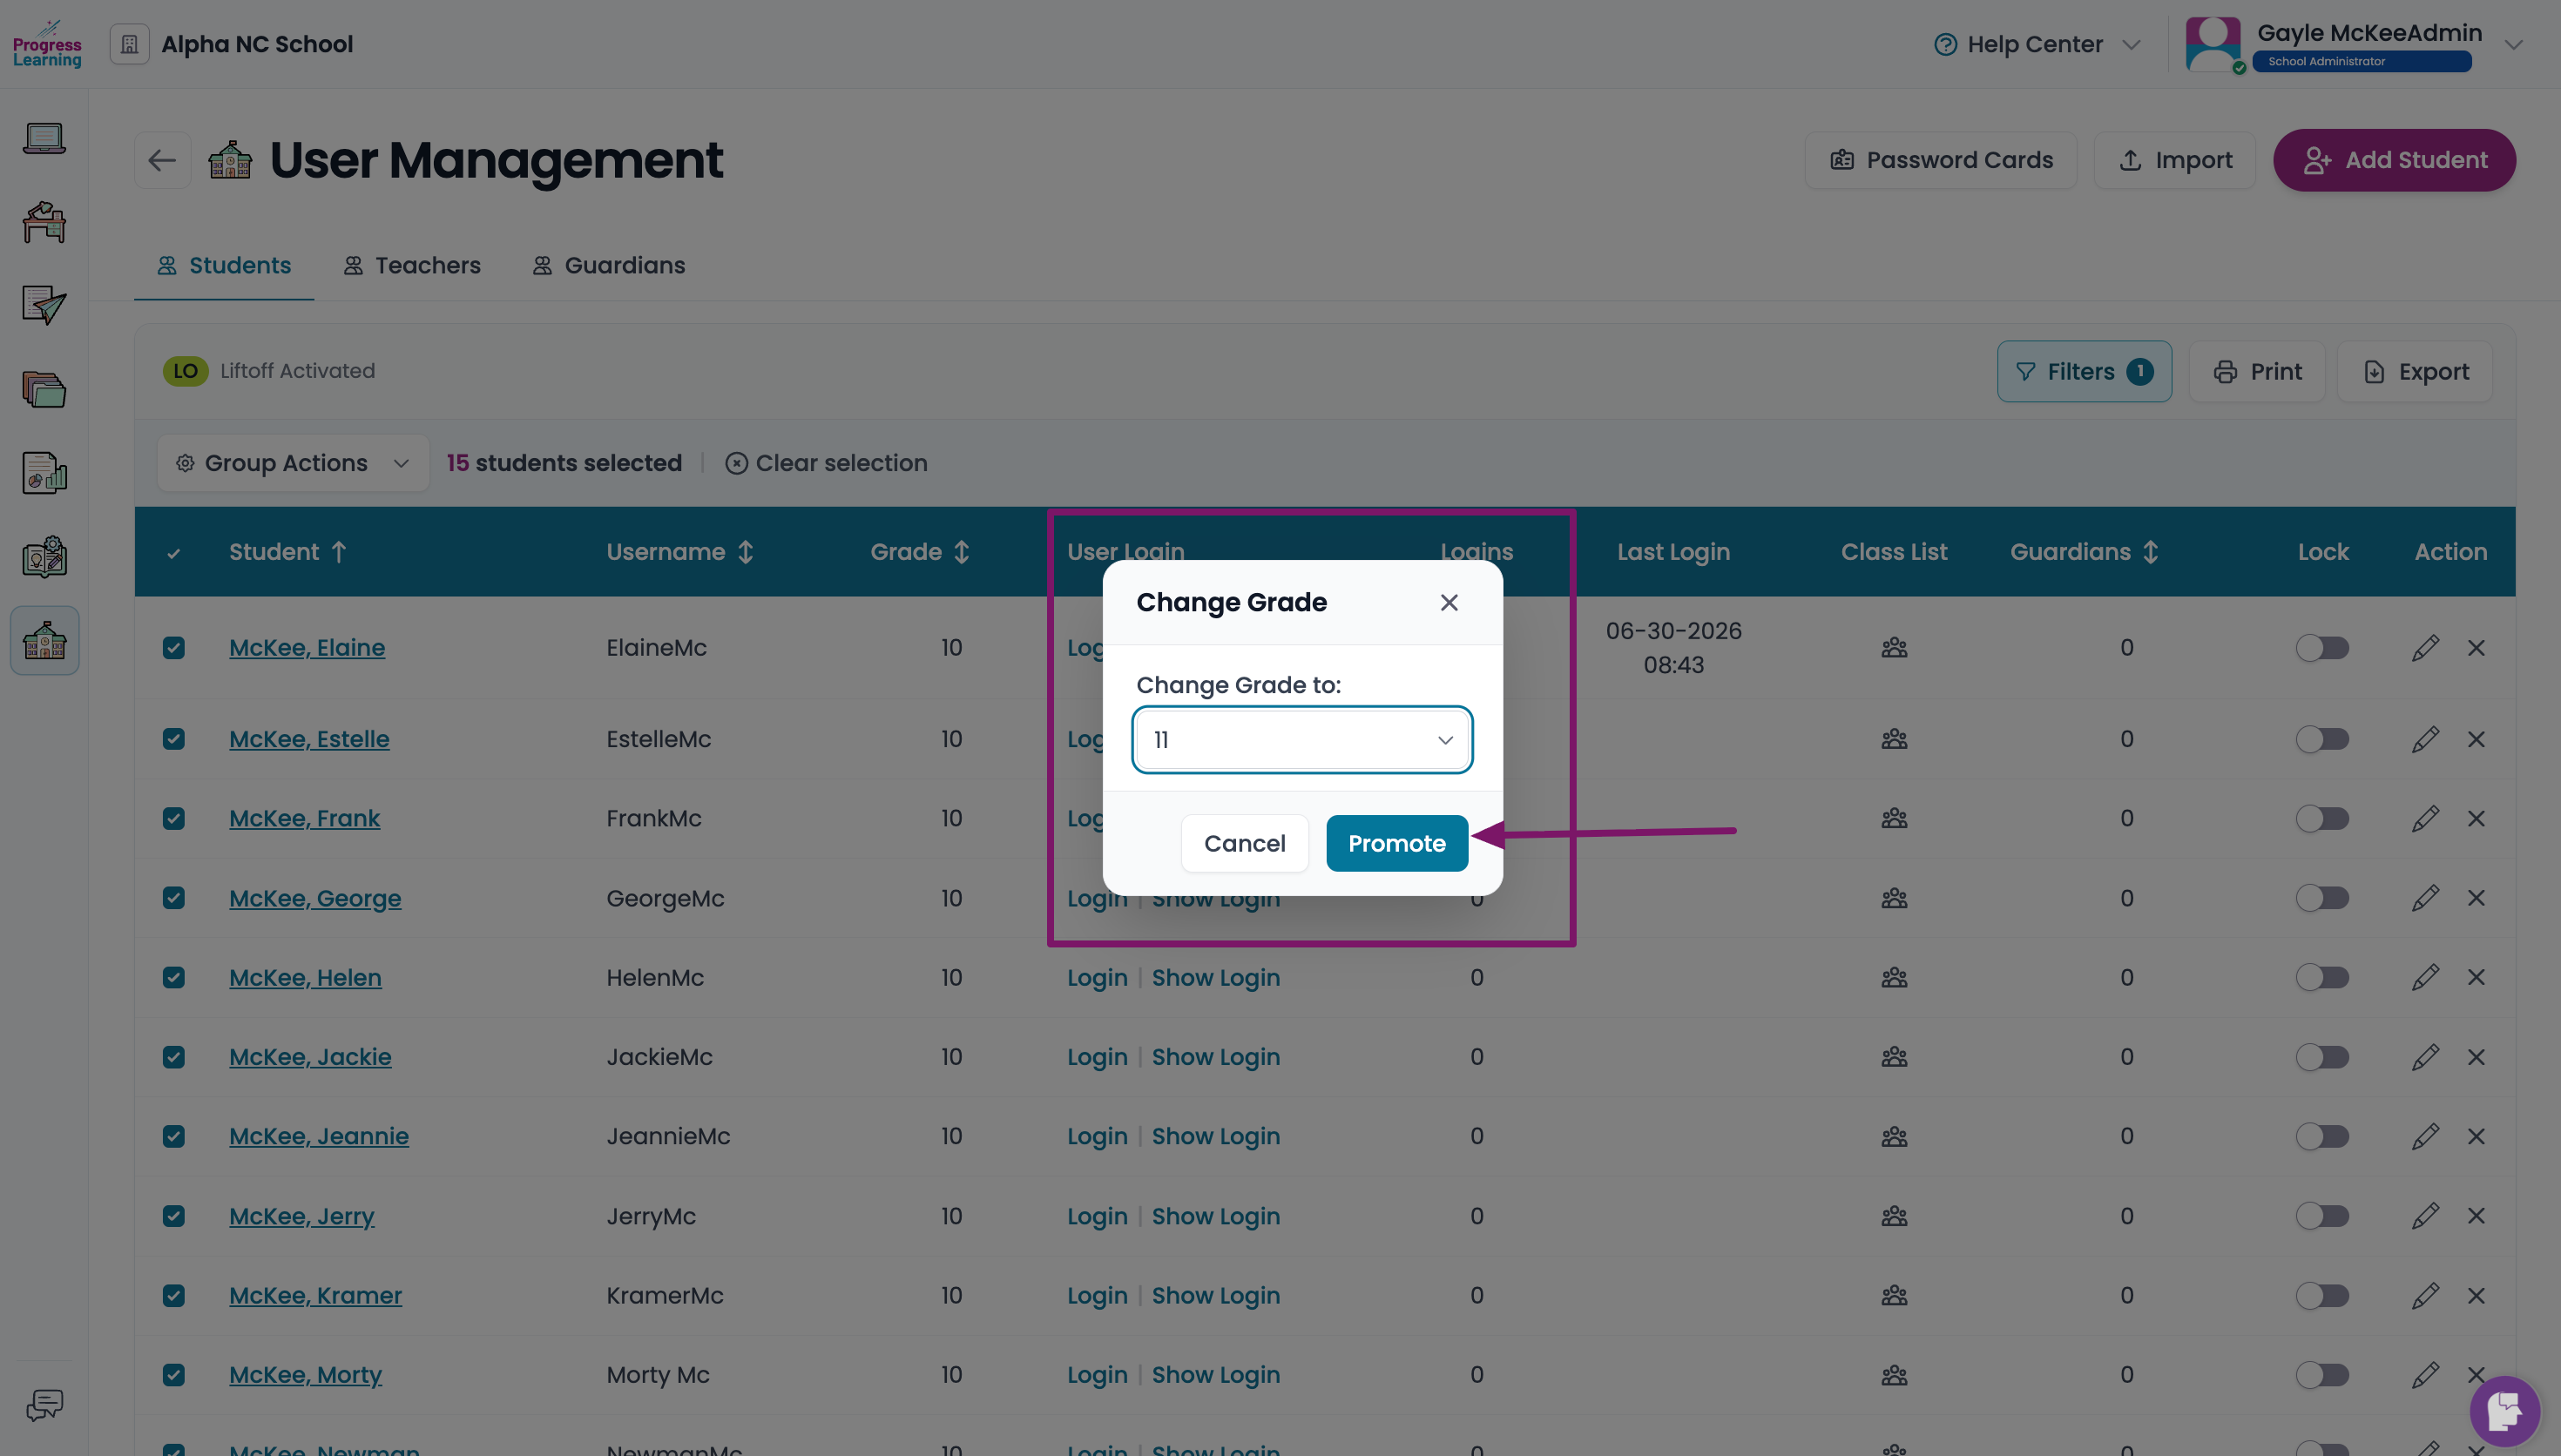
- In the pop-up box, use the drop-down arrow to select the new grade level and click Promote
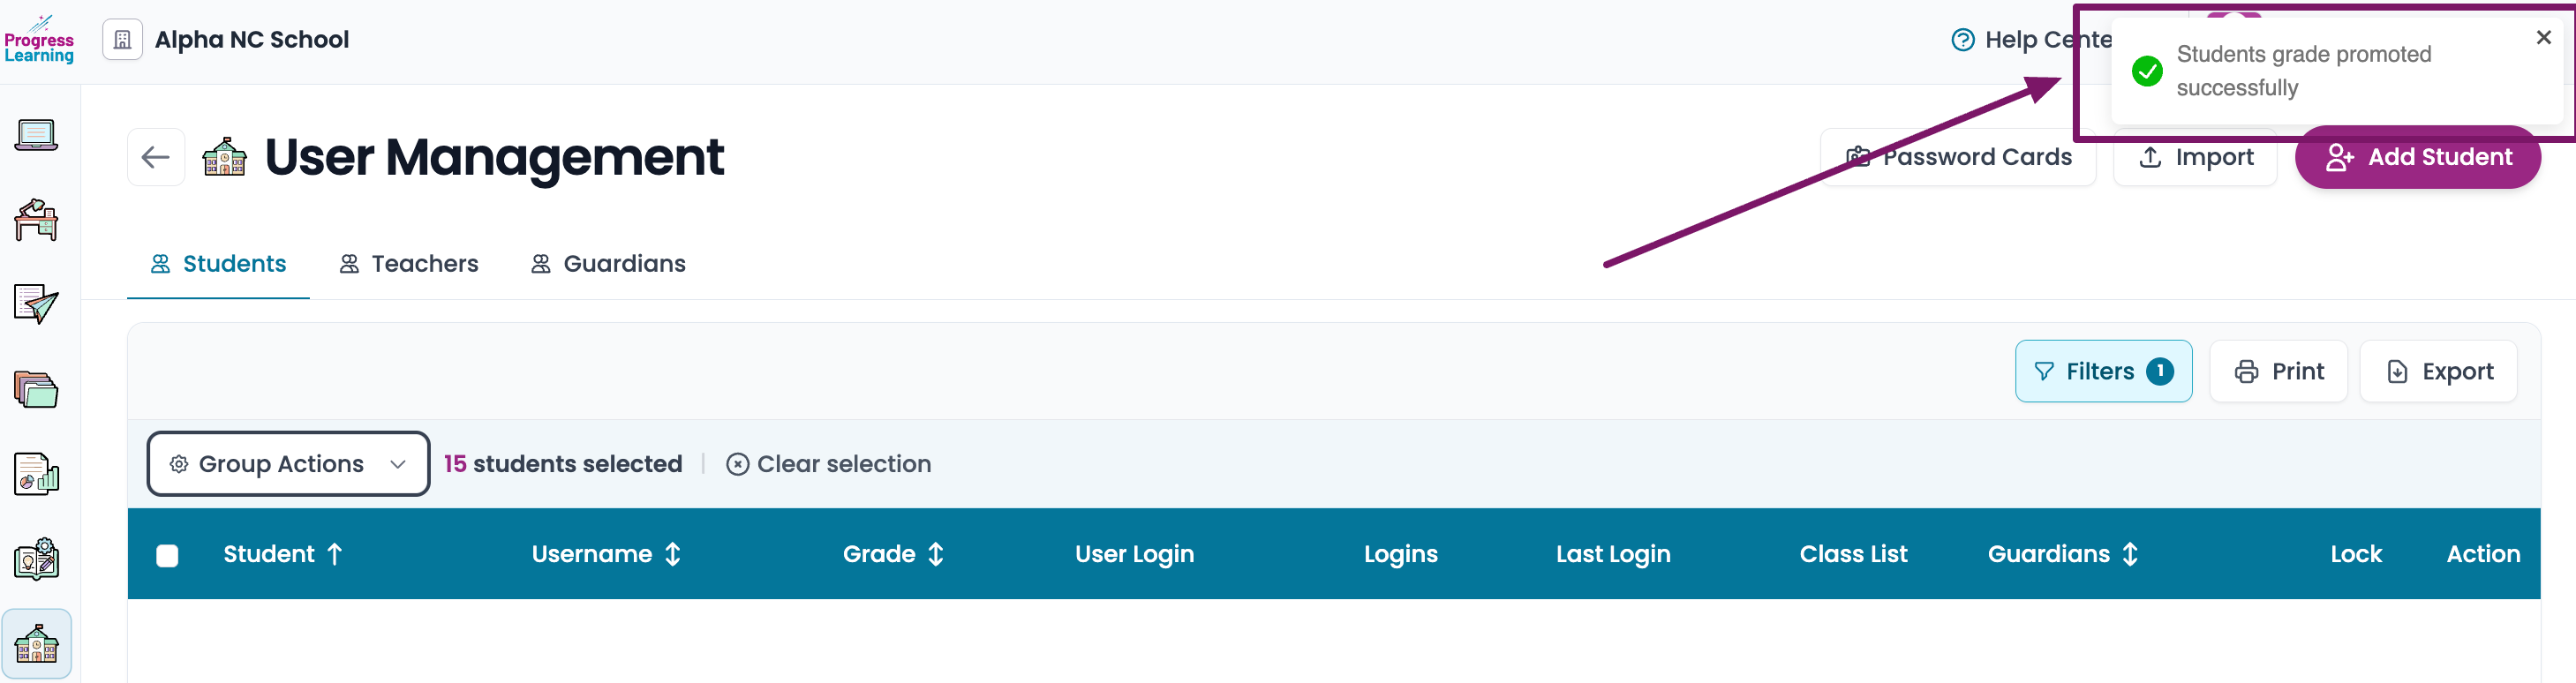
- A confirmation pop-up box confirming that students were promoted successfully will briefly appear in the top right corner of your screen. You can also filter the student list again to confirm that the correct grade-level changes were made.
- After students have been promoted, follow the steps listed in the article linked below to upload only your new students to avoid duplicate account creation.
How do I import students?
If you have questions or need assistance, please reach out to us by emailing support@progresslearning.com