How do I create an Assessment?
 Updated
by
Rebecca Baker
Updated
by
Rebecca Baker
How do I create an Assessment
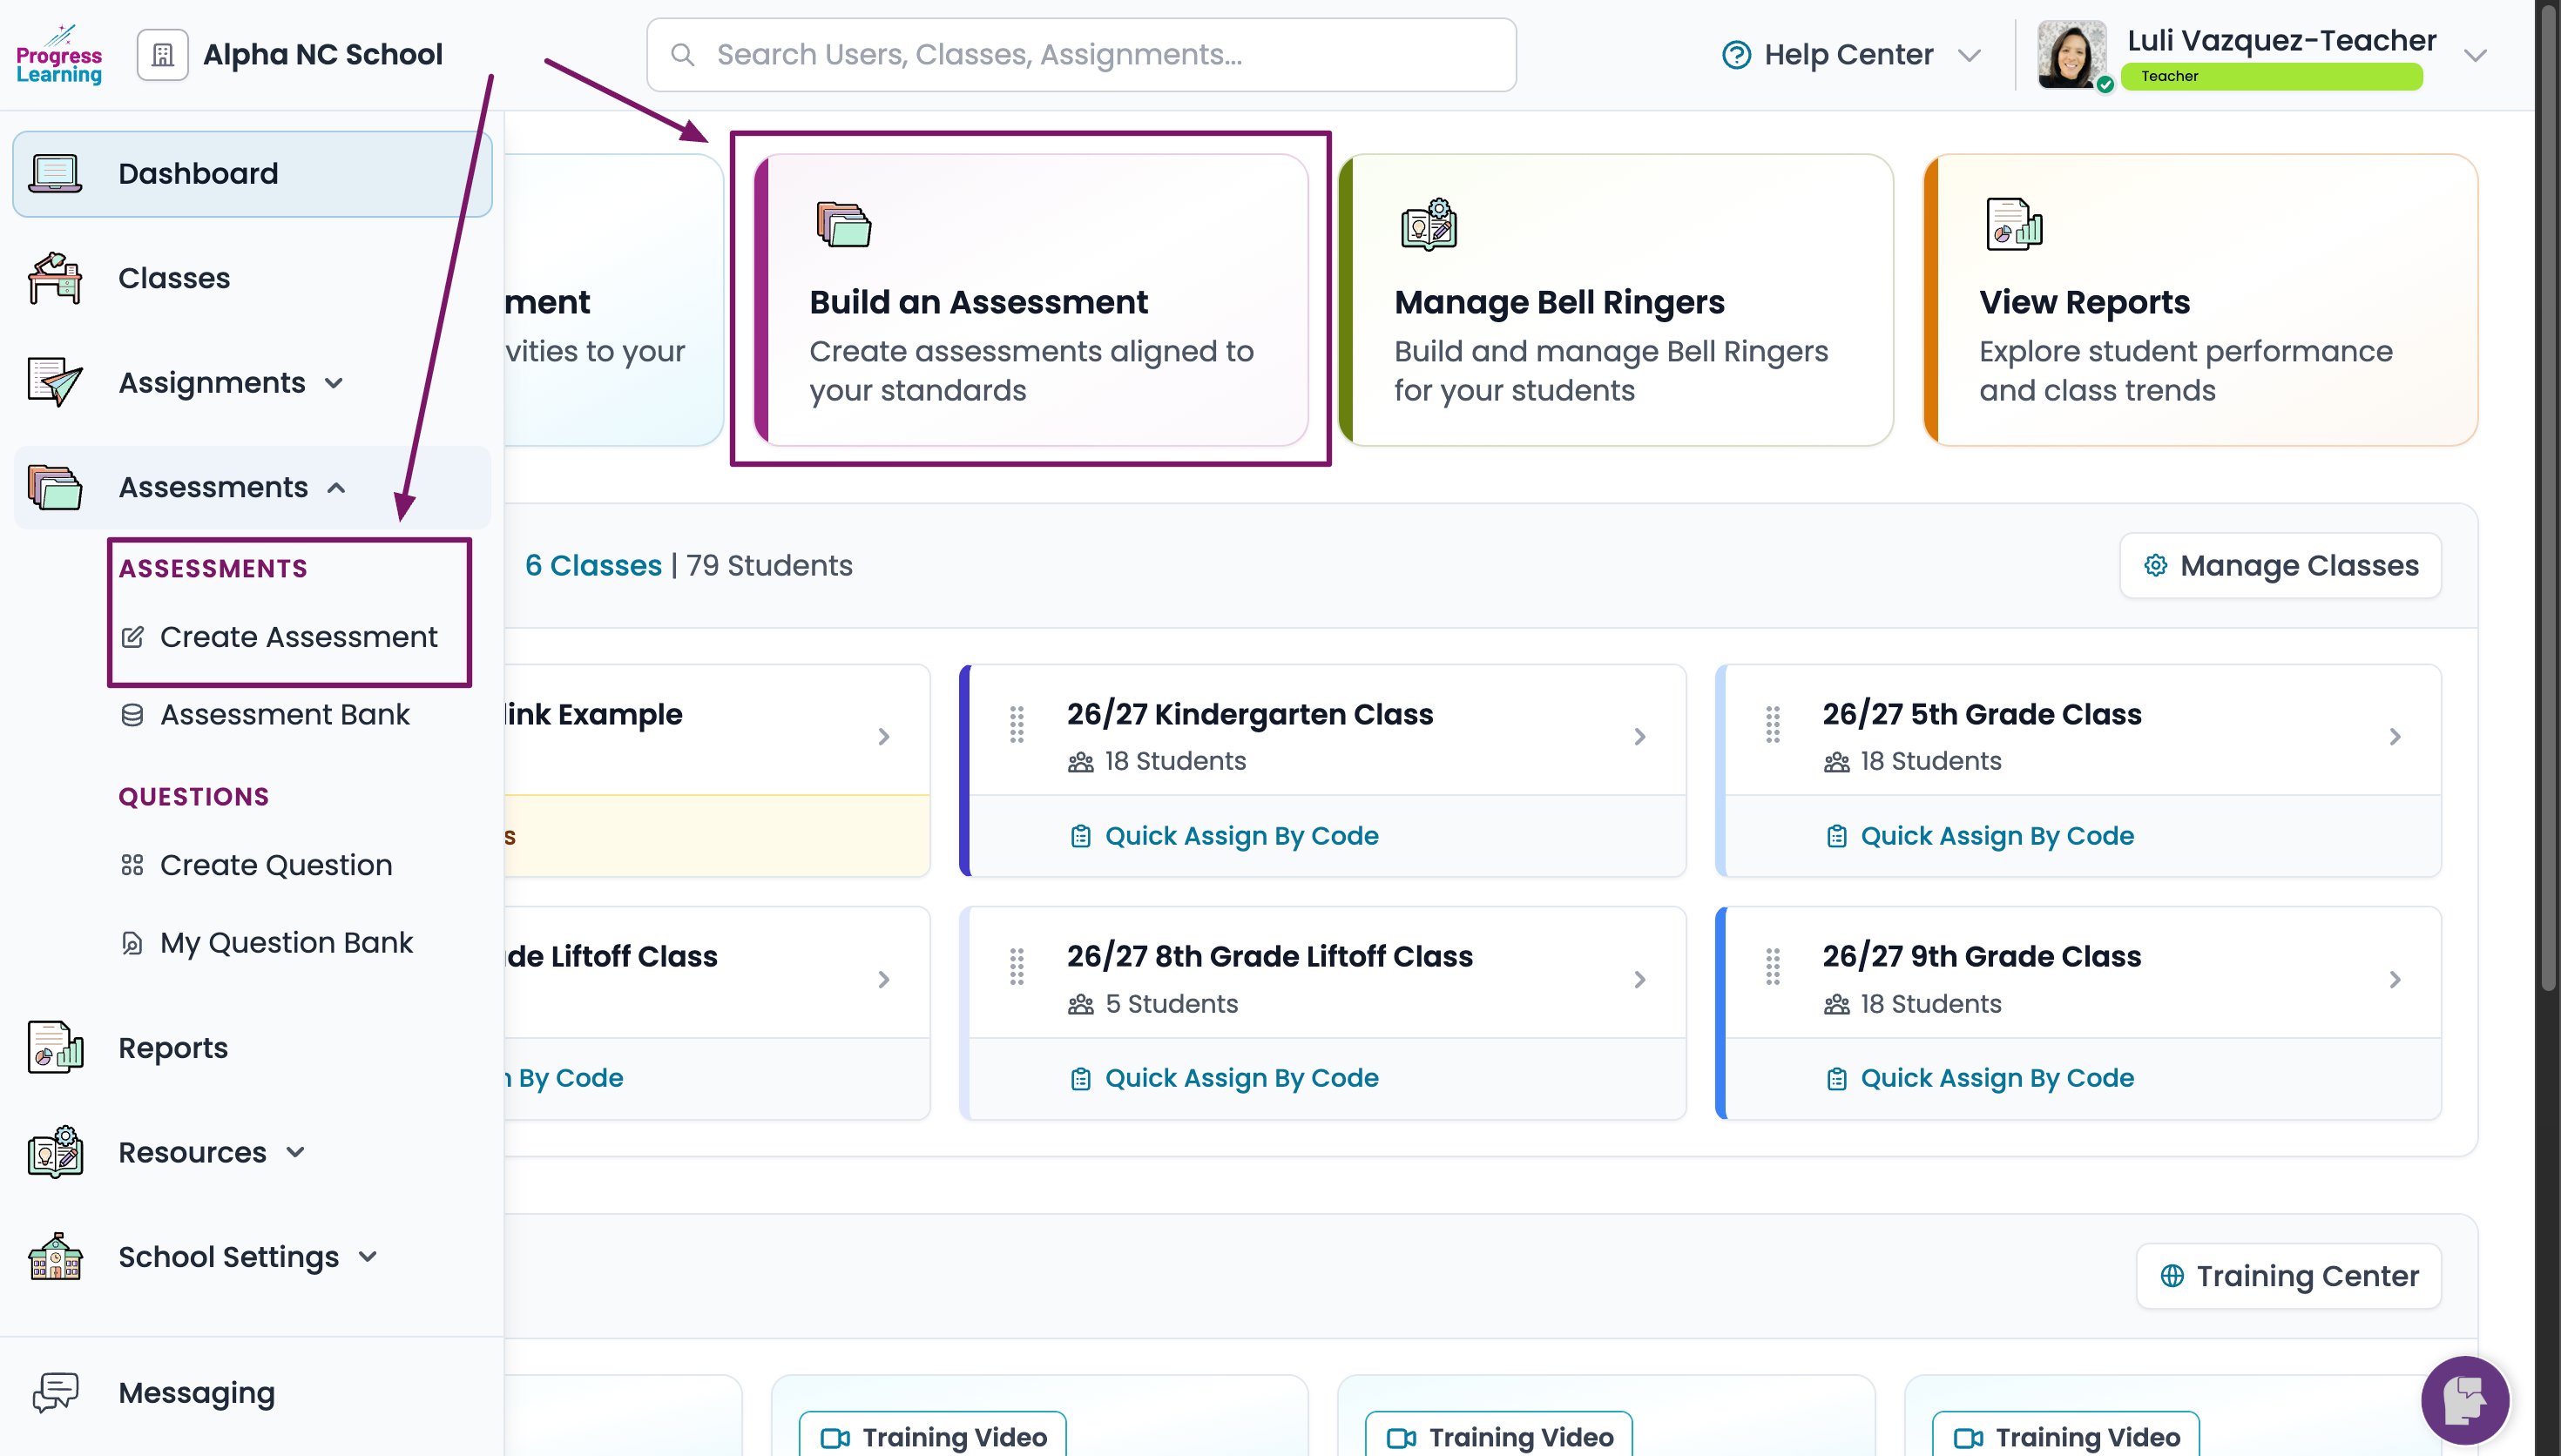
- On your teacher dashboard, click on Build an Assessment, or click on Create Assessment in the menu bar on the left-hand side of your screen.
Click here for information regarding creating an assessment as an Administrator.
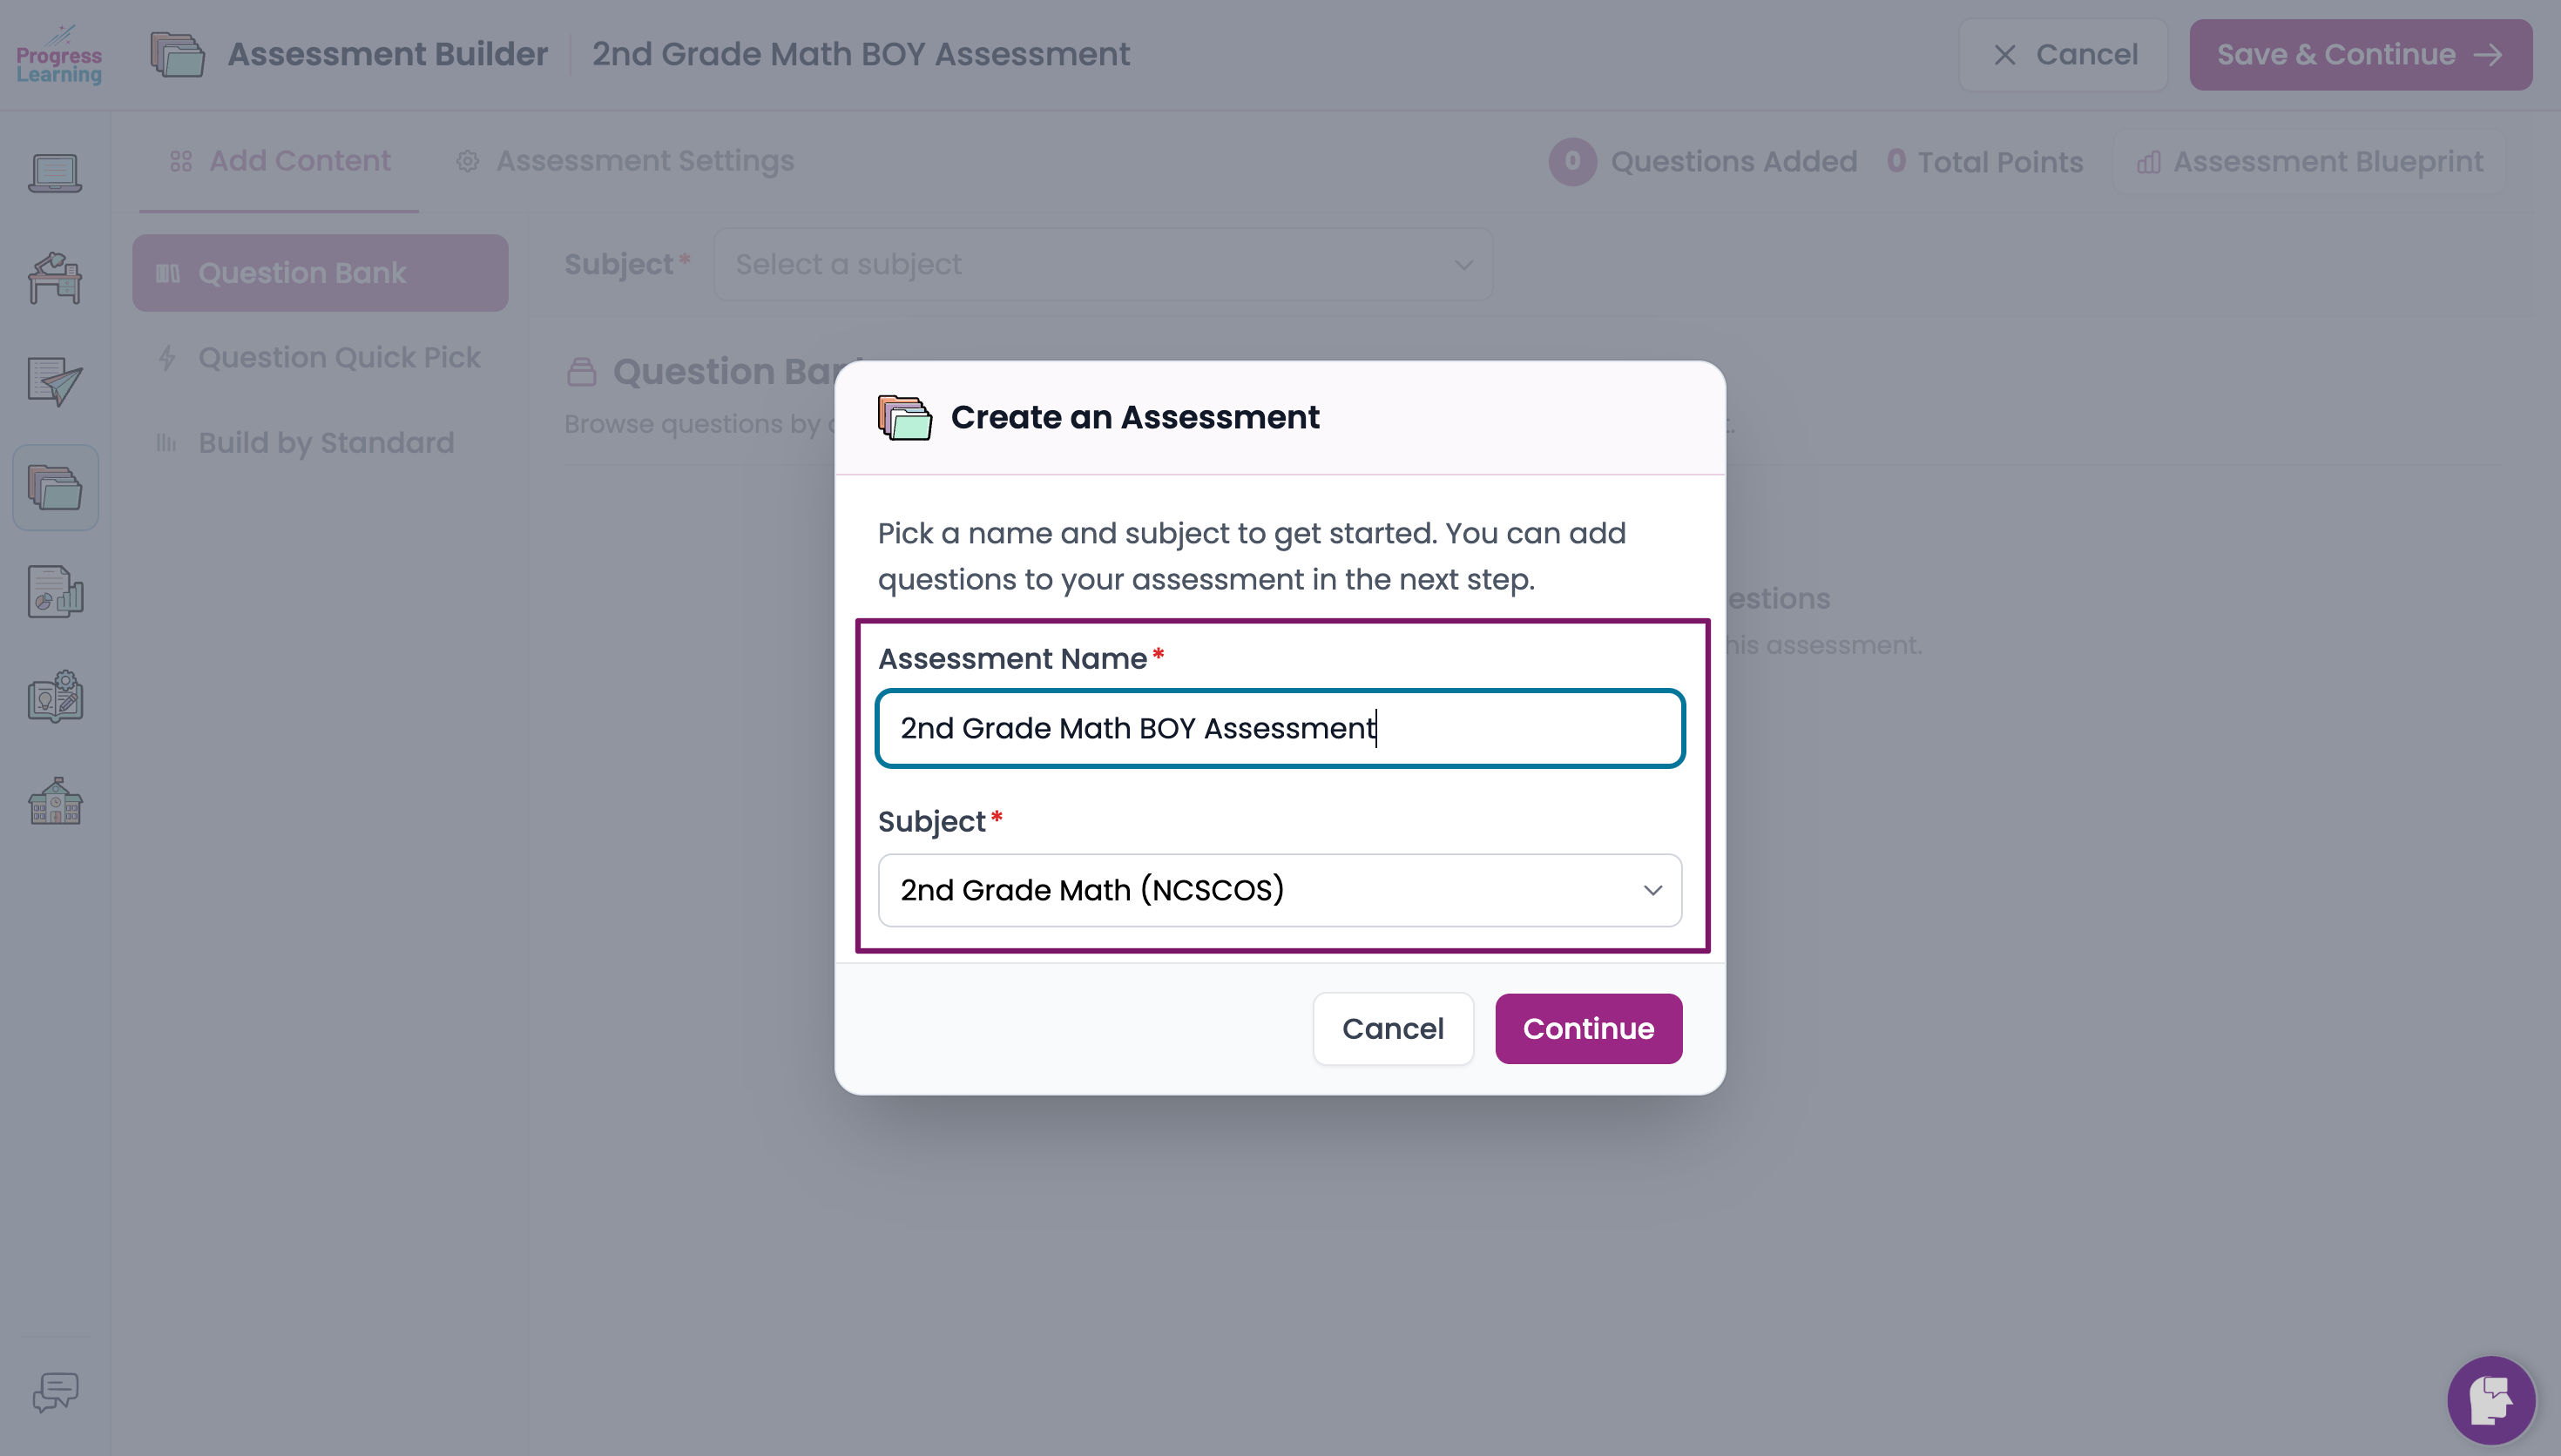
- On the pop-up screen, give your assessment a name and select your subject.
There are three methods you can use to build your assessment, and you can also combine multiple methods to fit your needs.
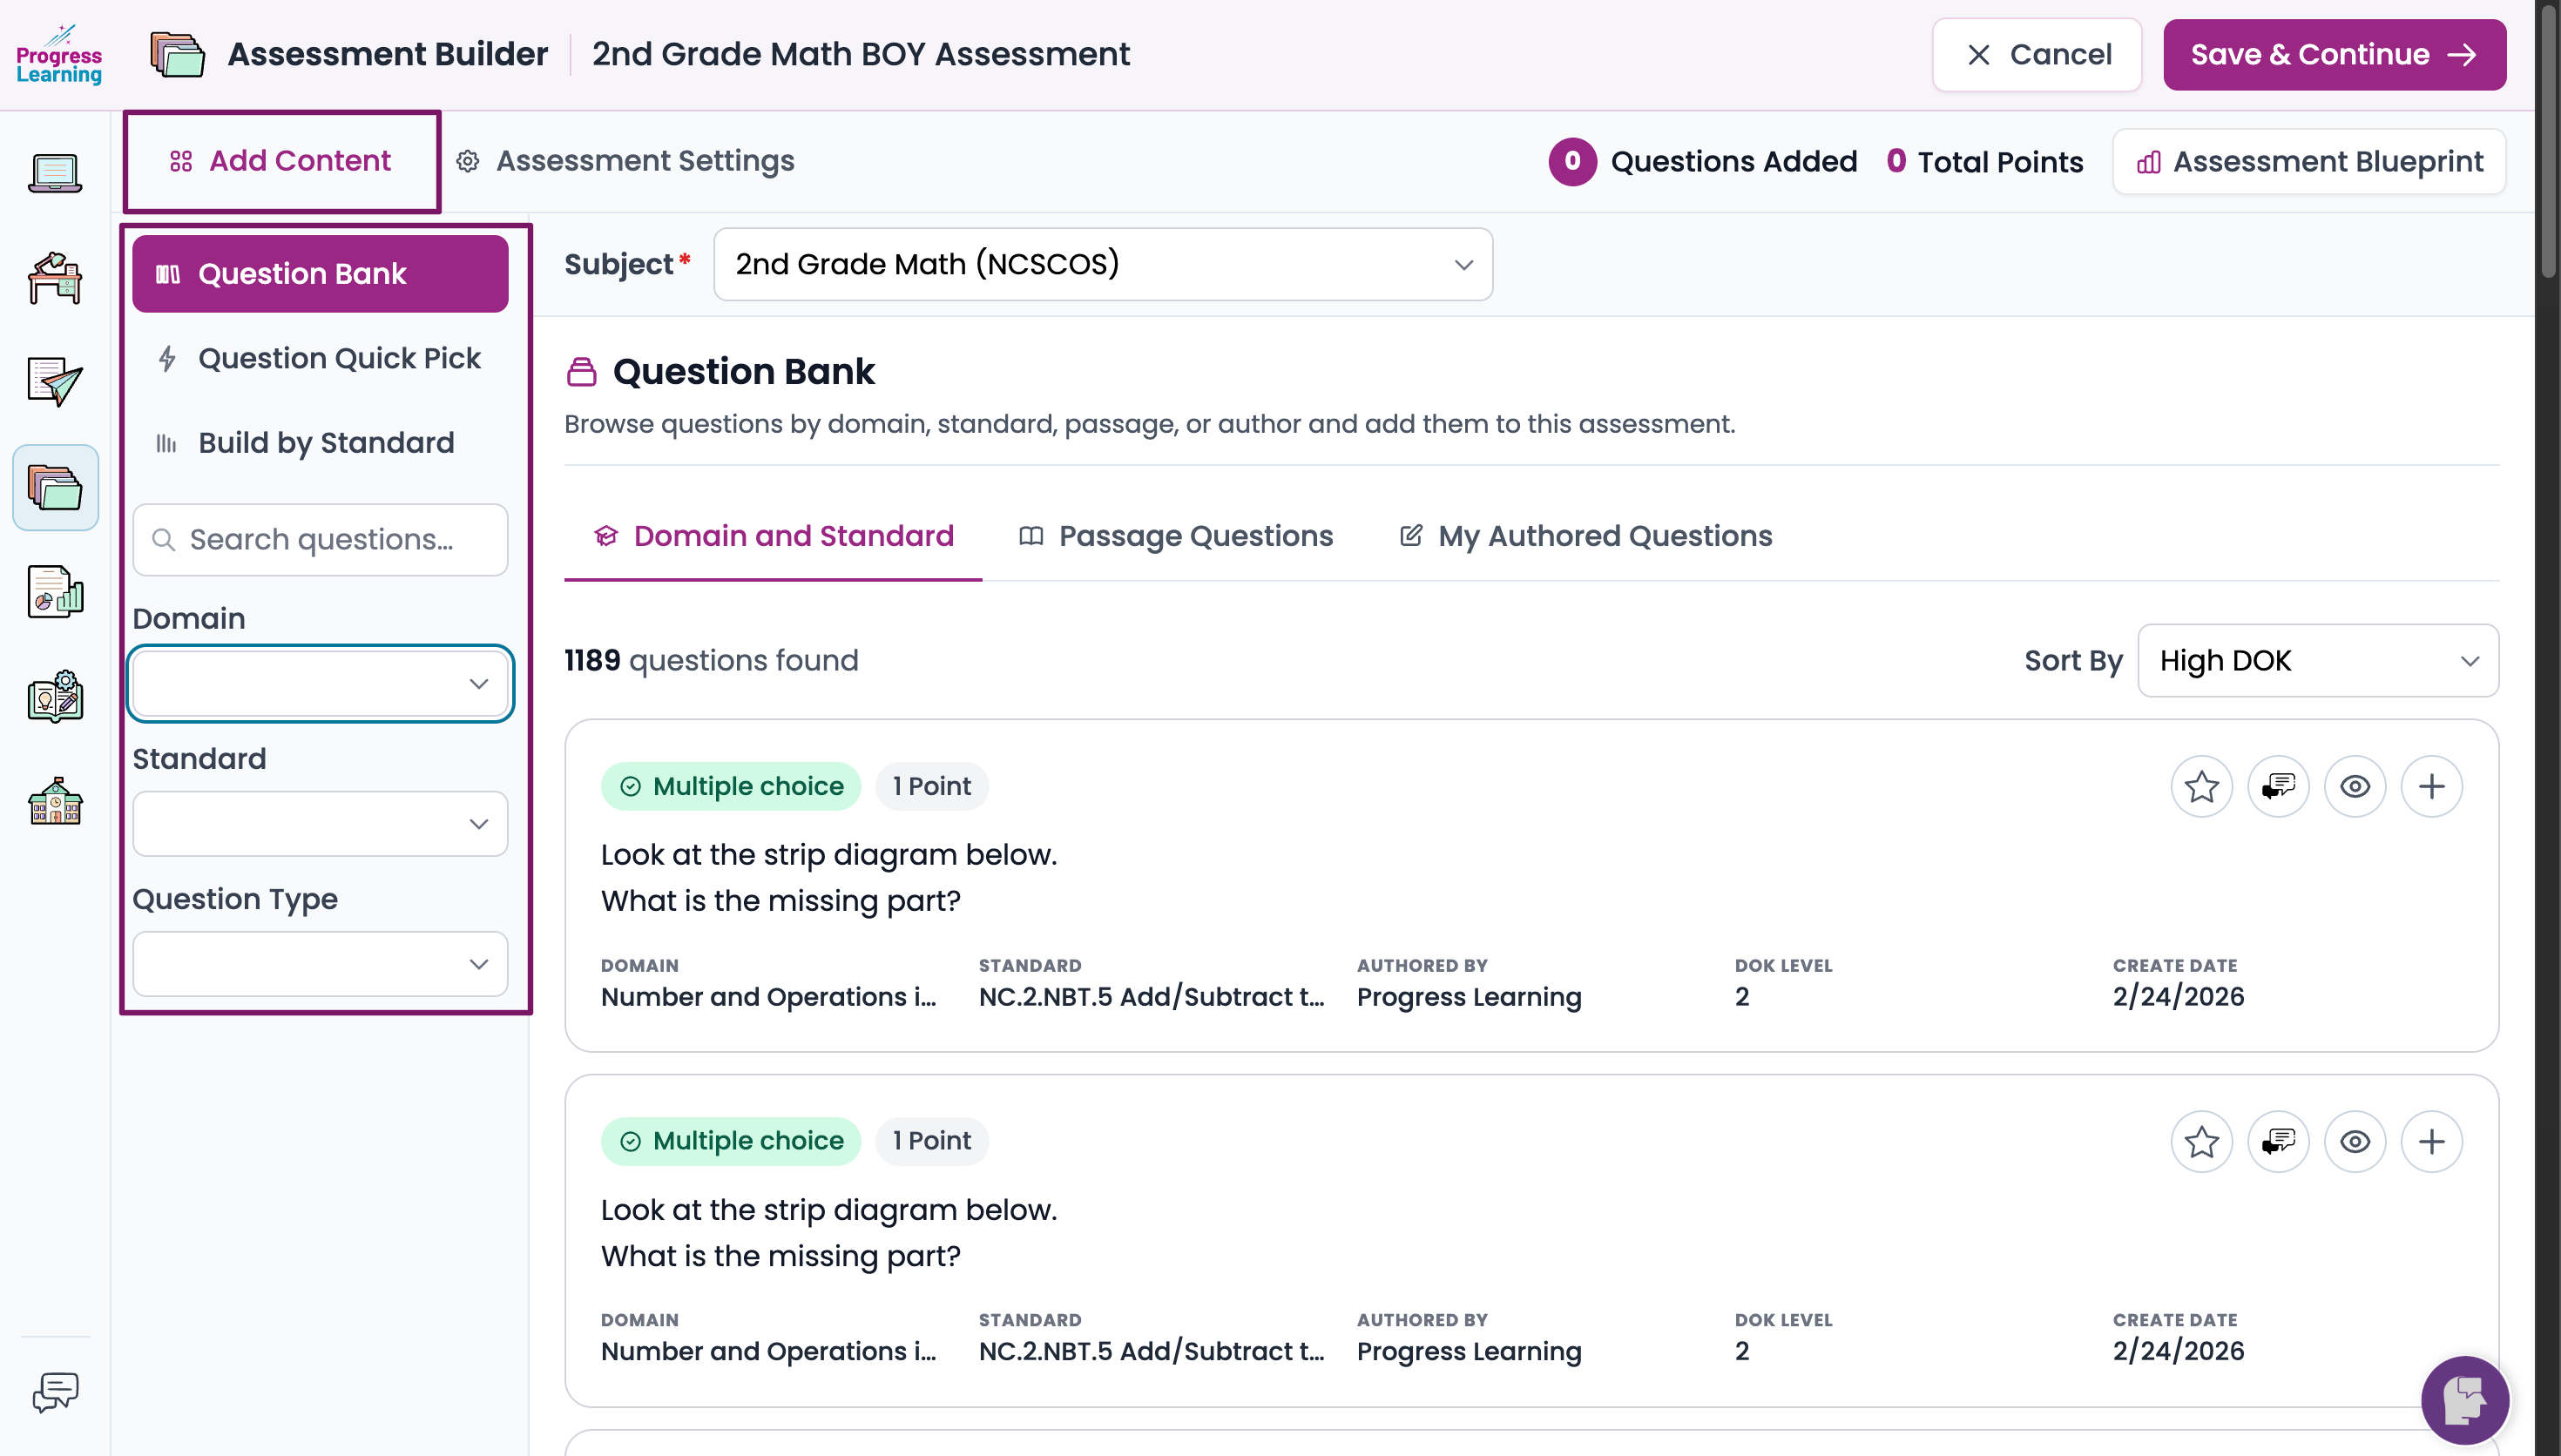
- Add your content.
Method 1: Question Bank
You will be selecting the questions yourself from our item bank or from your list of authored questions.
- Use the drop-down filters on the left to select for Domain, Standard, Question Type, and/or Keywords. Questions that match your search filters will display to the right.
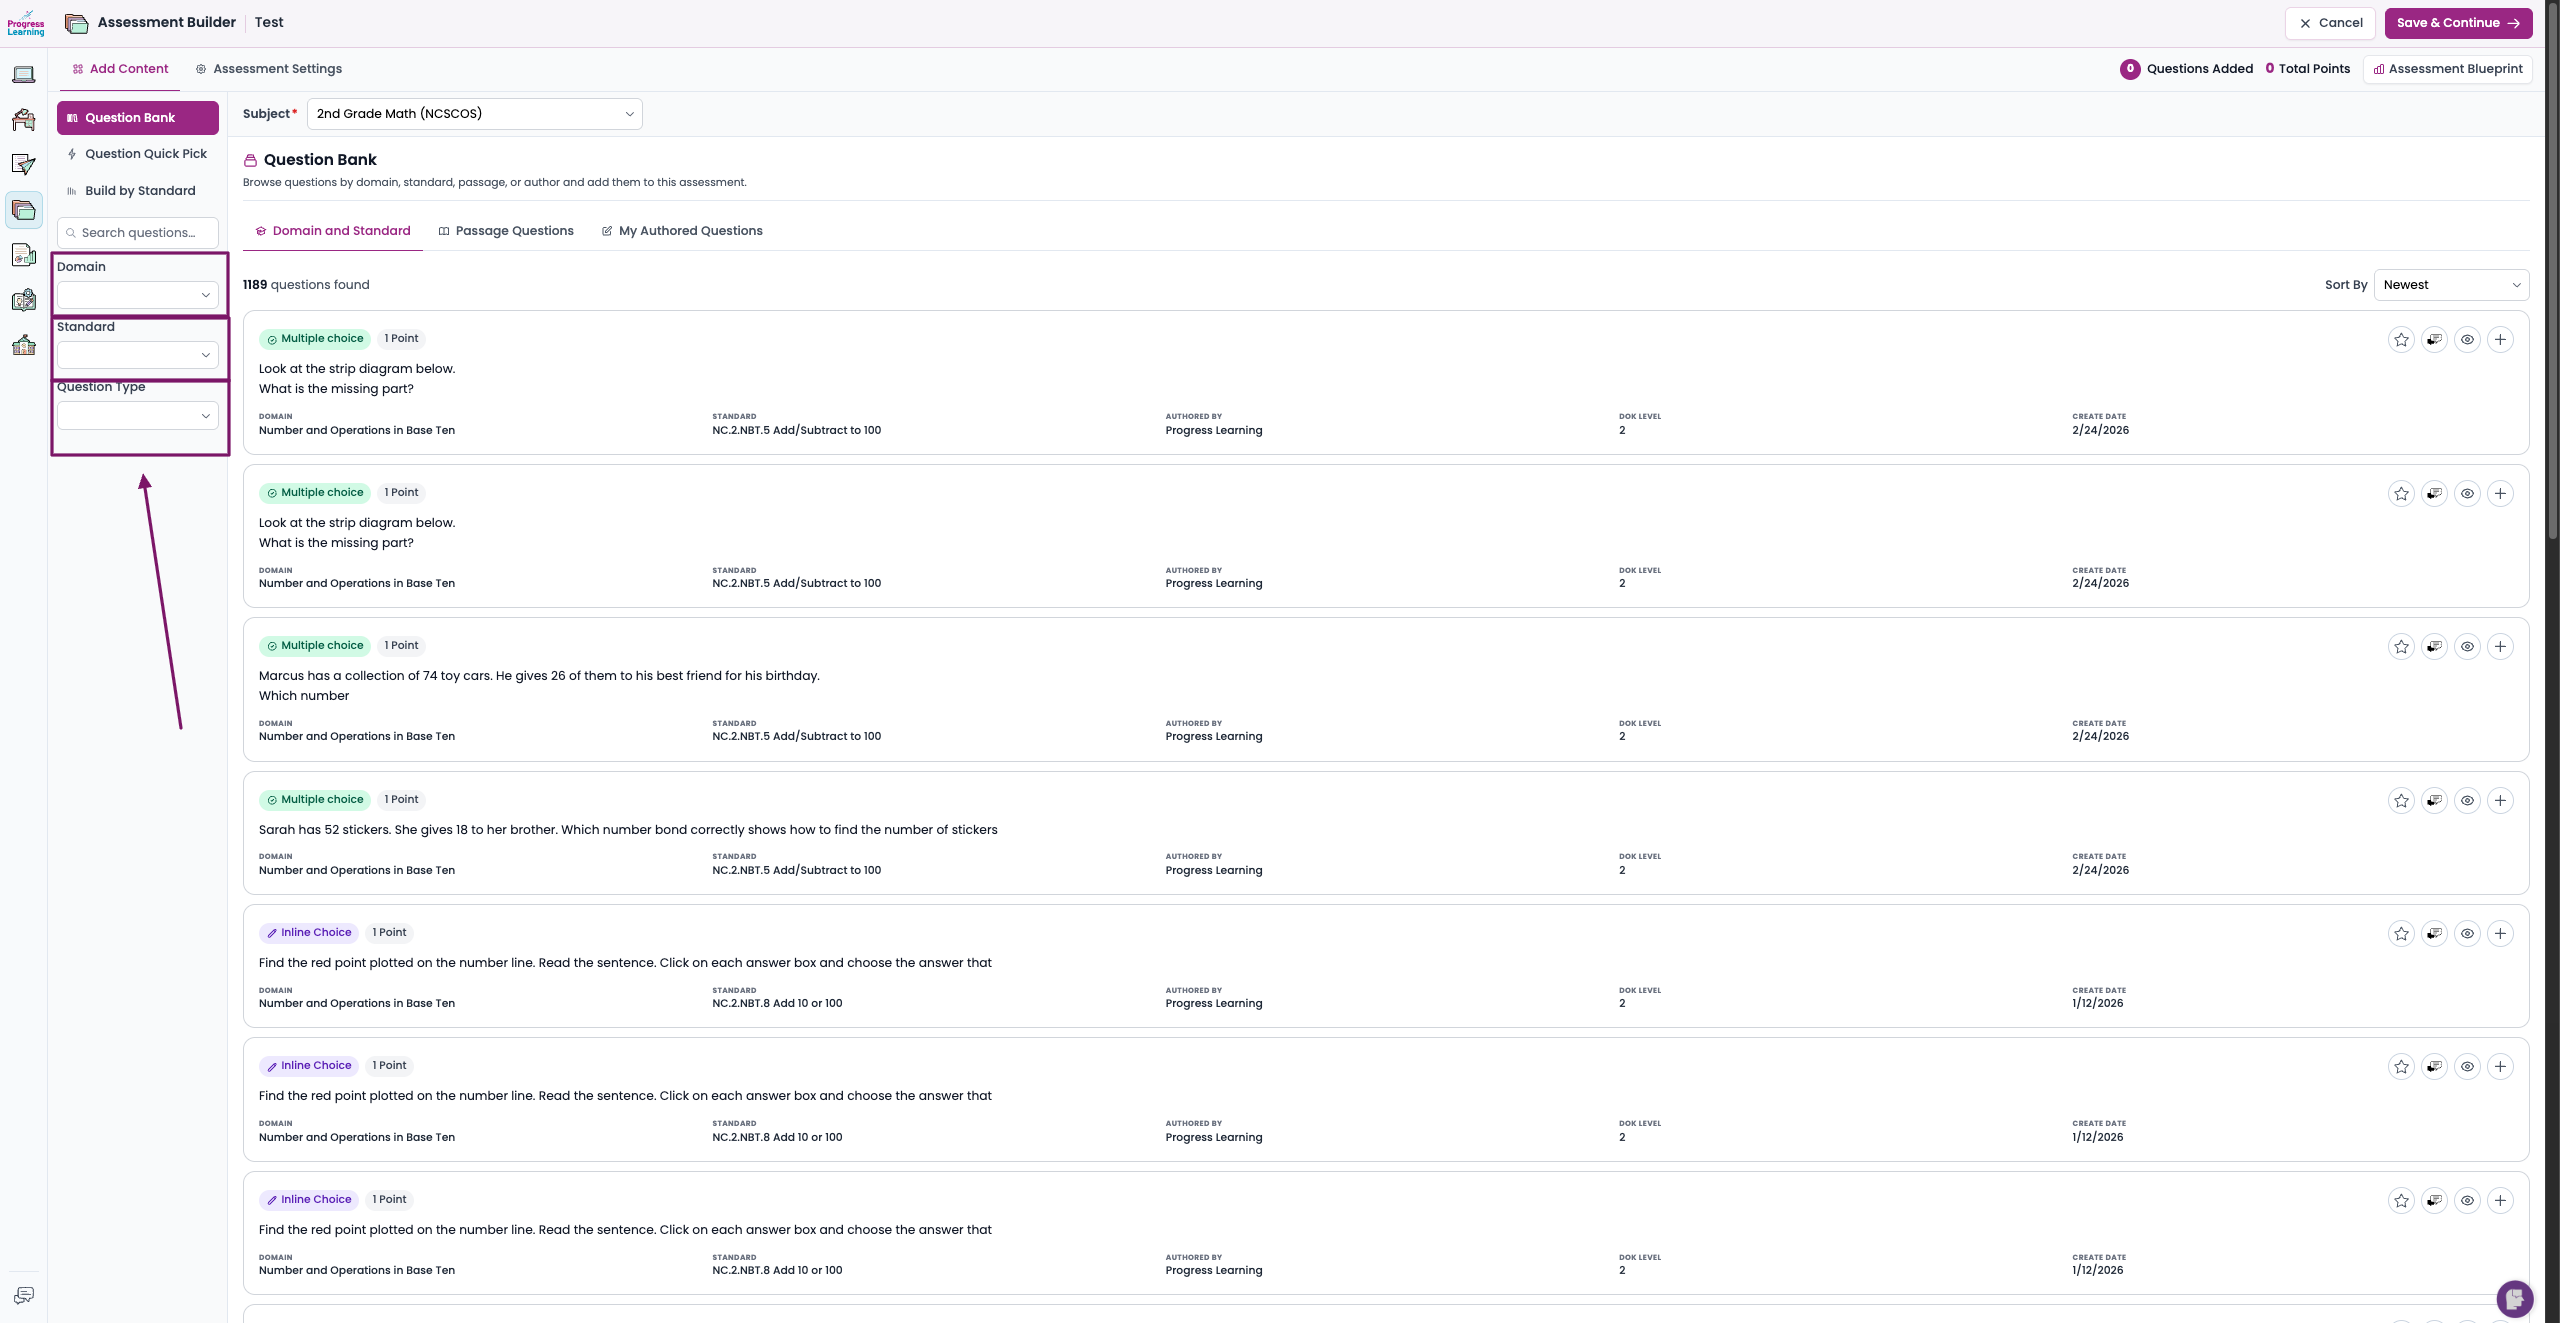
- Click View Questions to see questions in that standard.

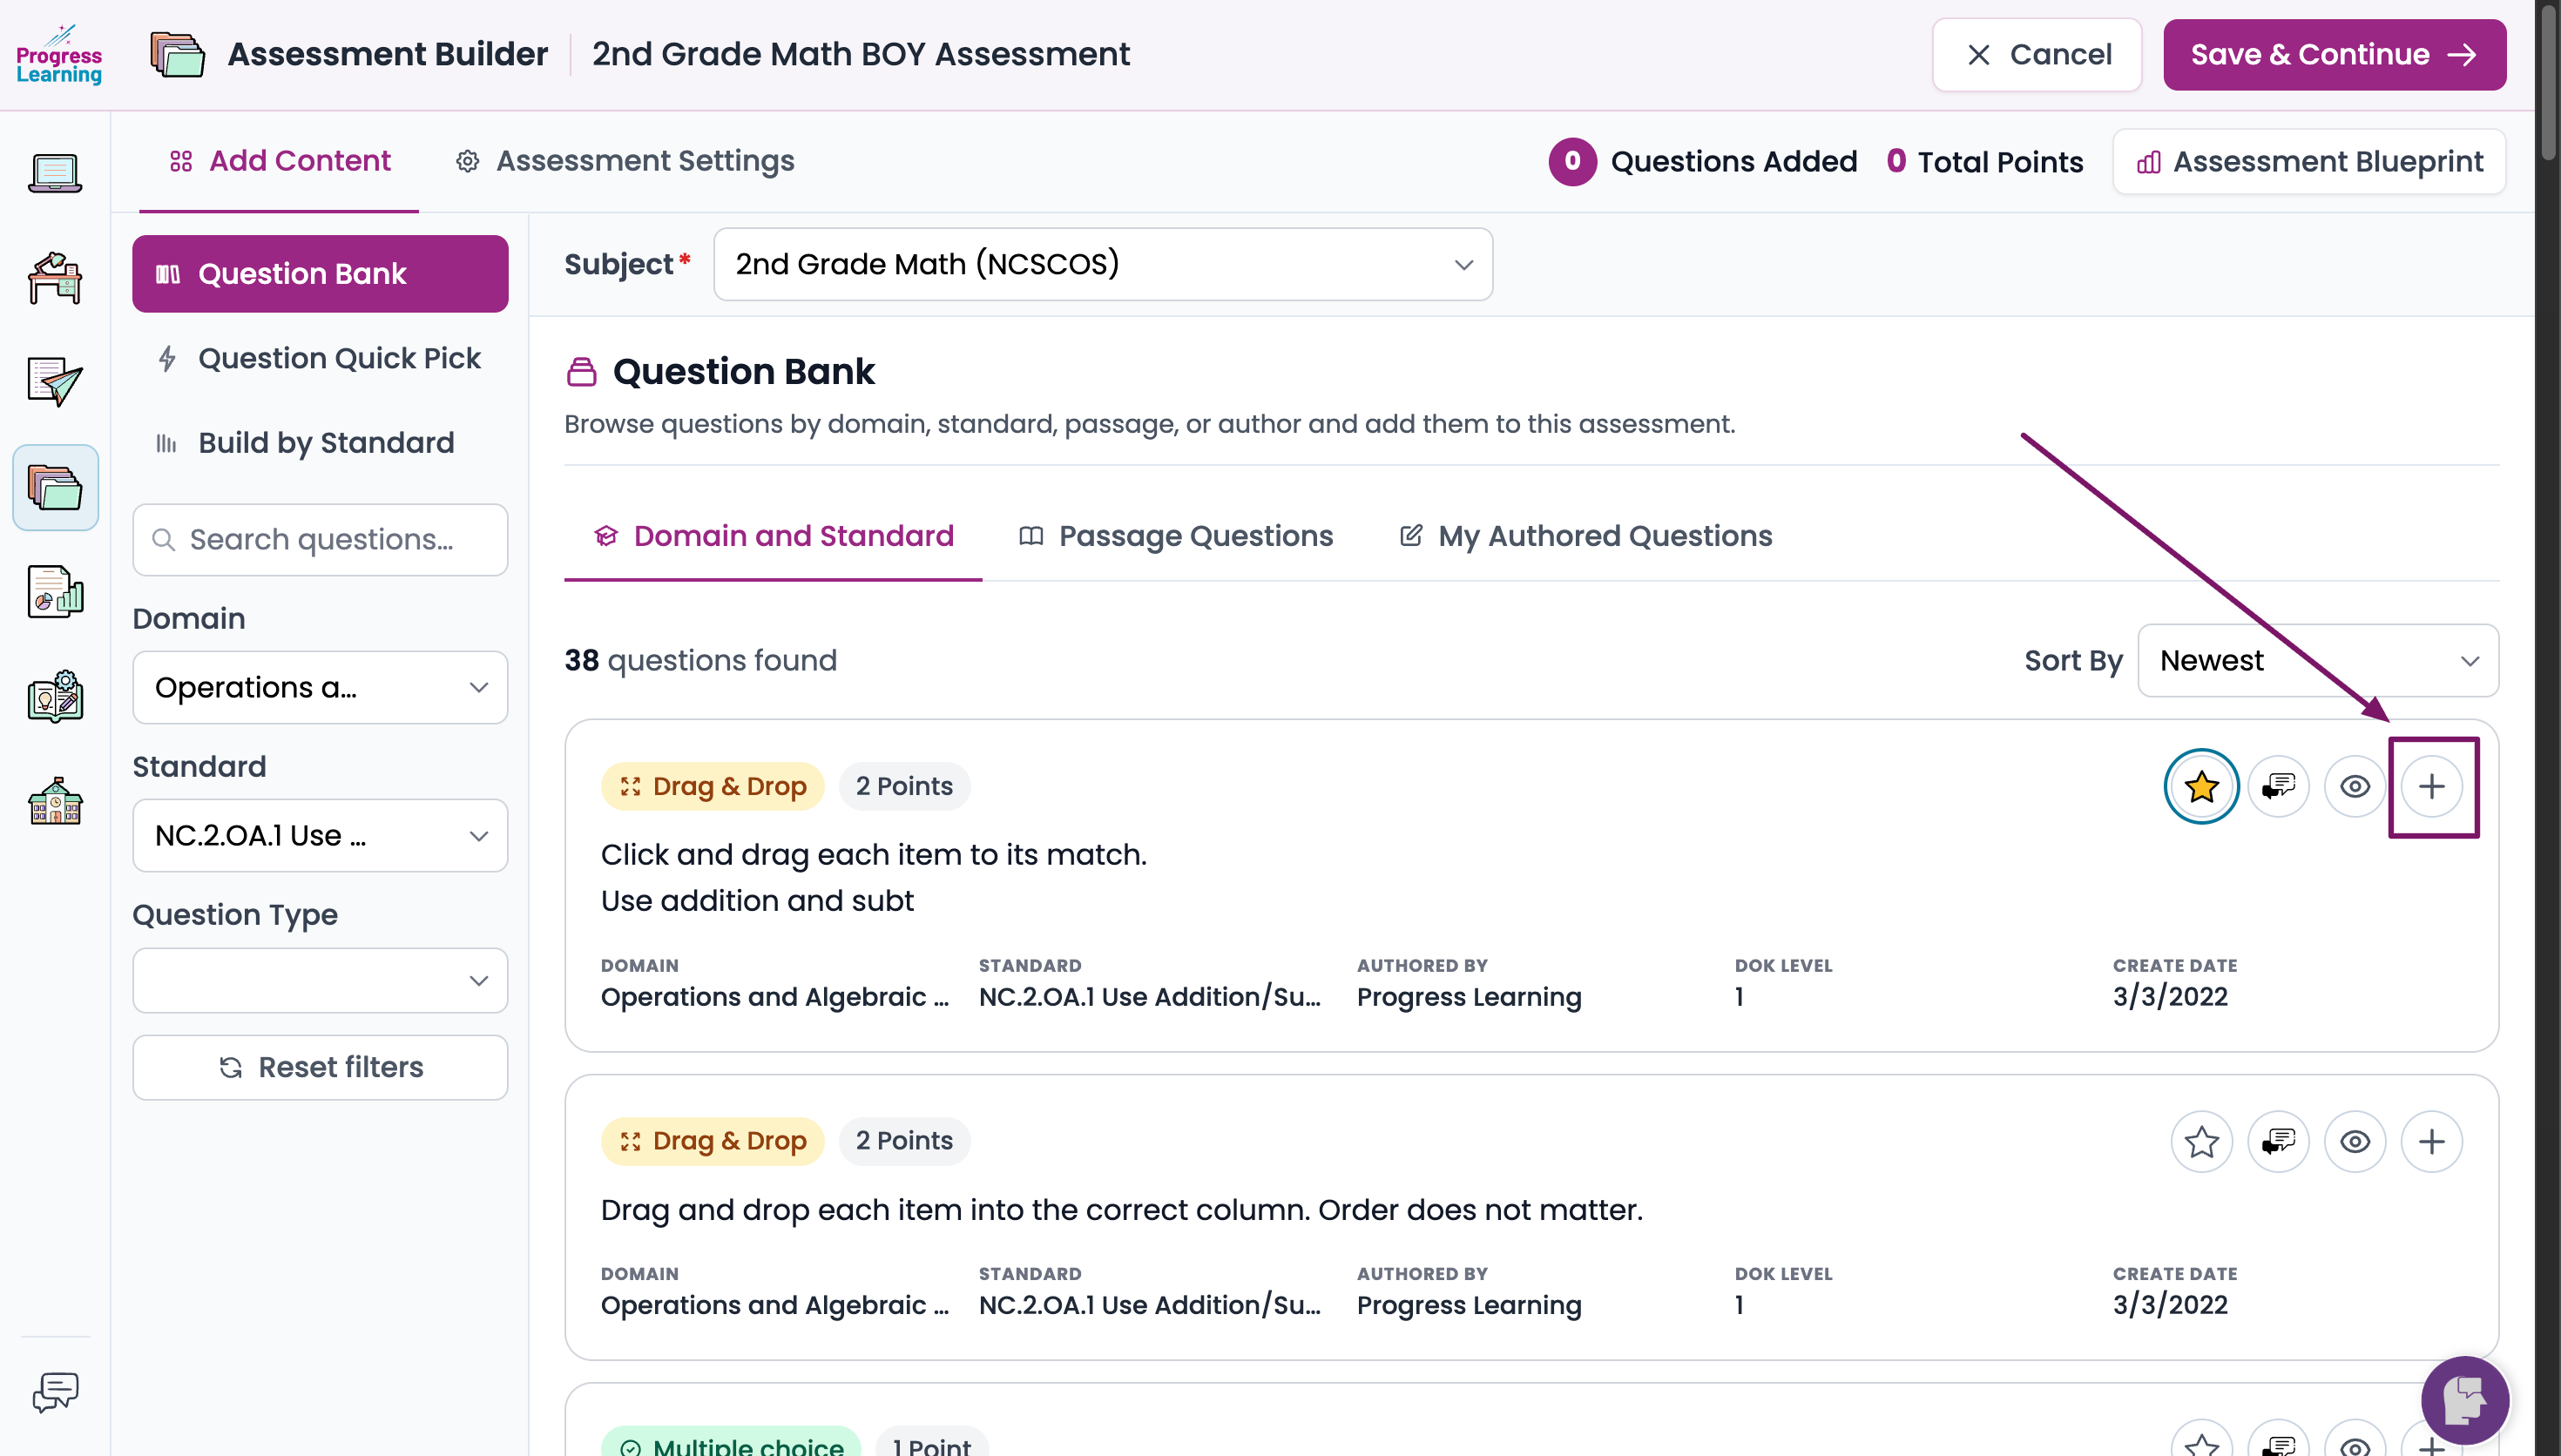
- Click on the + sign next to the questions that you would like to choose for your assessment. If you want to preview a question, click on the question itself and it will appear in a preview pane.
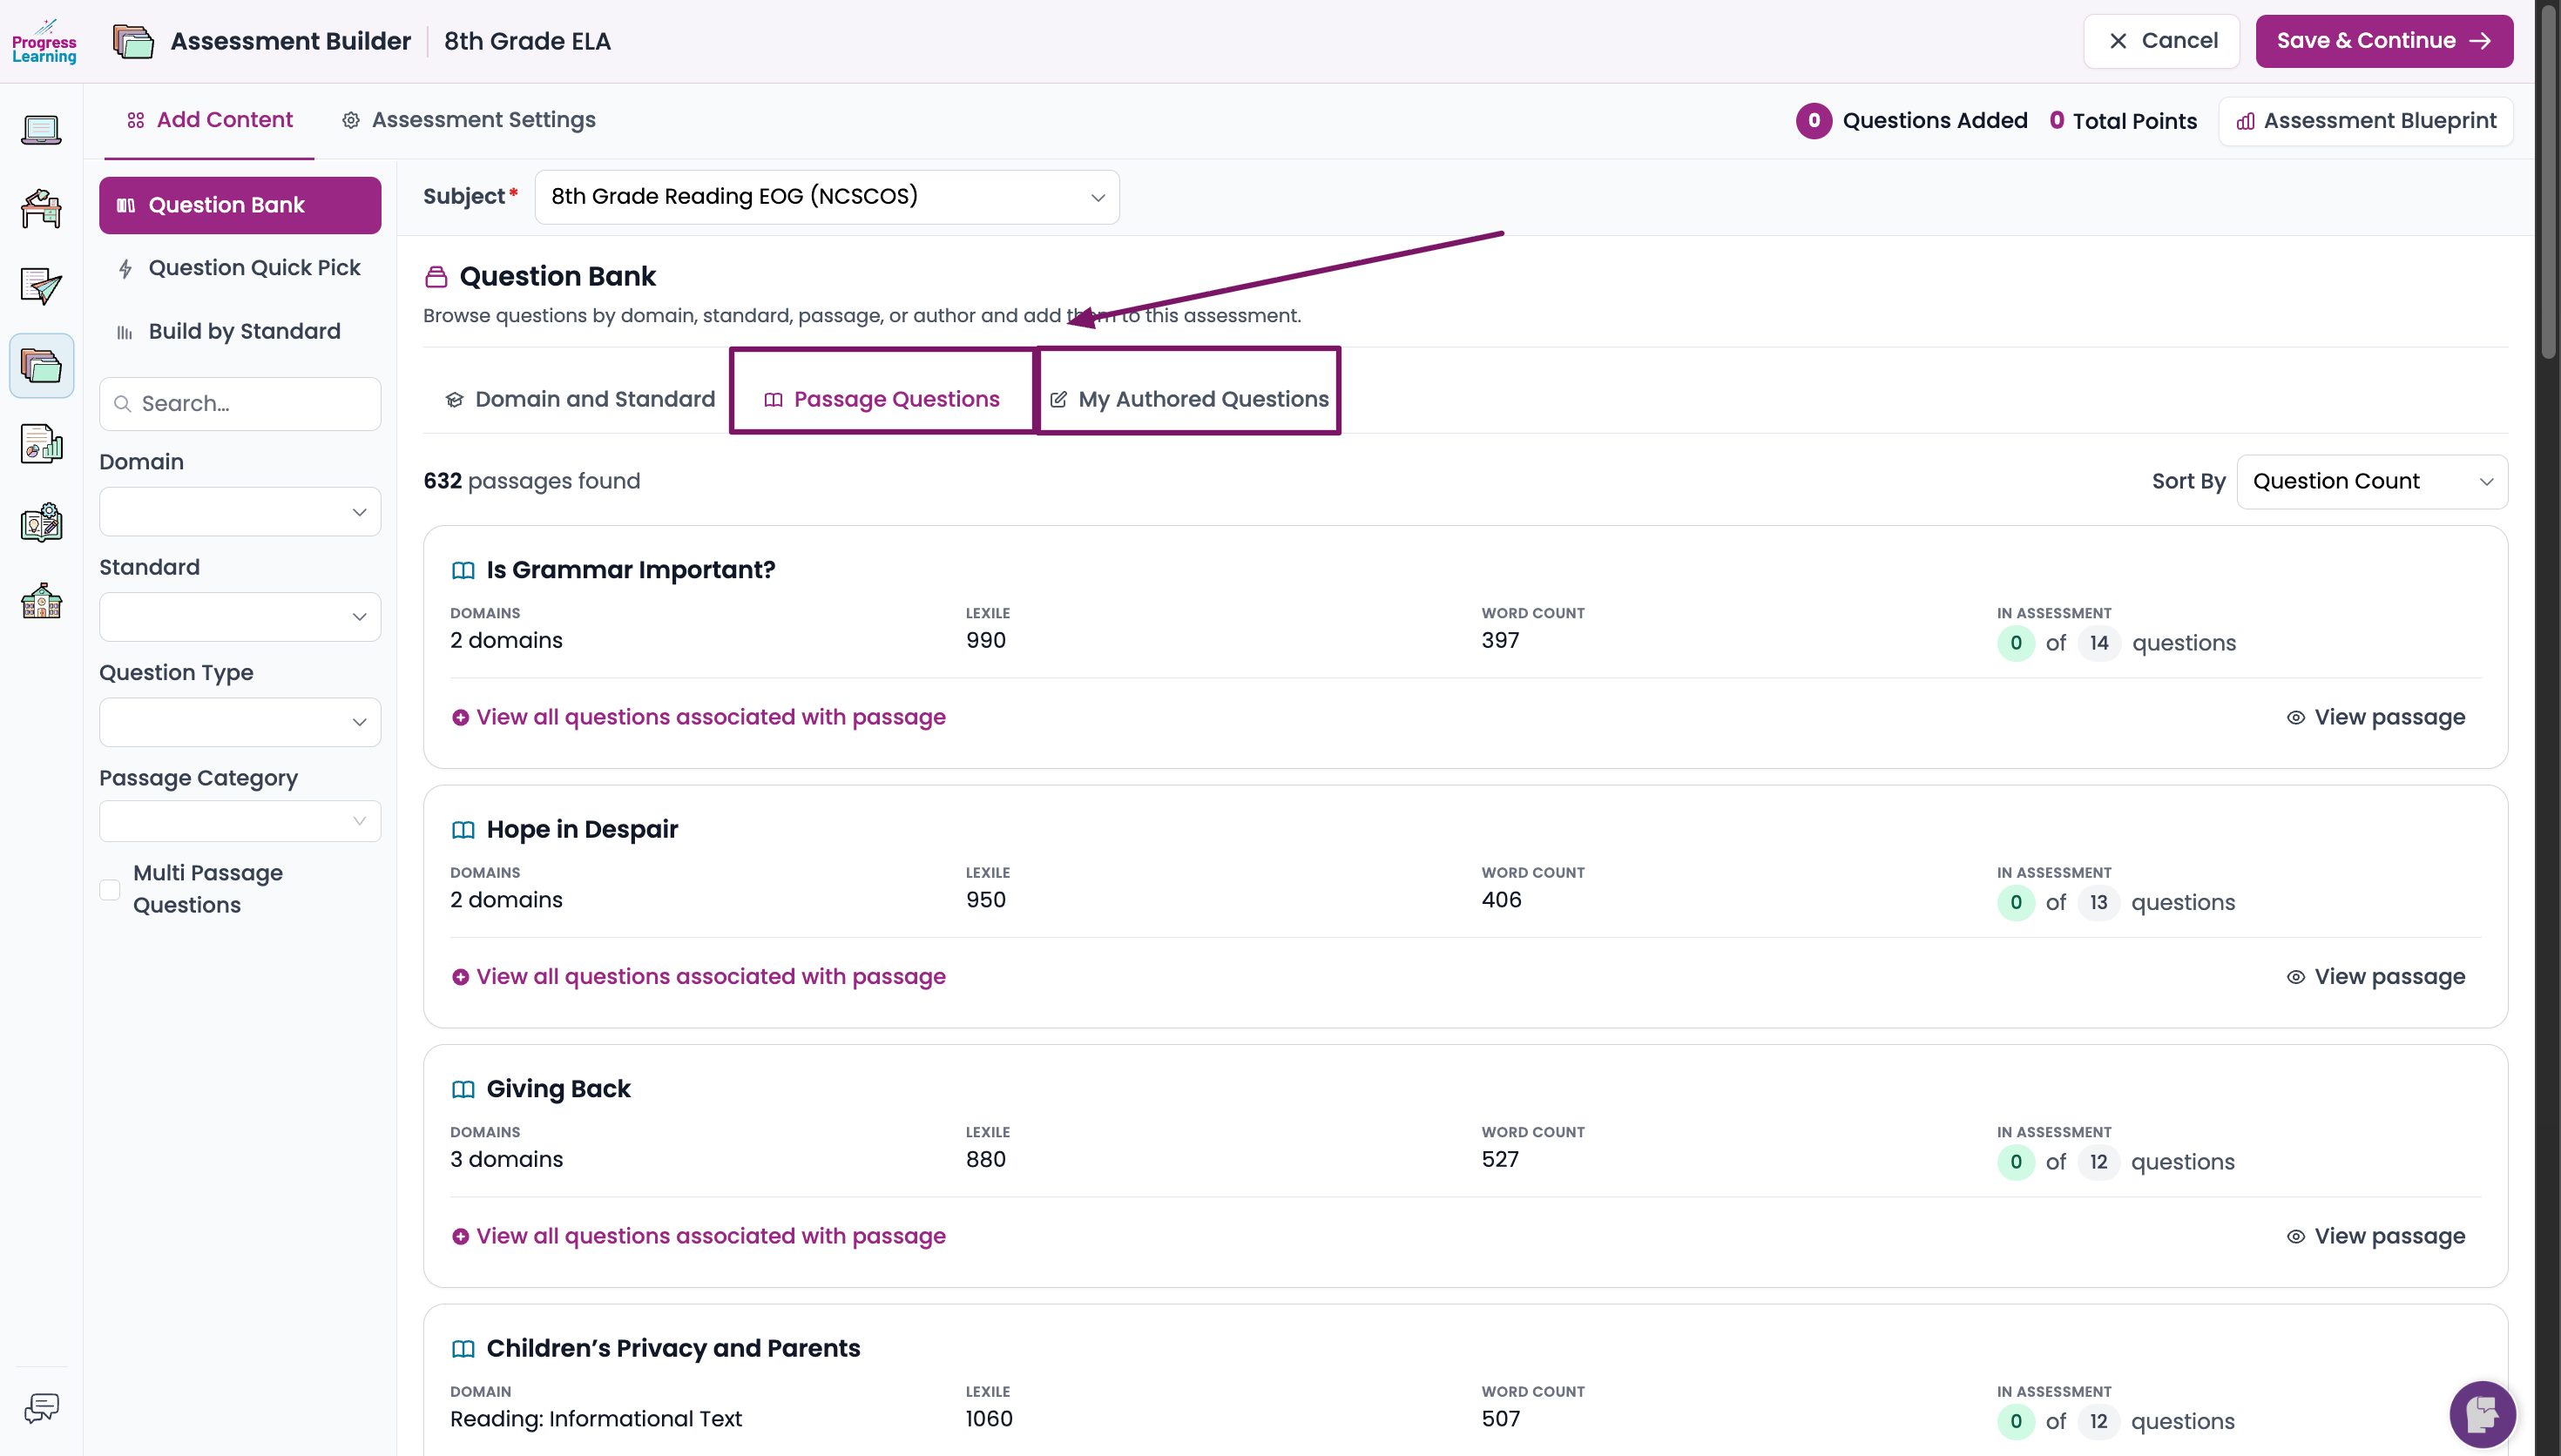
- You can also include questions based on lengthy Passages (for ELA subjects)or items that you have authored on your own ("My Authored Questions").
Method 2: Question Quick Pick
The program will randomly pick questions for you based on the blueprint for your state's assessment, creating an assessment that mirrors your state's test on that subject. This is an ideal option for creating BOY diagnostics, pre-tests, or reviews before the end of the year.
- Click on the Question Quick Pick tab. Choose the length of your assessment. The pie chart on the right will show the blueprint for your state's assessment. The program will randomly choose questions for you according to this blueprint.
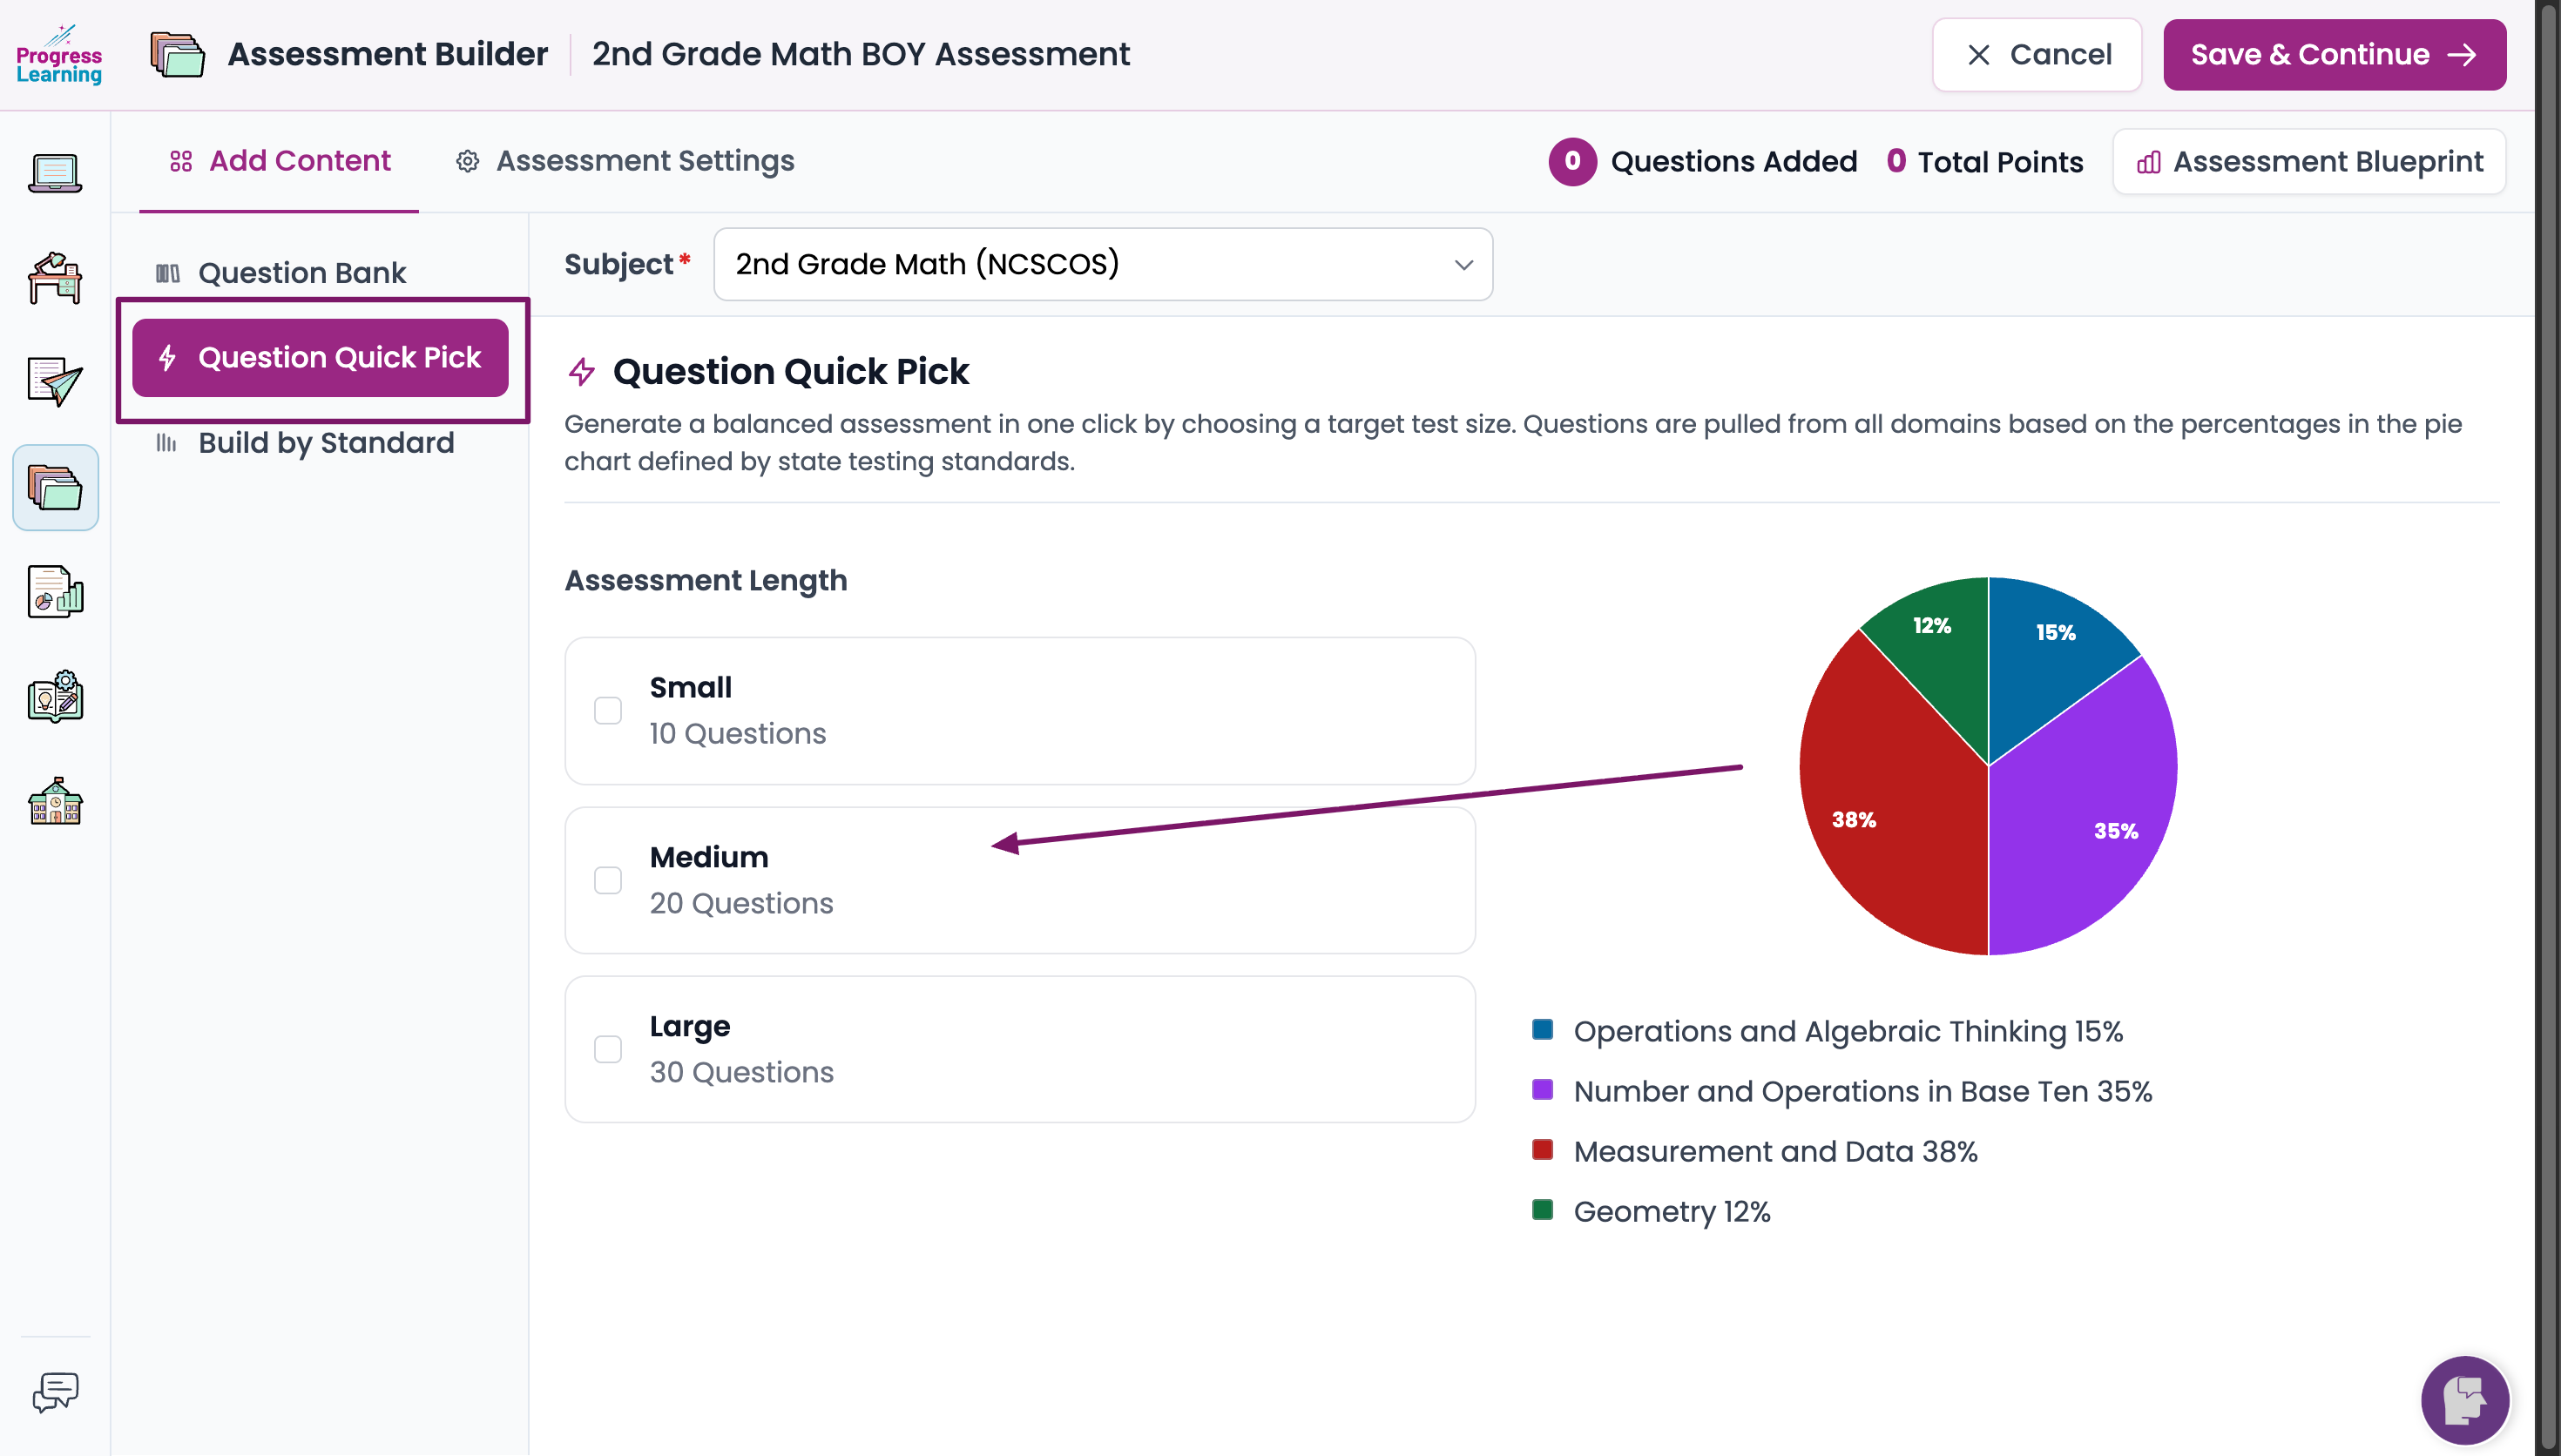
Note Regarding the Test Blueprint: If this is a state-tested subject, the blueprint will match the state test. If this is a non-tested subject, the blueprint is divided evenly based on the number of standards in each domain.
- Click Save and Continue at the top of the page.
Method 3: Build by Standard
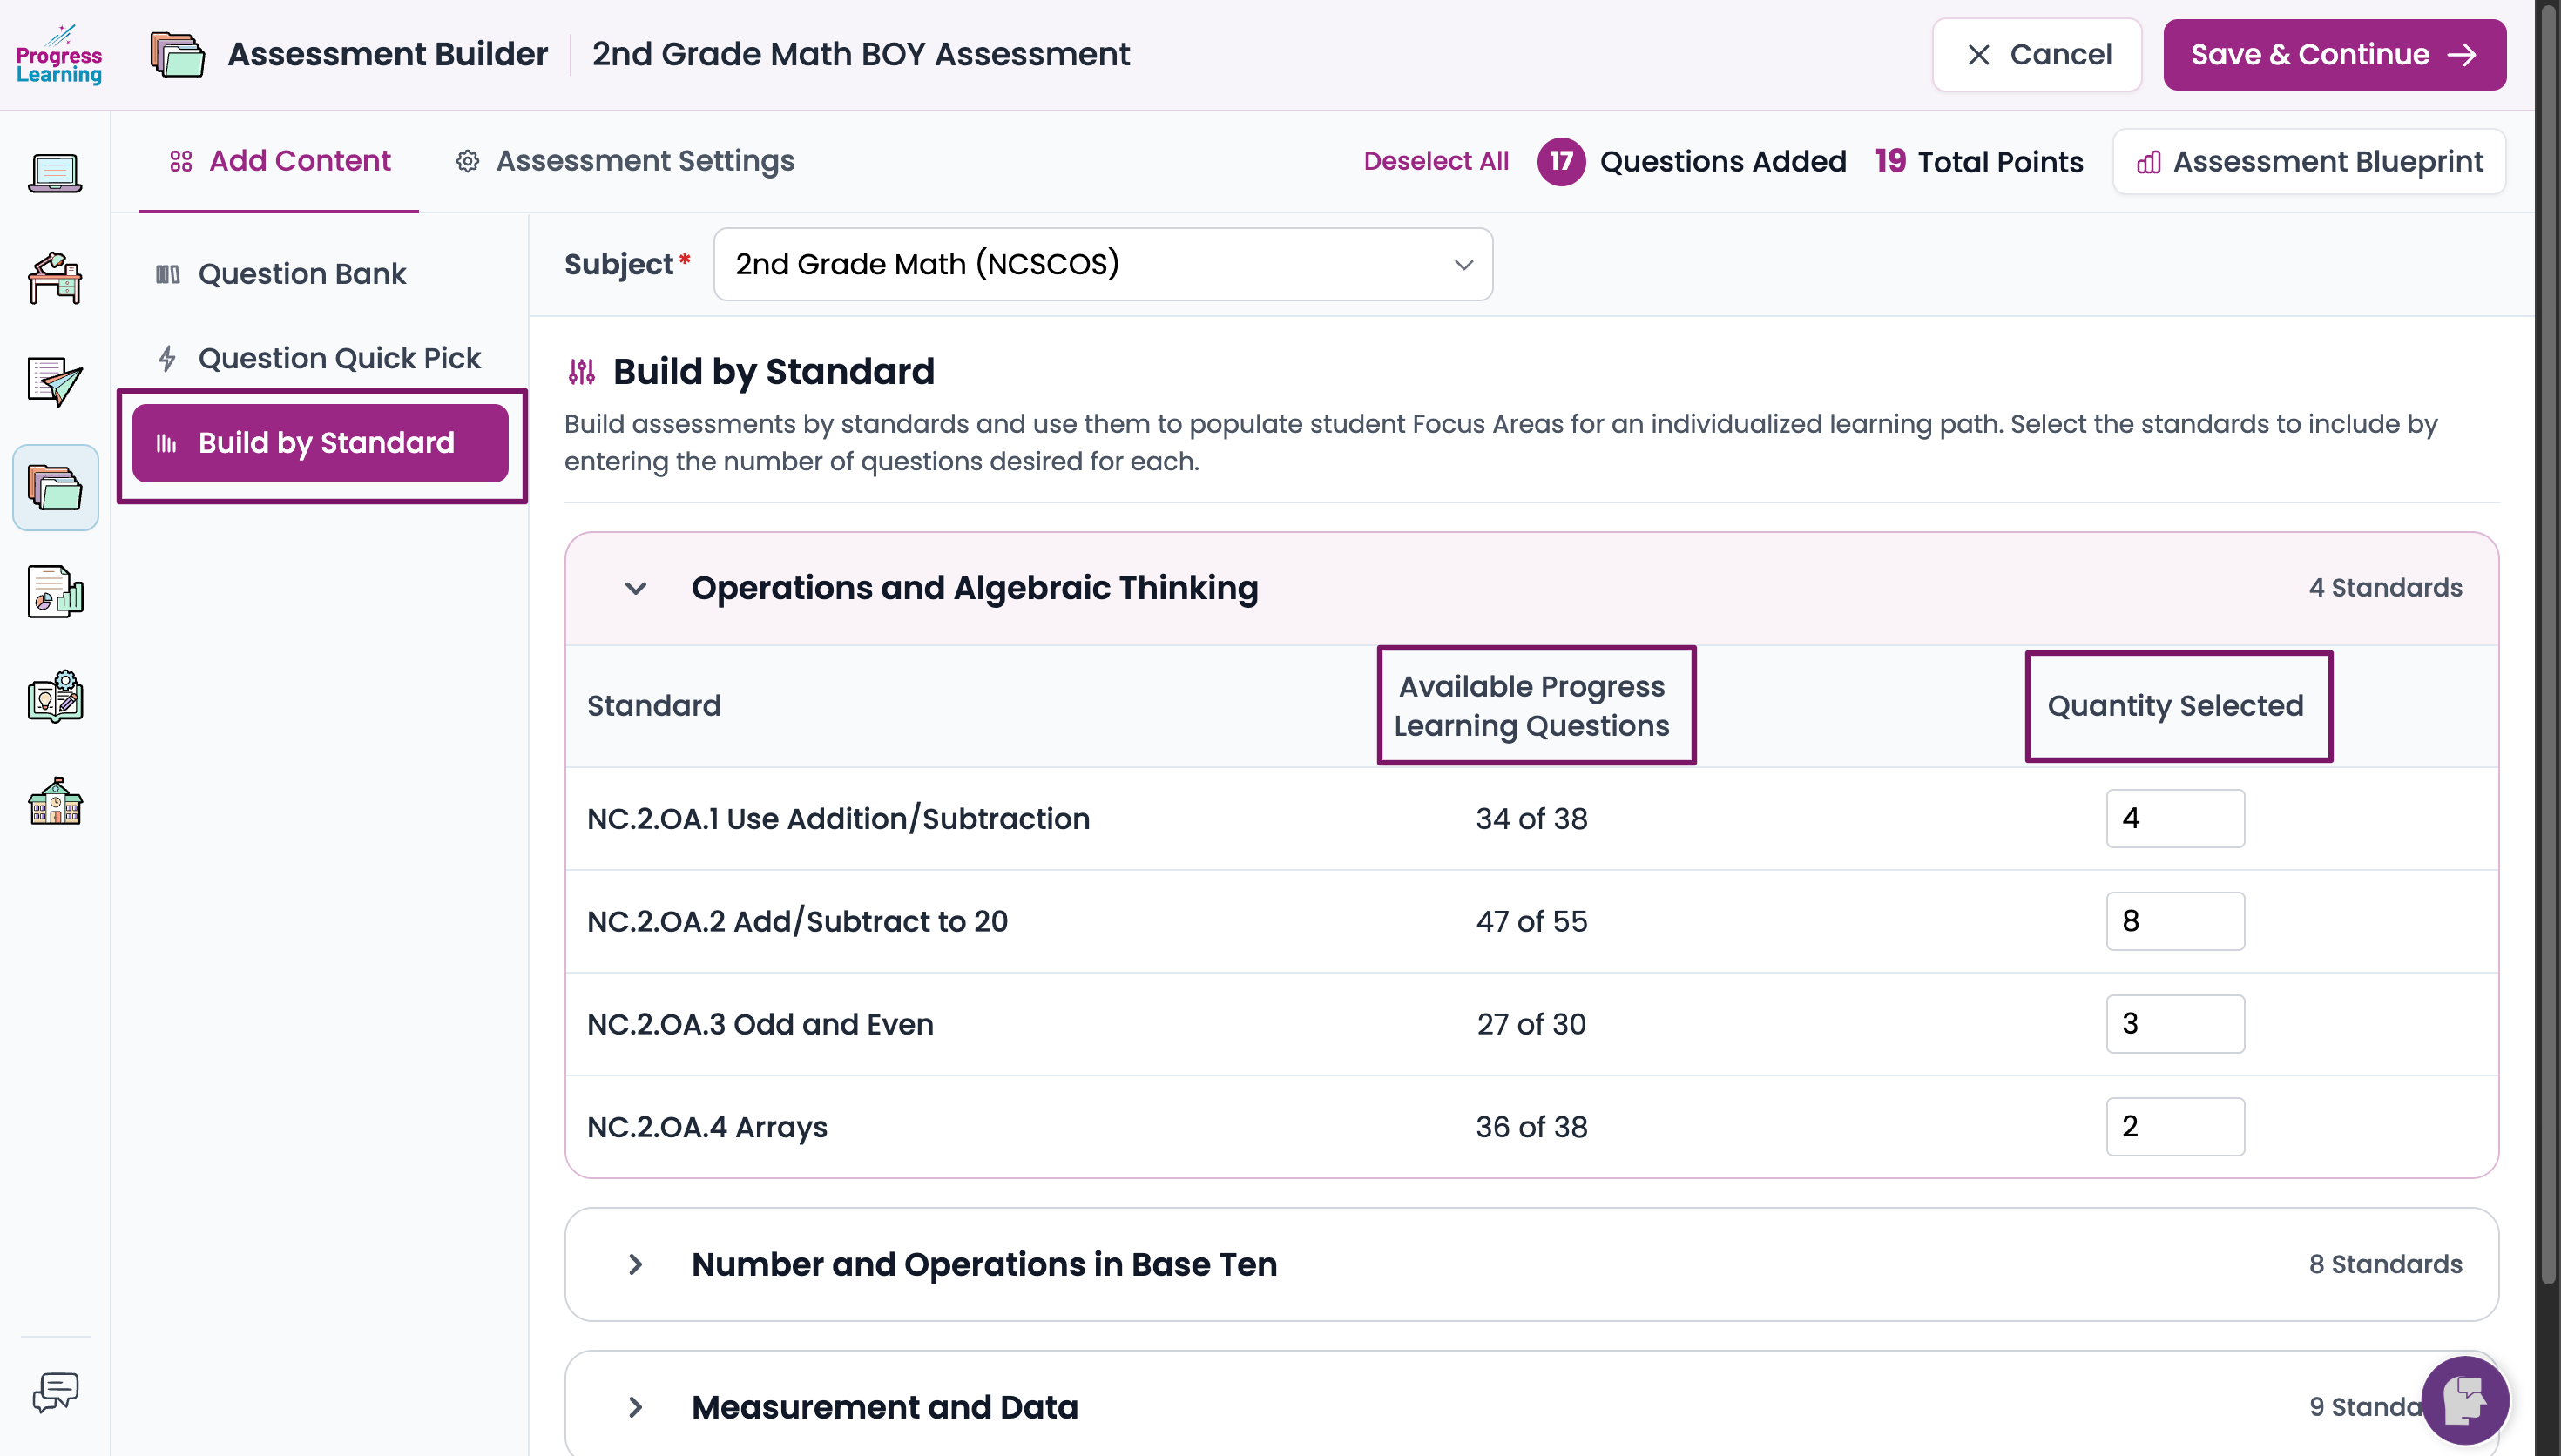
- Click on the Build by Standard tab. You can expand each domain to select how many questions from each standard you want to include in your assessment. The blueprint at the top keeps a cumulative record of how many questions you've selected.
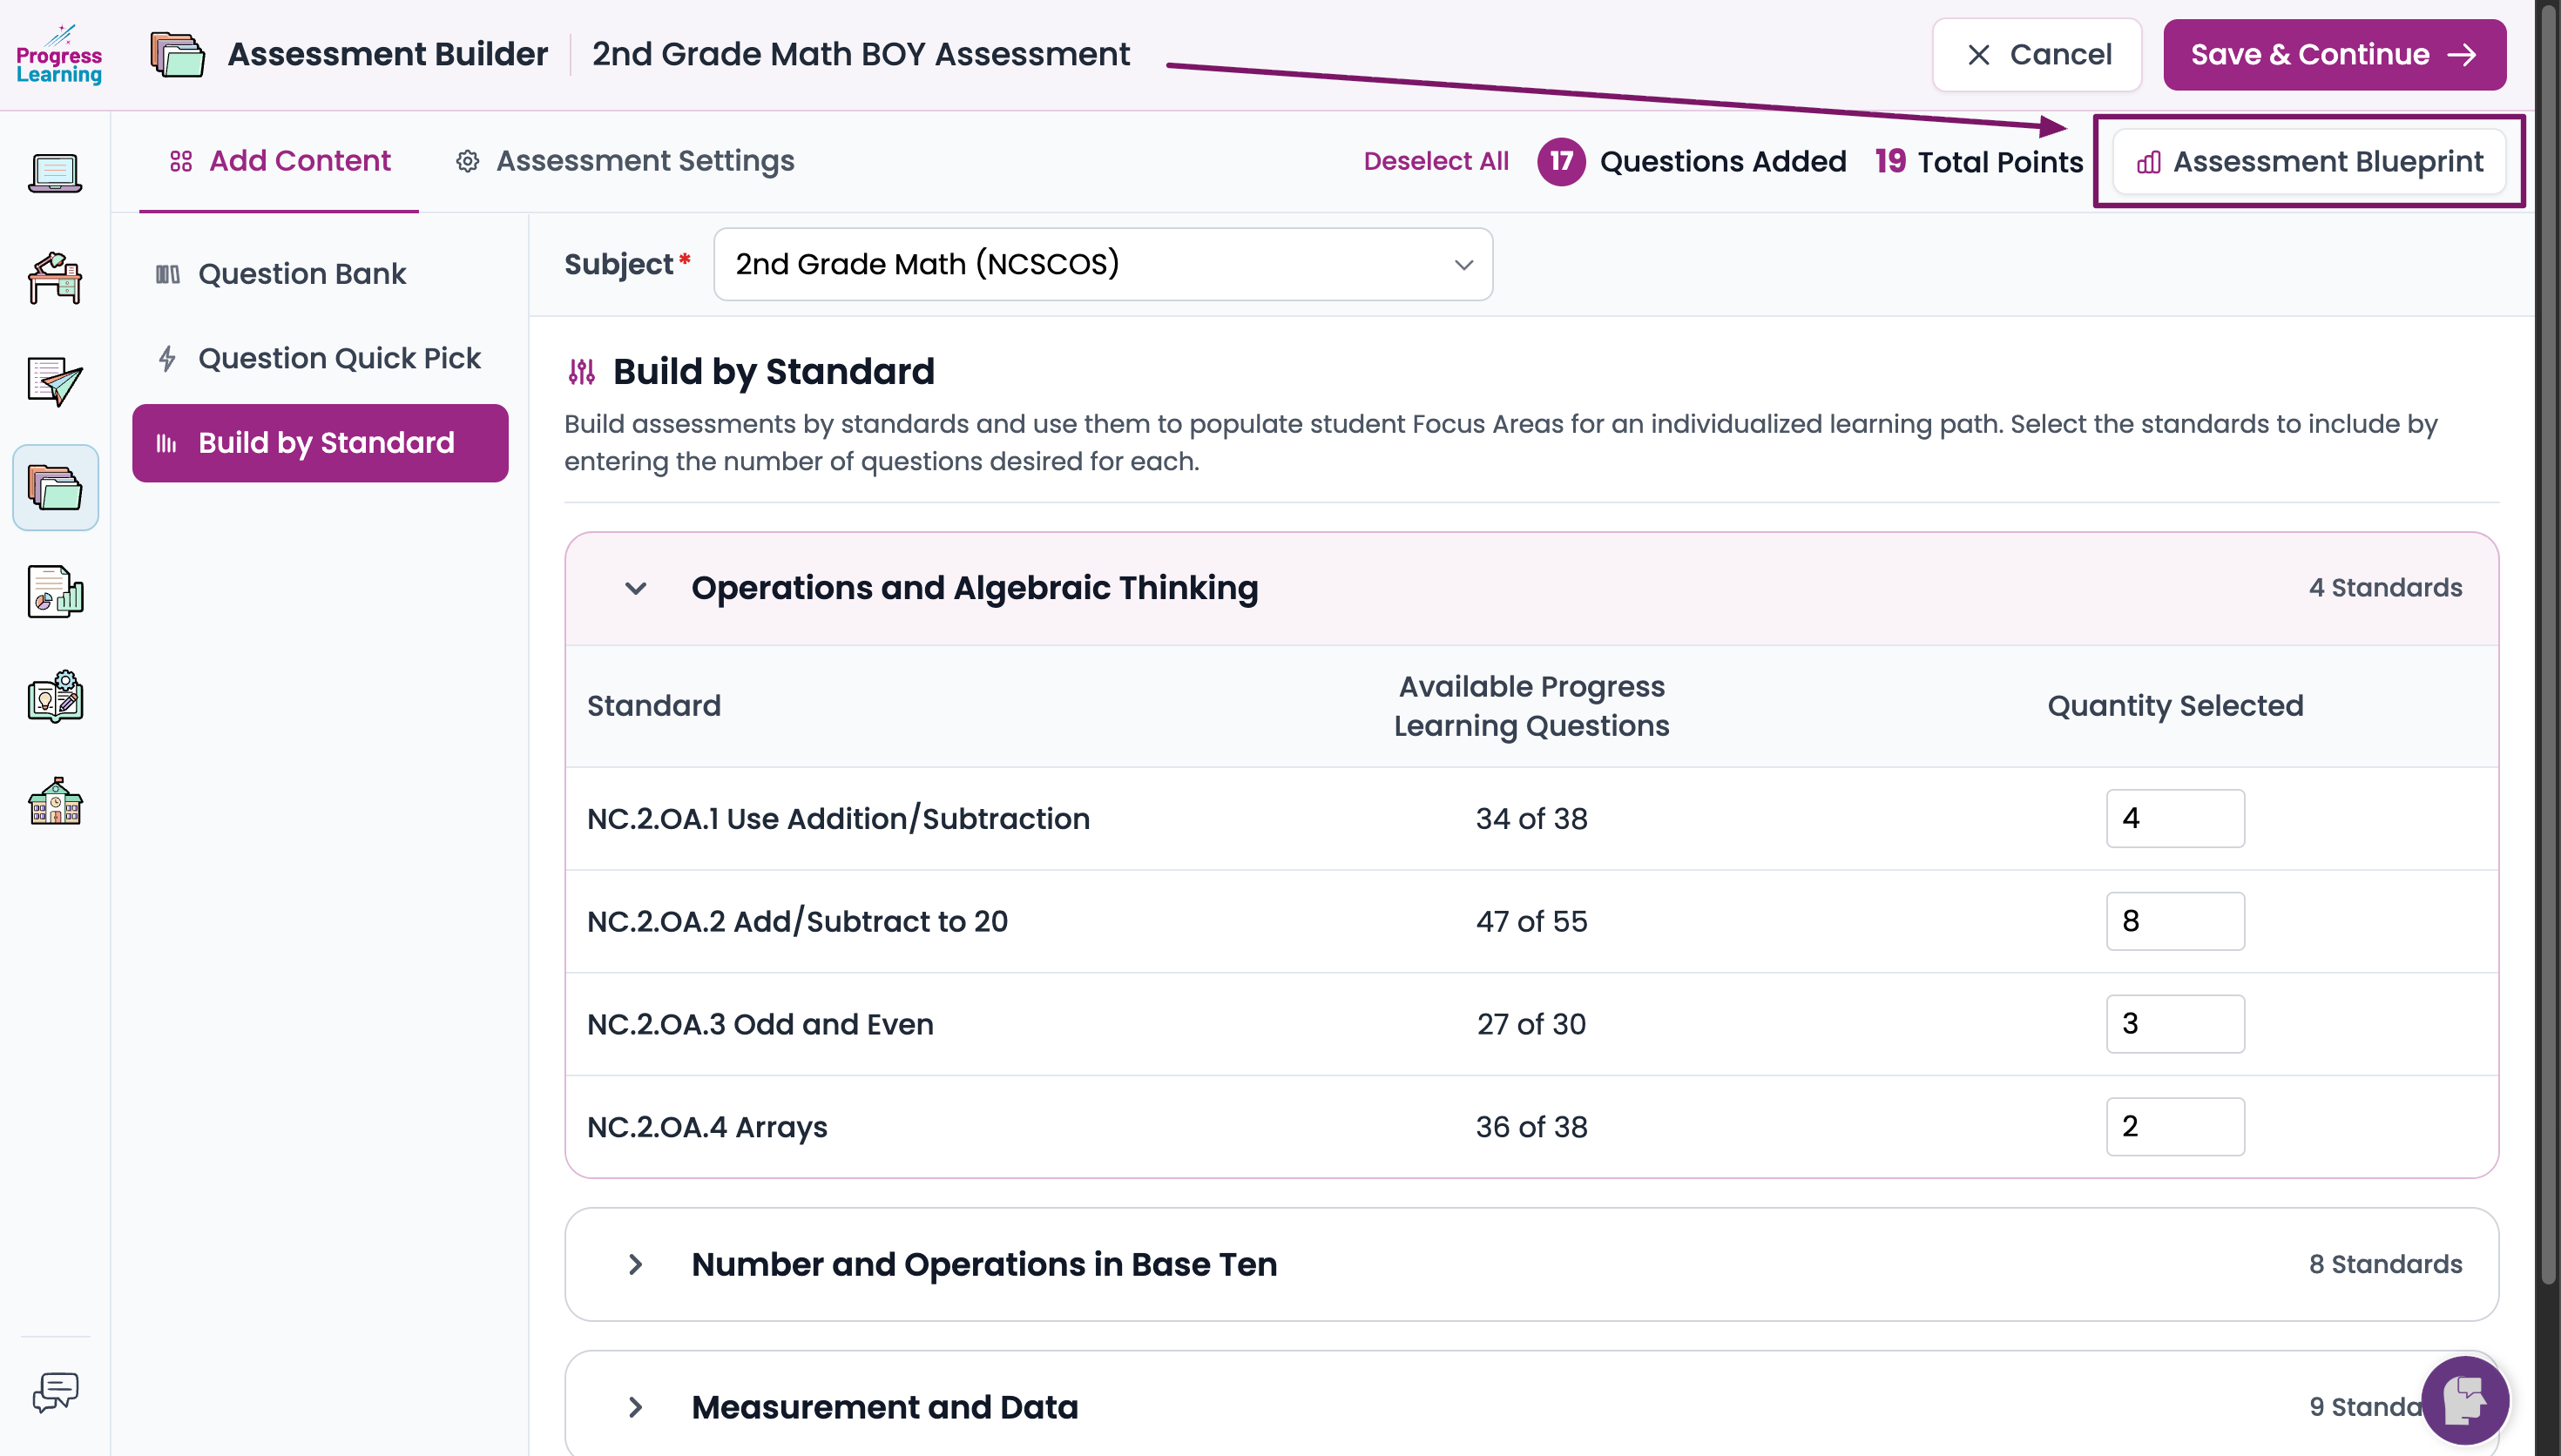
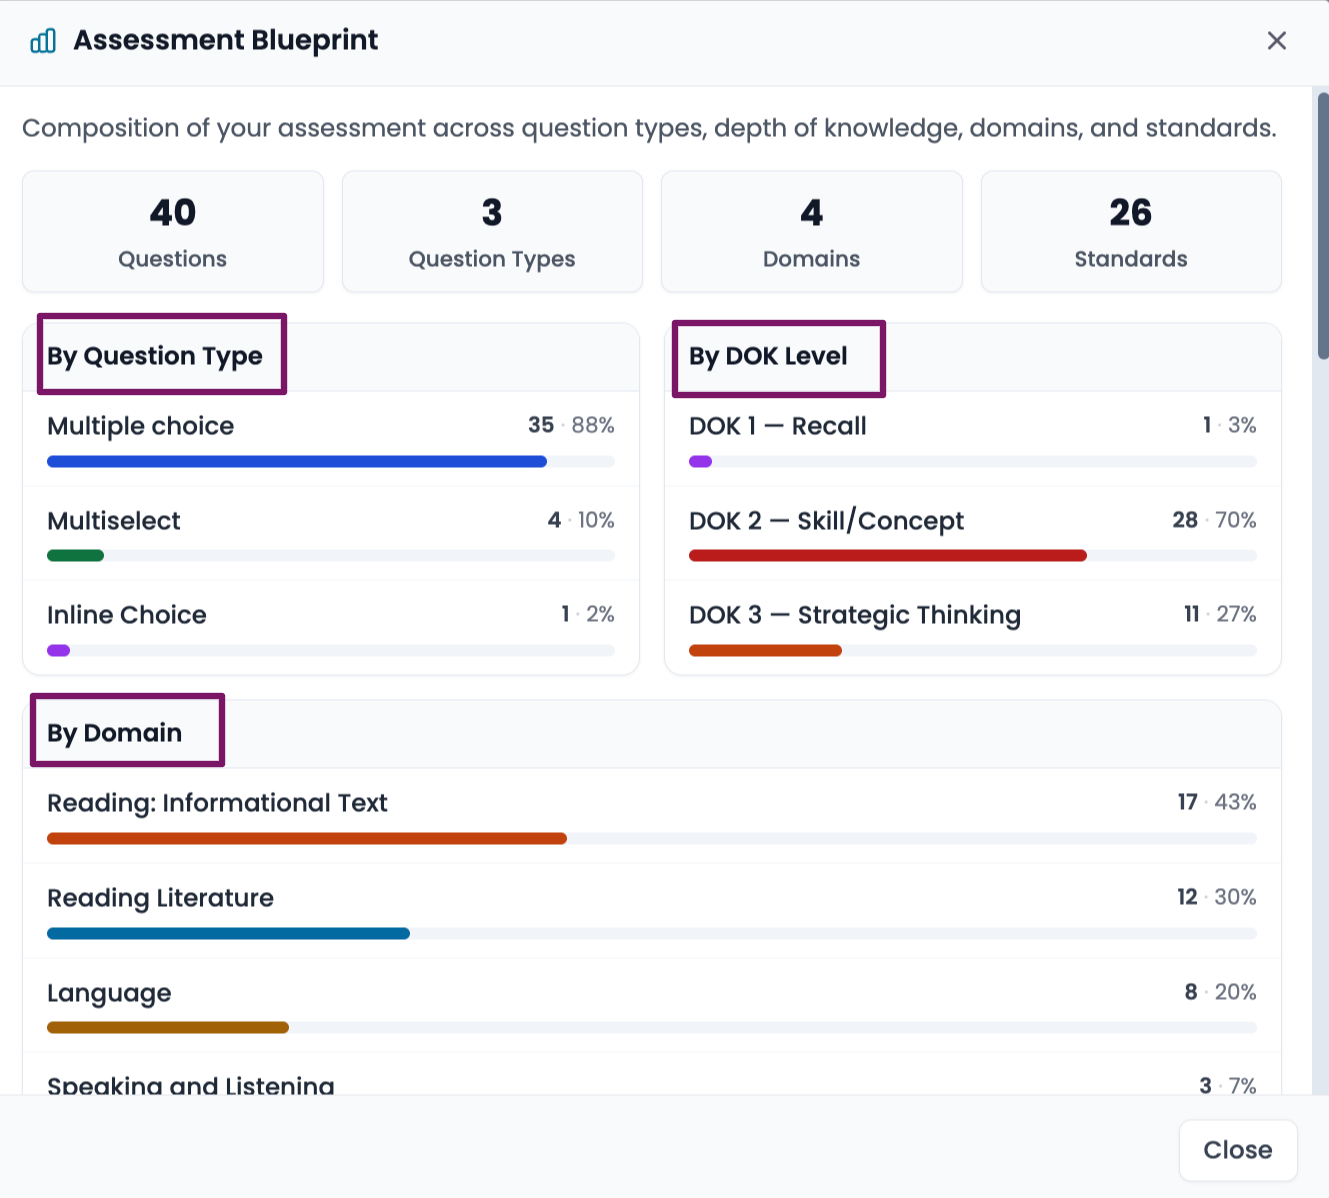
- Click the Assessment Blueprint bar to open a graphical representation of the contents of your assessment broken down by Question Type, Depth of Knowledge, Domain, and Standard.
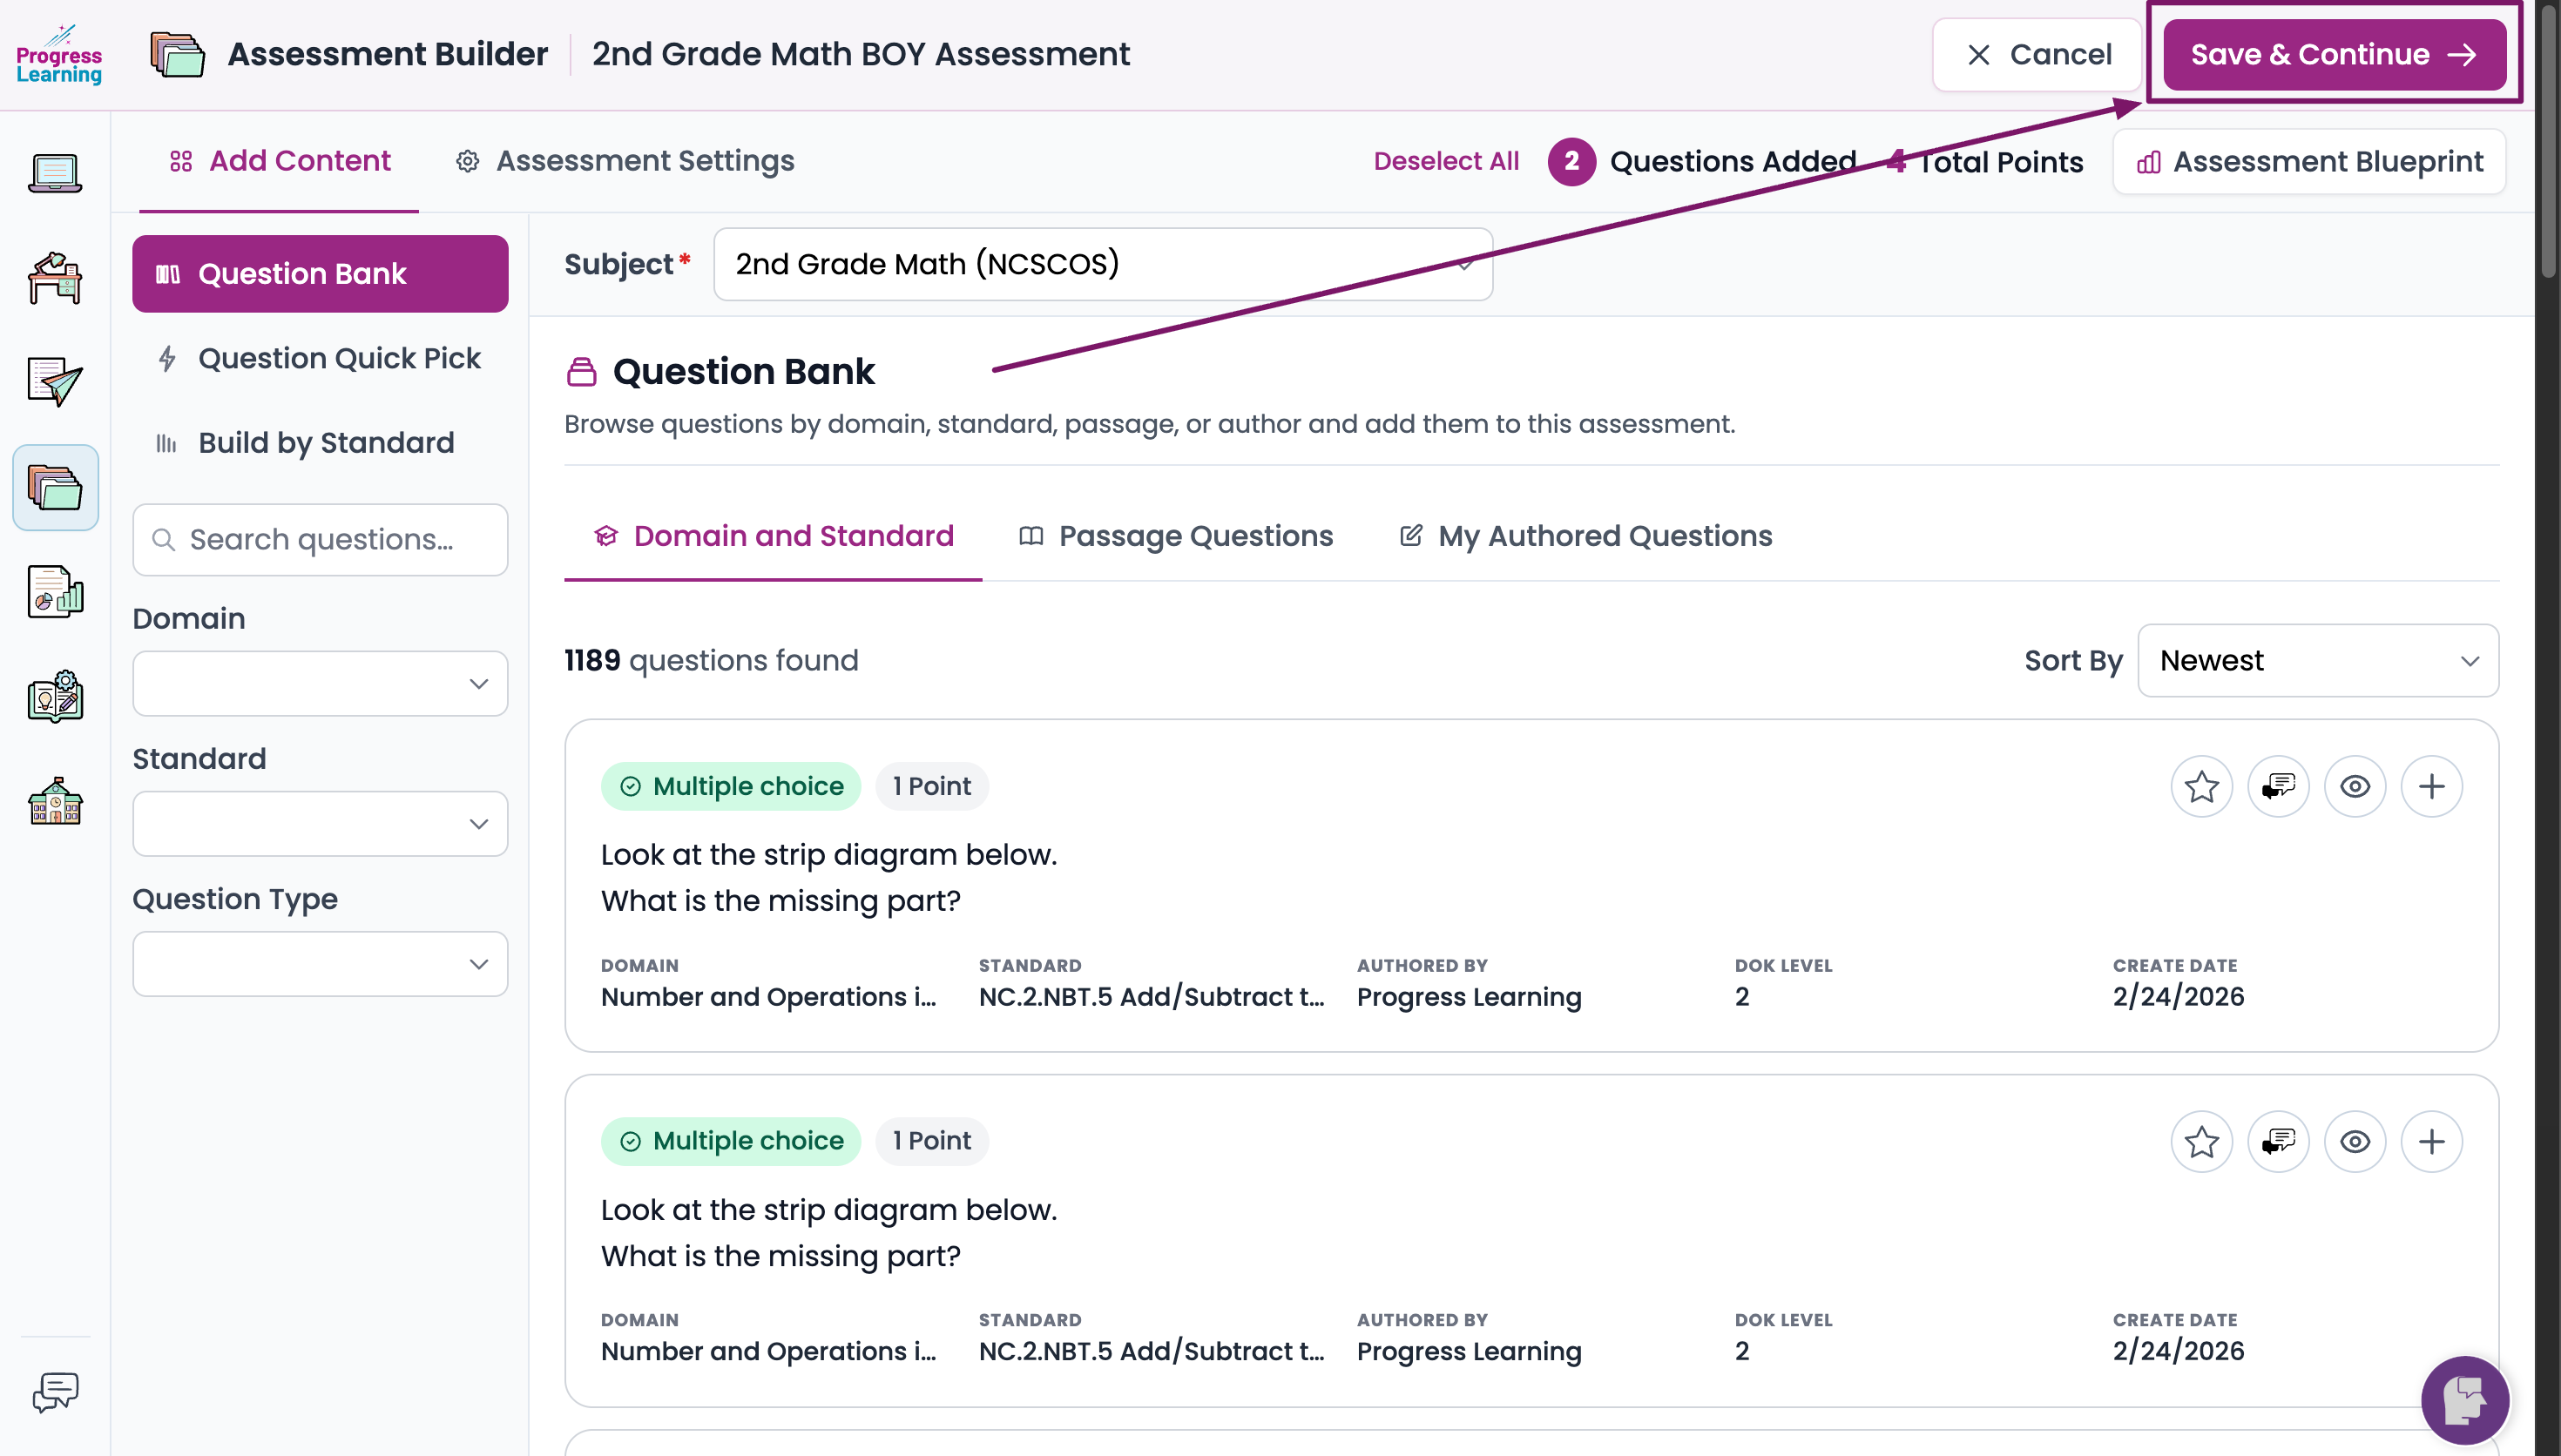
- Preview the assessment.
- Scroll up to the top and click Save and Continue. This will take you to a final preview screen where you can make last-minute edits to your assessment and select your desired assessment settings.
Assessment Settings
- Assessment Name: You provided the name in step 2. You can change the name here.
- Tags: A tag is a keyword or phrase to group and search for specific assessments. Click here for information on Organizing Your Assessments.
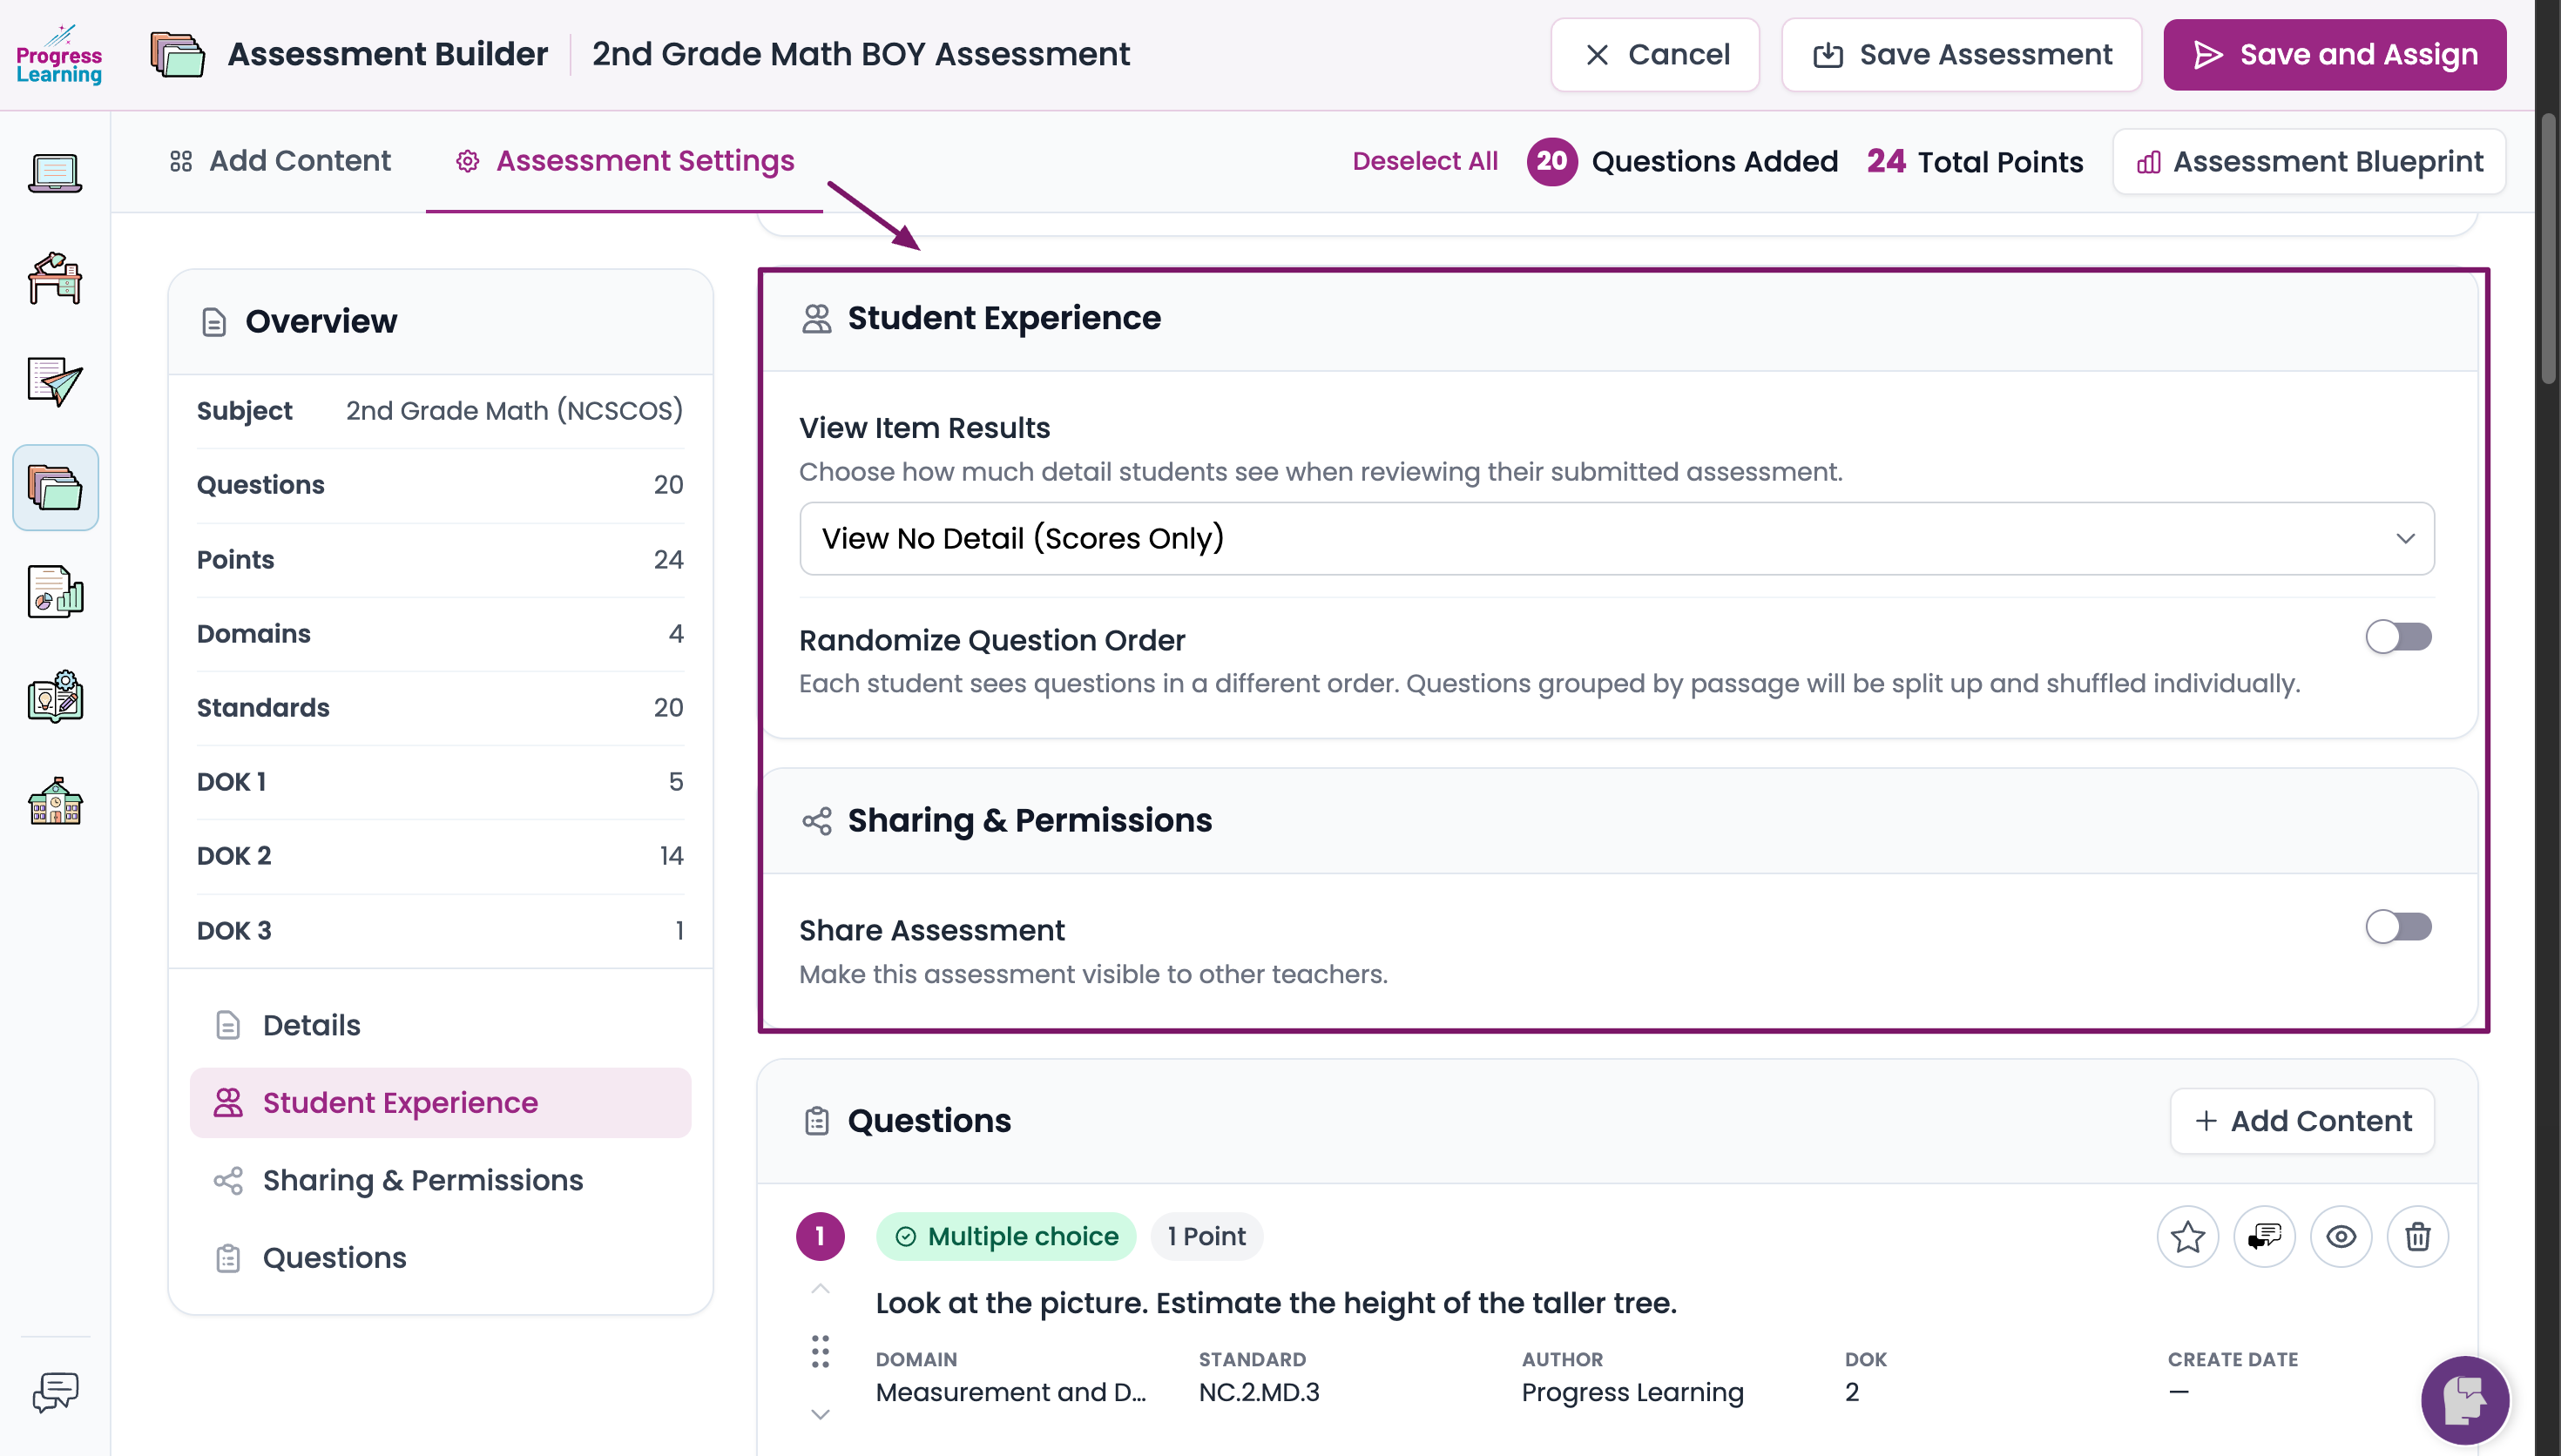
- View Item Results:
- View No Detail - The students only see their overall score and a list of the weakest standards.
- Questions Only - The students can see their overall score and can review the questions, but they cannot see the correct answer choices.
- Questions and Answers - The student can see their overall score and can review the questions, the correct answer choices, and the answer explanations.
- Randomize Question Order Toggle: This option shuffles the questions for students. Teachers can use this feature to minimize cheating.
- Share Assessment Toggle: Select this option to make the assessment accessible to other teachers in your school. Other teachers may view, assign, and duplicate the assessment, but they cannot make changes to your assessment.
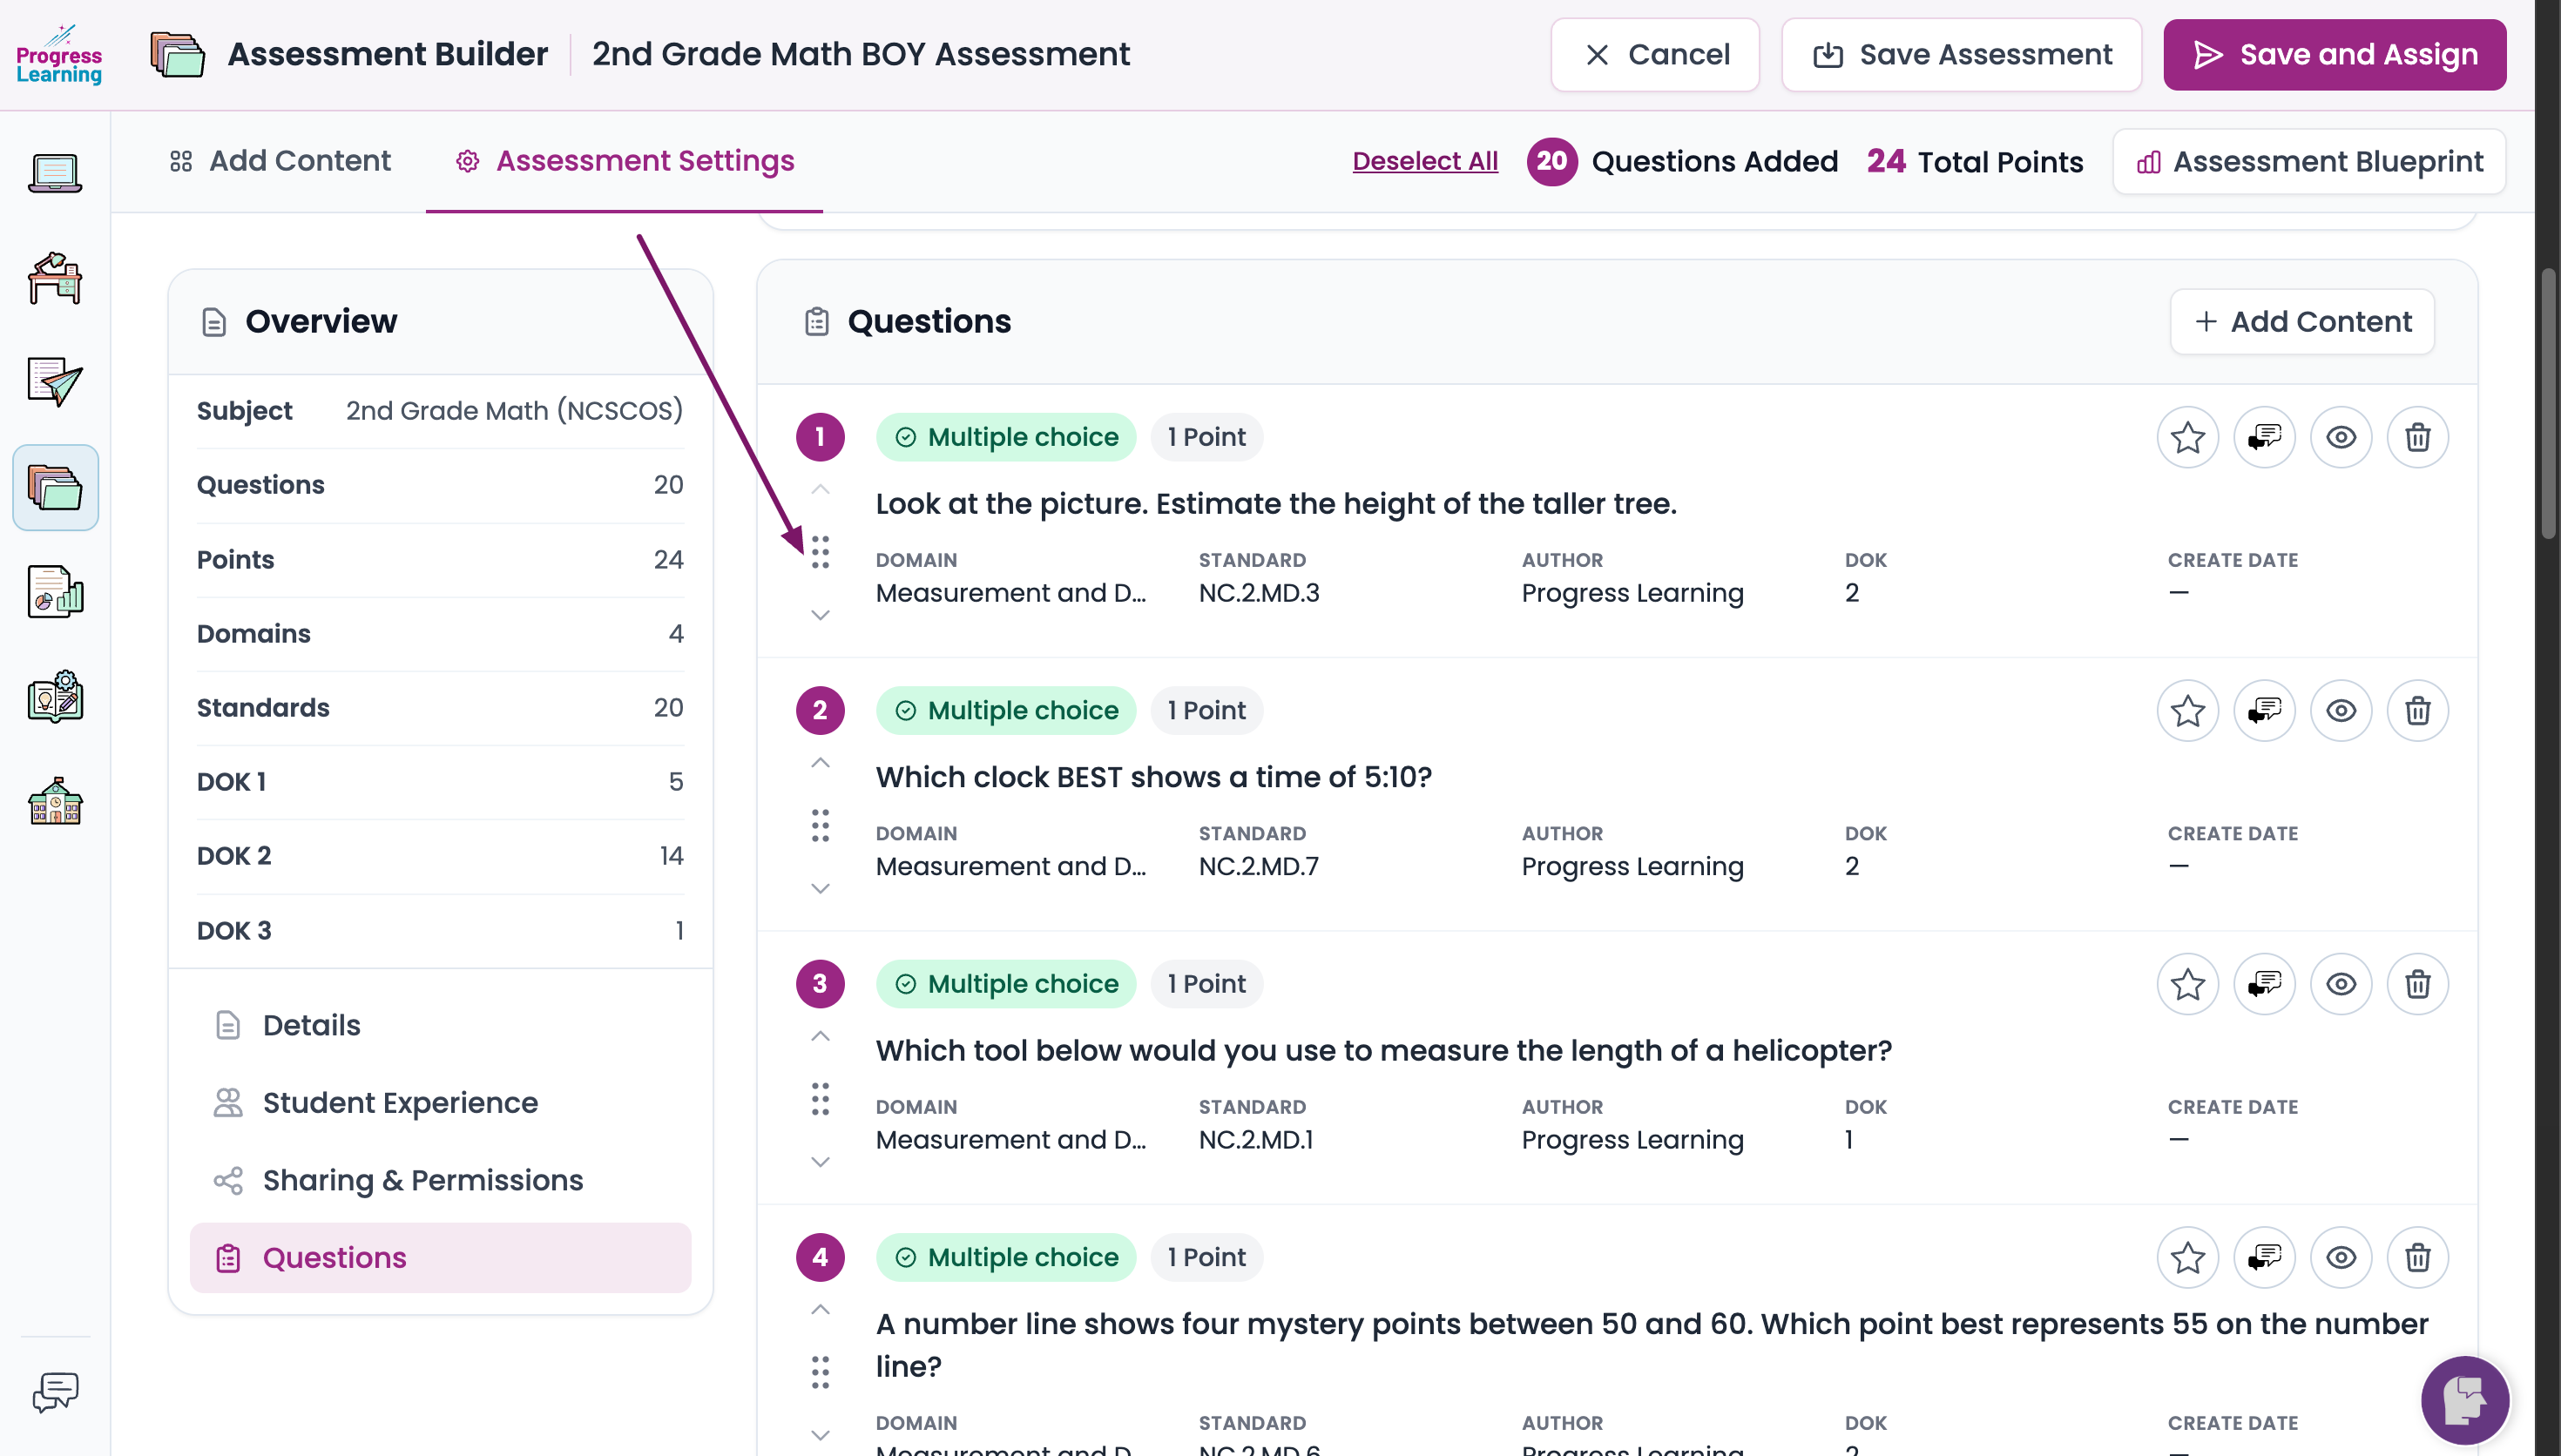
- You can change the order of the questions by clicking and dragging the dots next to the left of the question.
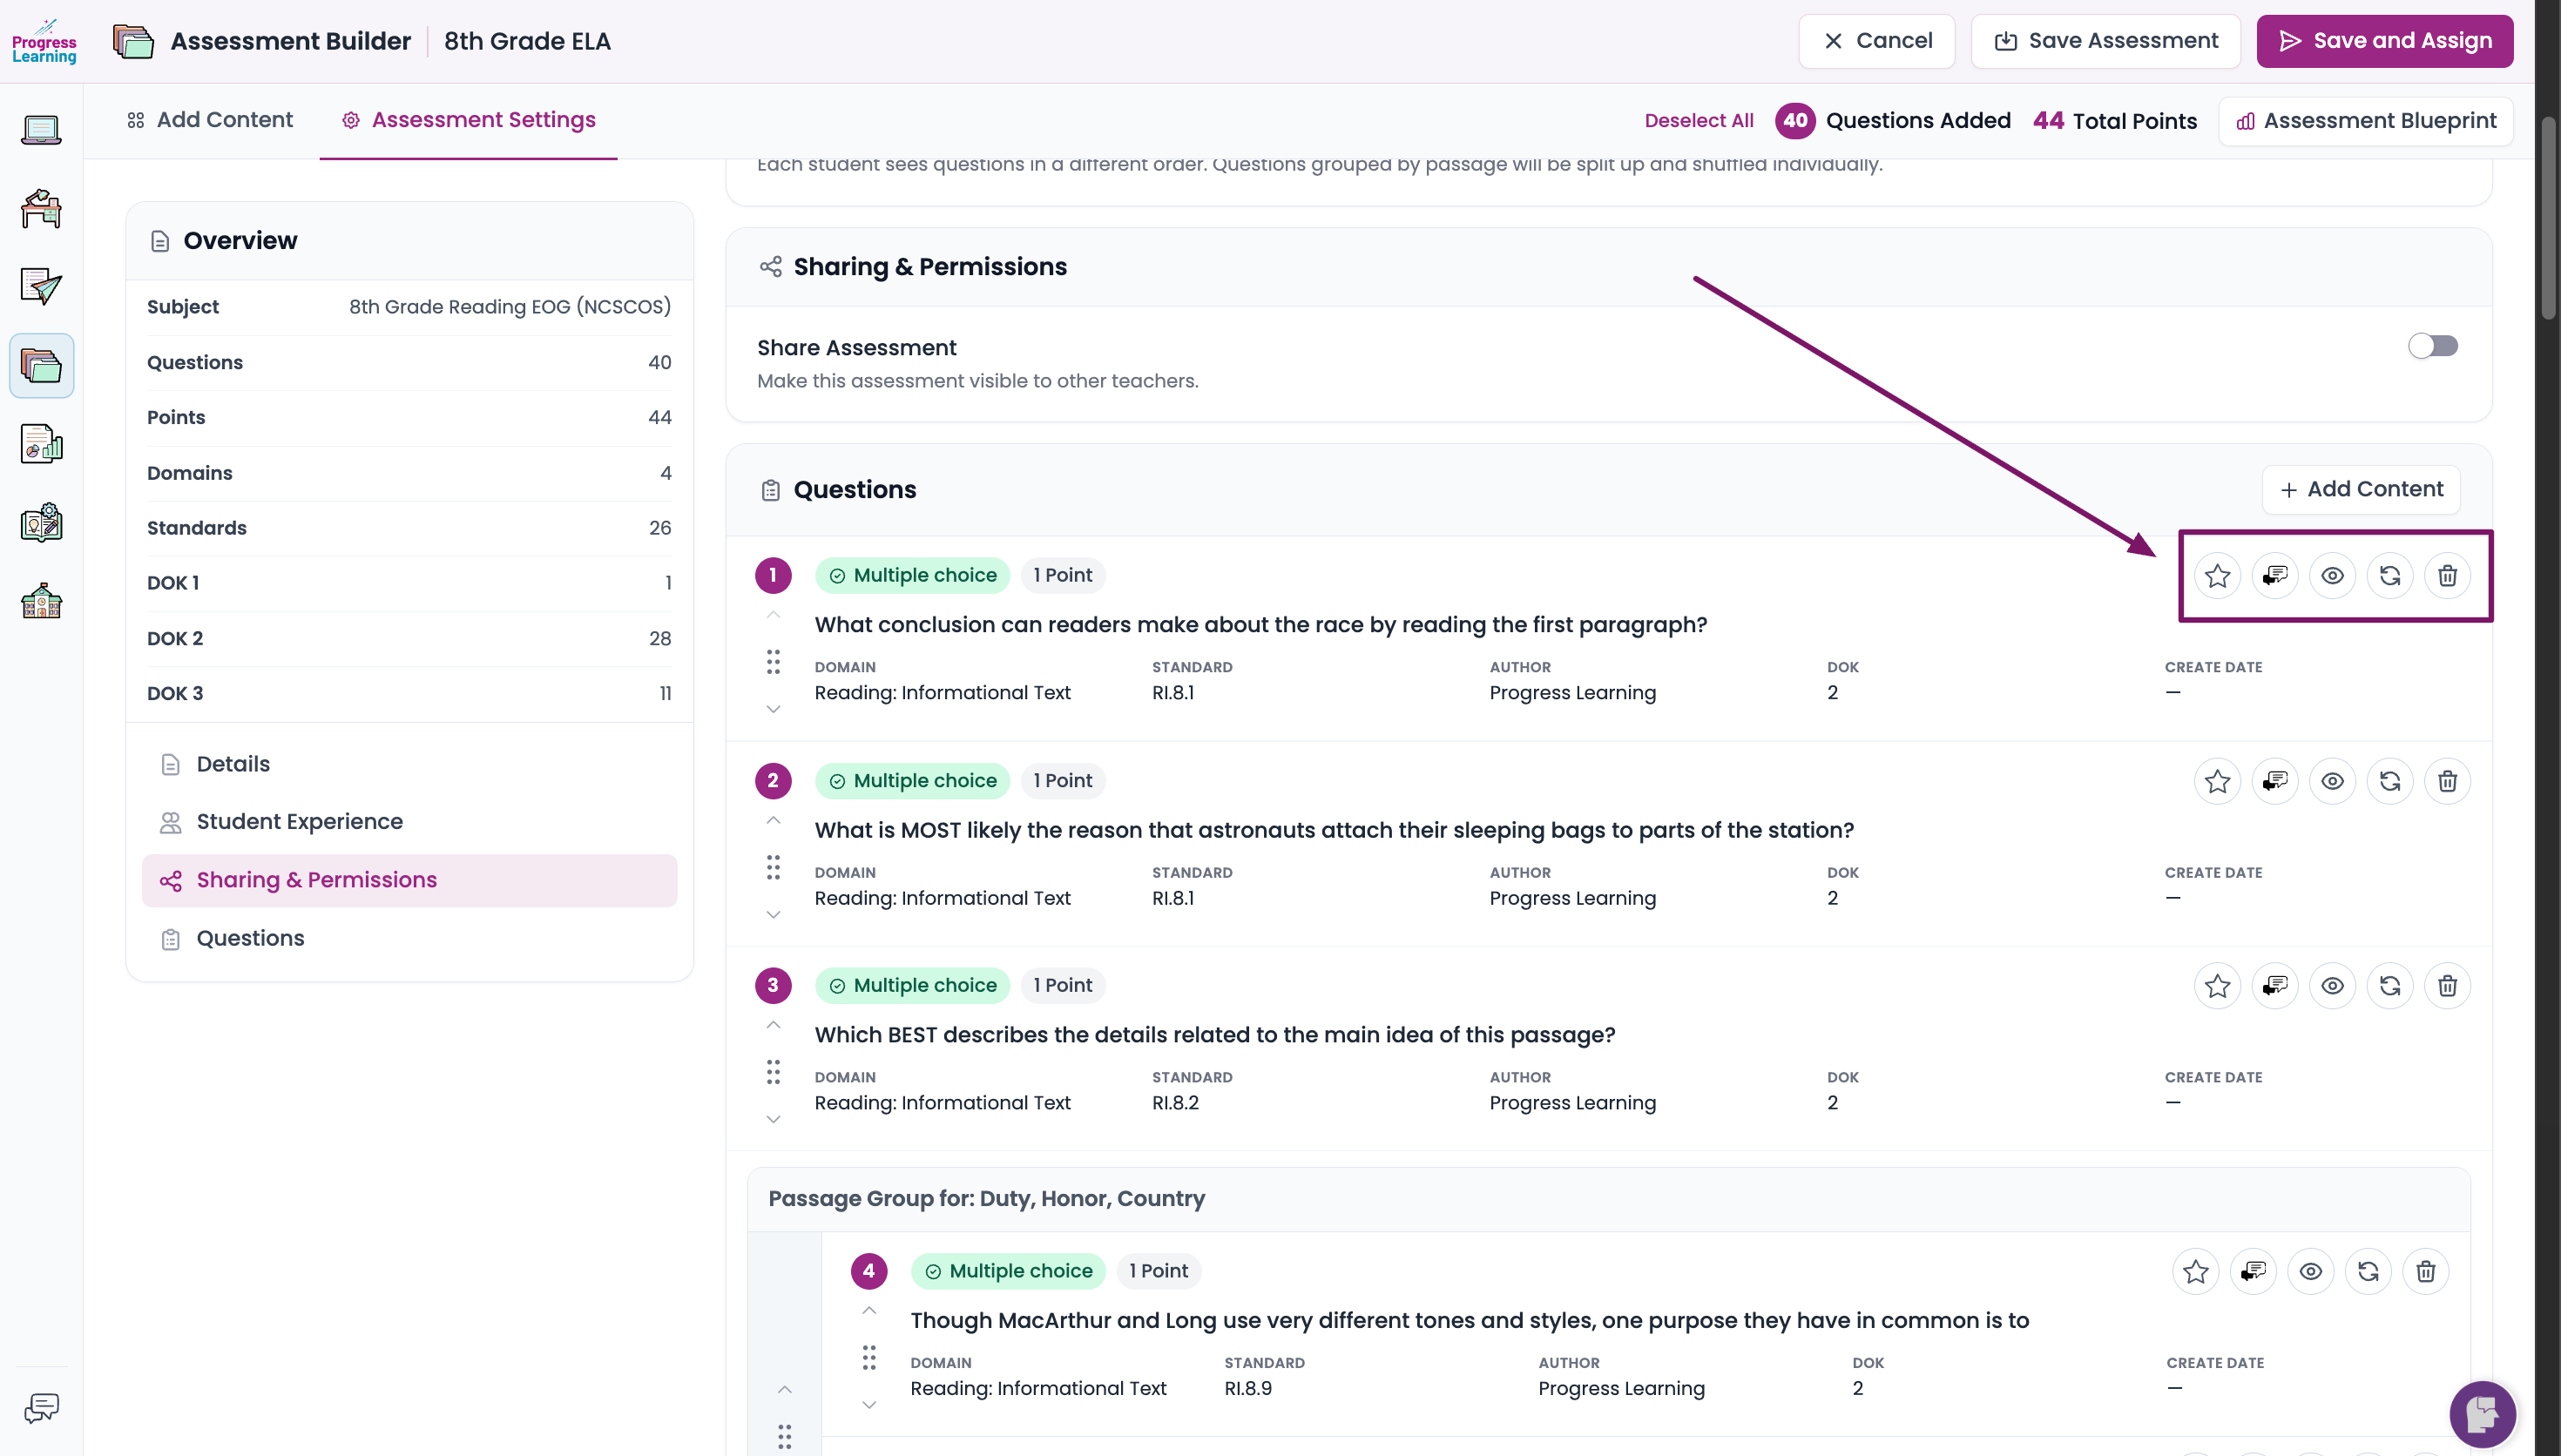
- Using the icons on the right, you can add to favorites, submit feedback to Progress Learning, preview the question, replace the question, and remove the question.
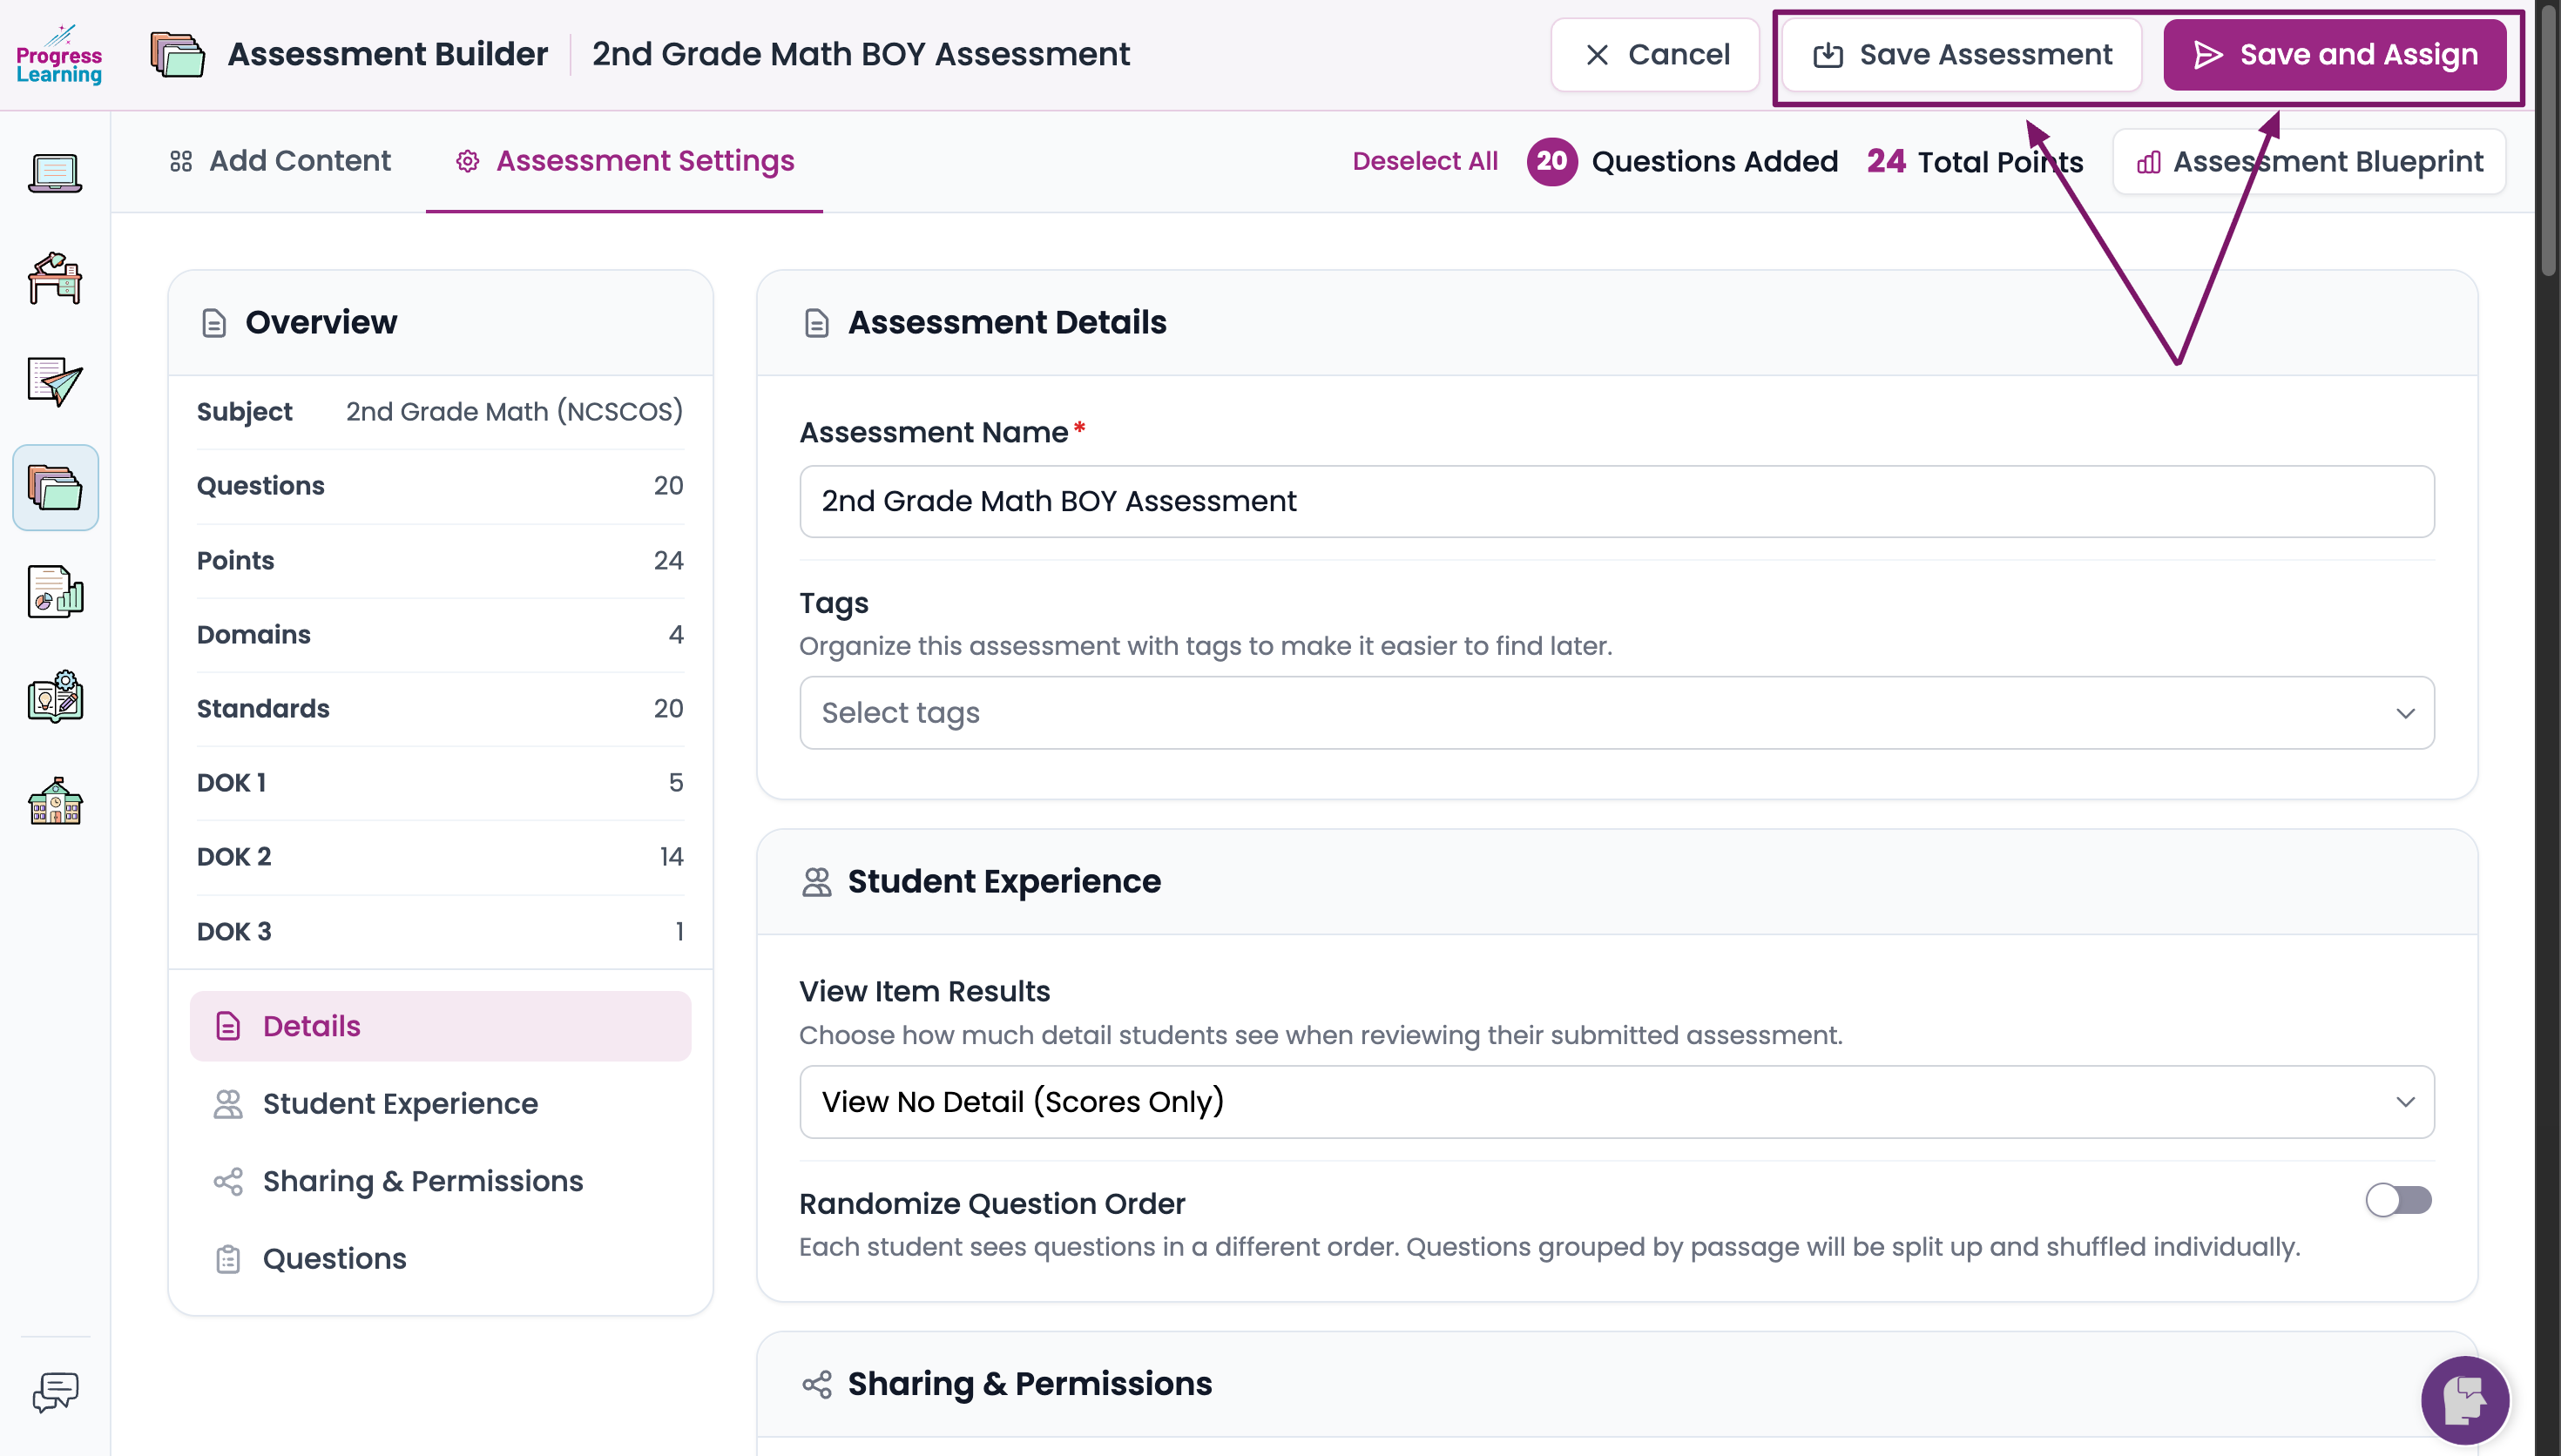
- Save the Assessment.
- Save Assessment: Once you've previewed your assessment and you are satisfied with your choices, you can save it by clicking Save Assessment. You will be taken to the Assessment Bank screen. Your new assessment will be on the list to be assigned later.
- Save and Assign: If you are ready to assign it to students now, click Save and Assign.
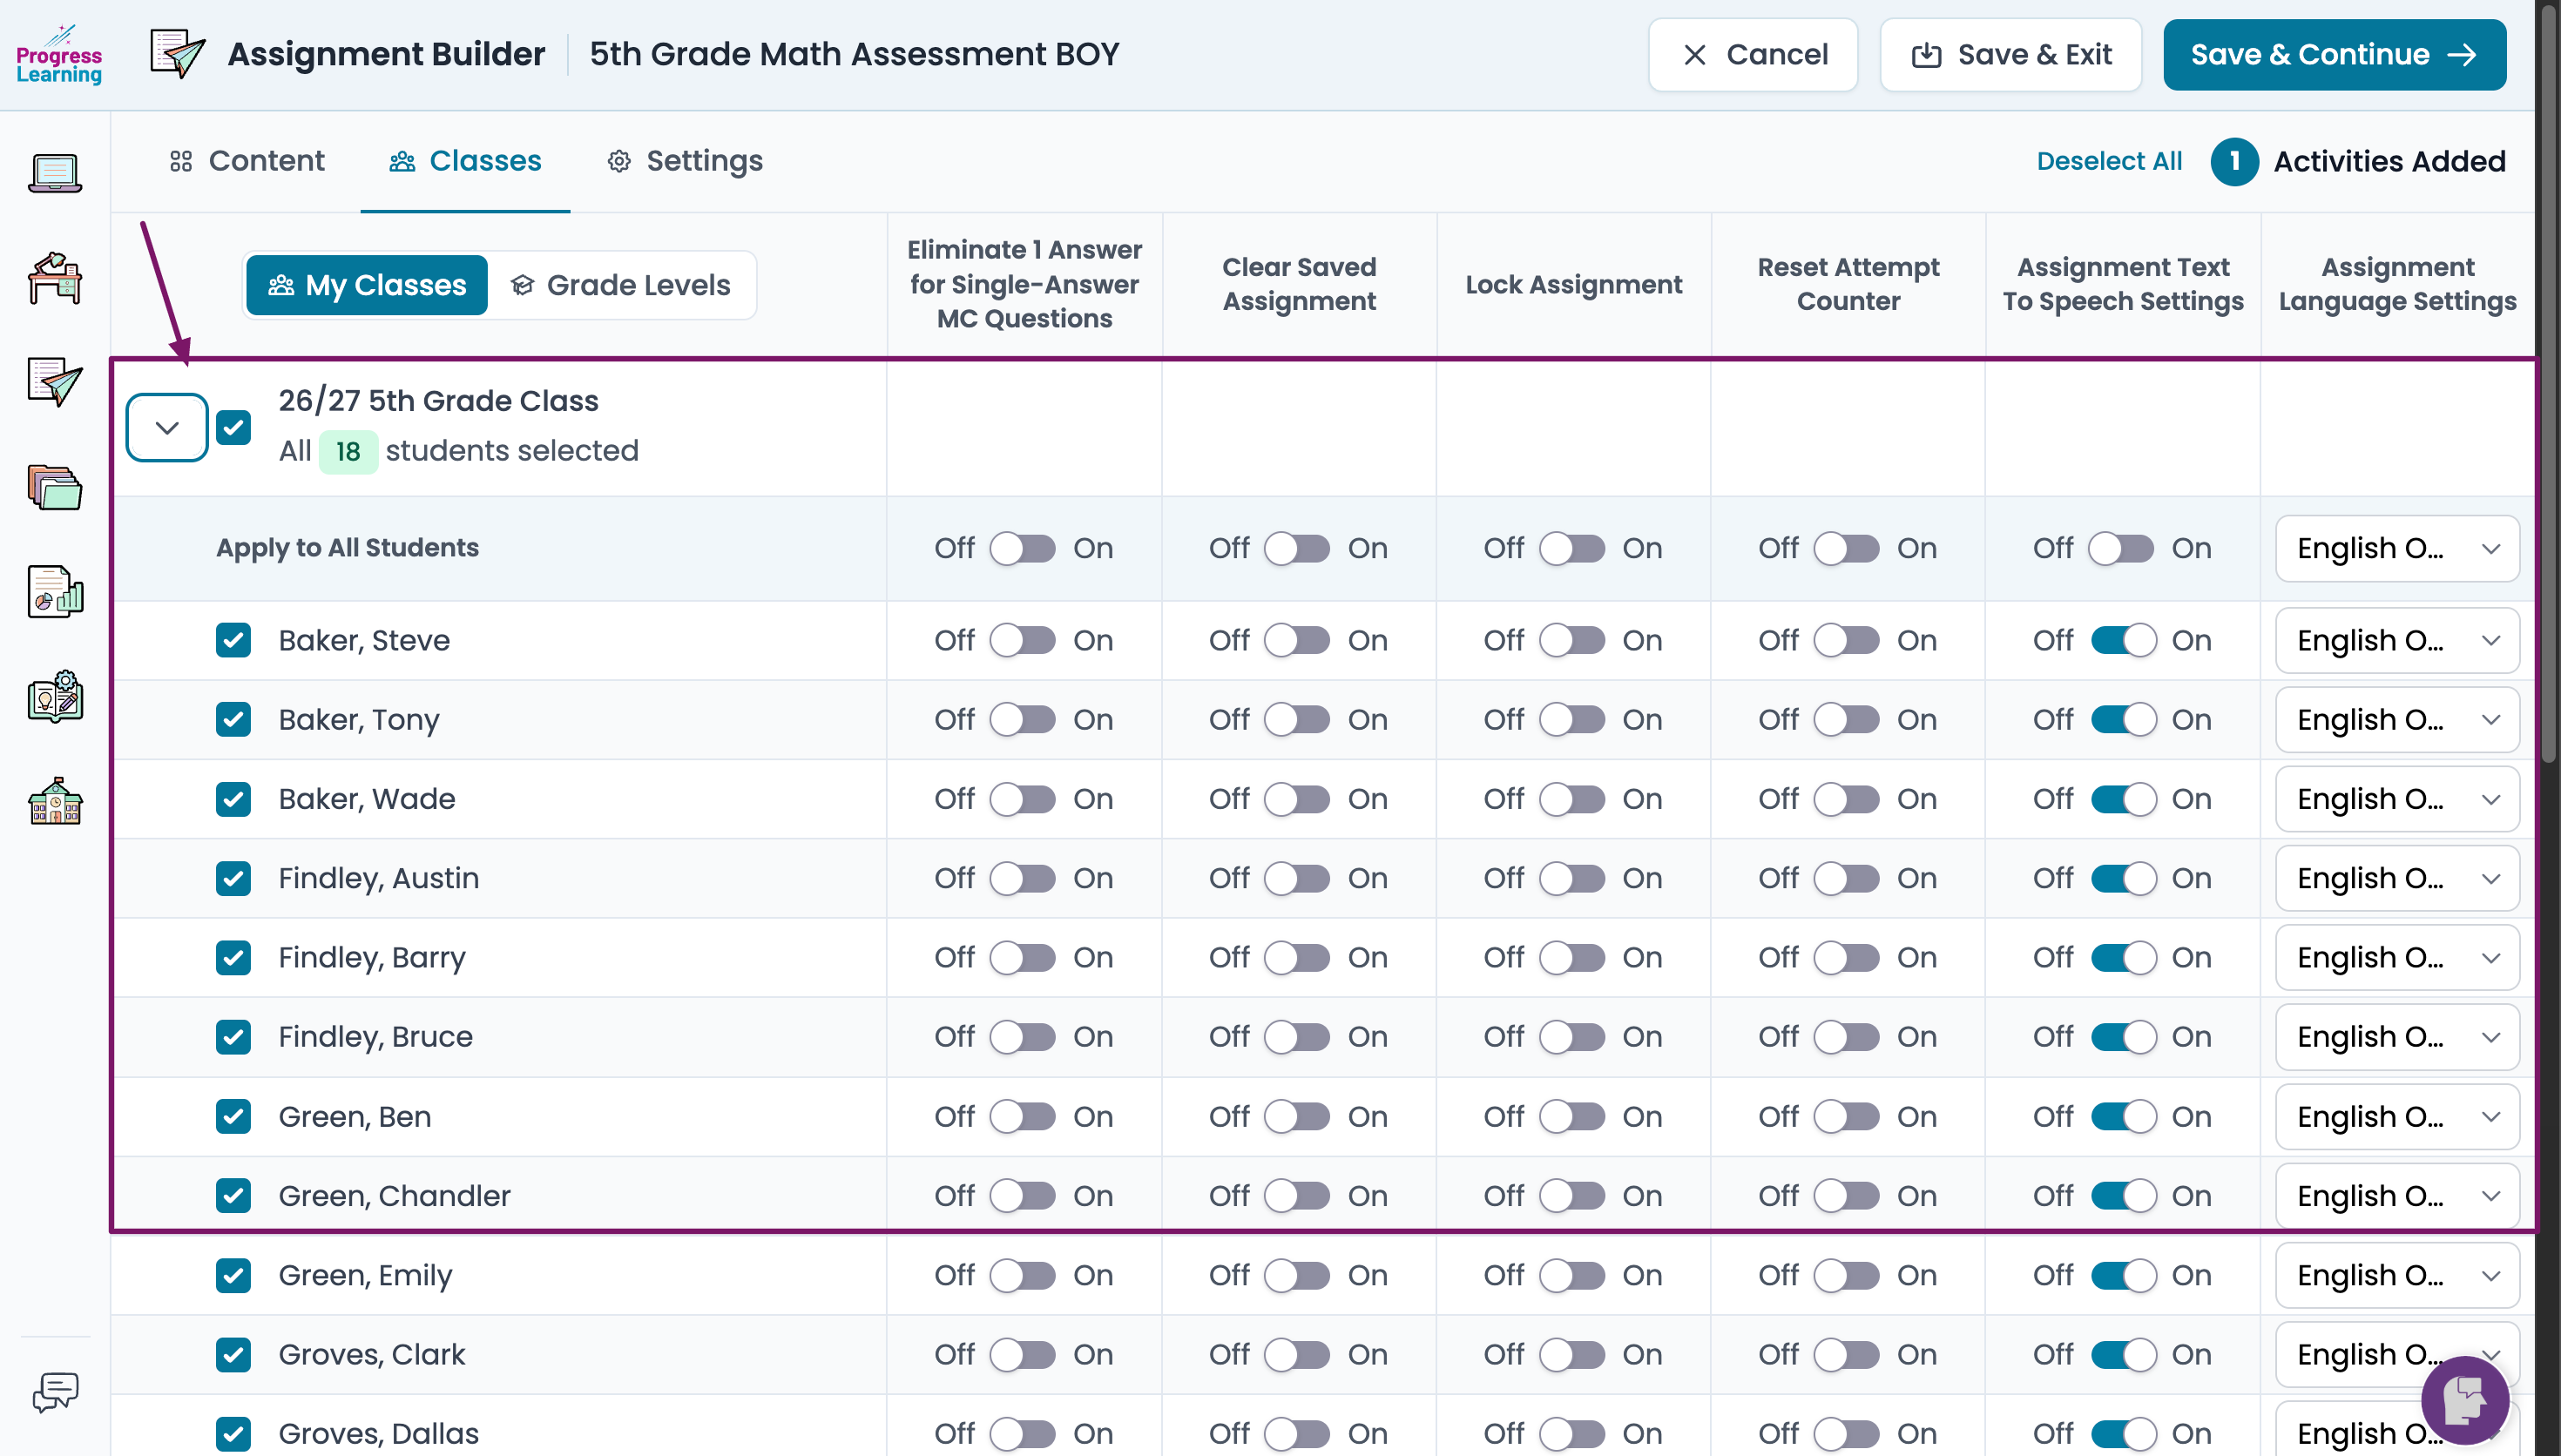
- On the Classes tab, check the box next to the classes to which you are assigning this assessment. Click the carat next to the class name to view each student and set their accommodations. Check the boxes to indicate which students will receive the assessment and toggle each accommodation blue to indicate the appropriate accommodations (reduced answer choices, text-to-speech). Use the drop-down menu to select the language setting for each student. Click Save and Continue.
- Settings Tab
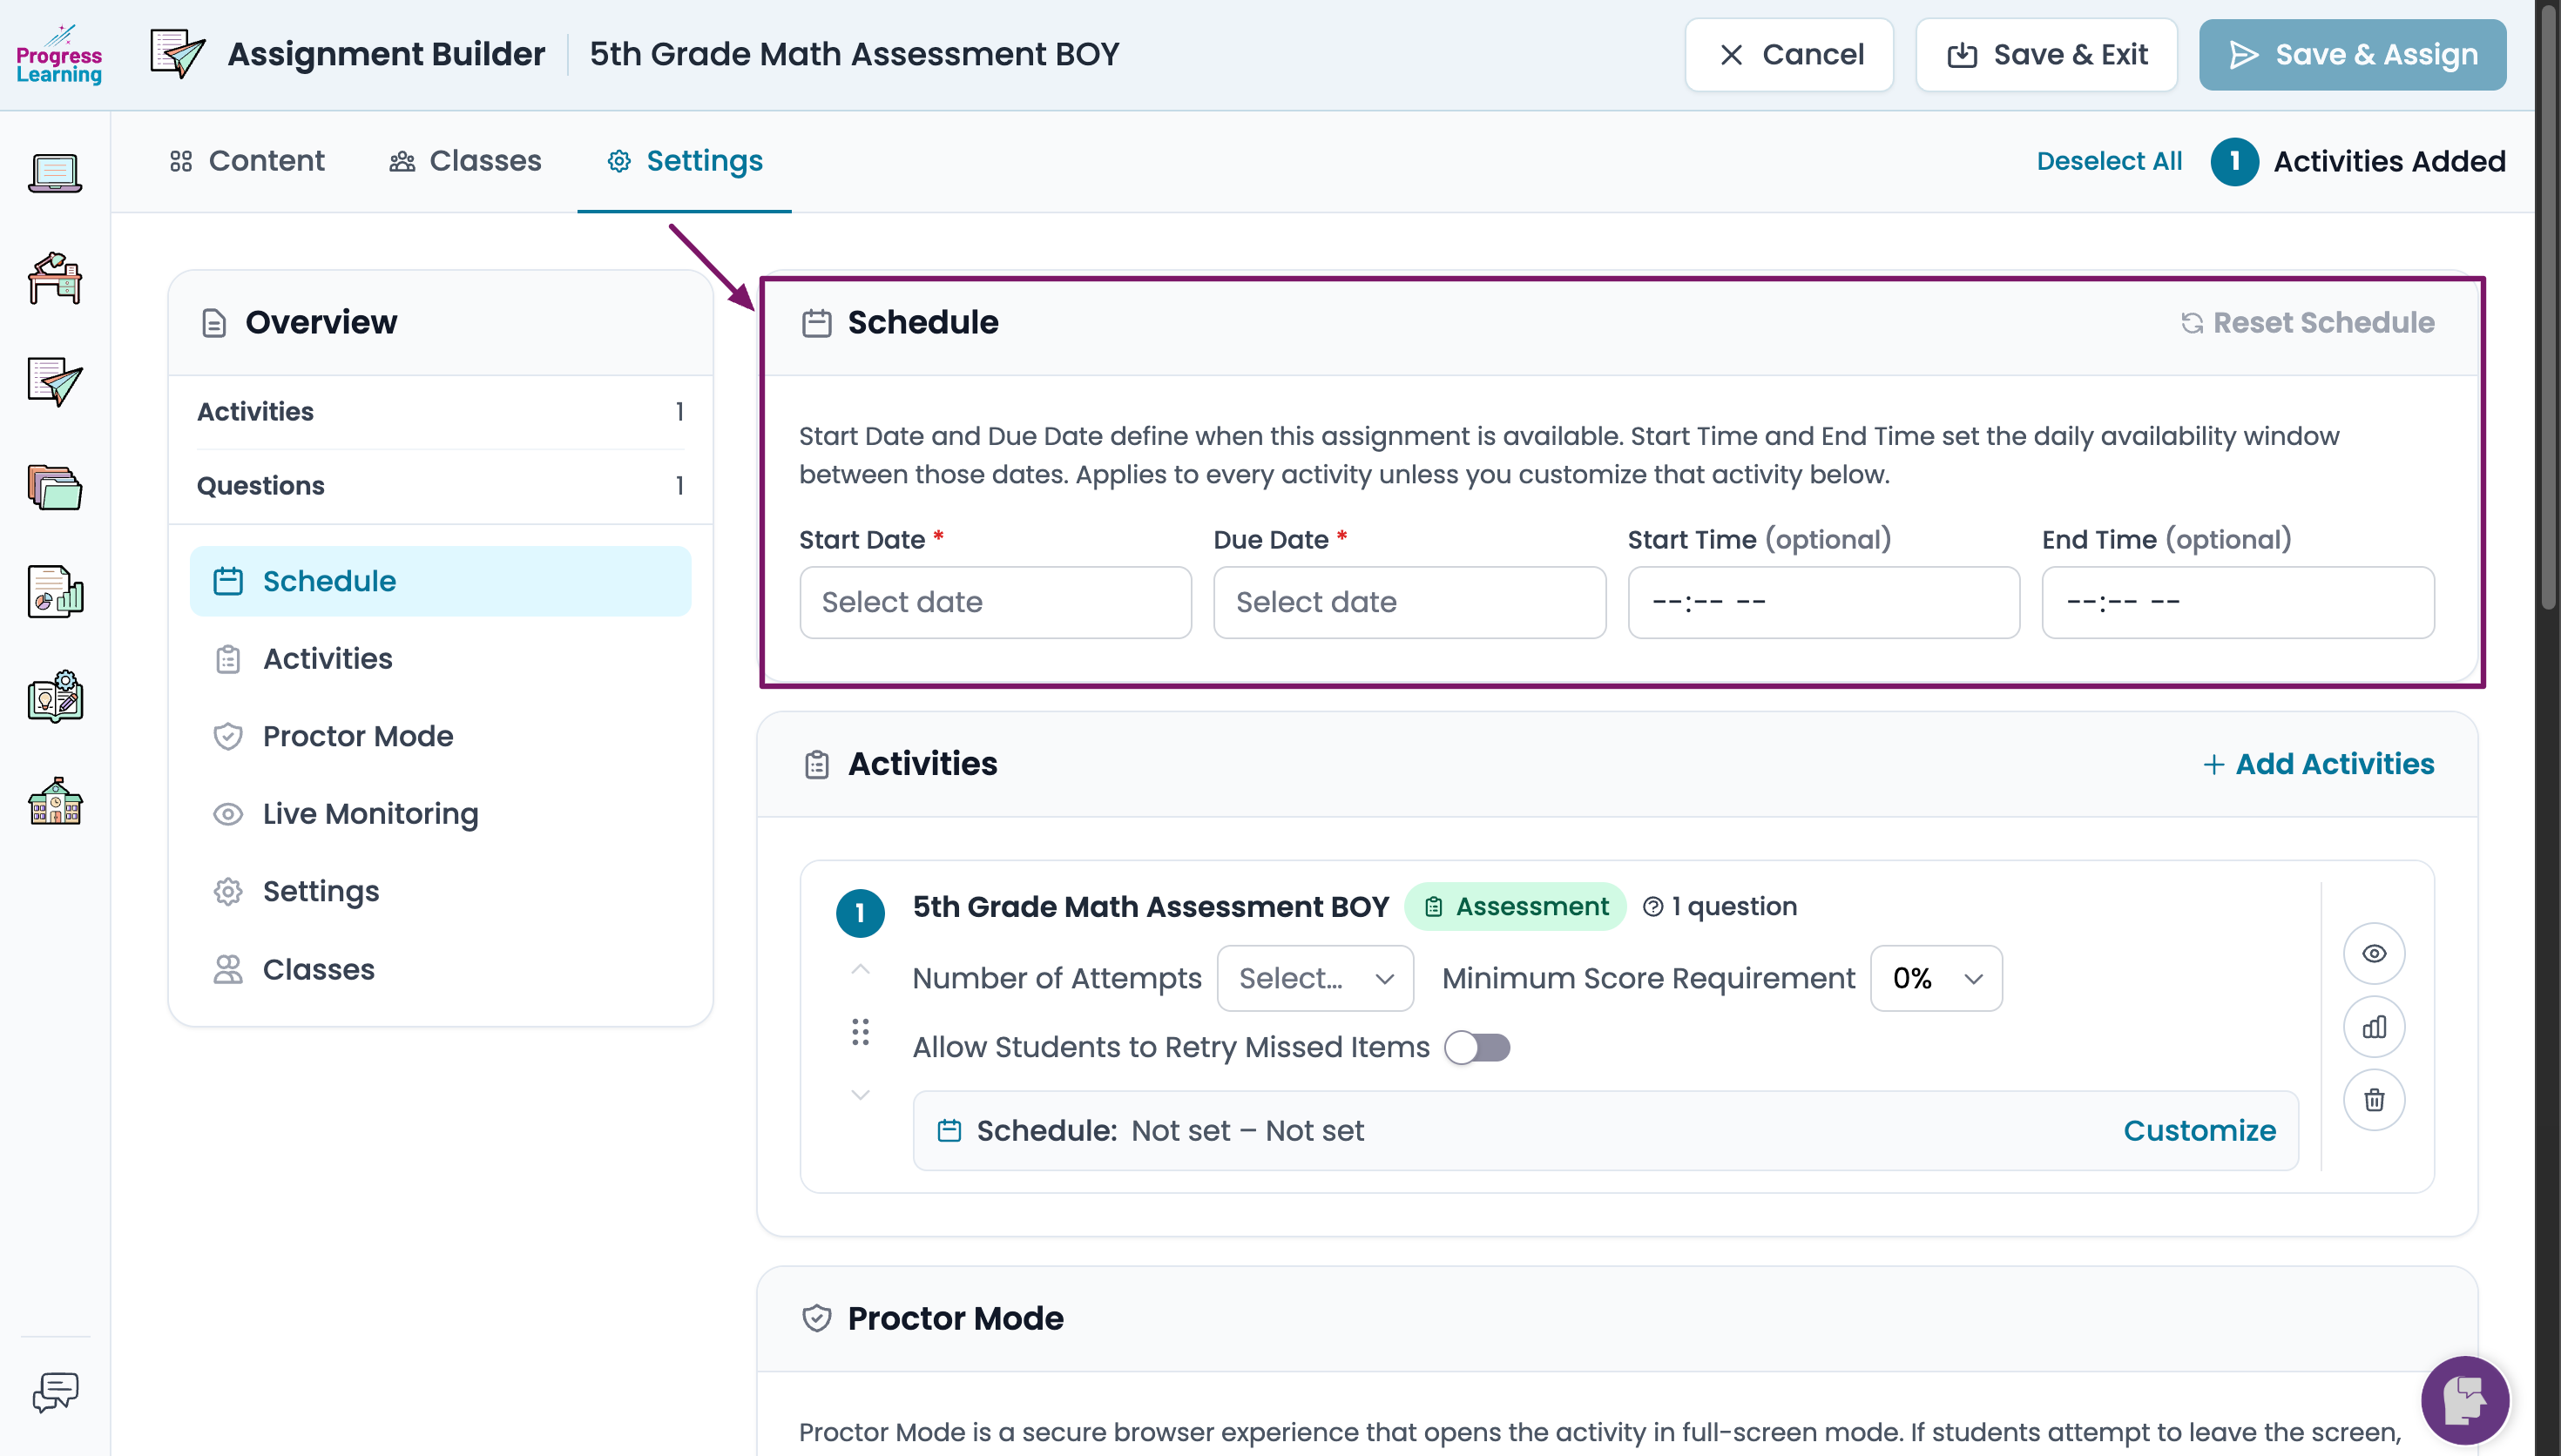
- Schedule: Set a start and a due date for the assignment. You can also specify a Start and End Time (optional).
- Note: If you choose a Start Date in the future, students will only be able to see and begin it starting on the date you have chosen.
Students may work on an Assignment after the due date, but the task will show in pink on their home screen and their result will show in pink in your gradebook. Teachers also have the ability to lock an assignment or assessment in order to prevent students from working on it after a due date.
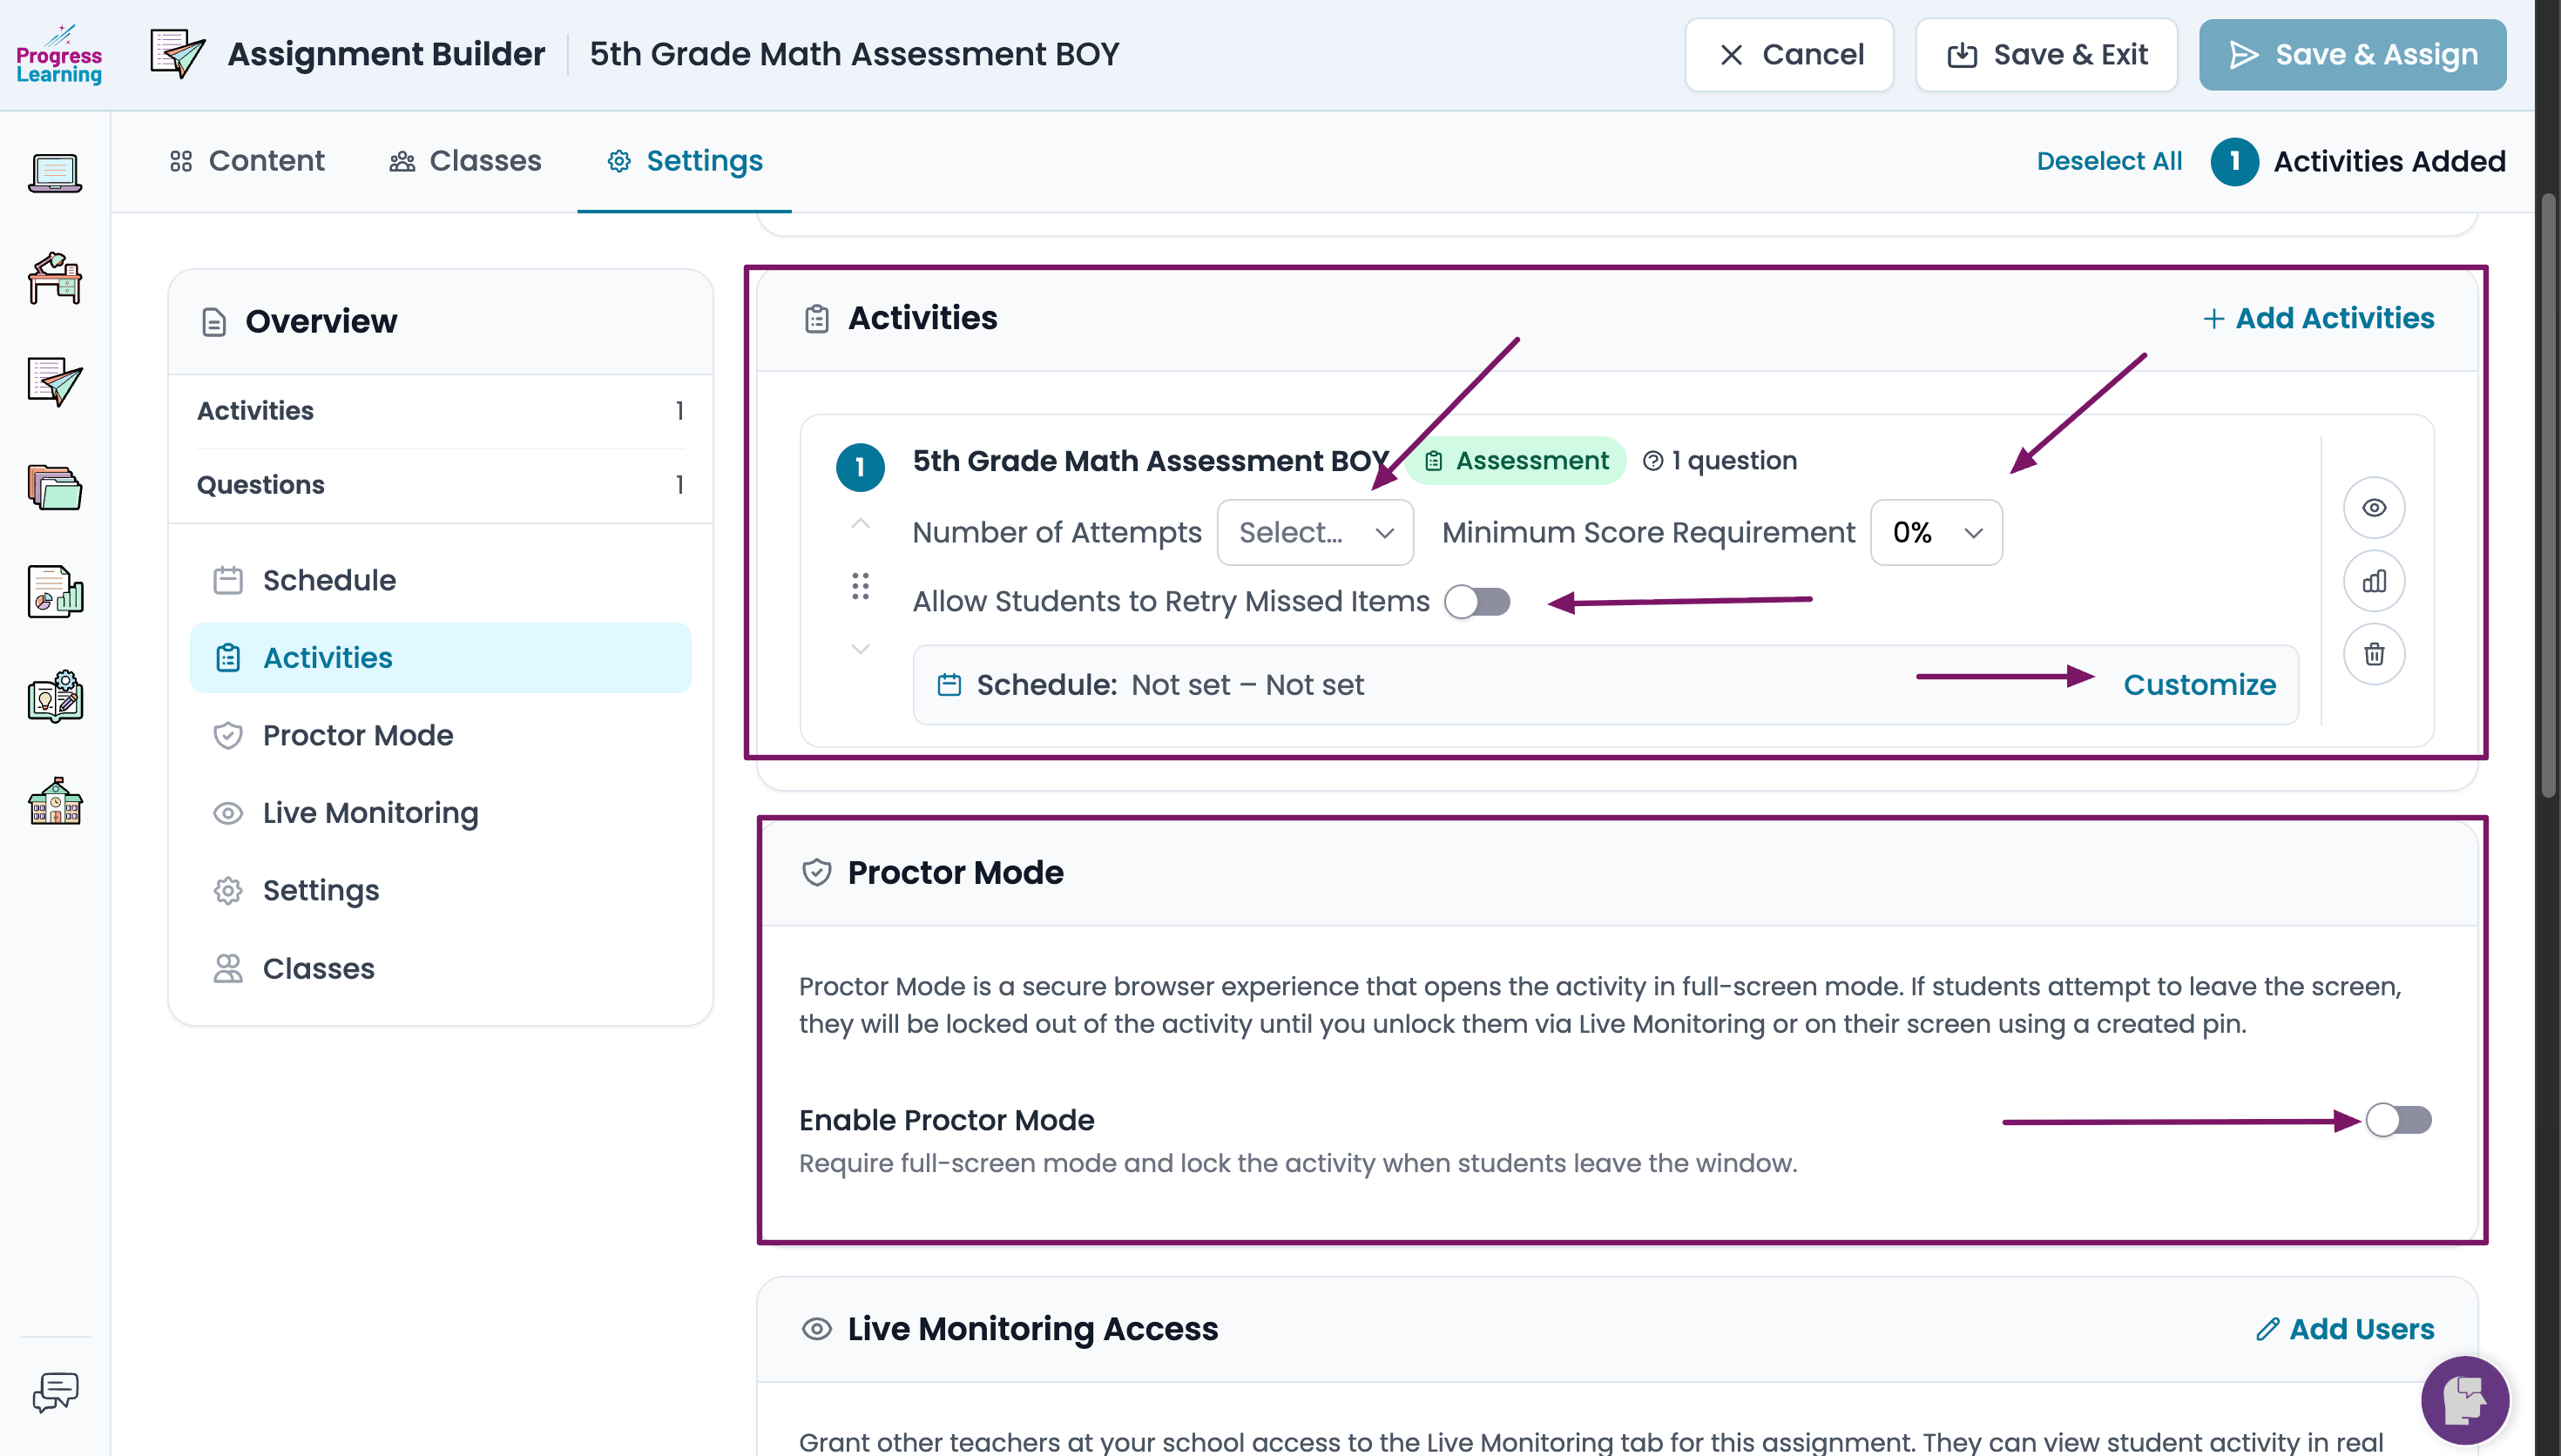
- Complete Activities in Specific Order: When this feature is toggled on, students must finish each activity in the order you specify below.
- You can change the order of the activities by clicking and dragging the dots or clicking on the up and down arrows to the left of the activity.
- Specify the number of attempts or a minimum score requirement. You can choose from 1 - 5 attempts. If you select a minimum score requirement, the student will receive unlimited attempts.
- You can also allow students to retry missed items. This allows students to only retry the questions that they've gotten wrong rather than the entire assignment. (If you choose this option, the "Number of Attempts" will be disabled by default.)
- You can also customize a schedule for each activity you've added to your assignment.
- Using the icons on the right, you can preview the assignment and delete the assignment.
- Proctor Mode: You can enable full-screen mode and lock the activity when students leave the testing window.
- Schedule: Set a start and a due date for the assignment. You can also specify a Start and End Time (optional).
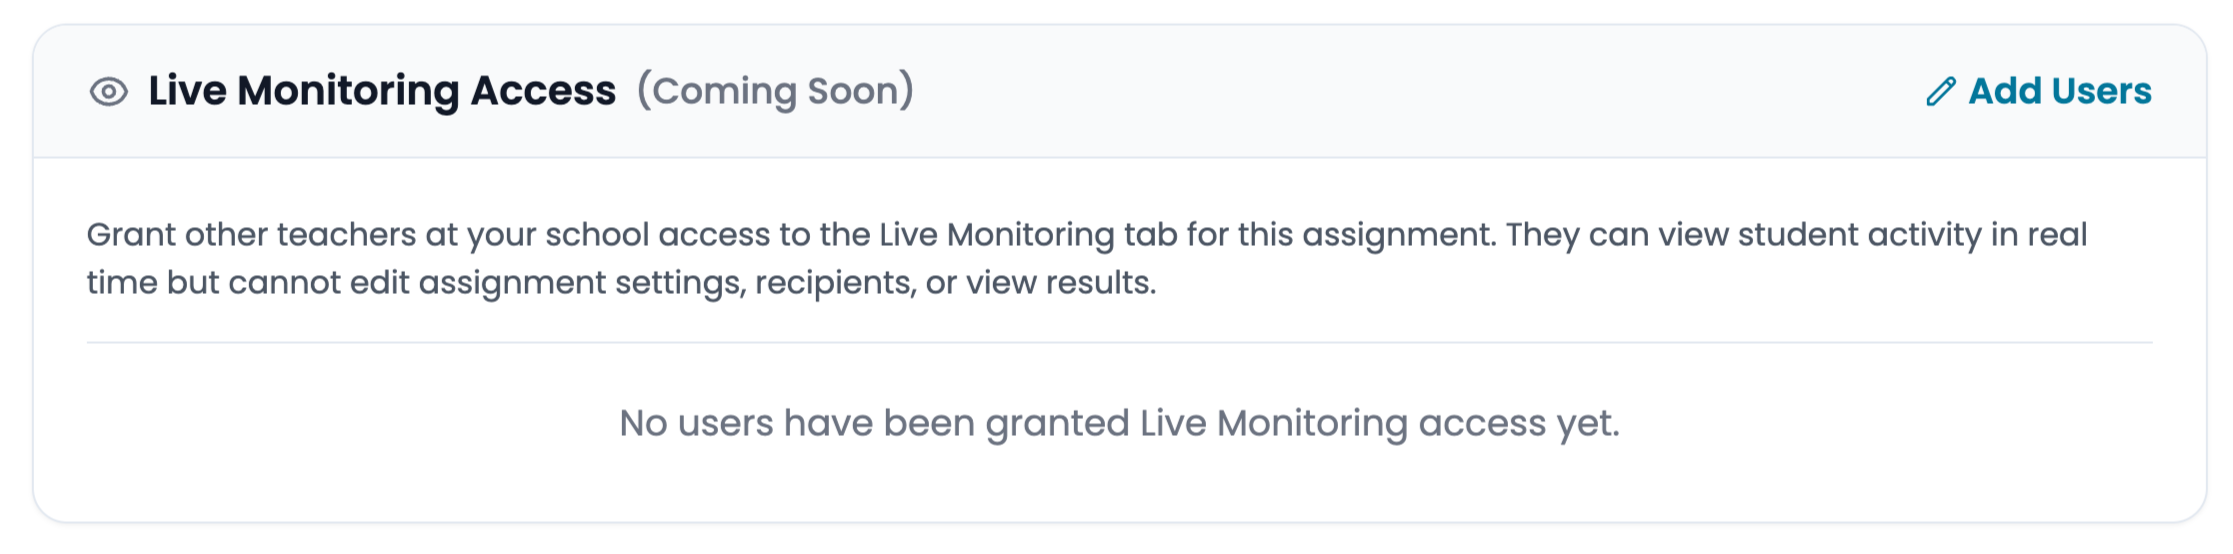
Live Monitoring Access: You can provide access to other teachers to Live Monitor students as they work in the assessment.
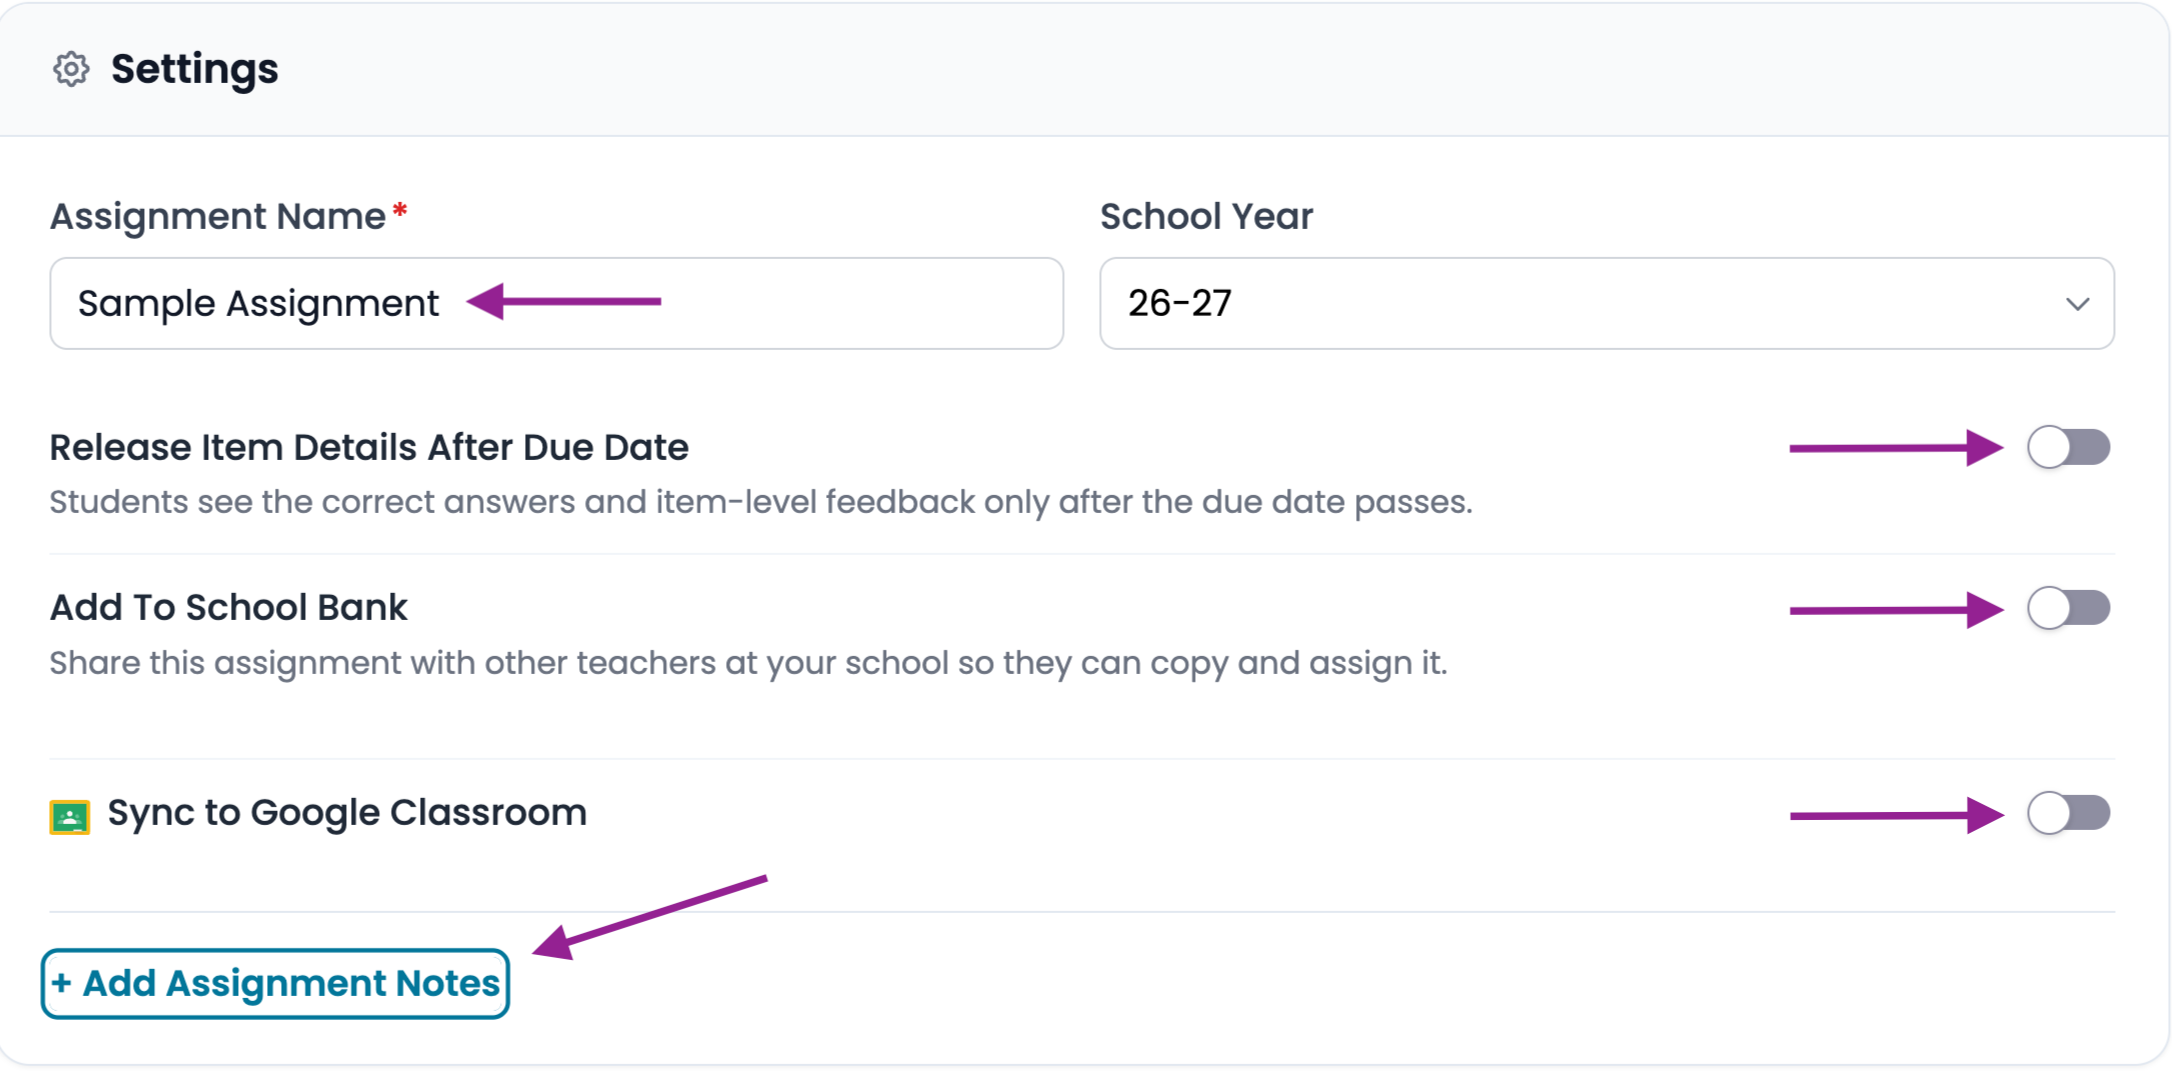
Settings:
- Assignment Name: You can edit the assignment name.
- Release Item Details After Due Date: Enabling this setting will hide all item details (excluding scores) from students until the due date has passed. This setting applies to all activity types excluding user-authored assessments. User-authored assessment settings must be managed in Assessment Builder.
- Add to School Bank: This saves the assignment in the school assignment bank and other teachers can assign it to their students too.
- Complete Activities in Specific Order: This allows you to customize the order of the activities included in your Assignment.
- Sync to Google Classroom or Canvas: If you have set up a 3rd party integration, you can sync the assignment.
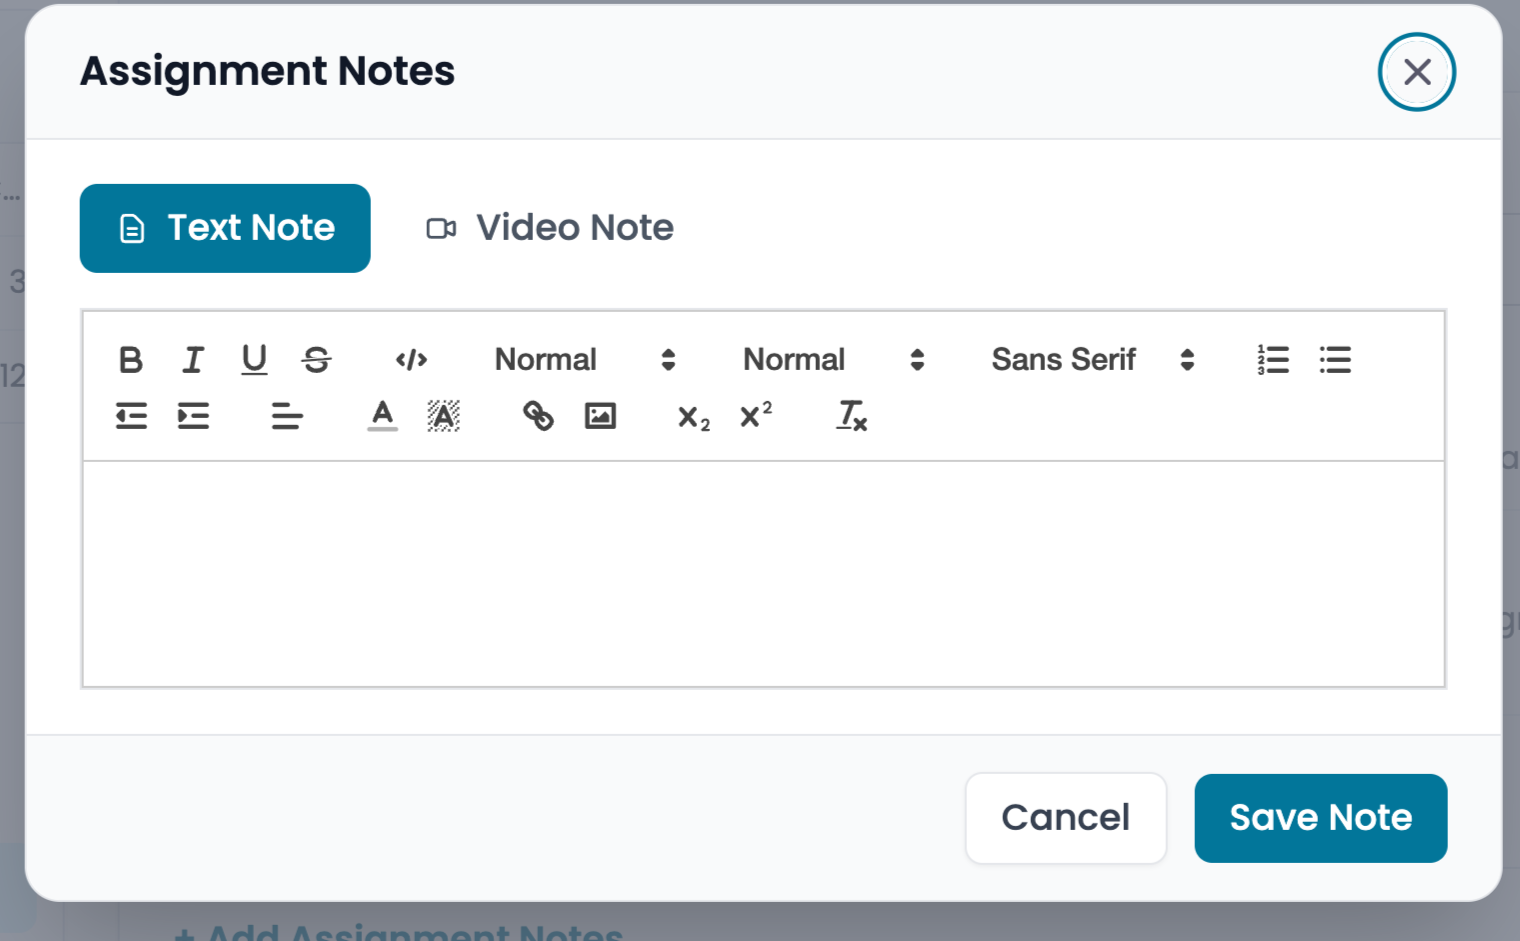
- Add Assignment Notes: You can add text or video notes. Click Add Assignment Notes, type a note or record a video, then click Save Note.
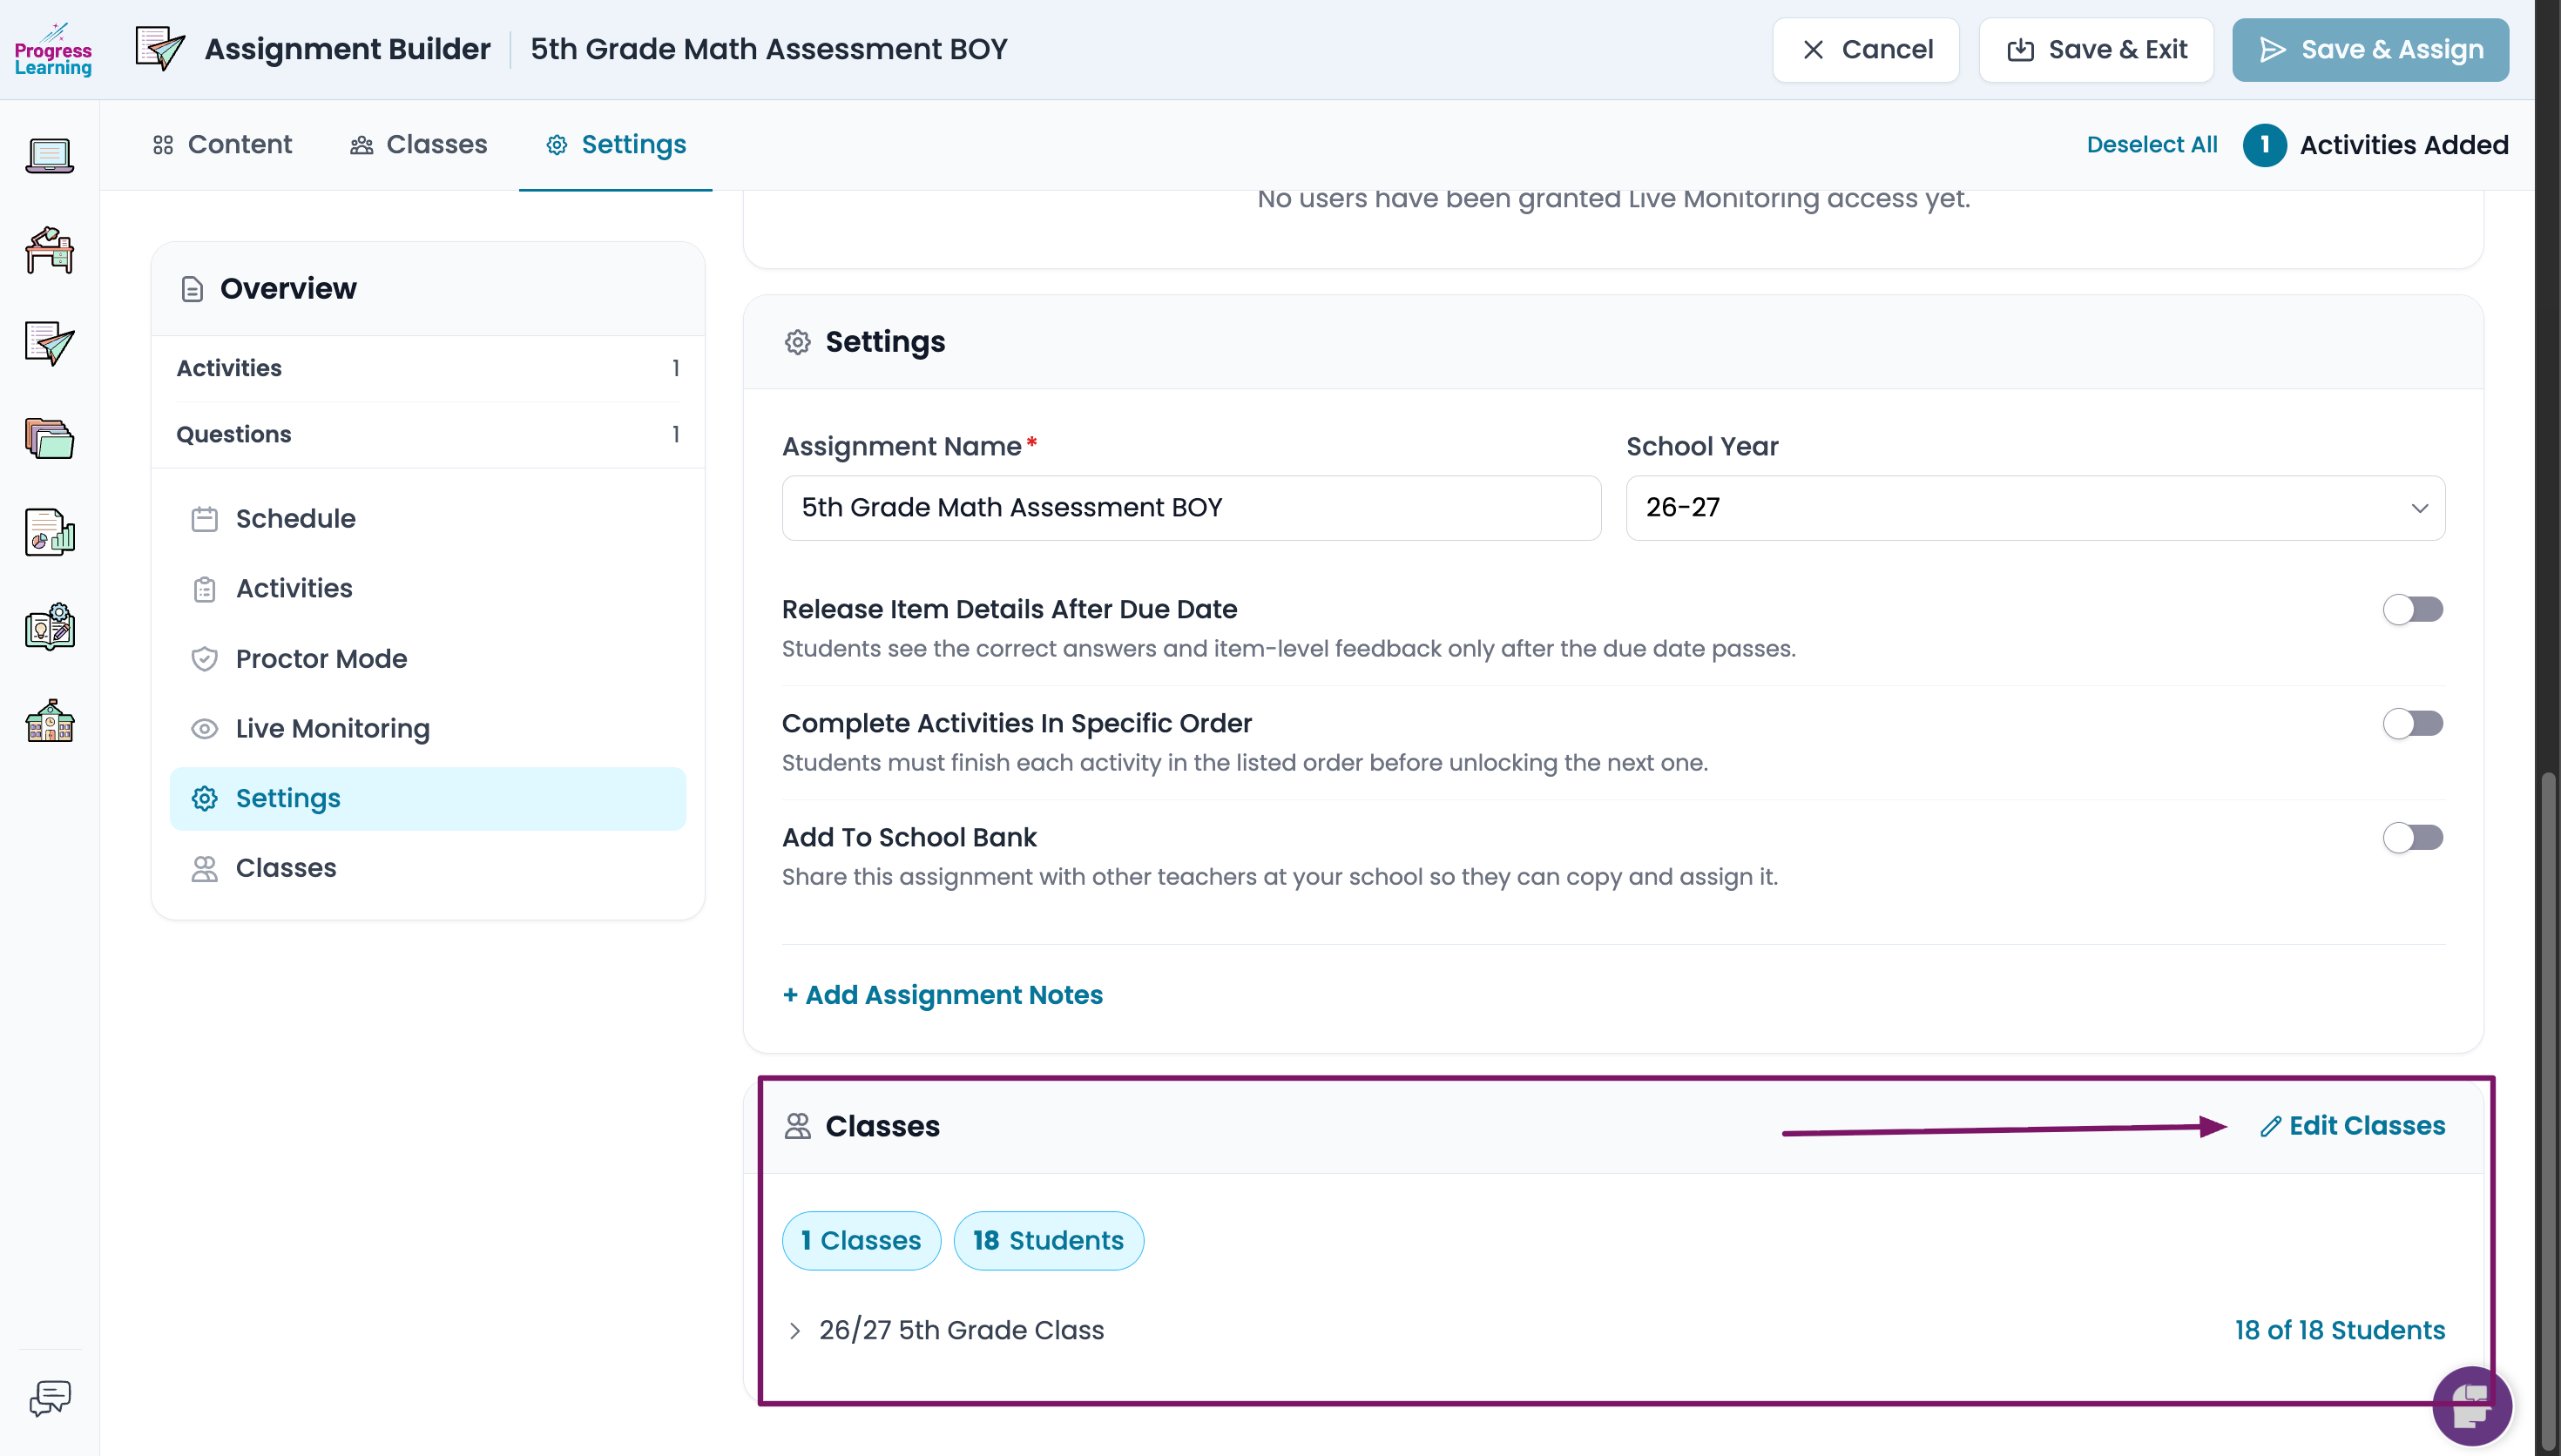
Classes: Edit which classes and students will be assigned the activity on the specified start date.
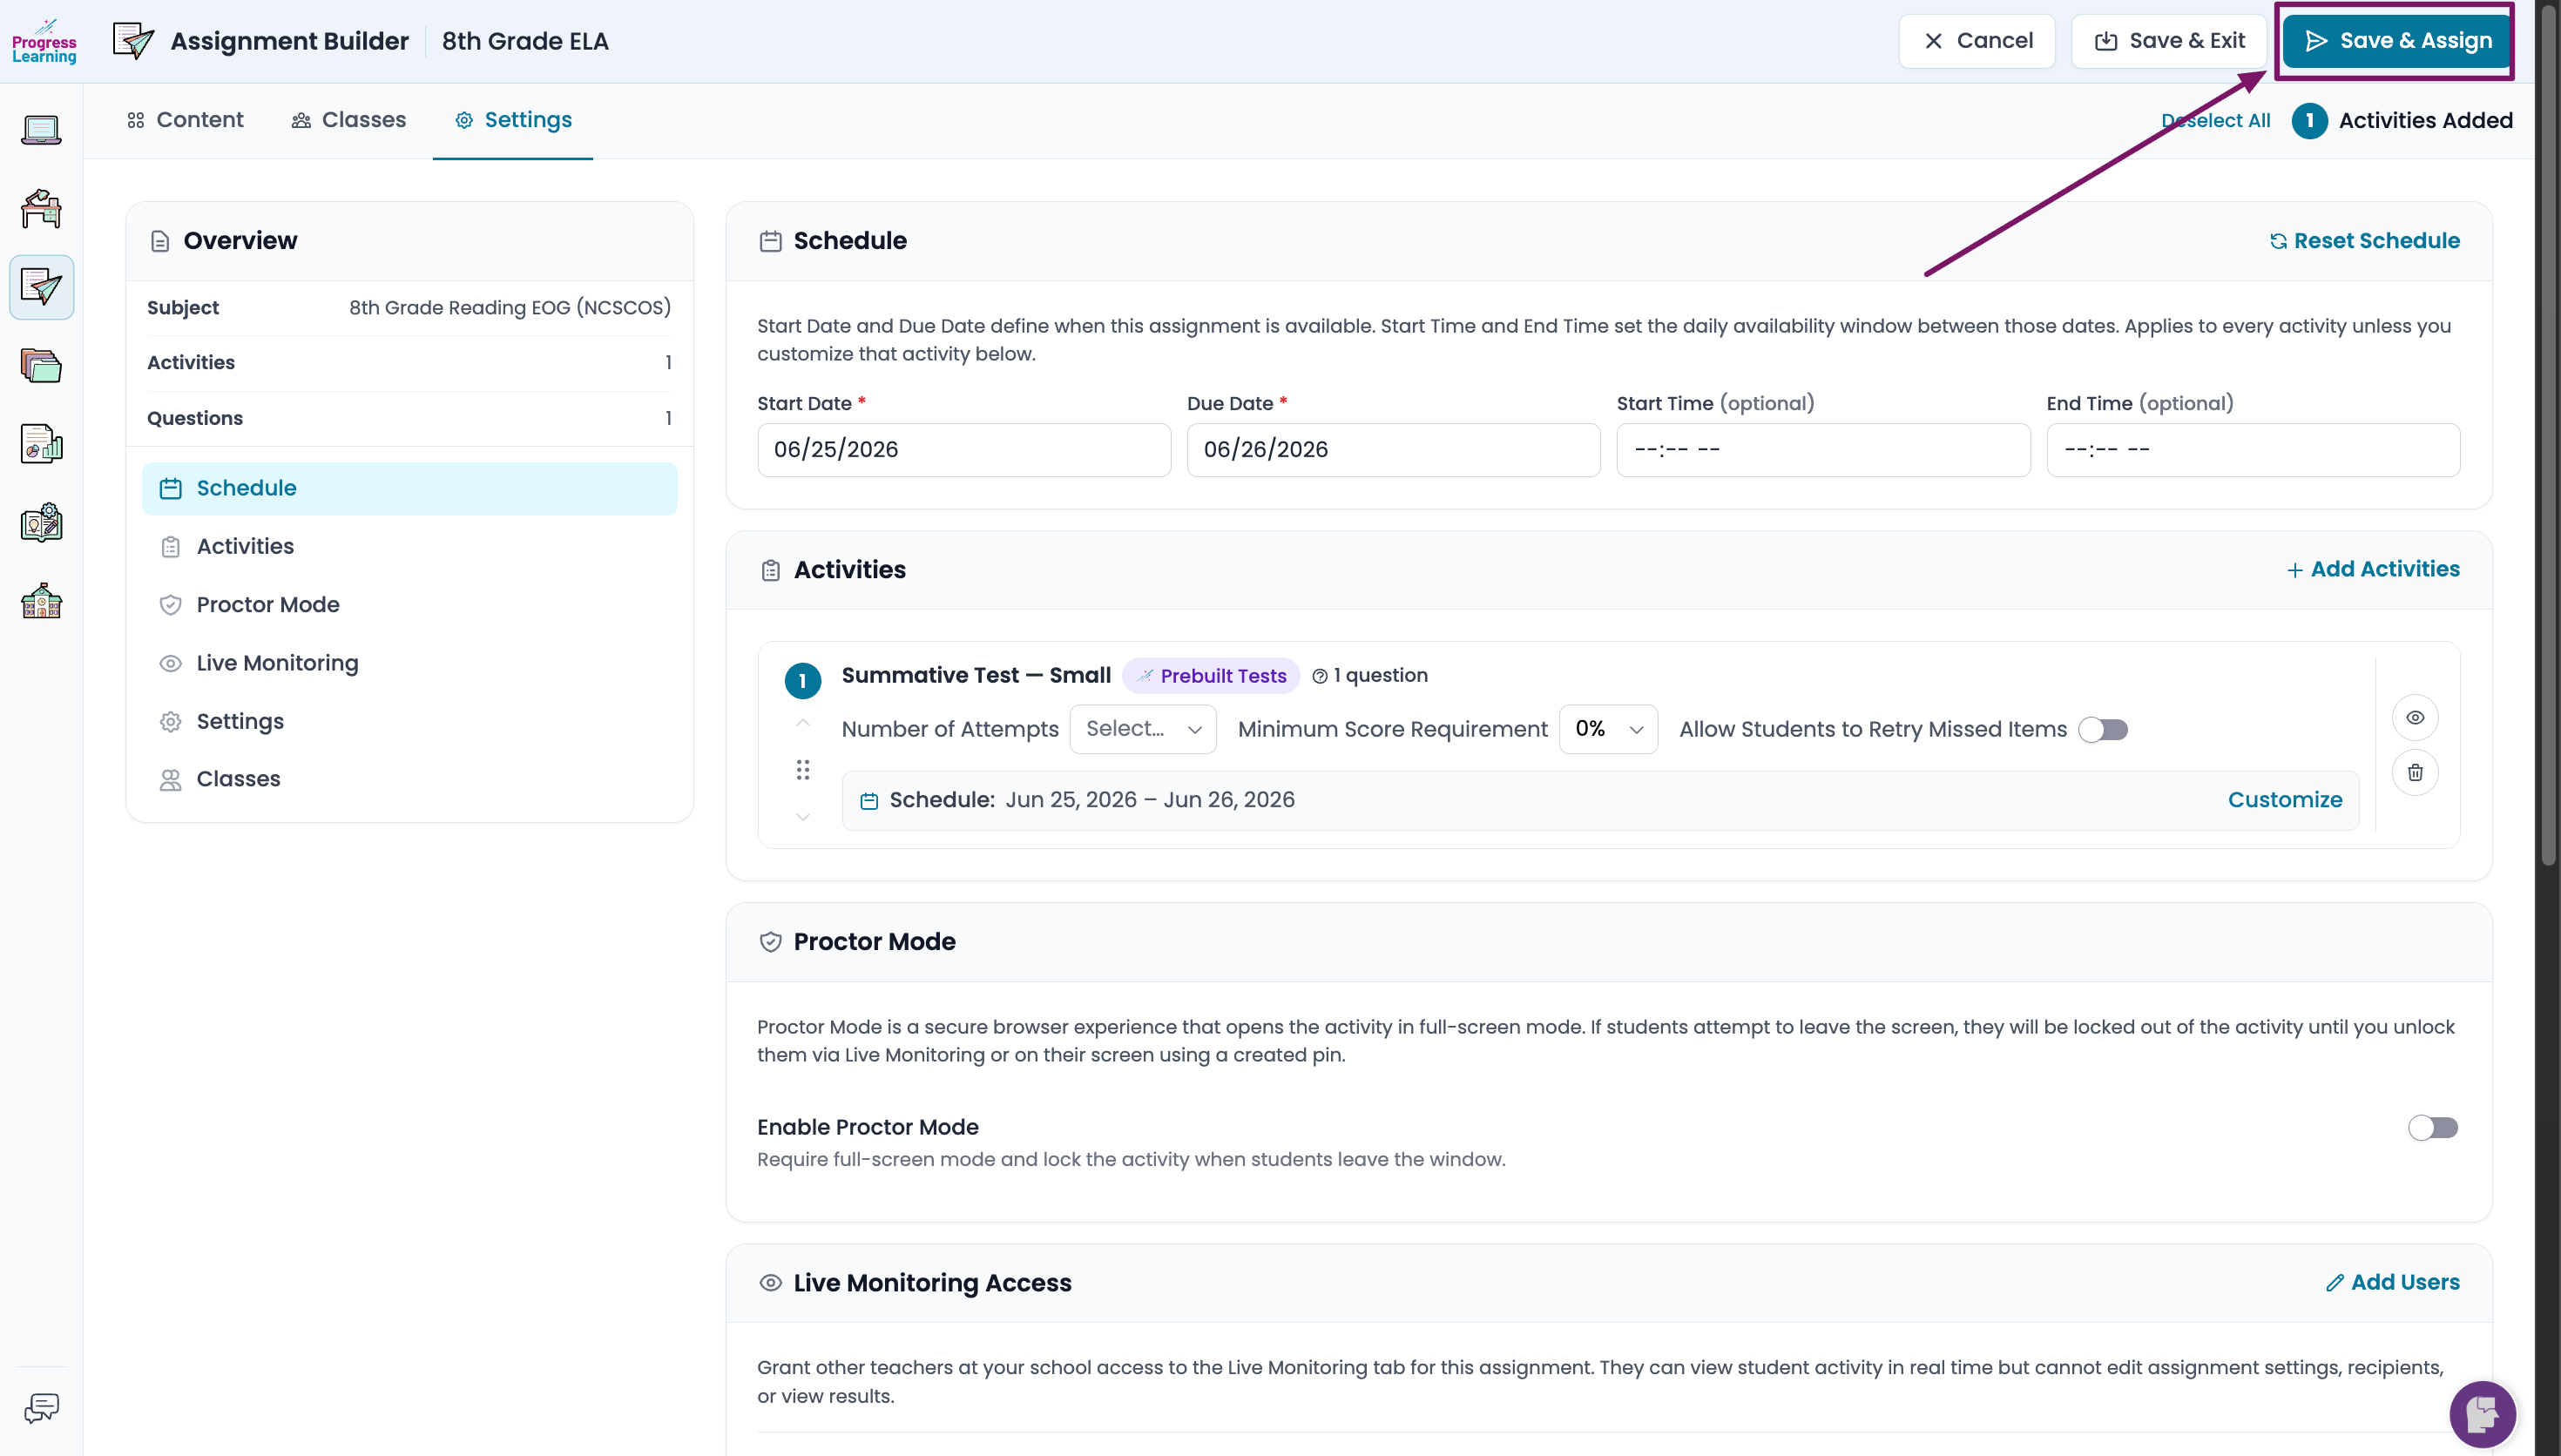
- Click Save & Assign.
How do I find an Assessment that I've saved and how do I assign it later?
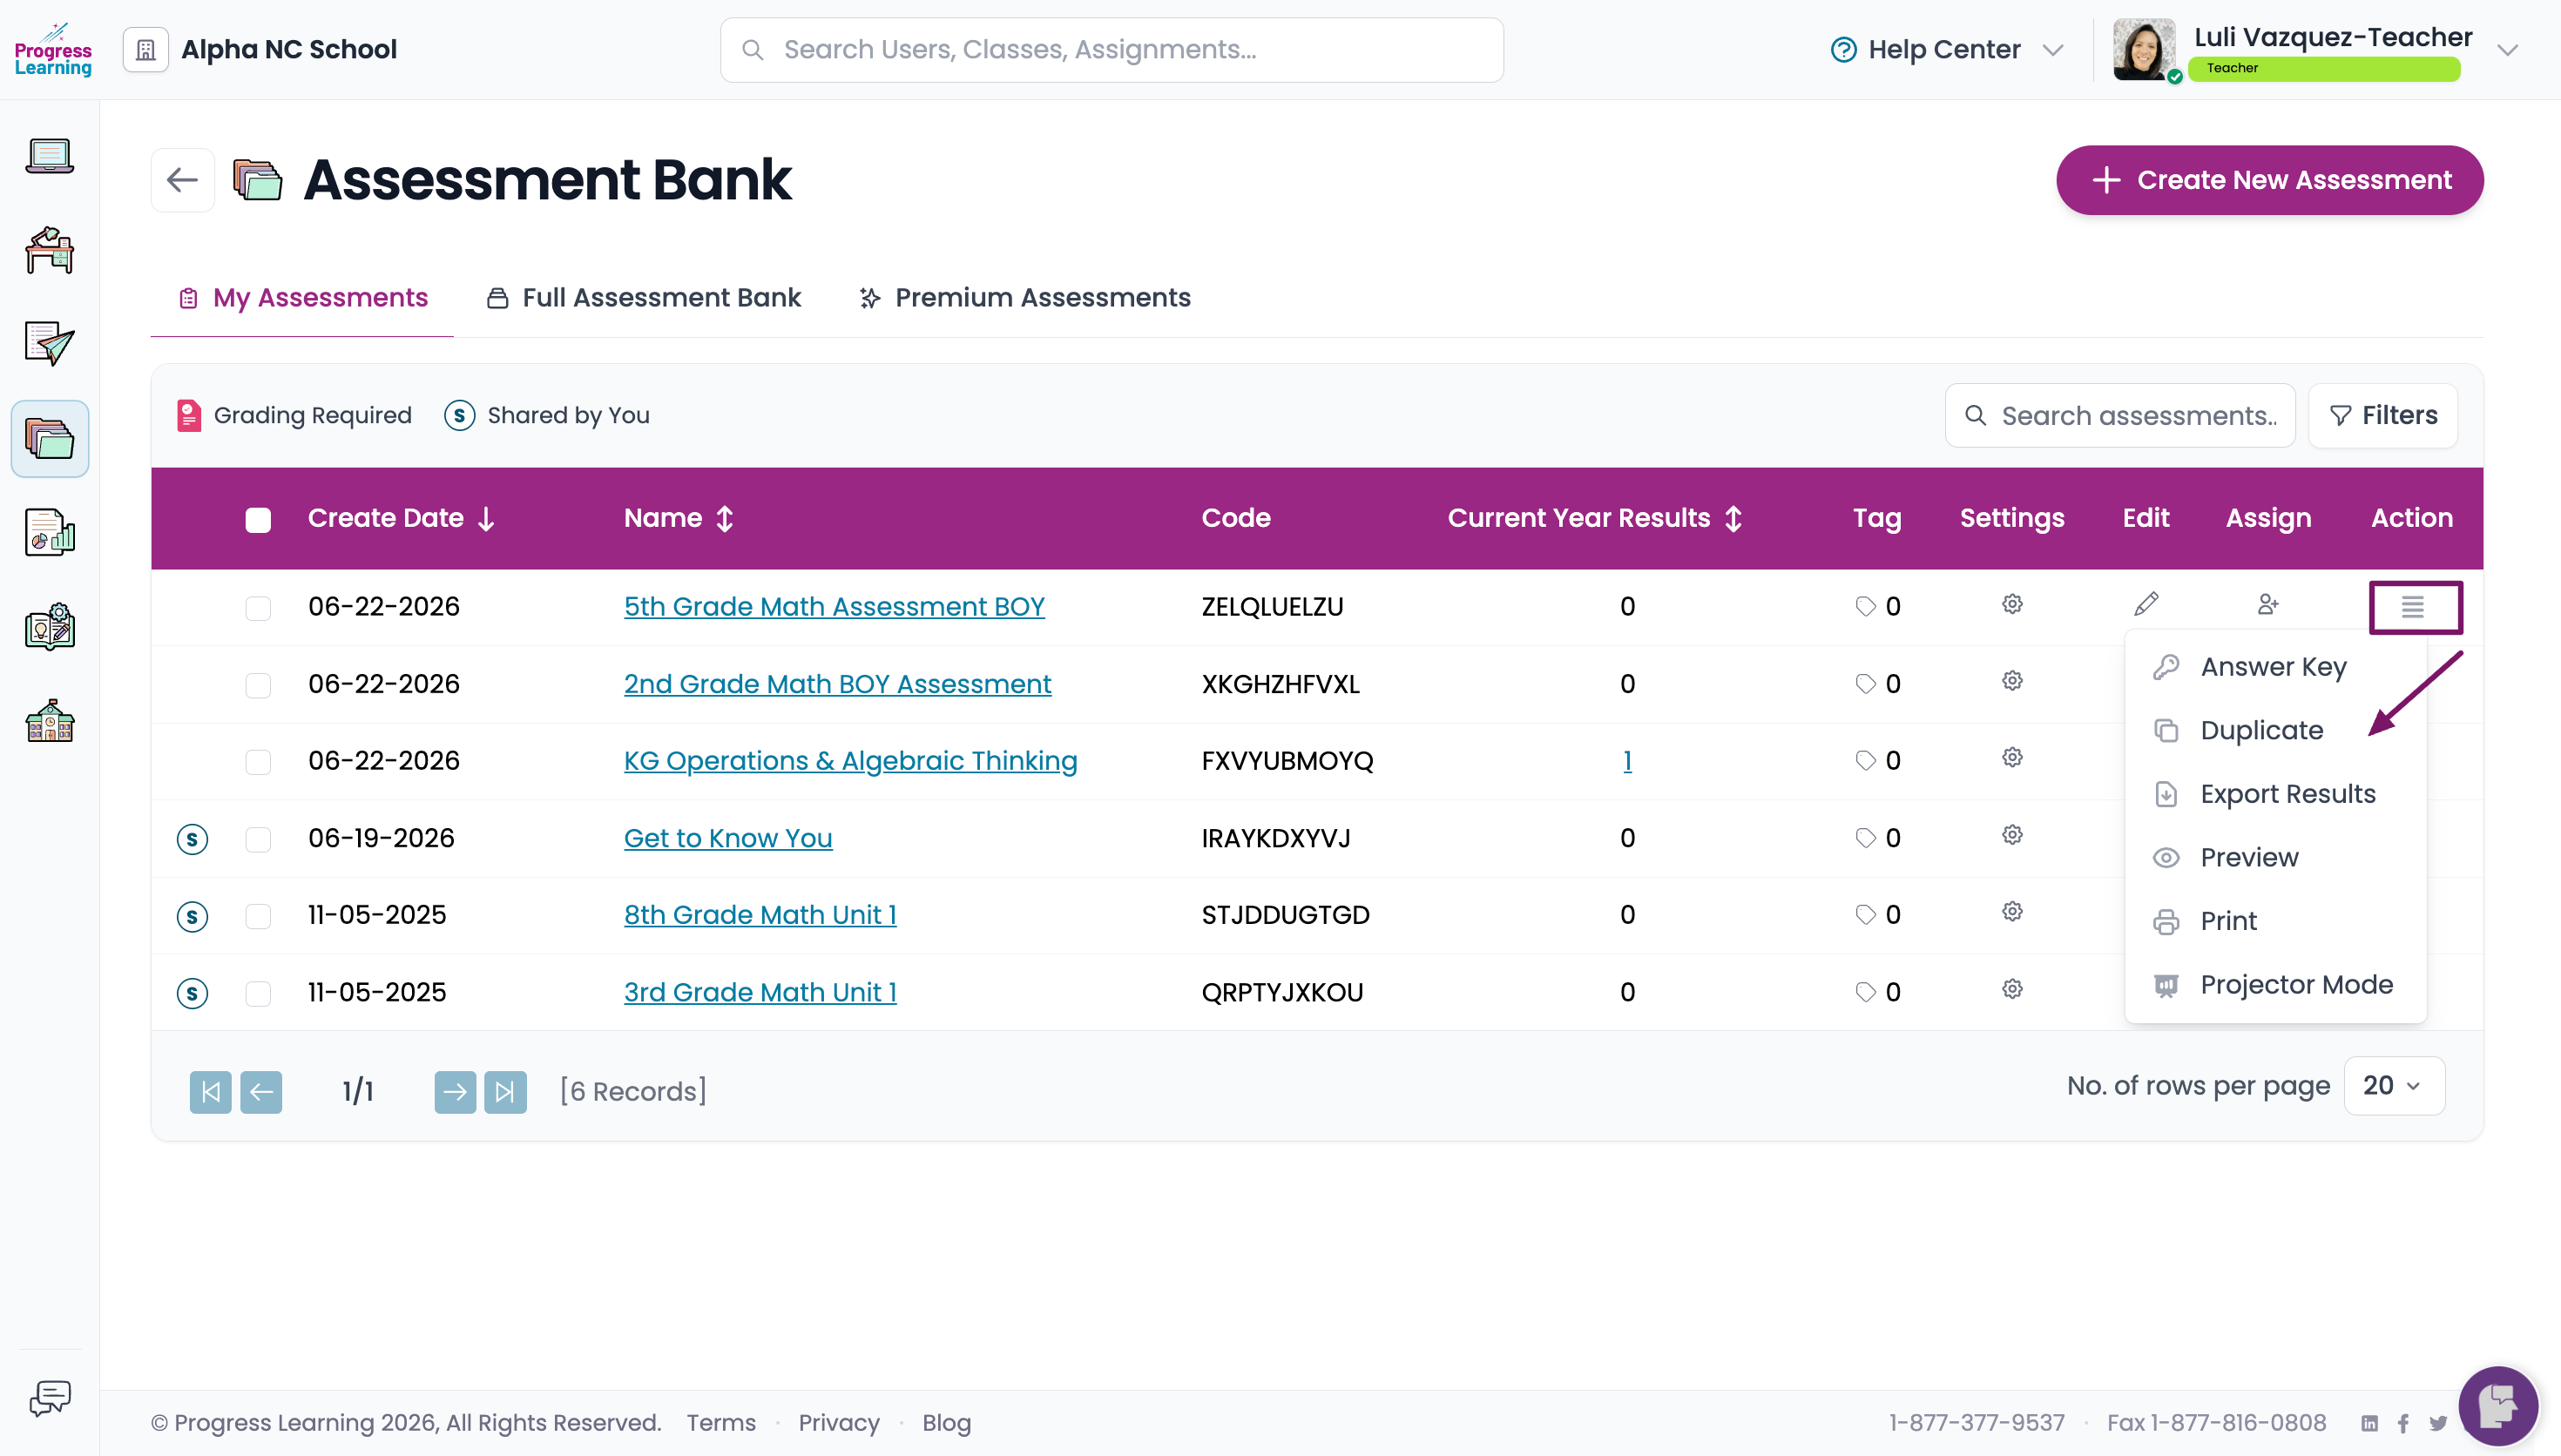
- You can revisit and view your assessment by going back to your teacher dashboard. Click Assessments and then select Assessment Bank.
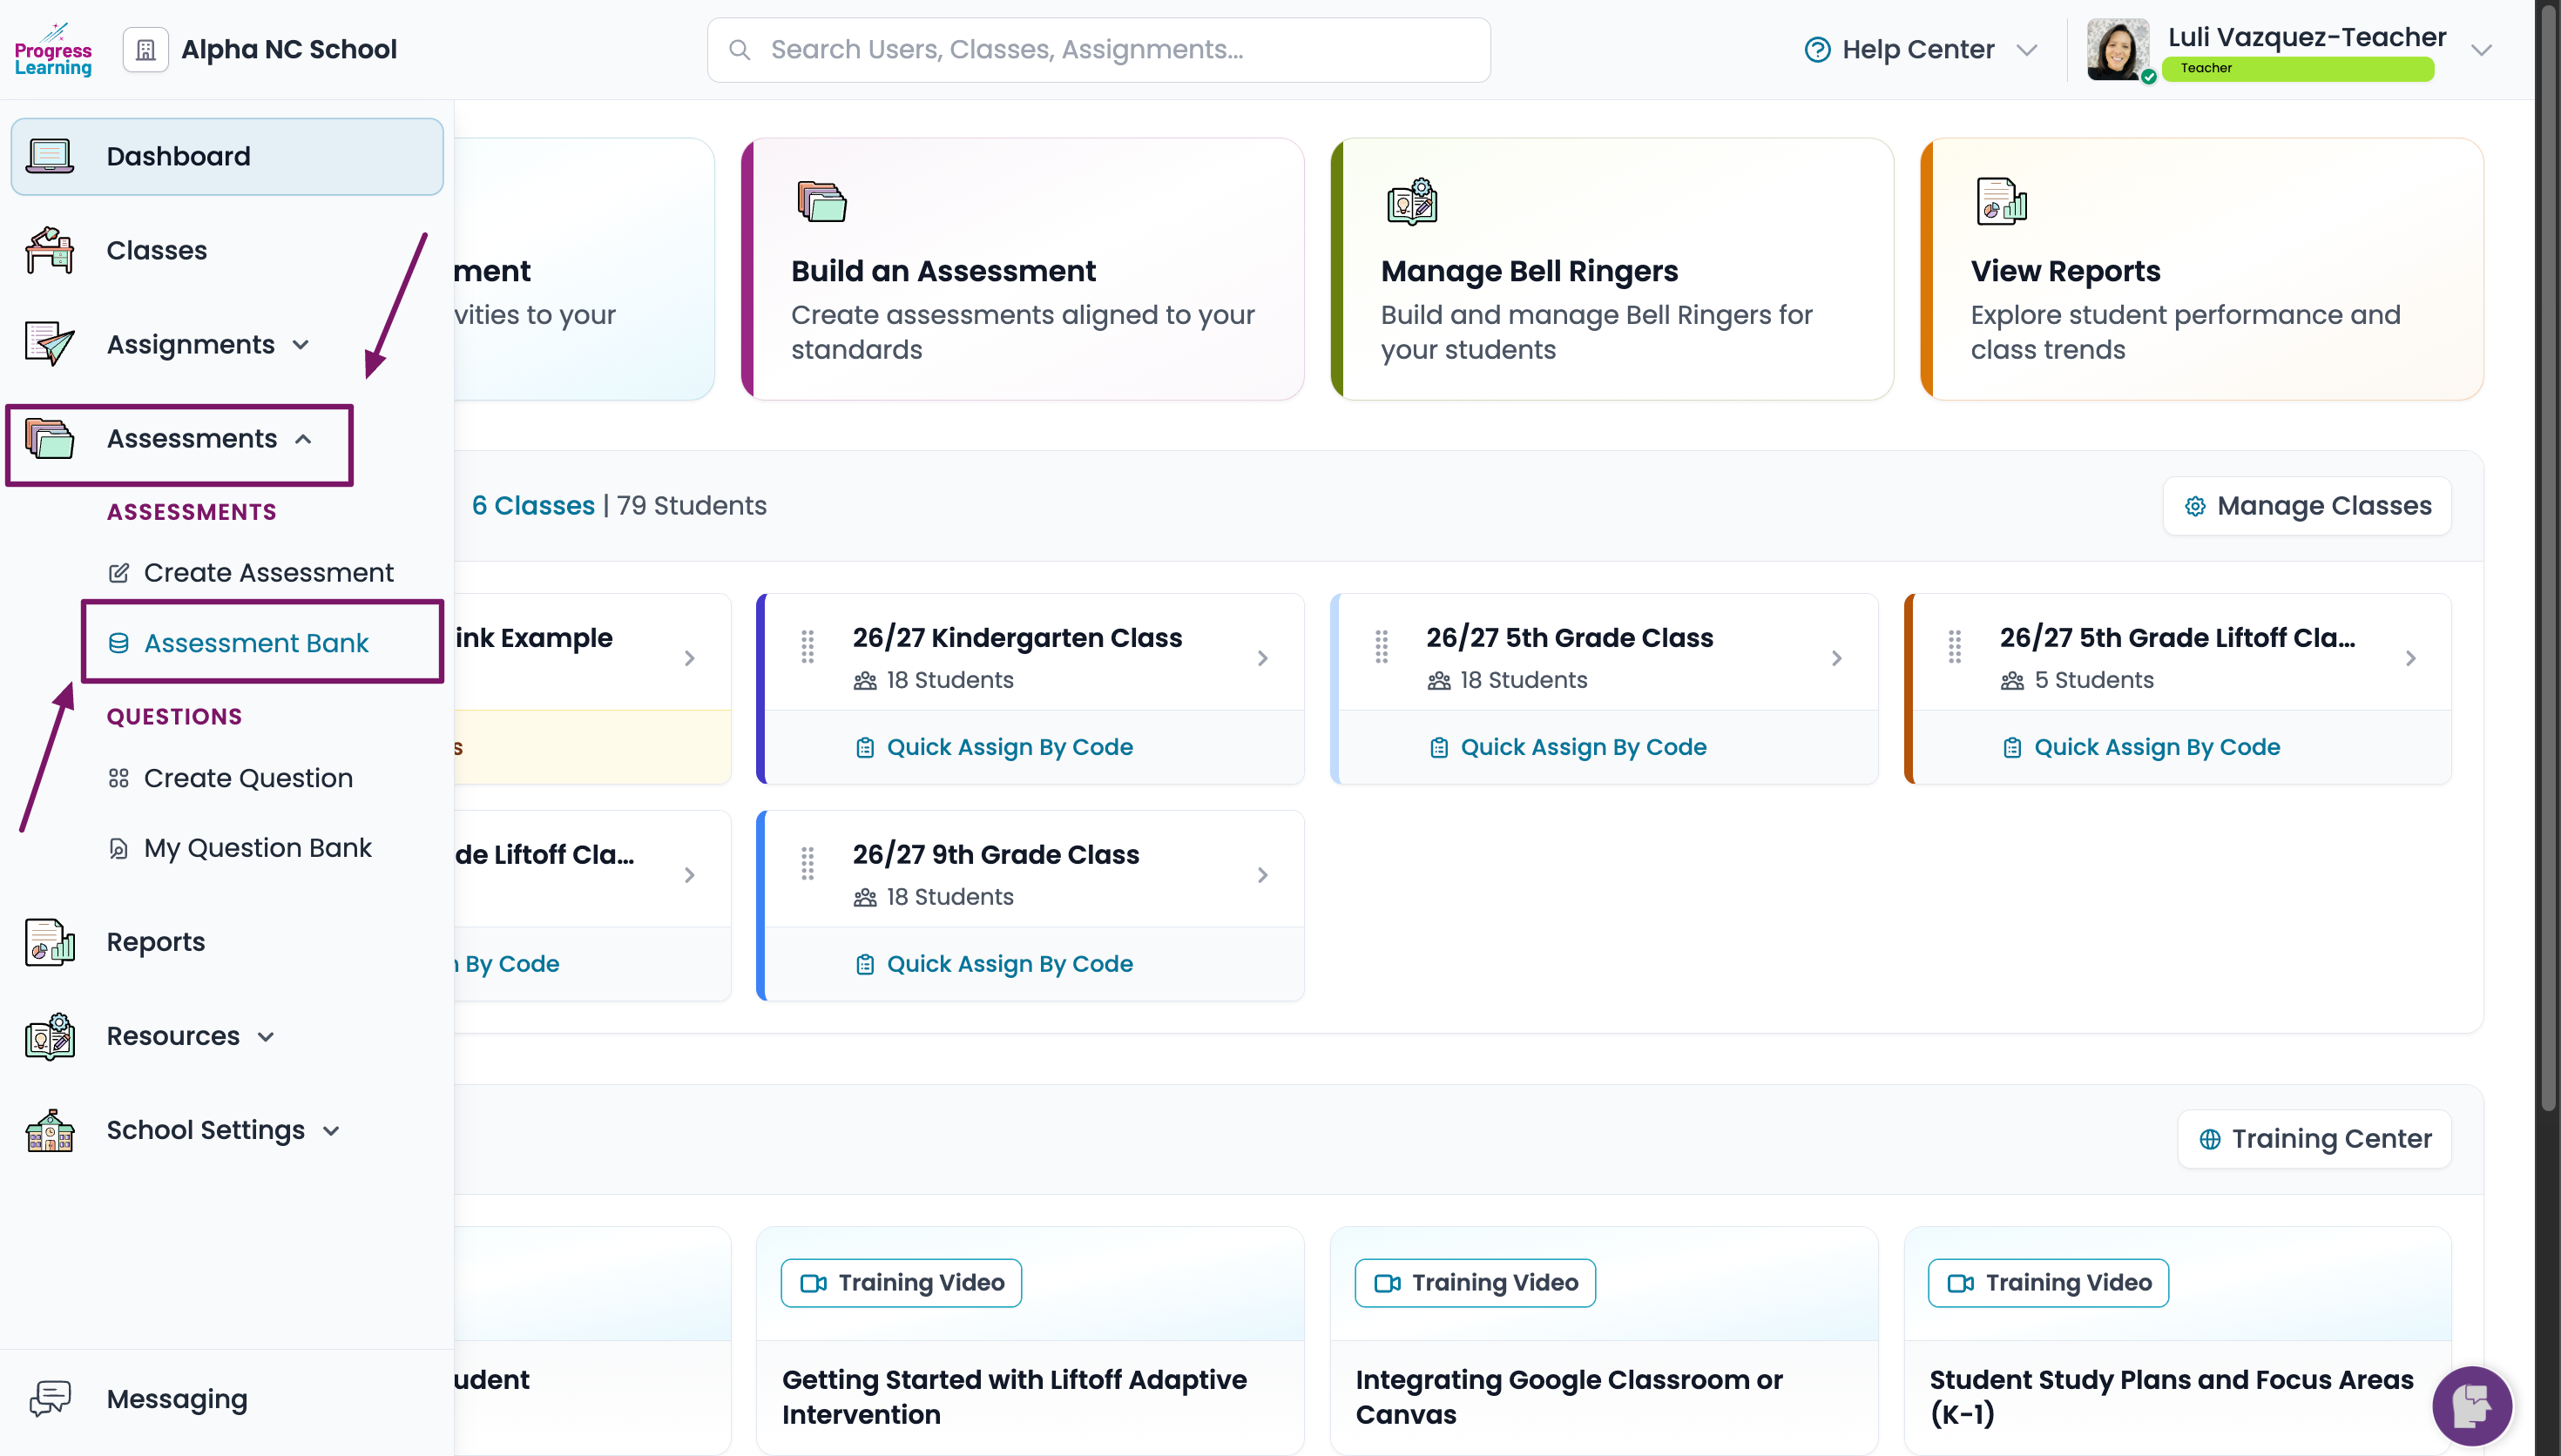
- Find the assessment that you'd like to assign in the list and click on the icon under the Assign column. This will take you to the Assignment Builder. From this point on, follow the same steps assign that were mentioned above.
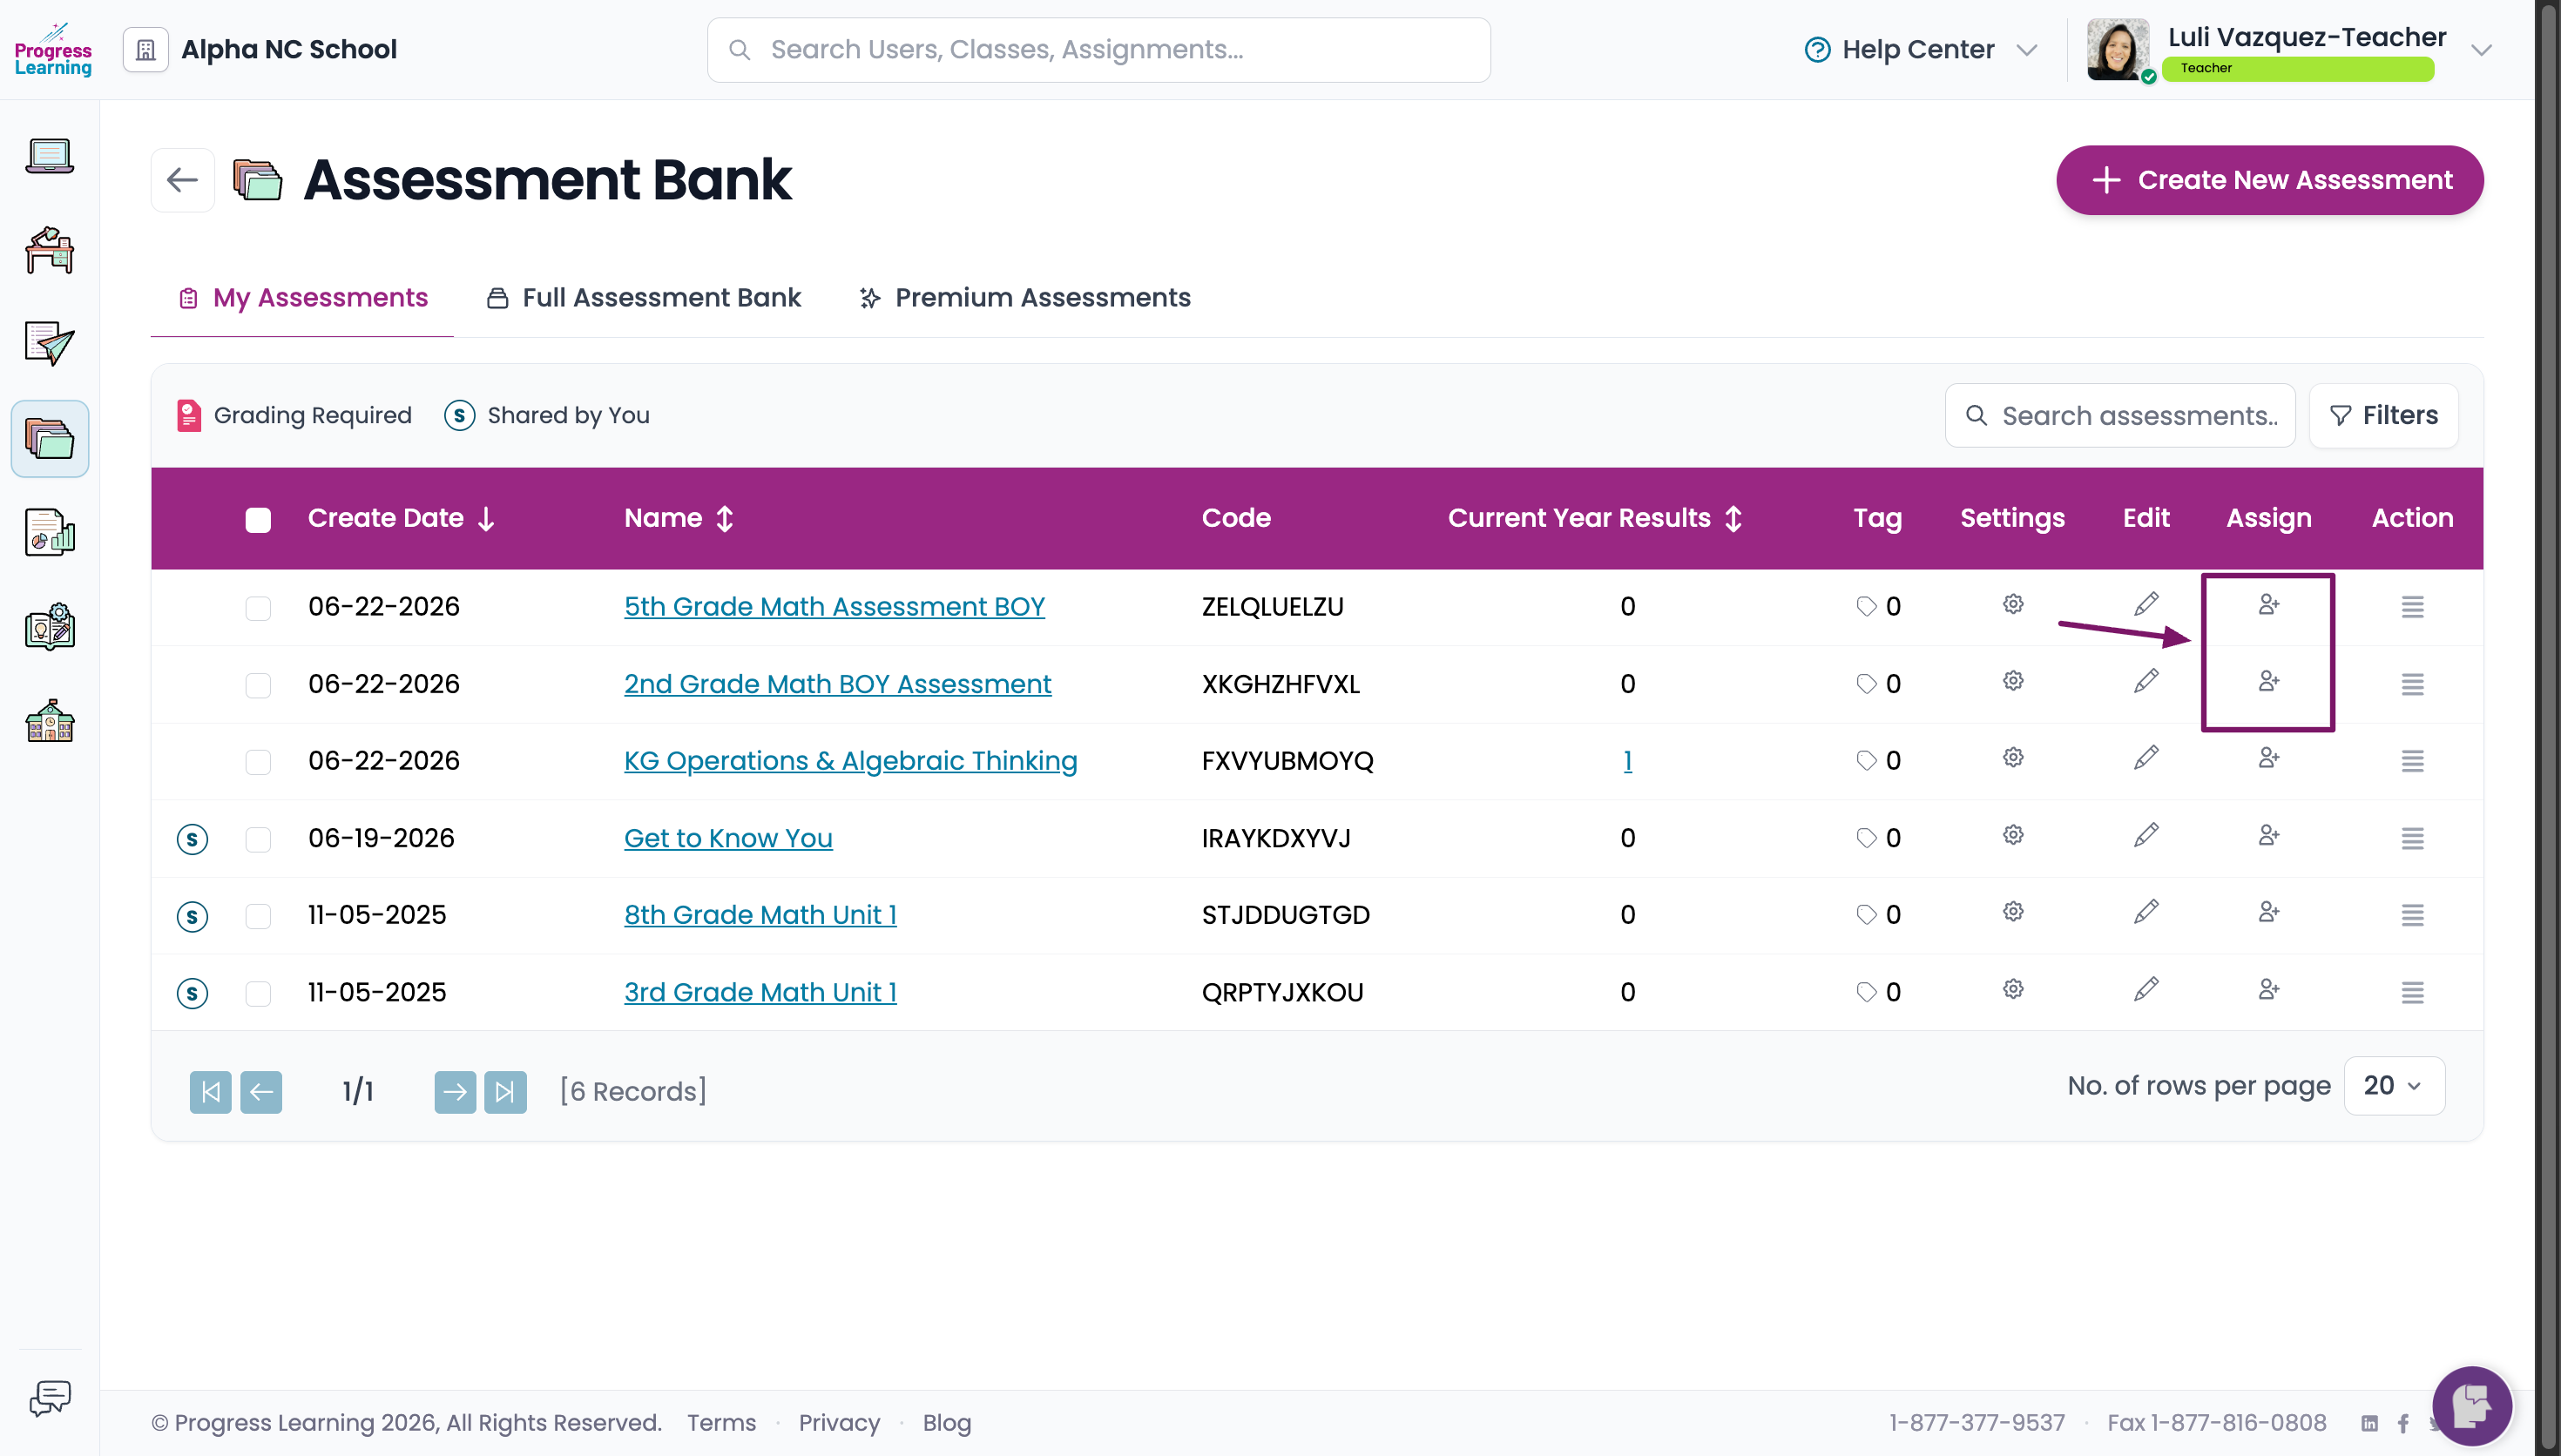
You can click the icon in the Action column for additional assessment options such as generating an answer key, duplicating the assessment, exporting the results, previewing the assessment, printing, or displaying in projector mode for whole class instruction.