Administrative Setup for SAT/ACT Testing
This article addresses assigning the ACT®/SAT® assessment from the School Administrator dashboard.
Teachers should check with their school administrator before assigning an ACT® or SAT® assessment from the Premium Assessment bank.
Administrative Setup for SAT/ACT Testing
Assigning the Assessment from the Assignment Builder
- From the admin dashboard, select Assessment/Assignment Center.

- Click on Assignment Builder

- Give the Assignment a name and chose from the Premium Assessments in the subject dropdown menu

- Once you've selected either the ACT® or SAT® test, the bank of available assessements will populate. Choose the assessment you want to assign by ticking the box beside the assessment name. Click Save and Continue

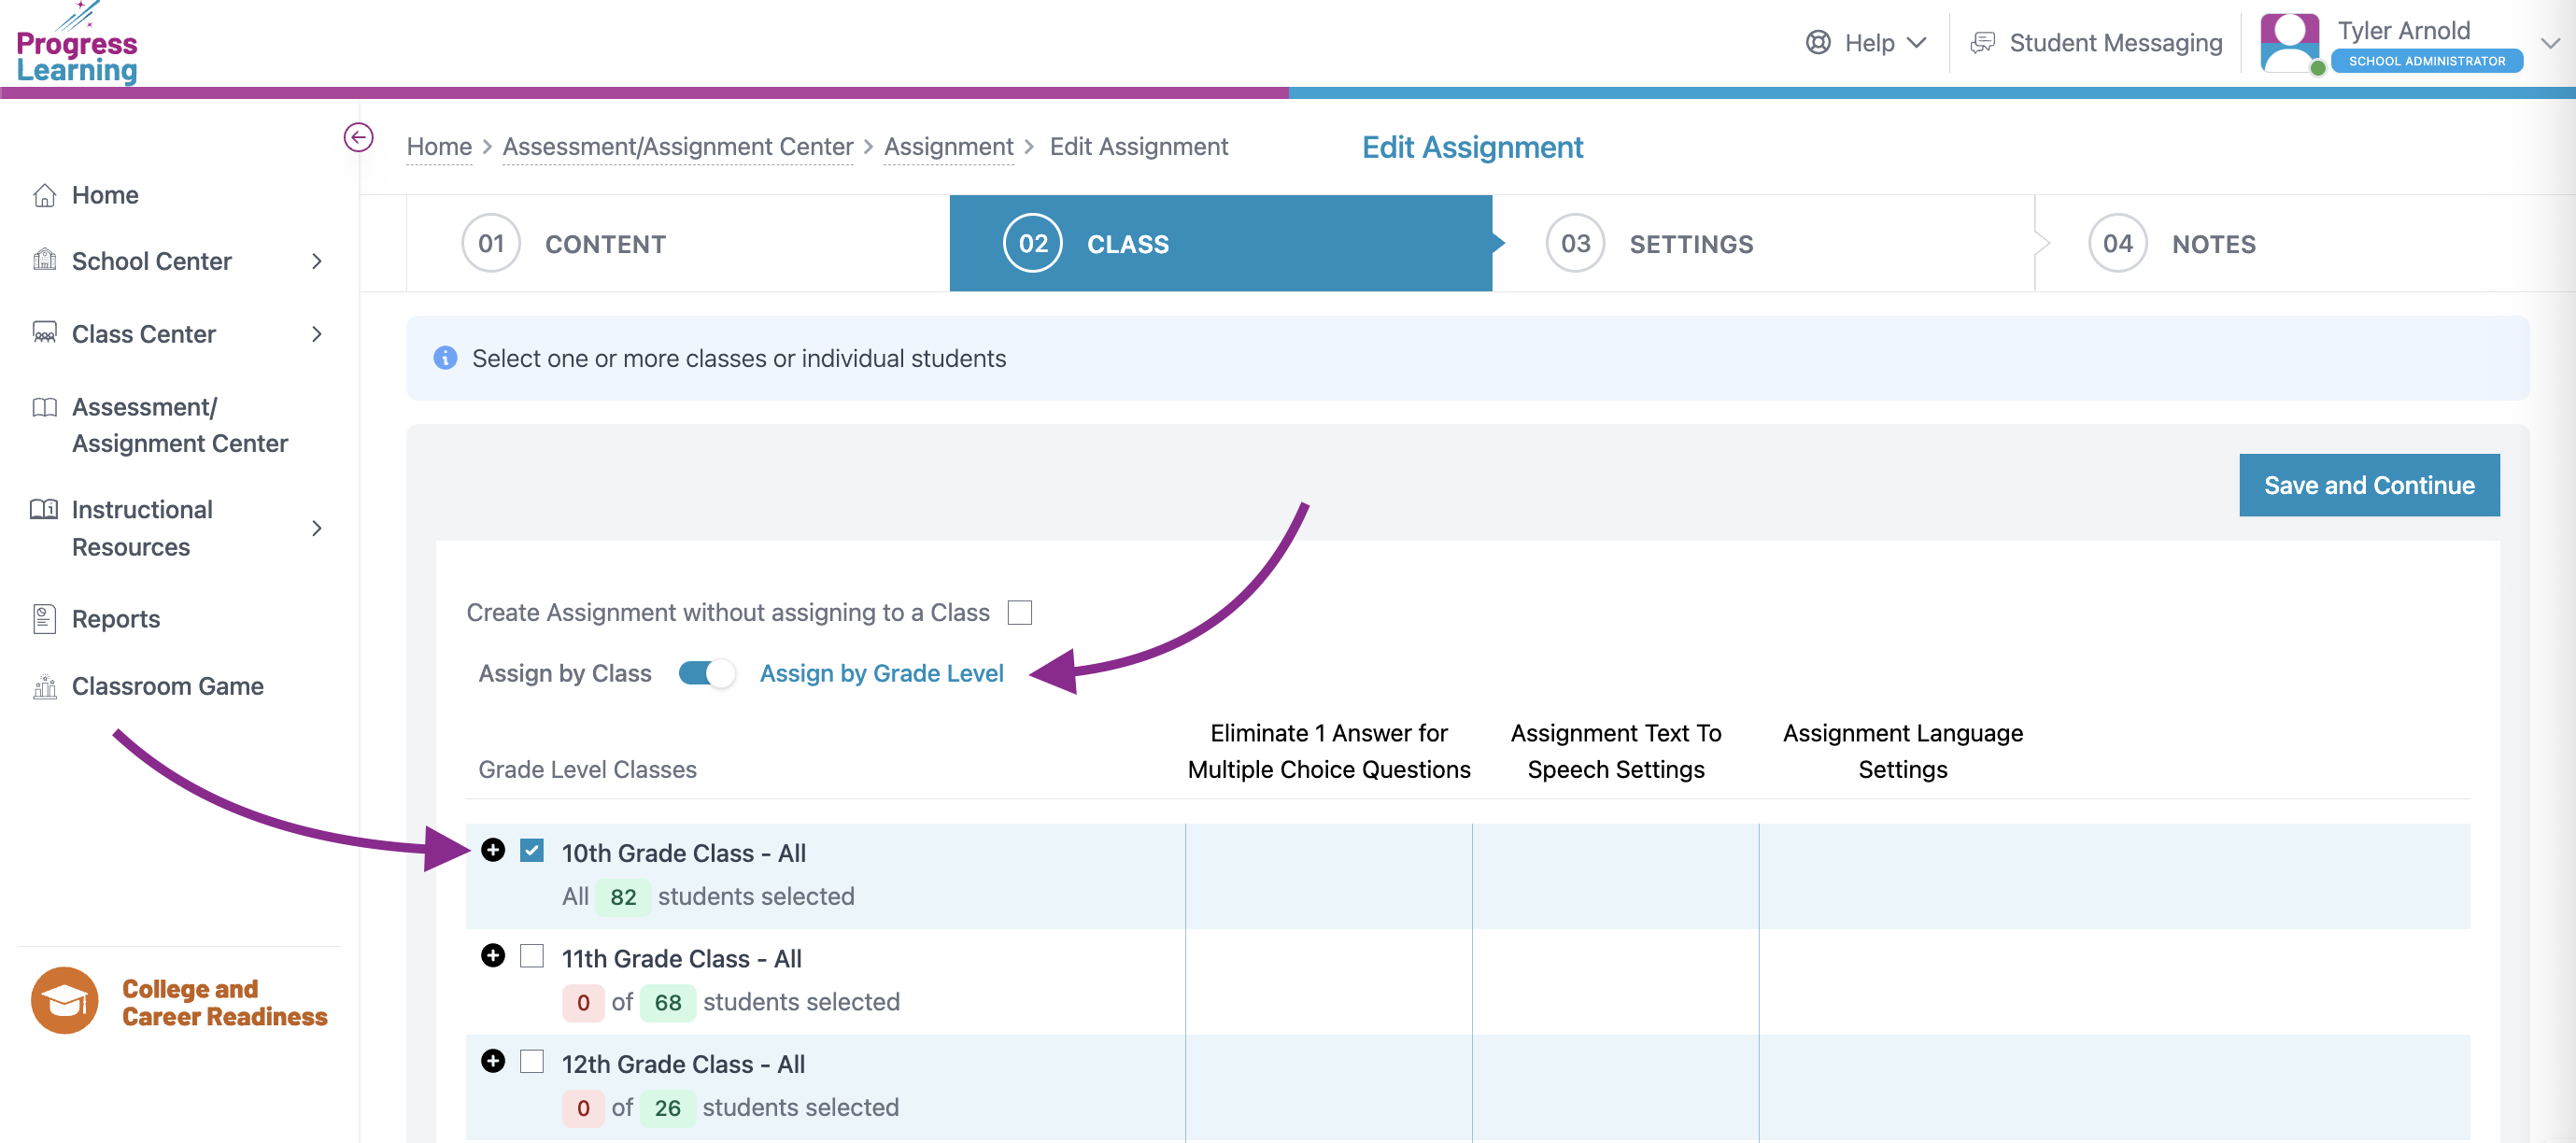
- Check the box next to the Class or, using the Grade Level toggle to assign by Grade, you would like to assign your Assessment to, then press Save and Continue.

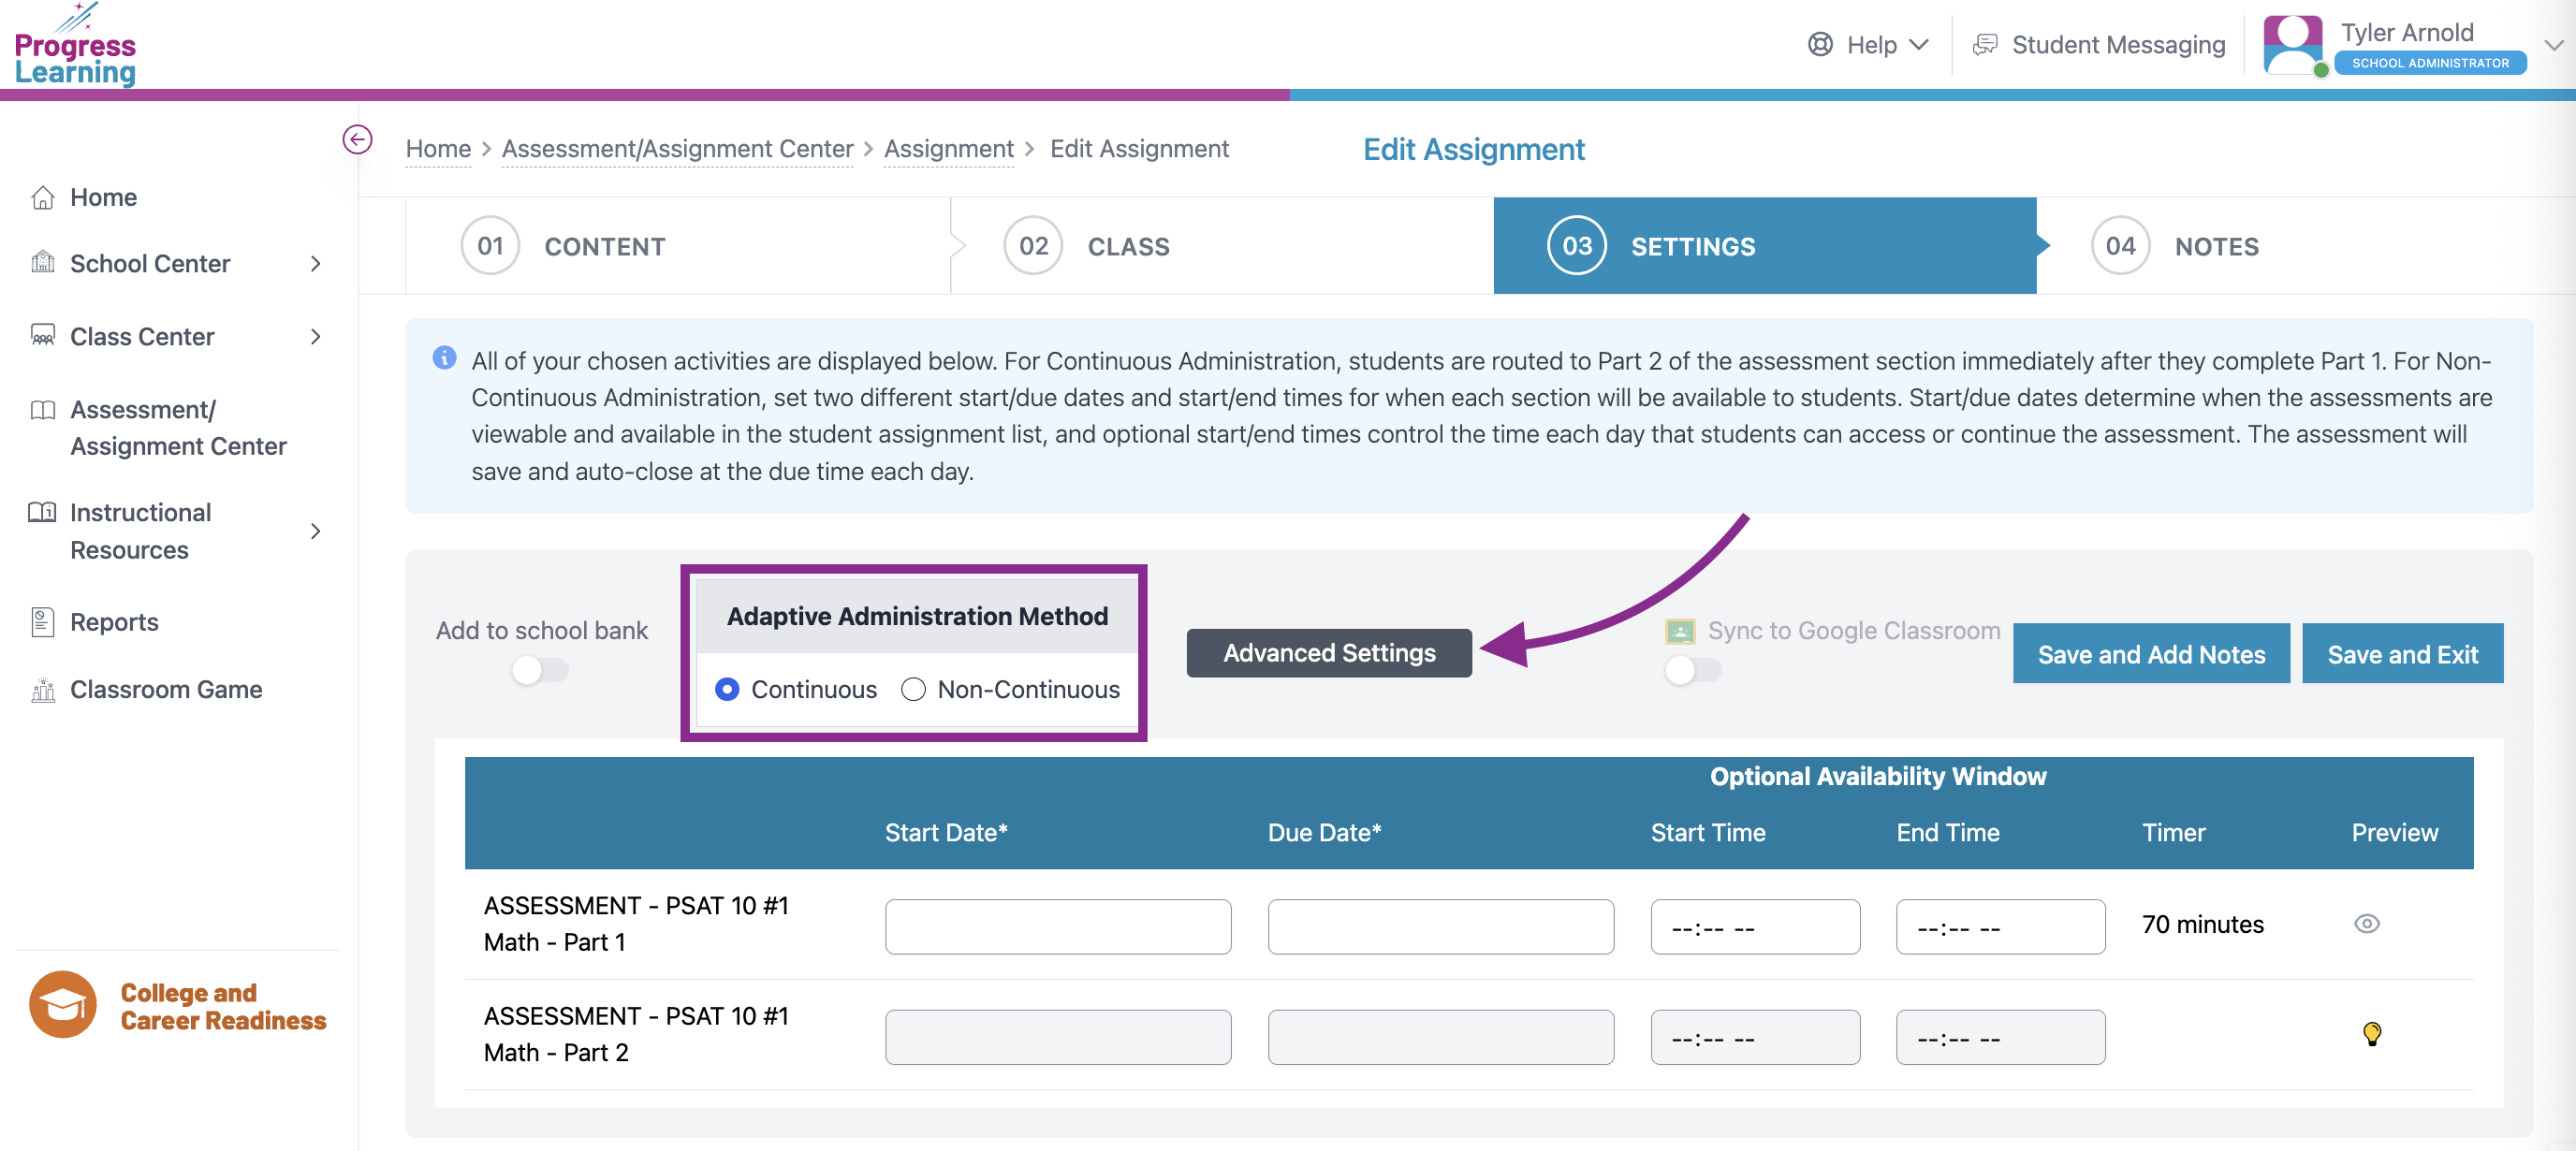
- Assign a Start Date and Due Date, set the Start Time and End Time, select if you would like for it to be a Continuous or Non-Continuous Administration, and you may also select if/when Assessment Results will be released to students via the Advanced Settings button. Press Save and Exit or Save and Add Notes.

Assigning the Assessment from the Assessment Bank
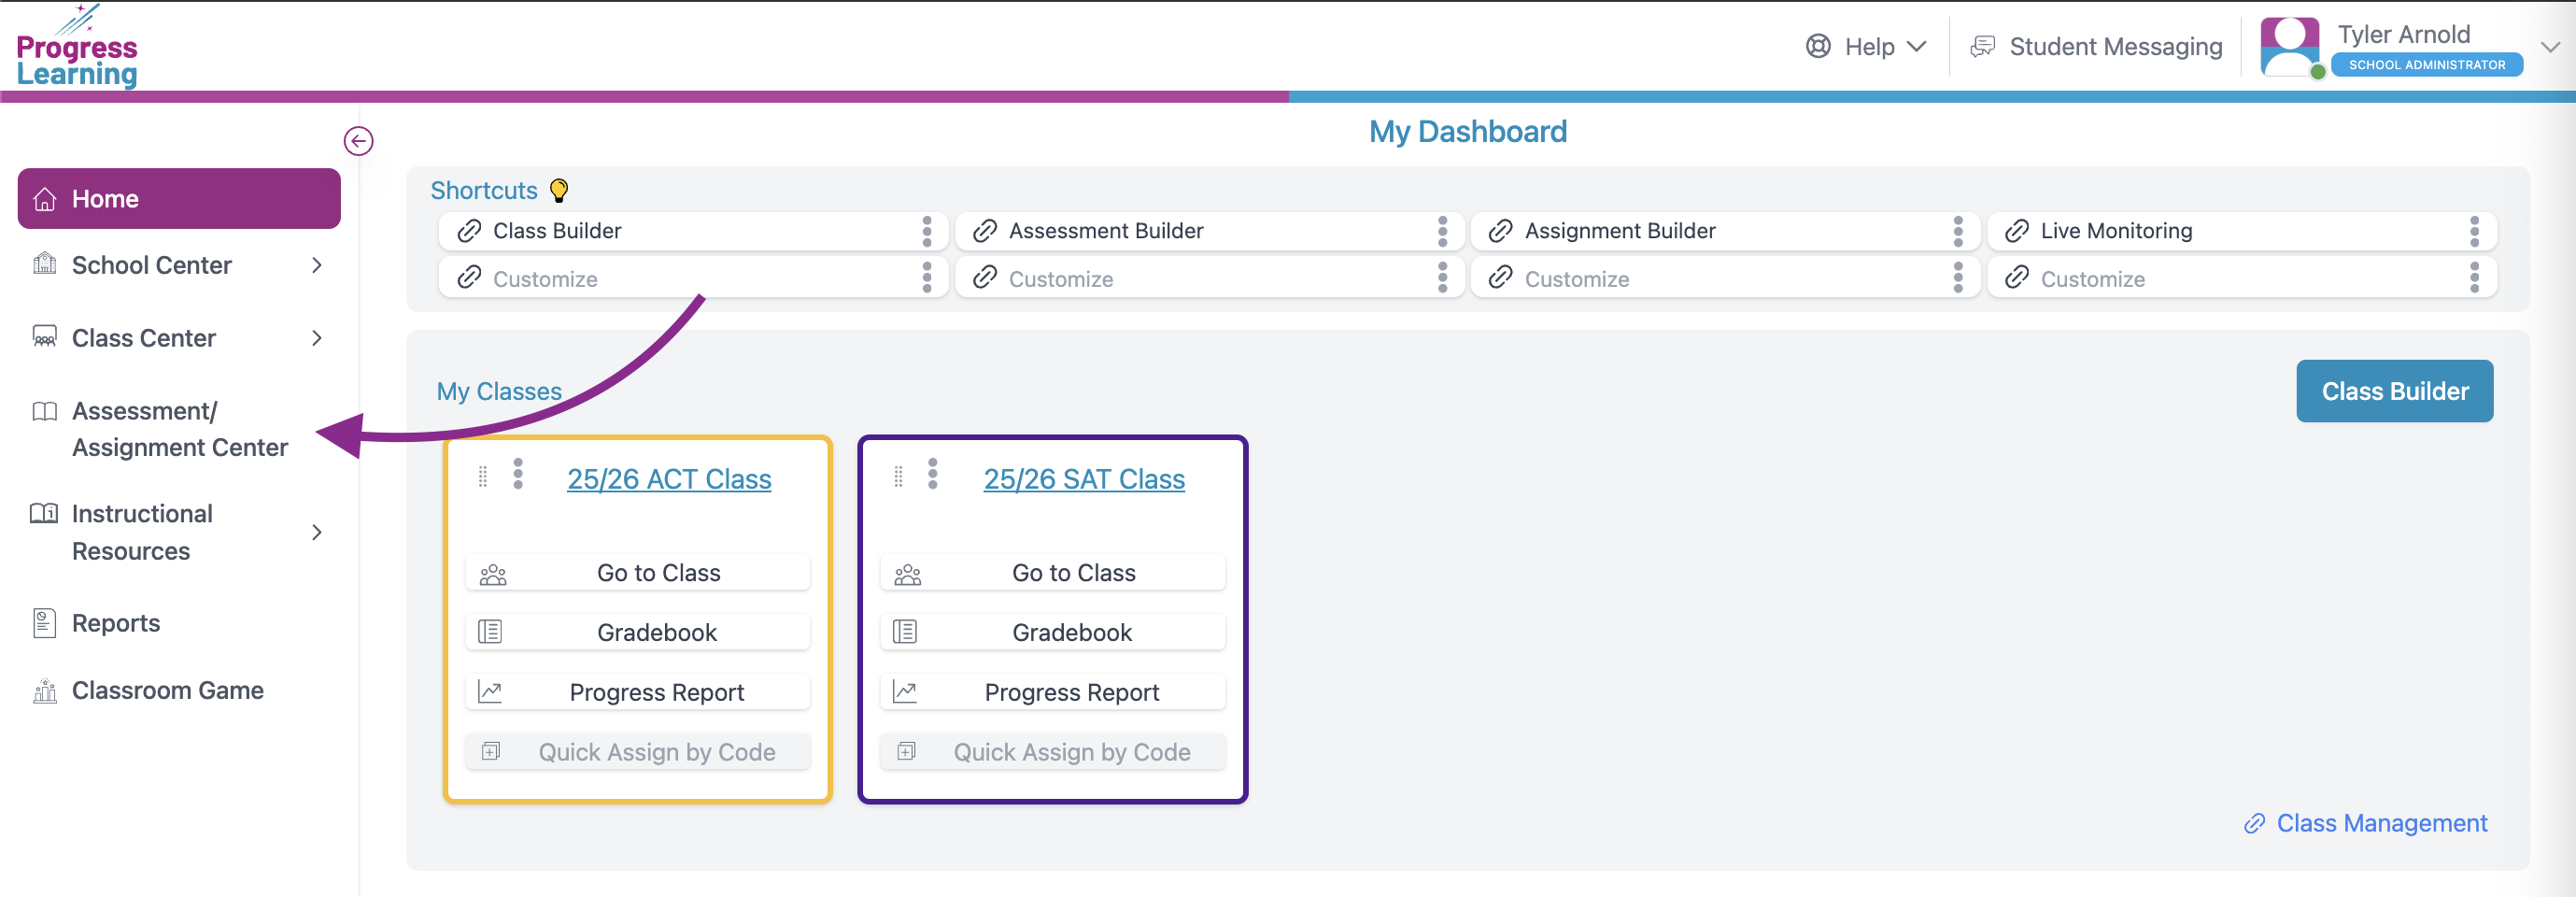
- From the teacher or admin dashboard, select Assessment/Assignment Center.
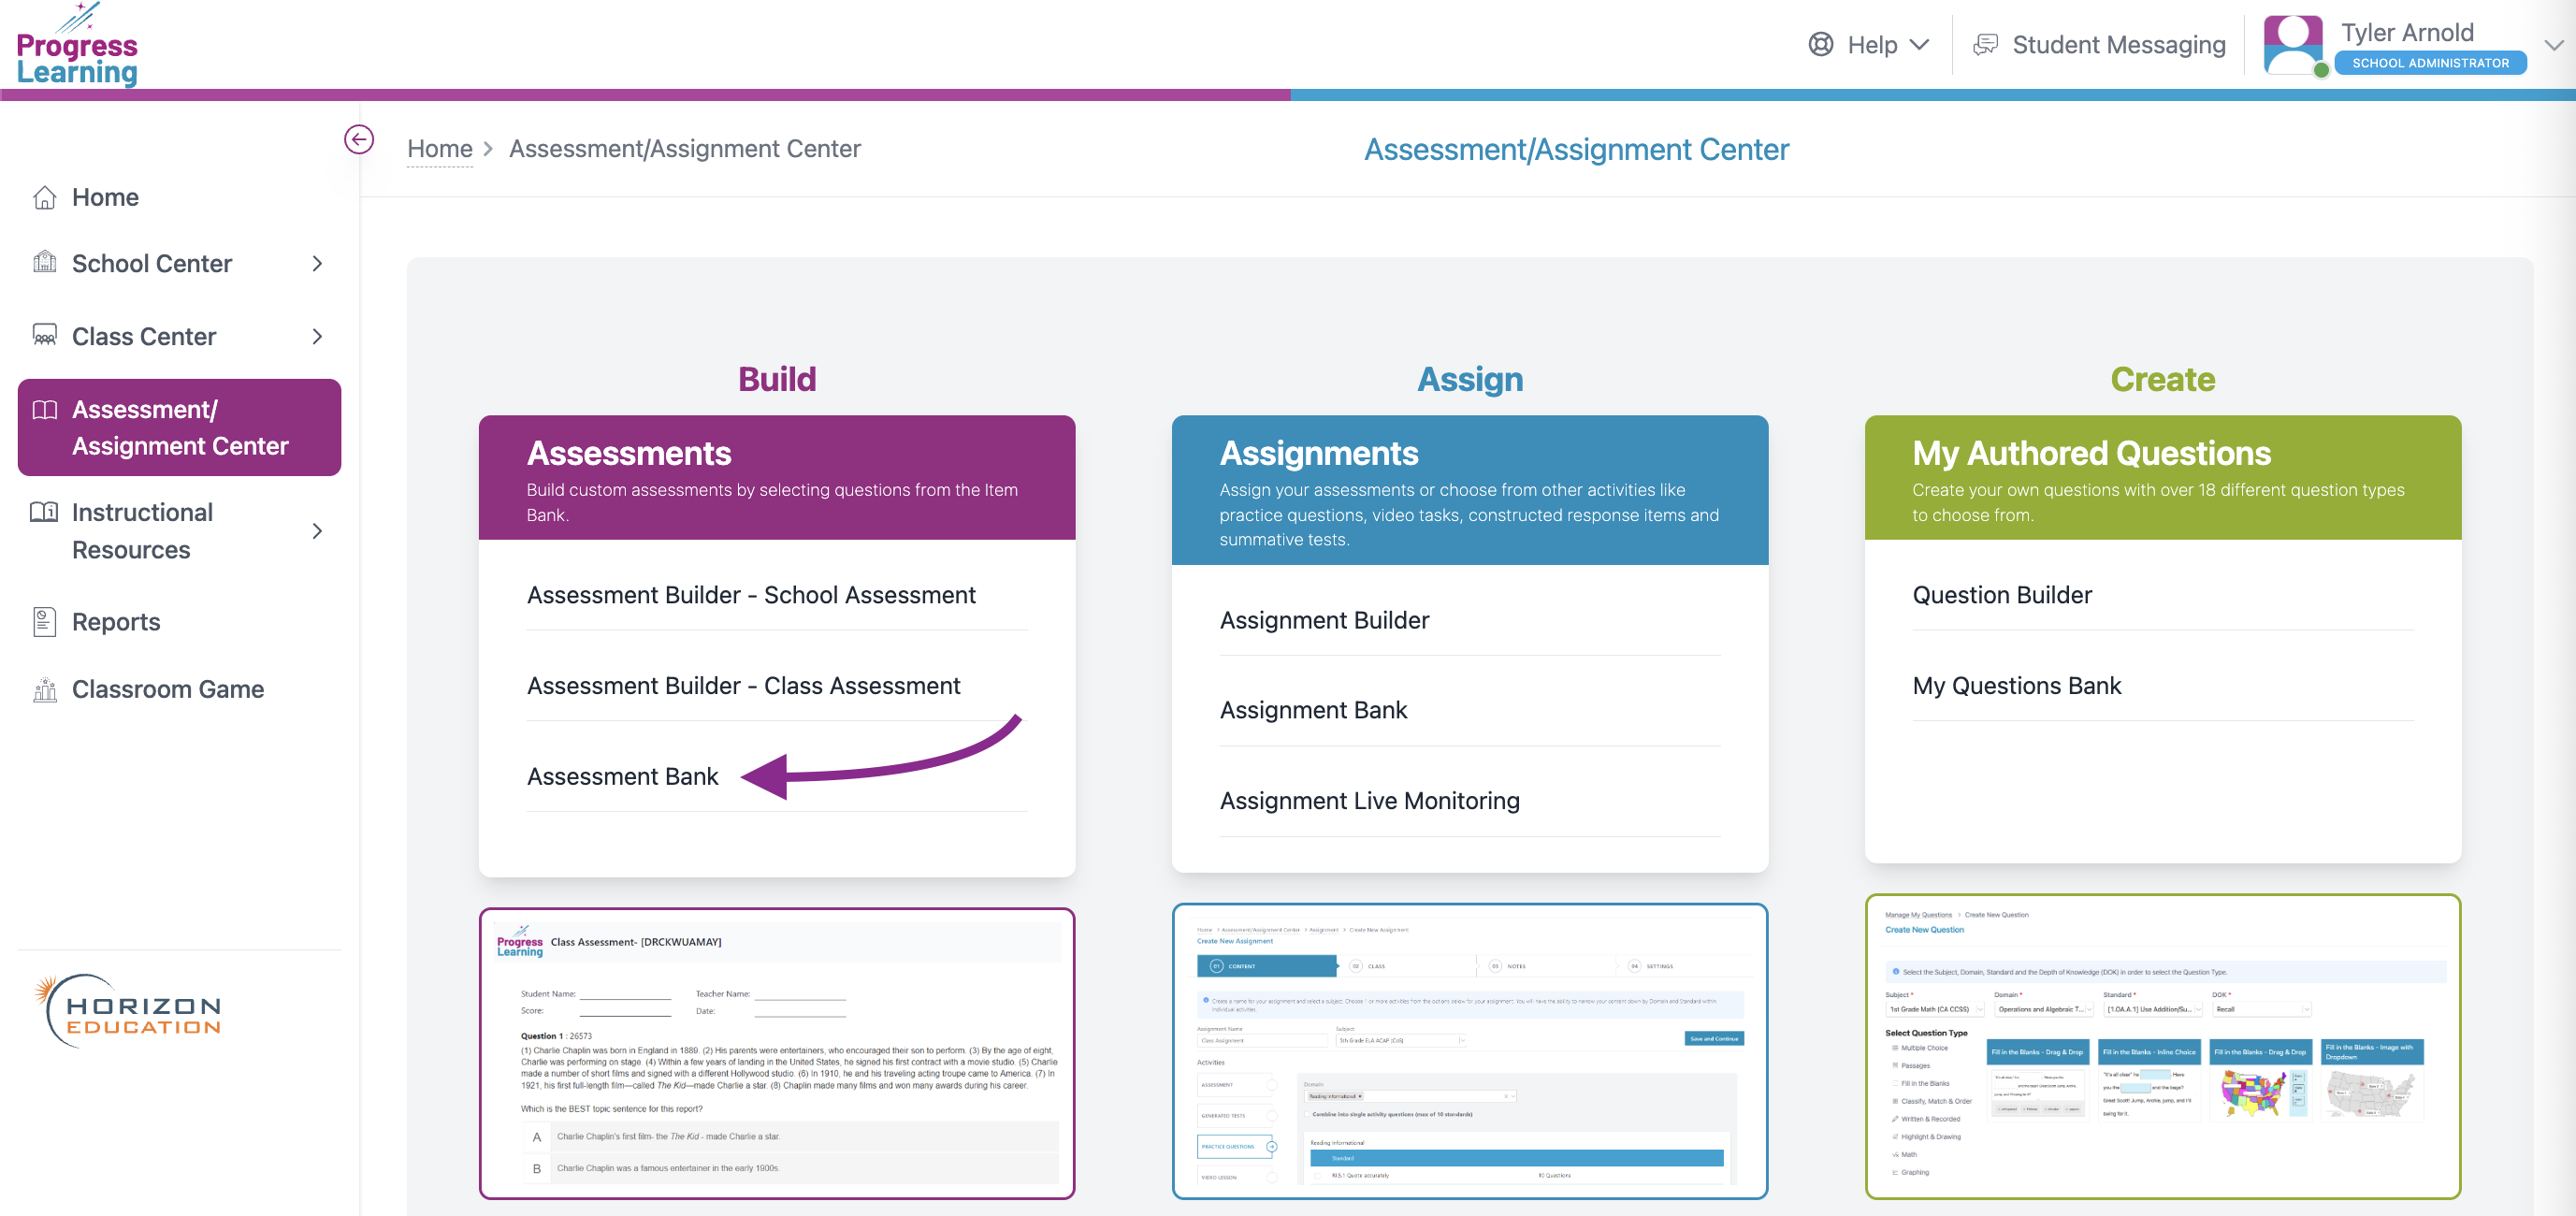
- Click Assessment Bank from the Assessments section.
- Click on the Premium Assessments tab and filter by Subject
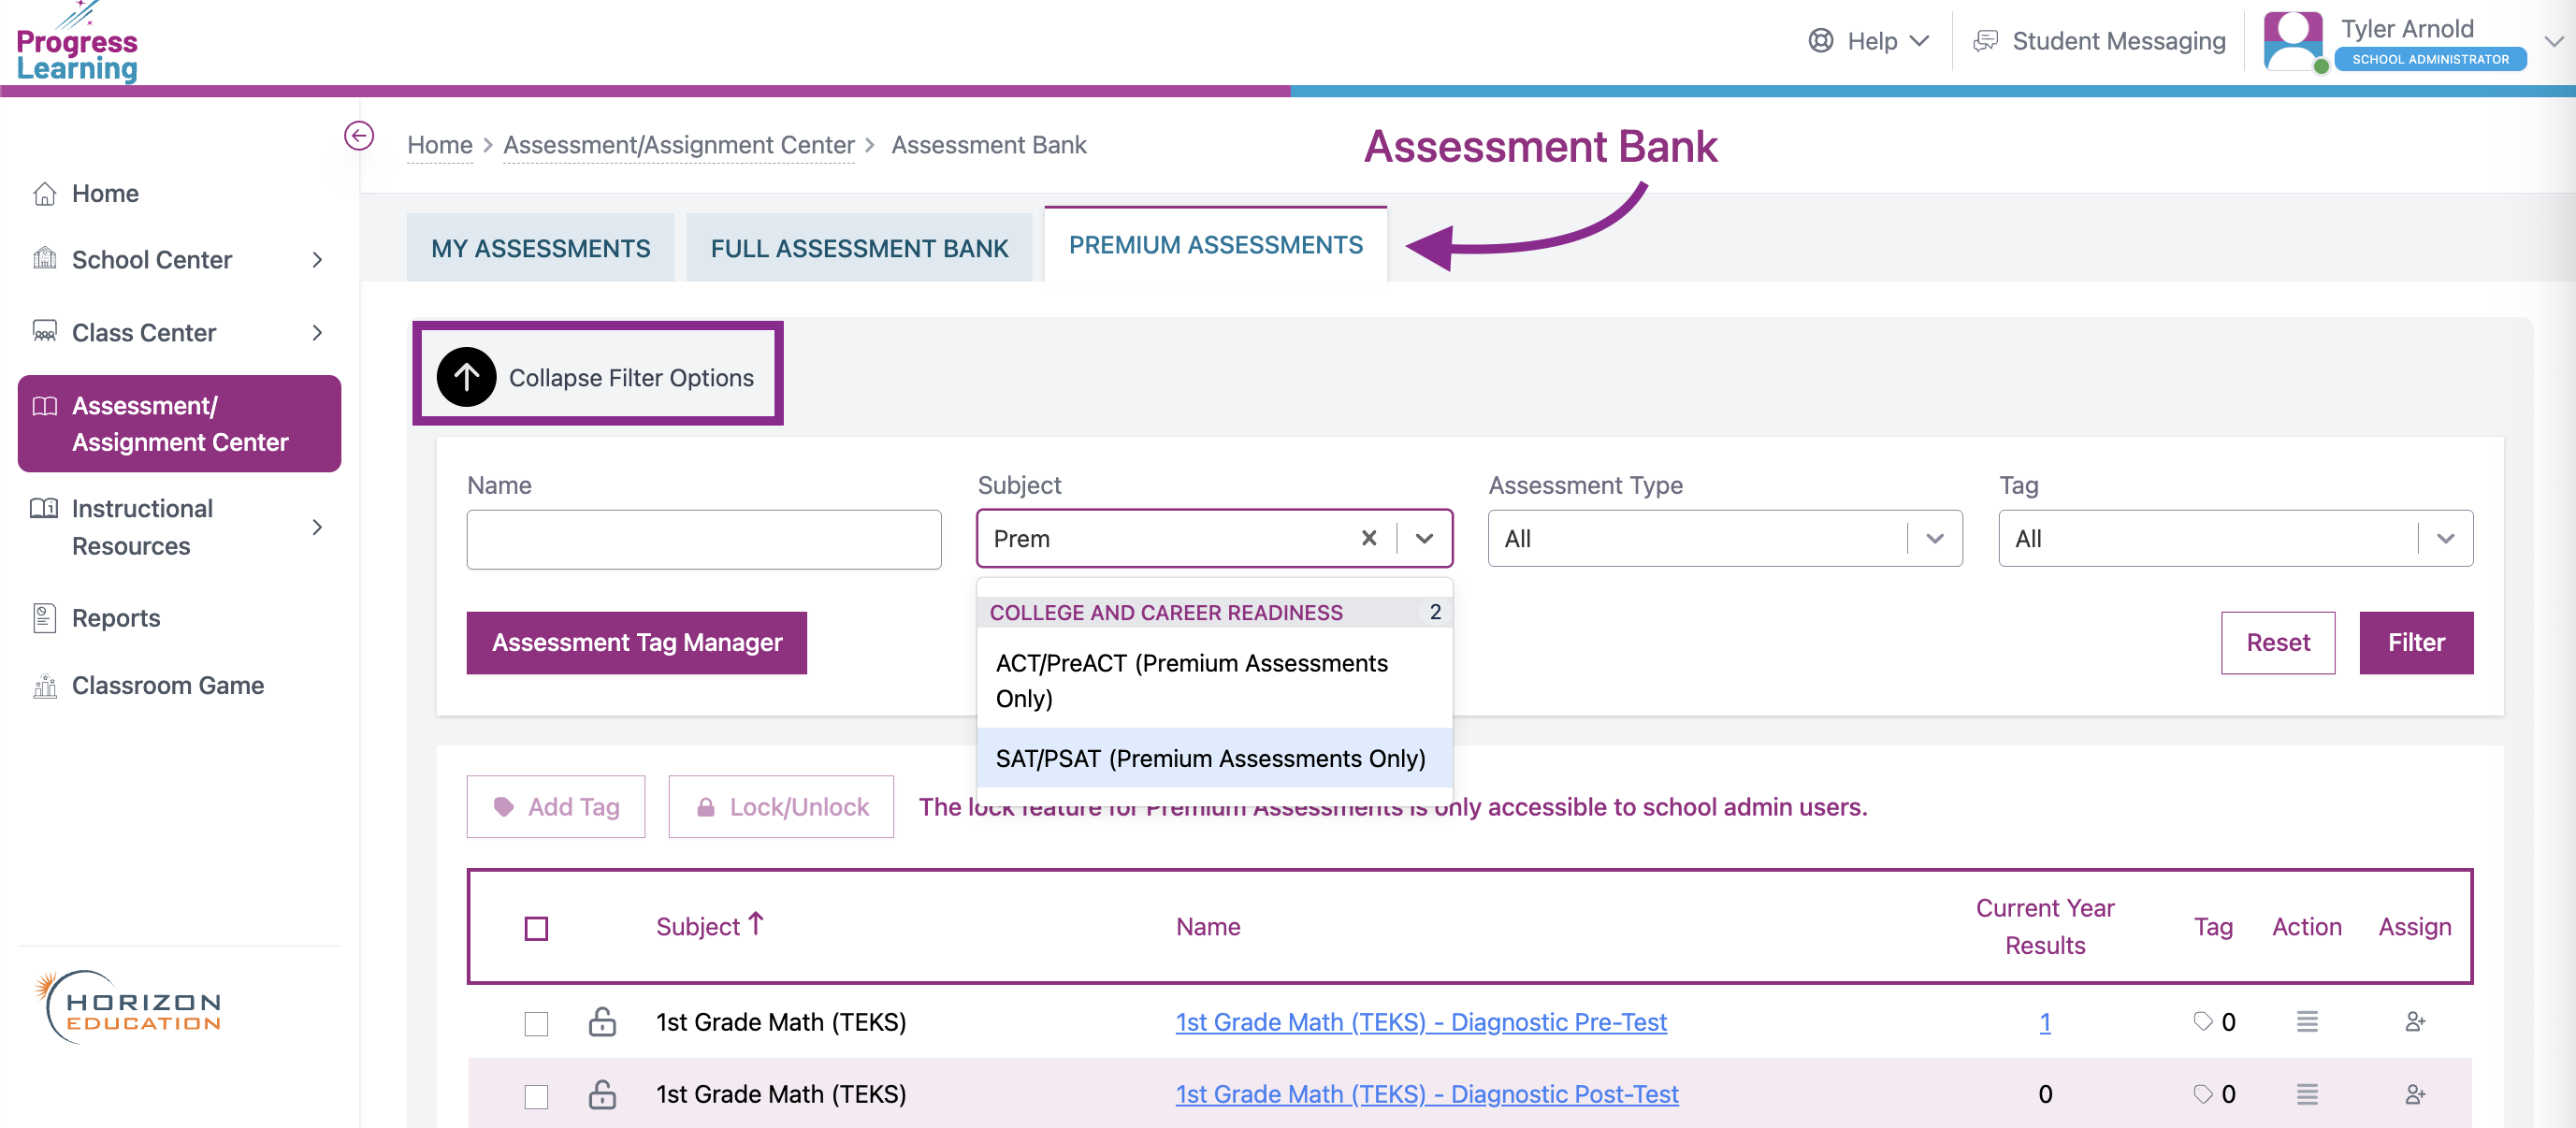
- Check the box next to the SAT/ACT Assessment that you would like to assign to your students.
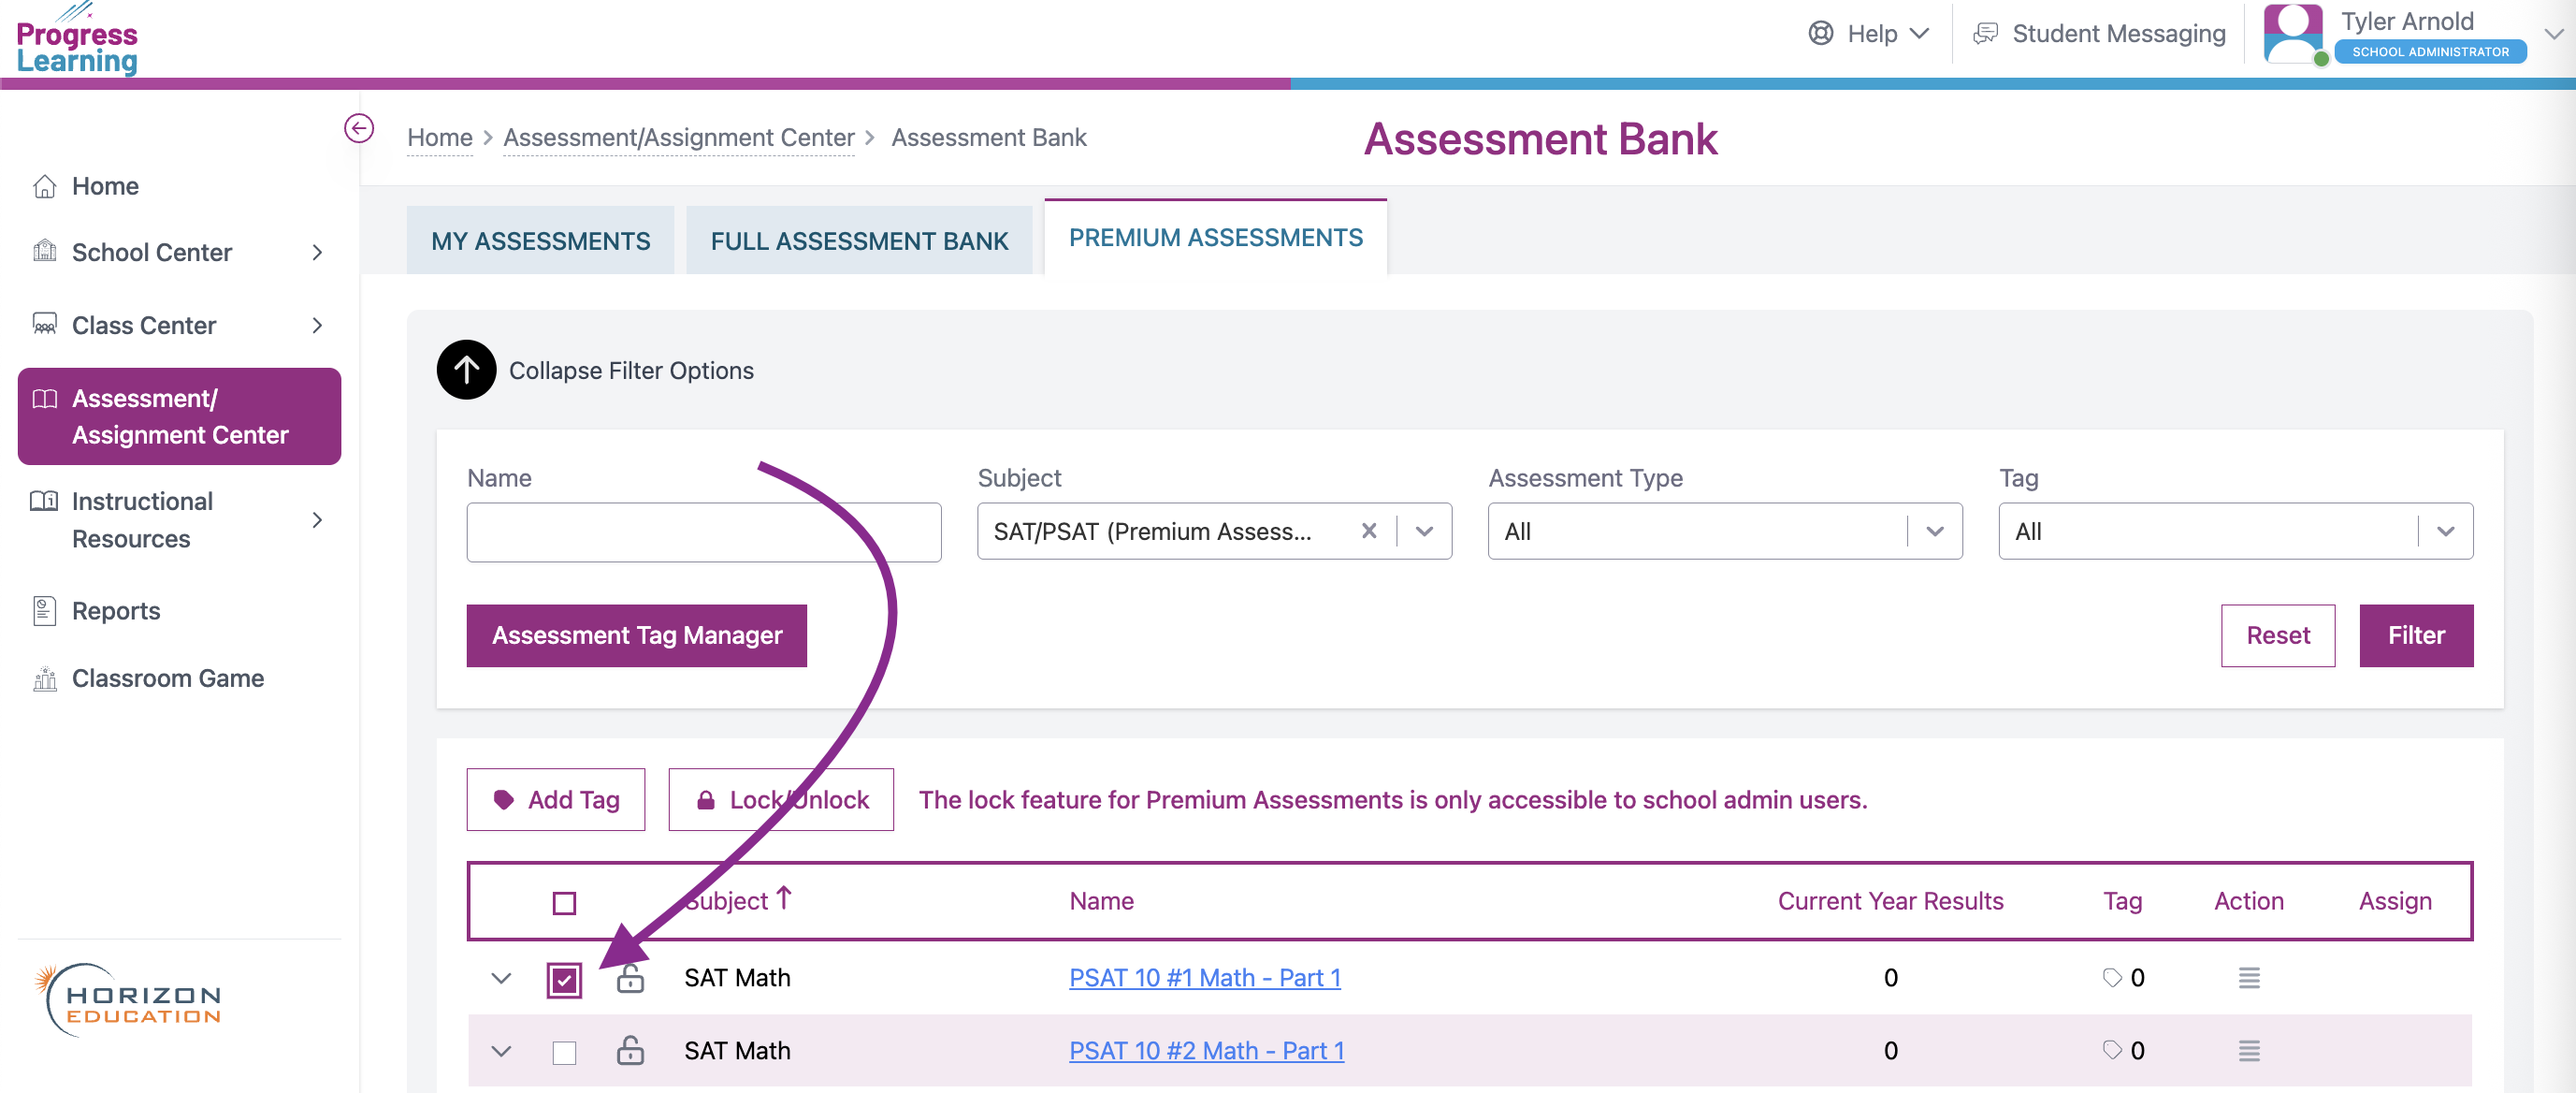
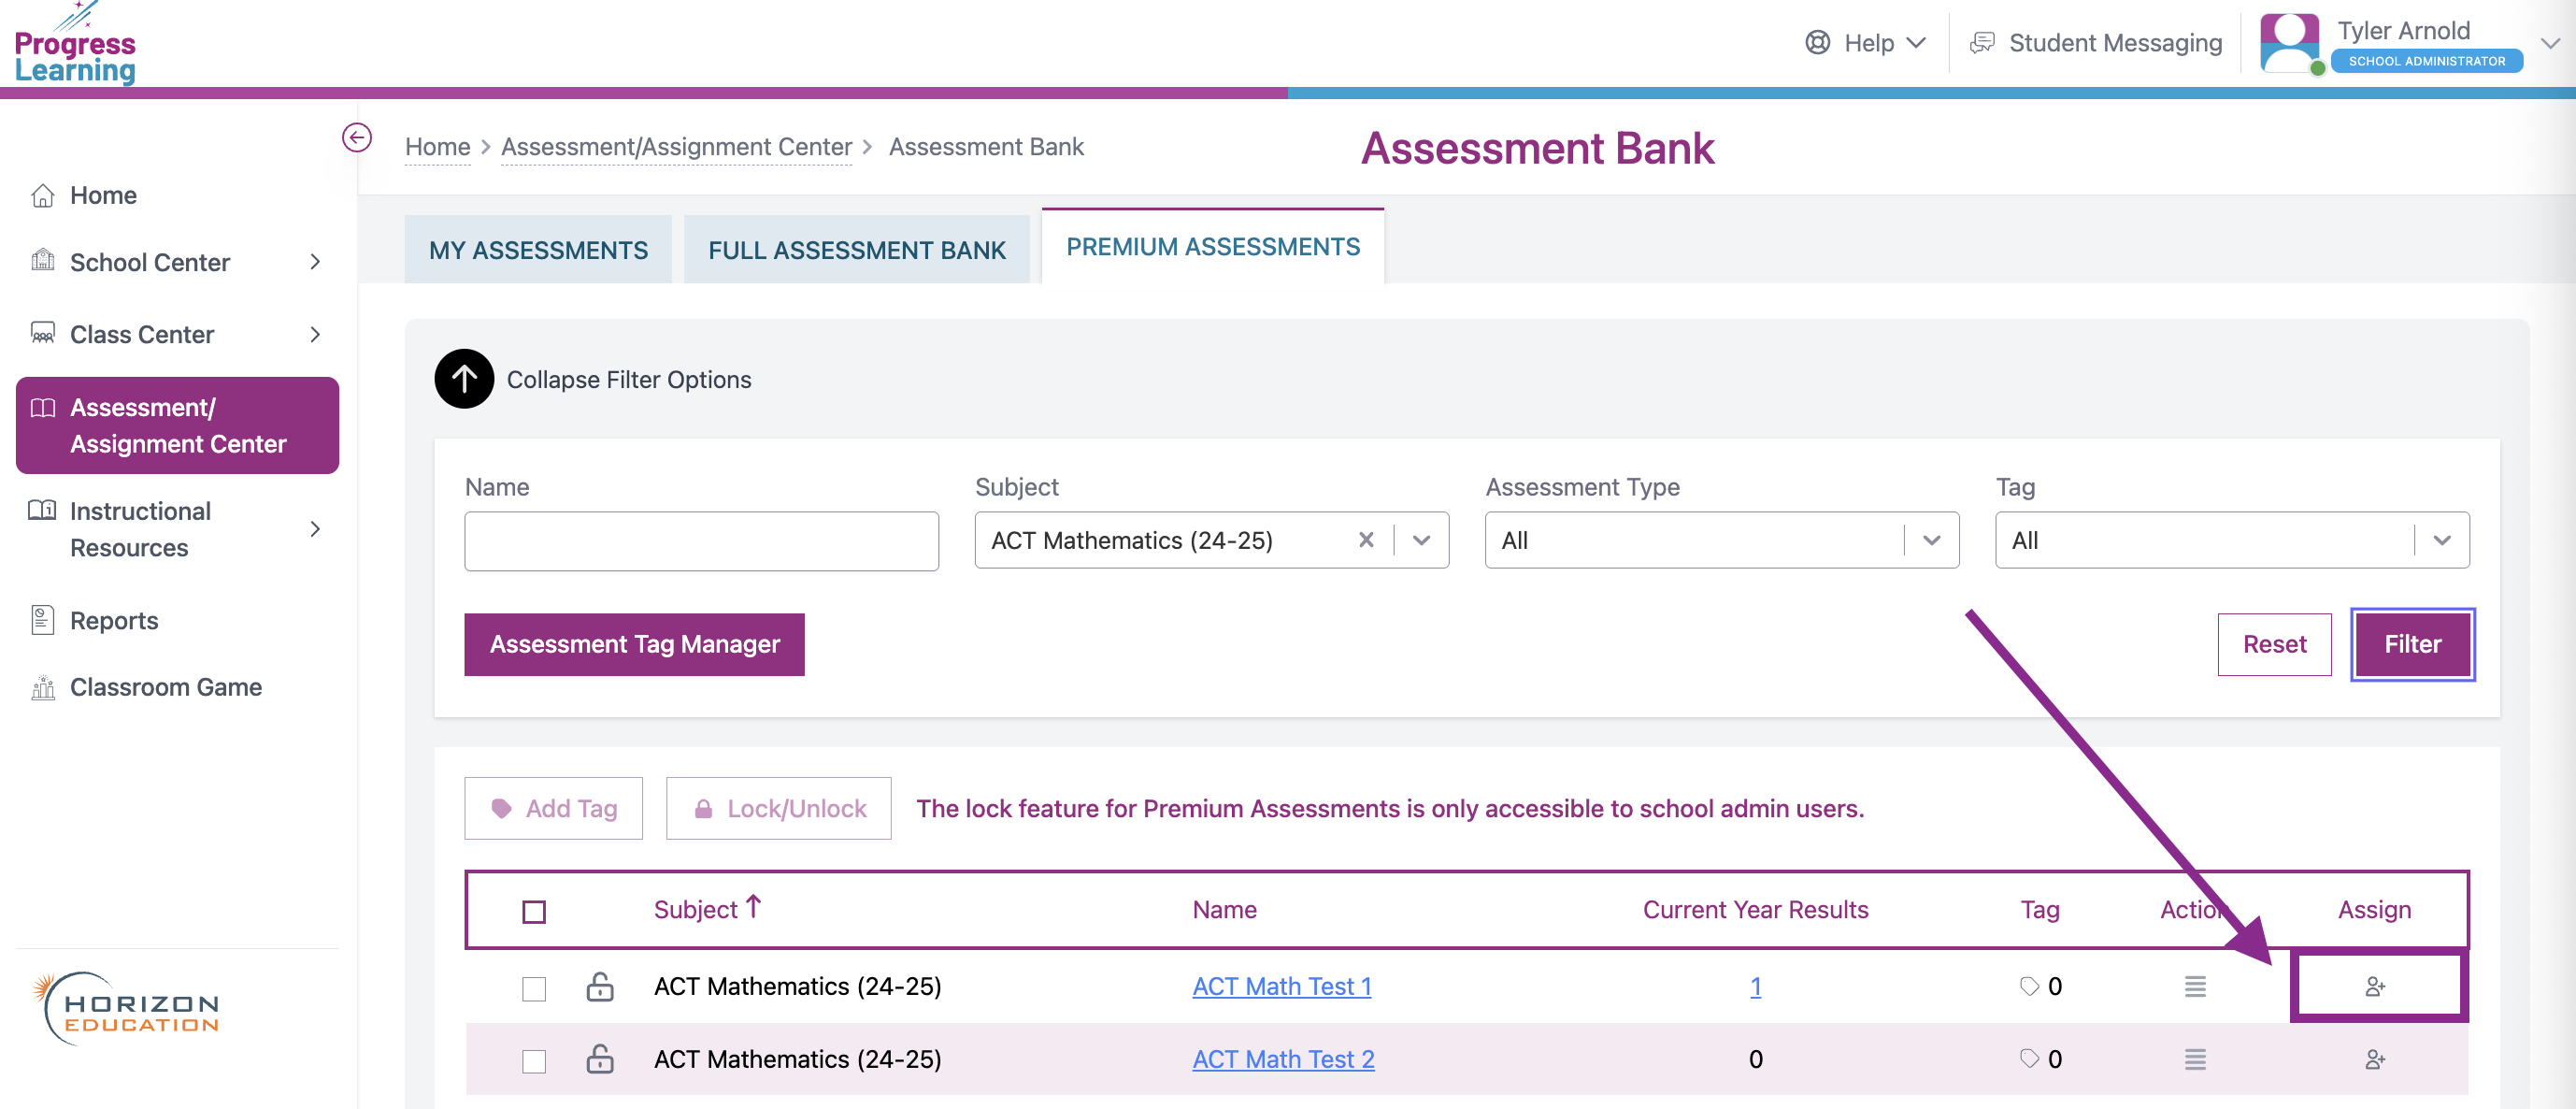
- Click on the icon in the Assign column. You will be taken to the Assignment Builder to complete the assigning process.
- Check the box next to the Class or, using the Grade Level toggle to assign by Grade, you would like to assign your Assessment to, then press Save and Continue.
- Assign a Start Date and Due Date, set the Start Time and End Time, select if you would like for it to be a Continuous or Non-Continuous Administration, and you may also select if/when Assessment Results will be released to students via the Advanced Settings button. Press Save and Exit or Save and Add Notes.

Enabling Accommodations
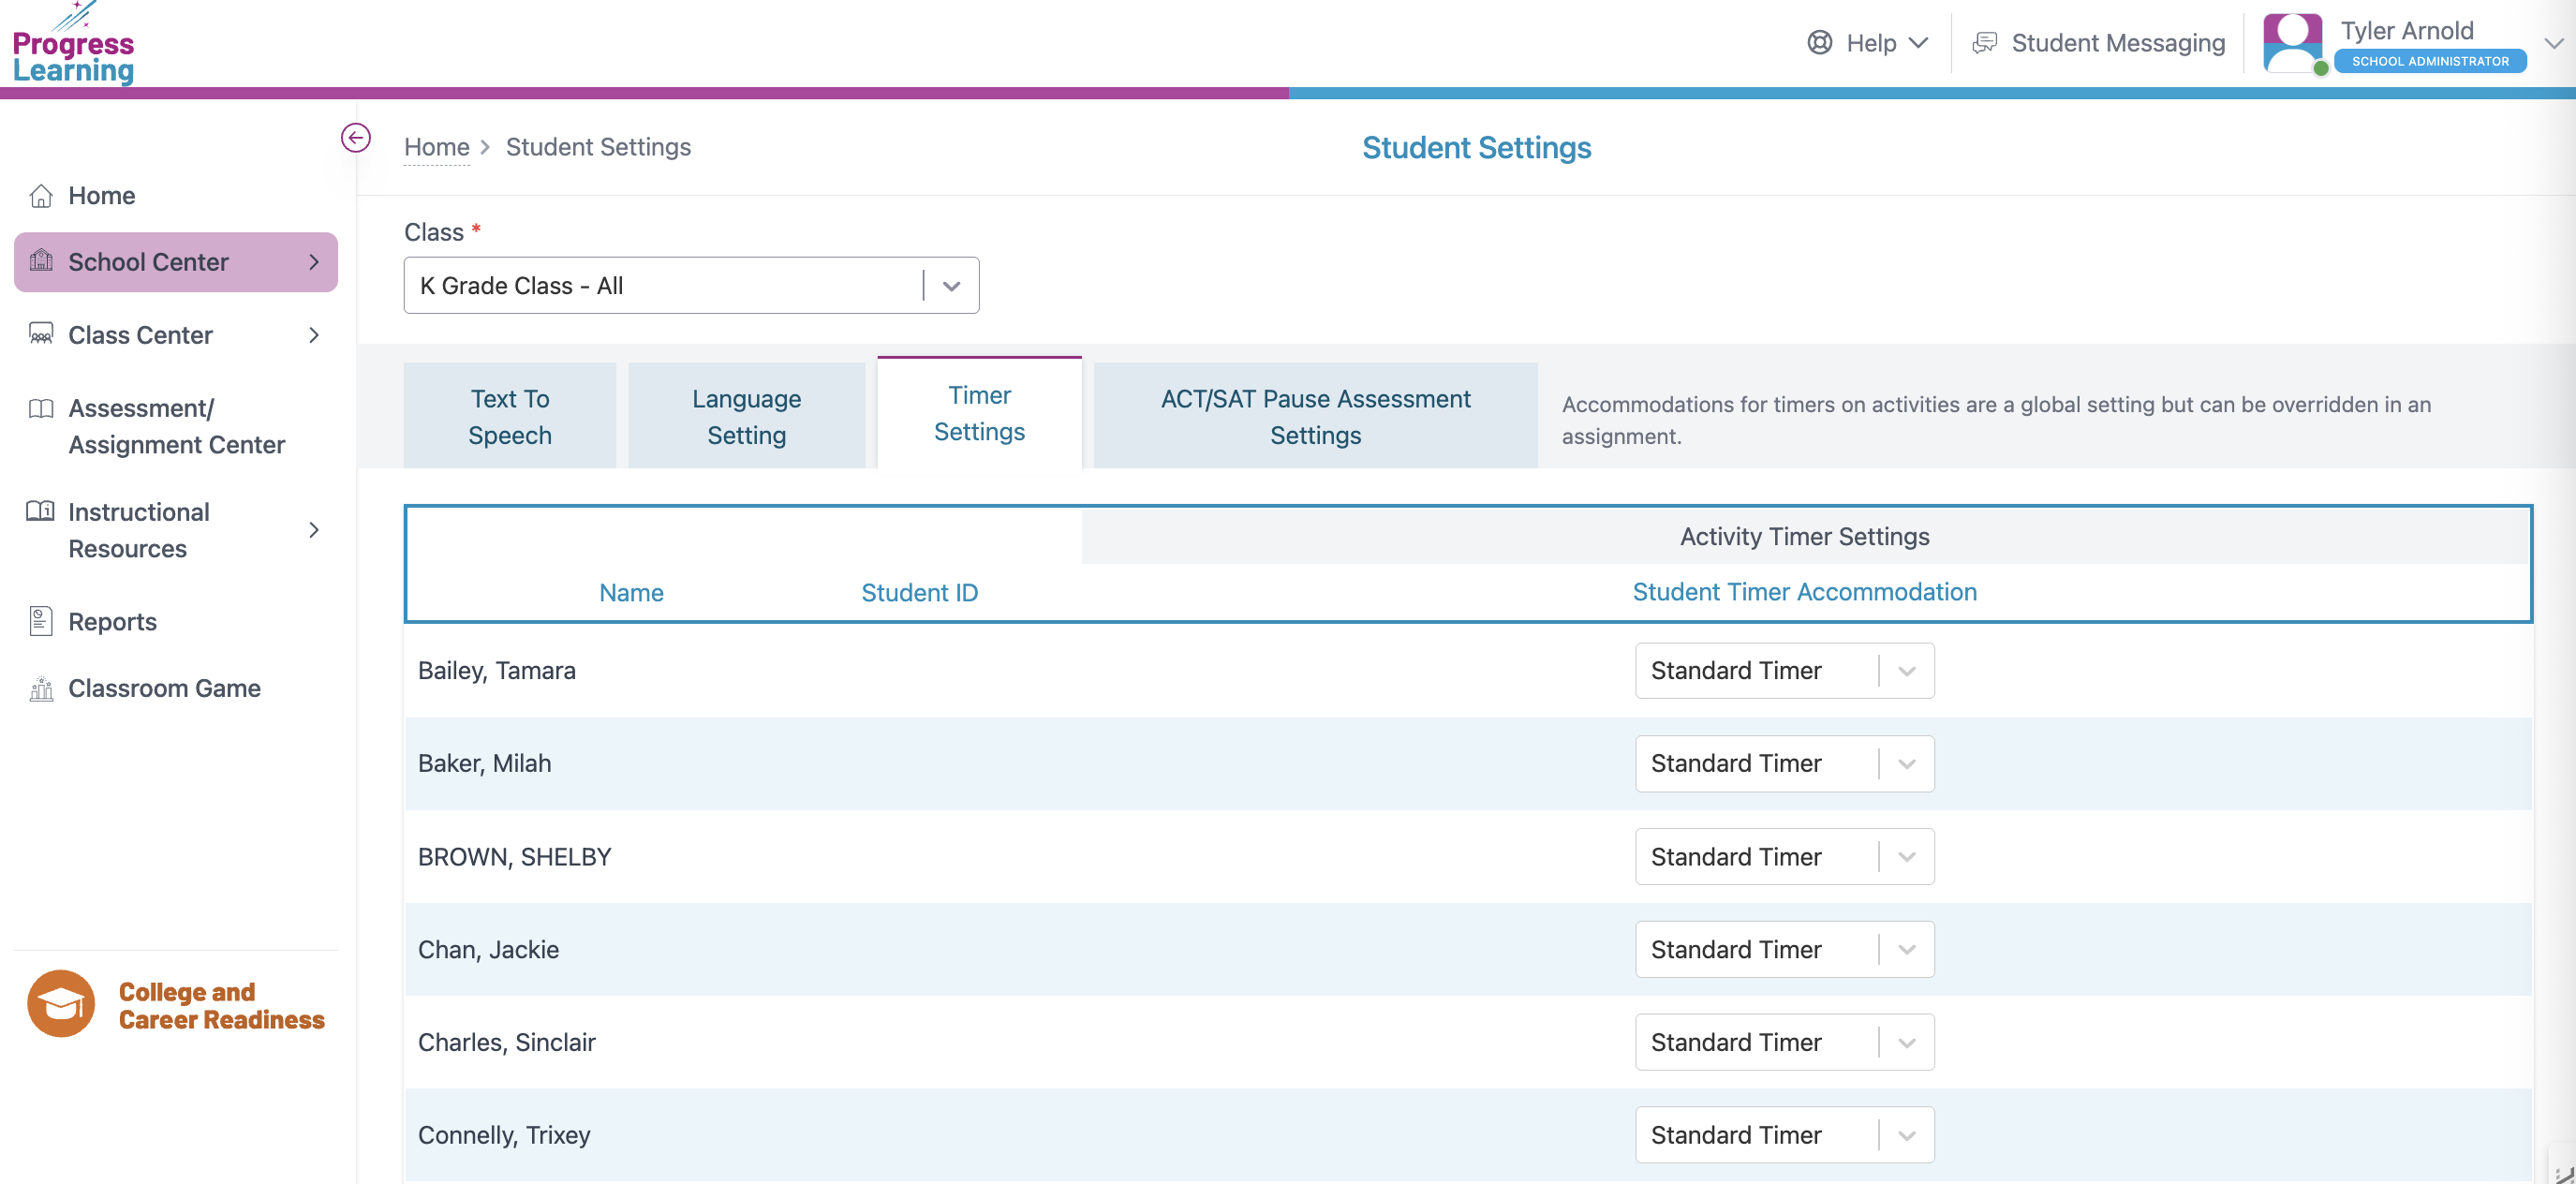
- From the teacher or admin dashboard, select School Center, then Student Settings.
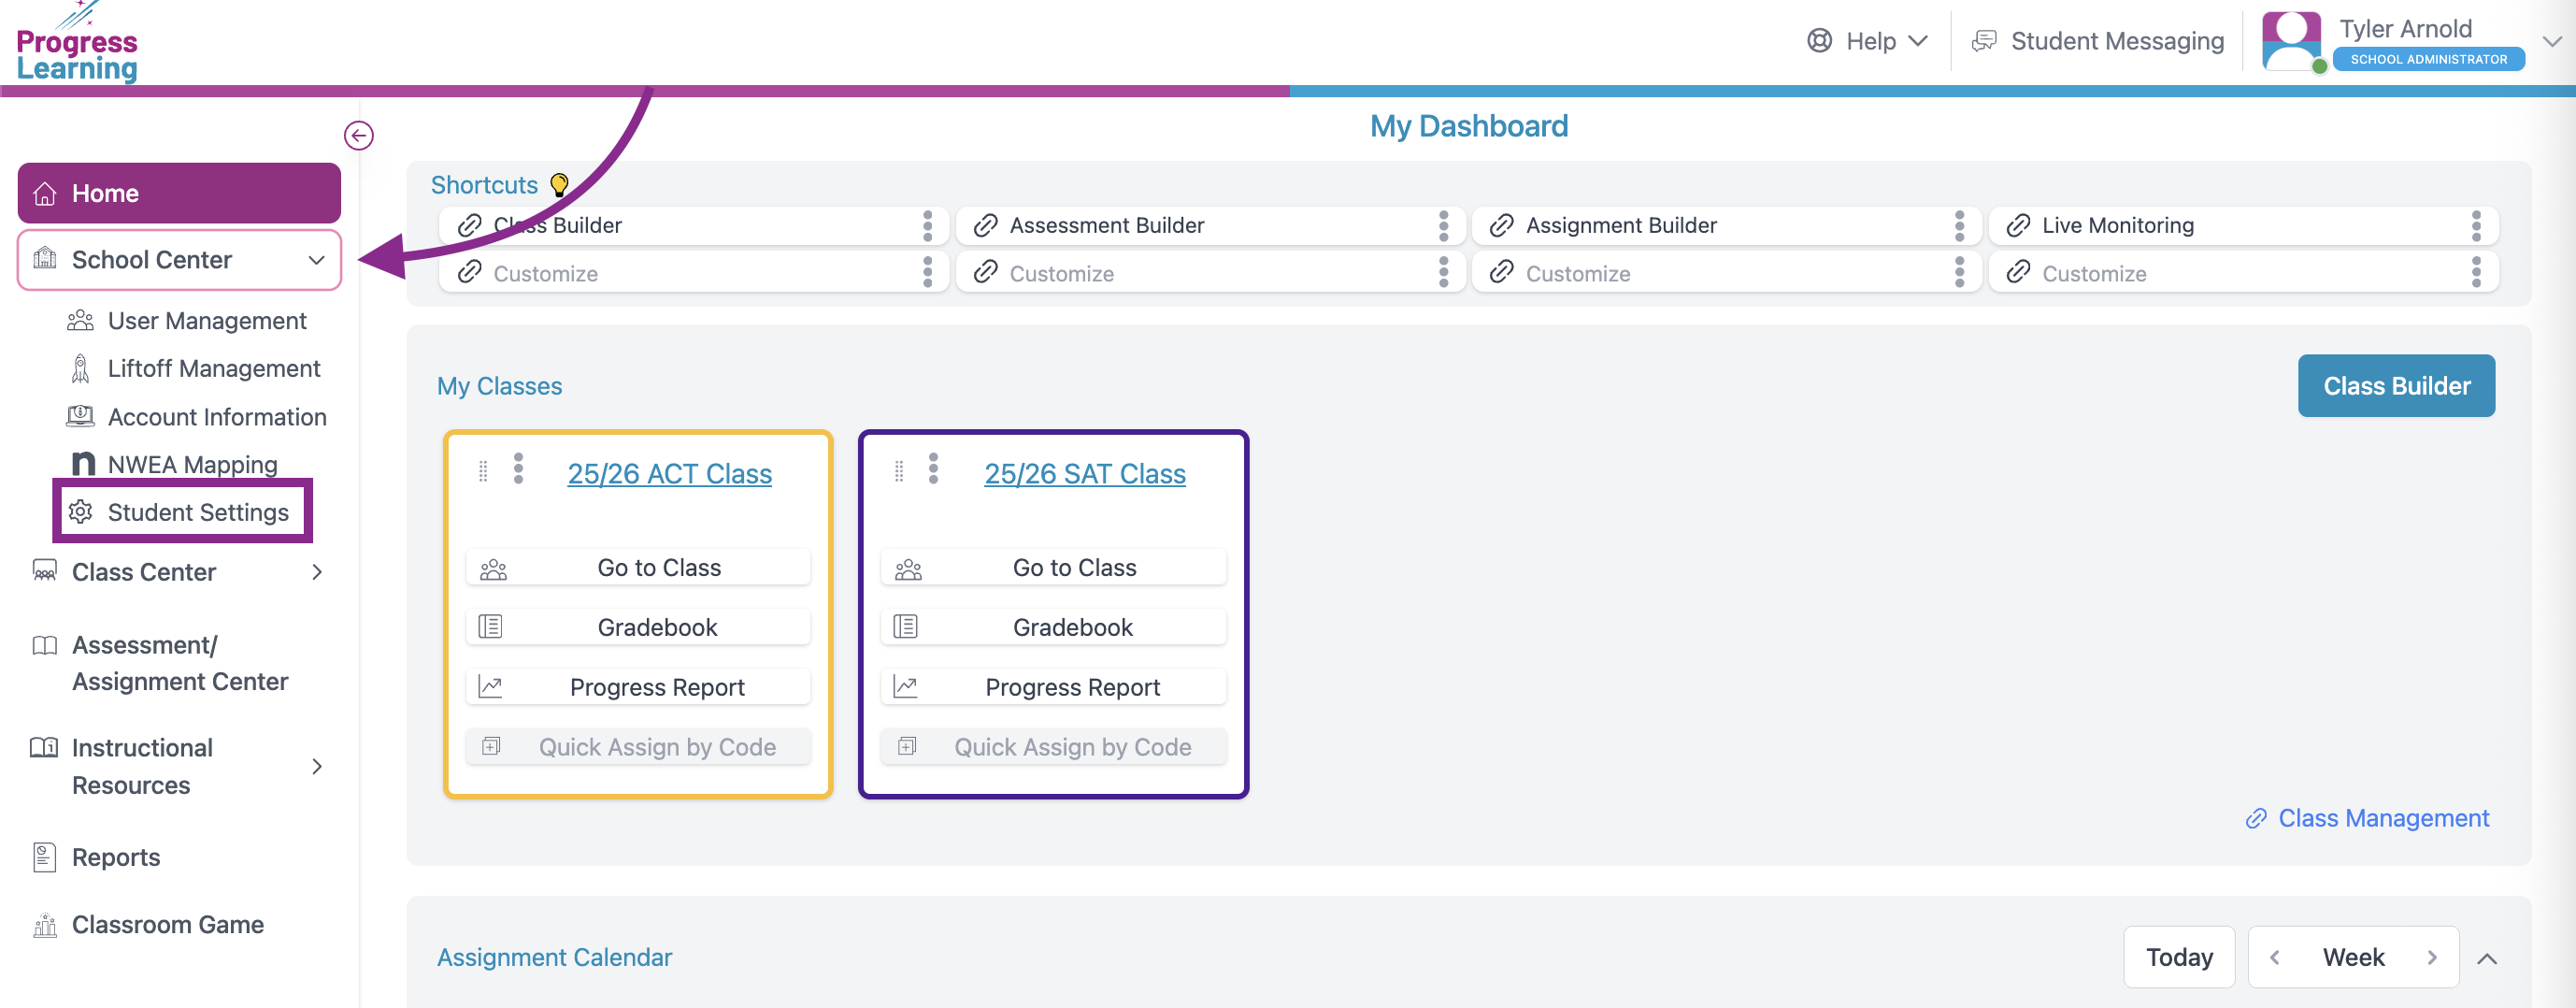
- Select the Class filter and press the Grade Level Class or Class name.
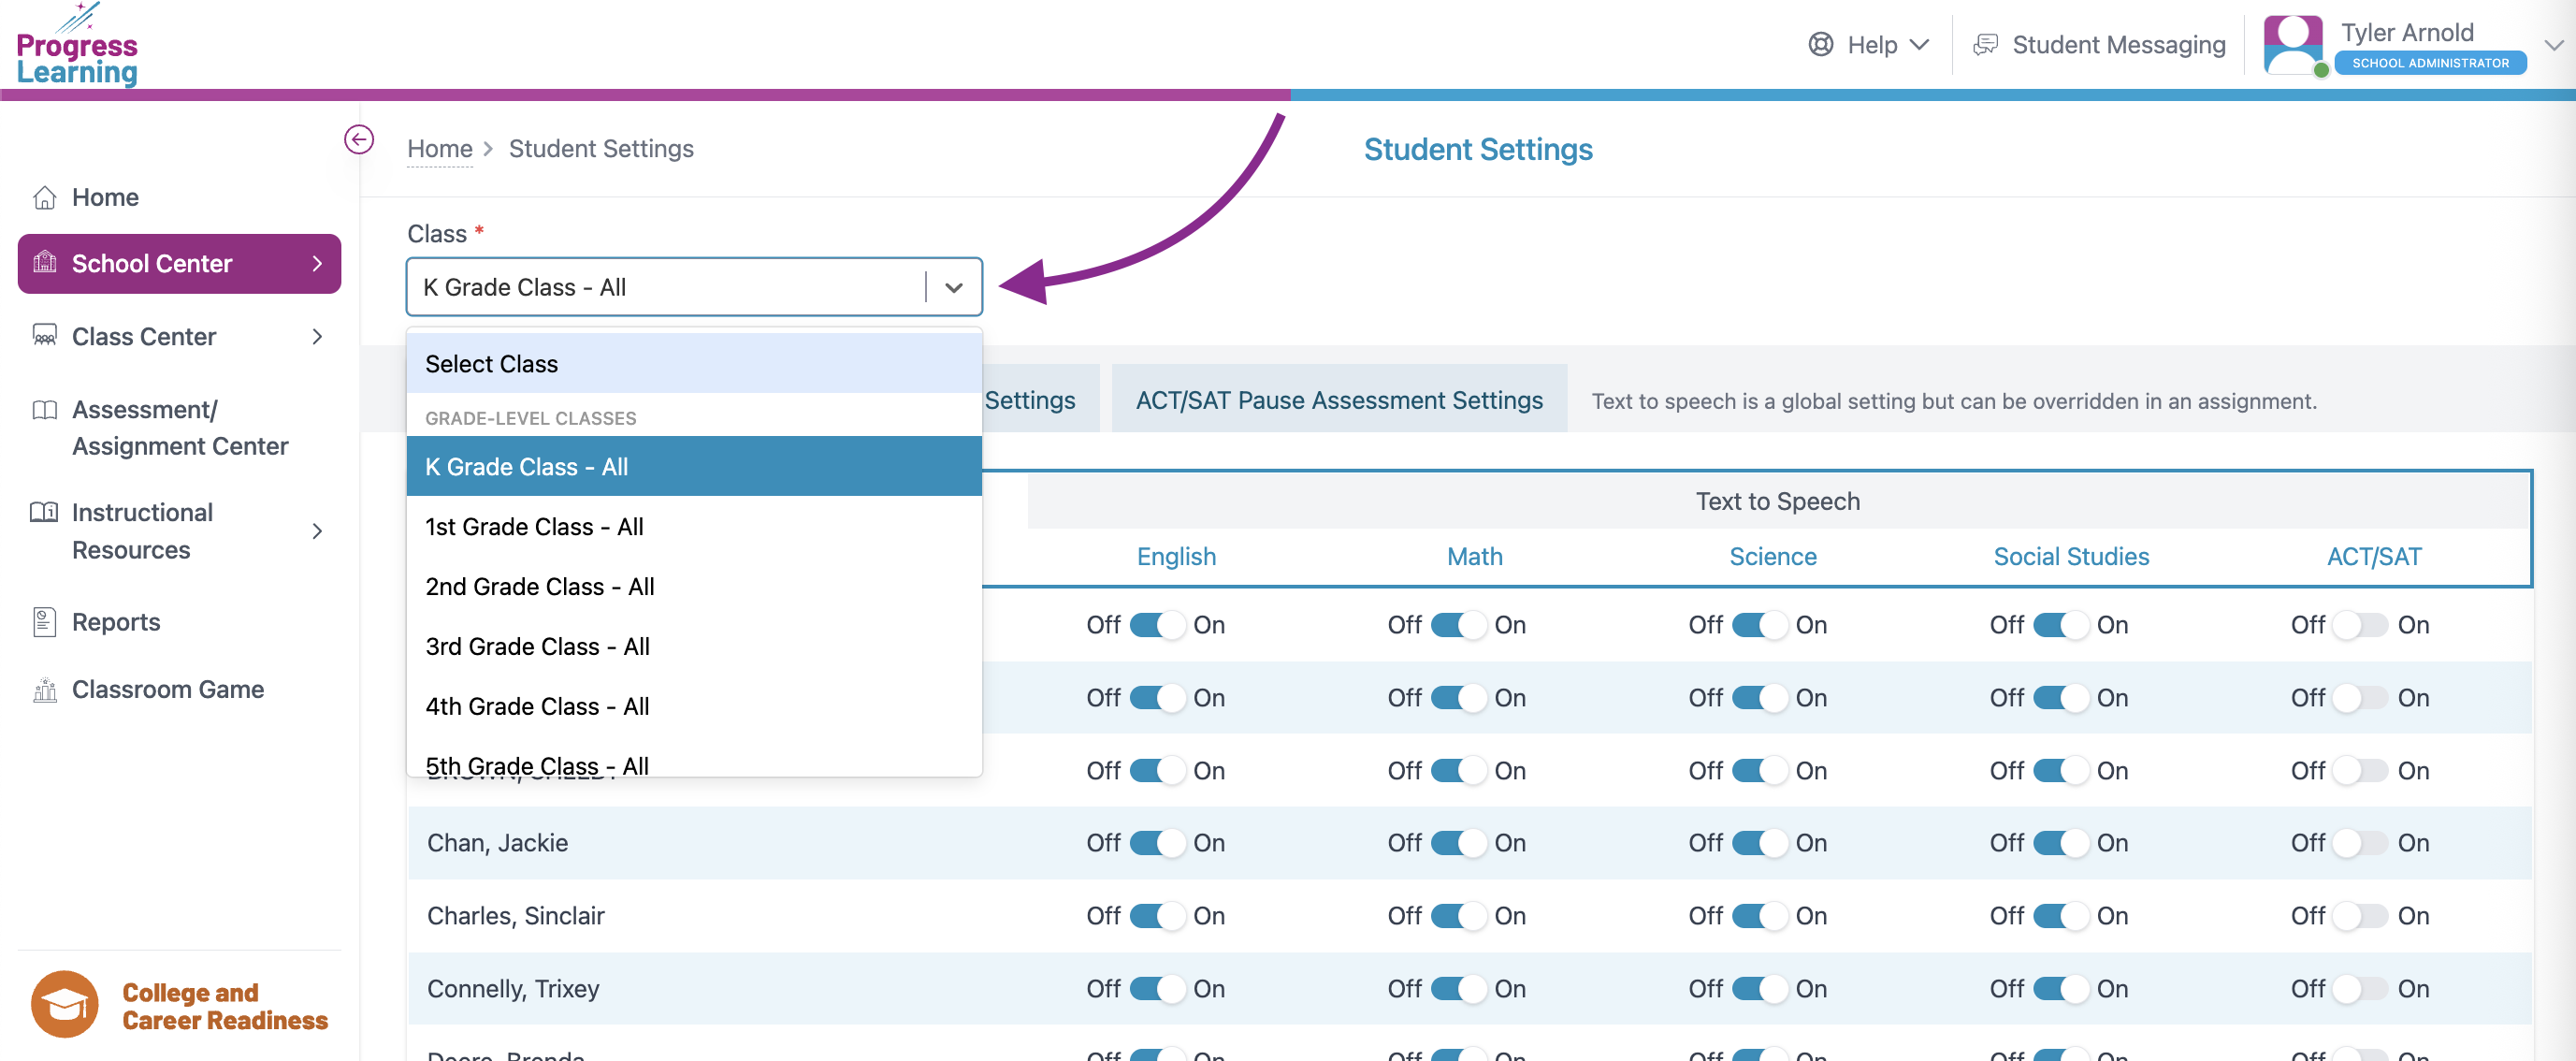
- Make adjustments to the Text-To-Speech, Timer Settings, and ACT/SAT Pause Assessment Settings.
Pre-Testing Checklist
- Assessment Assignment:
- Assign the specific SAT/ACT assessment(s) to the correct student groups or classes within Progress Learning.
- Double-check the assignment settings (start/end dates, start/end time, accommodations).
- Devices: Ensure all devices (computers, tablets) students use are fully charged and in good working order.
- Internet Connectivity: Verify stable and strong internet access in all assessment locations.
- Browser Compatibility: Confirm that the browsers being used are compatible with Progress Learning (updated versions of Chrome, Firefox, Edge, Safari).
- Verify that all students have active accounts and can log in to Progress Learning successfully.
- Ensure teachers/proctors also have appropriate access and roles.
- Confirm that all students are correctly rostered in their respective classes within Progress Learning. This is crucial for accurate reporting and assignment distribution.
- If using Clever/ClassLink for rostering, ensure the connection to Progress Learning is enabled. Remember that Horizon Education Clever/ClassLink rostering does not automatically transfer to Progress Learning and requires a new setup.
Address Any Platform or Login Issues
- If you have any questions or concerns, please reach out to the Support Team via Chat With Us in the Resource Center, Contact via email (in the upper right-hand of this page), or Call at 1-877-377-9537.
