How do Admins get started with Family Connect?
 Updated
by
Cody Darr
Updated
by
Cody Darr
- Getting Started with Family Connect
- How to Manage Guardian Accounts
- Navigating Guardian Accounts
- 3 Ways to Create Guardian Accounts
- Sending the Welcome Email
- Linking Additional Students to a Guardian
- Resetting a Guardian’s Password
- Logging in as a Guardian (Admin Impersonation)
- Locking or Unlocking Guardian Accounts
- Deleting a Guardian Account
- Using Filters to Find Guardians
- Exporting or Printing Guardian Lists
Getting Started with Family Connect
Family Connect is managed via User Management by District and/or School Admins. Family Connect allows parents and guardians to effortlessly monitor their students' grades and assignments within Progress Learning. Guardians will receive a unique login providing access to information for all connected students.

How to Manage Guardian Accounts
This section outlines how administrators can effectively manage guardian accounts, including navigating the Manage Guardians tab, creating accounts, and performing key actions within Family Connect.
Navigating Guardian Accounts
- Log in to Progress Learning.
- Navigate to School Center → User Management.
- Select the Manage Guardians tab.
From this page, Administrators can:
- Add new Guardian accounts
- Import Guardians in bulk
- Link Guardians to Students
- Send Welcome Emails
- Send Password Reset Emails
- Manage Guardian access
The Manage Guardians table displays key information about each guardian including:
- First Name
- Last Name
- Username (Email)
- Total Logins
- Last Login Date
- Students Linked
Administrators can also perform actions directly from this table.
3 Ways to Create Guardian Accounts
Administrators can create guardian accounts in three different ways, including manual entry, bulk import, or SSO roster sync. Use Method 1, 2, or 3 below that best fits your needs.
1. Add a Guardian Manually
- Go to User Management → Manage Guardians.
- Click the Add Guardian button in the upper-right corner.
- Enter the Guardian’s information:
- First Name
- Last Name
- Email Address (this becomes the Guardian’s username)
- Select the Student(s) you want to connect to the guardian.
- Click Save.
Once added, the Guardian will appear in the Manage Guardians table.
2. Import Guardians (Bulk Upload)
If you need to add many Guardians at once, you can import them using the Import Guardians tool.
Steps to Import Guardians in Bulk:
- Navigate to User Management → Manage Guardians.
- In the Group Action panel, select Import Guardians.
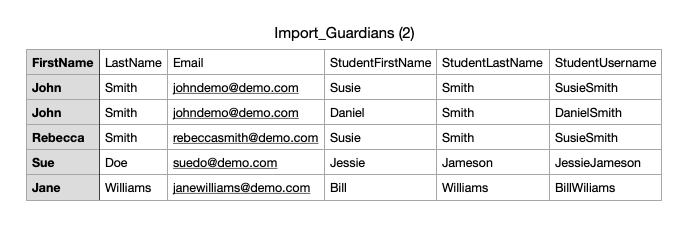
- Download the Guardian import template (Import_Guardians_Template.csv)
- Enter the required information in the spreadsheet.
The fields required are:
- Guardian First Name
- Guardian Last Name
- Guardian Email Address - This will be the Guardian's username
- Student First Name
- Student Last Name
- Student Username - This is the identifier used to connect the Guardian to the Student.
- Save the file after entering your data.
- Upload the completed file through the Import Guardians option.
After processing, the system will create the guardian accounts and link them to the appropriate students.
Ex: Guardian John Smith needs to be connected to Students Susie Smith and Daniel Smith. Your import sheet should have 2 rows containing John Smith's same information, along with Susie and Daniel's specific information.
3. SSO Roster Sync
Some districts use Single Sign-On (SSO) systems such as Clever or ClassLink for students and staff.
Guardians, however, do not log in through the district’s SSO system. Guardians should always login through our website directly at https://app.progresslearning.com.
- Guardian accounts always use their email address and password to log in.
- Guardians will log in directly at: https://app.progresslearning.com
- SSO providers like Clever or ClassLink are not used for guardian authentication. They are simply created via the SSO roster-sync.
What administrators should do for SSO schools:
- Administrators will see any Guardian accounts created through their SSO in the Manage Guardians page, along with the student(s) connected to each Guardian based on the information provided in the school’s SIS. The Guardian users who have been synced will not have access until they receive the Welcome Email and set up their password.
- Guardians must set their password using the Welcome Email.
- Guardians will log in at https://app.progresslearning.com using:
- Account ID
- Username/Email Address
- Password
Sending the Welcome Email
After a Guardian account is created, they must set a password before logging in, this is very important.
Follow the steps below to send welcome emails to guardians:
- Locate the Guardian in the Manage Guardians table.
- Check the box next to their name(s).
- In the Group Actions panel, select Send Welcome Email.
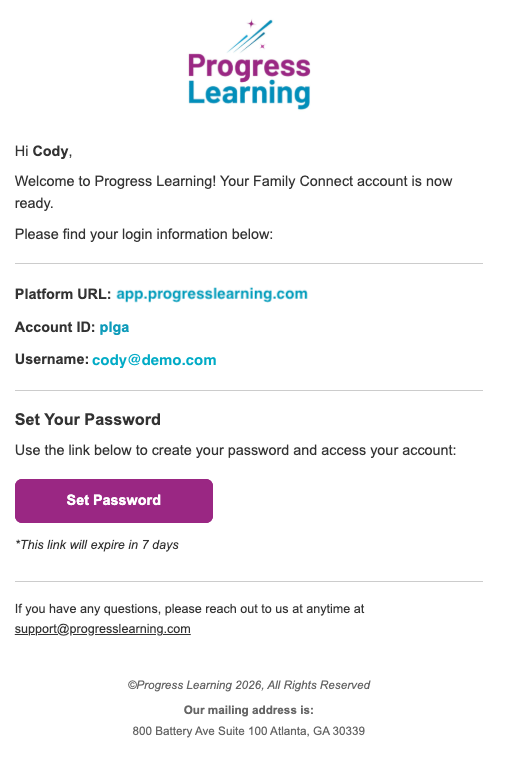
The Guardian will receive an email containing:
- The Progress Learning login link
- Their username and Account ID
- A Set Password button
Linking Additional Students to a Guardian
A Guardian can be connected to multiple students.
Follow the steps below to link additional students:
- Find the Guardian in the Manage Guardians table.
- Click the number in the Students Linked column.
- The Students Linked window will open.
- Select additional students to associate with the Guardian.
- Click Save.
The Guardian will now see all linked students in Family Connect.
Resetting a Guardian’s Password
If a Guardian forgets their password, Administrators can send a password reset email.
Follow the steps below to send a password reset email:
- Locate the Guardian in the Manage Guardians table.
- Select the checkbox next to their name.
- In the Group Actions panel, click Send Forgot Password Email.
The Guardian will receive a Reset Password email containing a secure reset link.
Logging in as a Guardian (Admin Impersonation)
Admins can log in as a Guardian to see what the Guardian sees. Follow the steps below to impersonate a guardian:
- Locate the Guardian in the table.
- Click Login under the User Login column.
This will open the Guardian’s account view.
Locking or Unlocking Guardian Accounts
If needed, administrators can temporarily disable a guardian’s login access.
Follow the steps below to lock or unlock a Guardian account:
- Find the Guardian in the Manage Guardians table.
- Toggle the Lock switch.
- Confirm the action.
Locked Guardians will not be able to log in until the account is unlocked.
Deleting a Guardian Account
To remove a Guardian from the system:
- Click the Delete icon in the Action column.
- Confirm the deletion.
Deleting a Guardian immediately removes their login access.
Using Filters to Find Guardians
The Manage Guardians page includes several filters to help locate accounts quickly.
Administrators can filter by:
- School (District Admins only)
- Username
- First Name
- Last Name
Additional filter options include:
- Show Locked Users Only
- Show Deleted
Click Filter to apply filters or Reset to clear them.
Exporting or Printing Guardian Lists
You can export or print Guardian data for reporting.
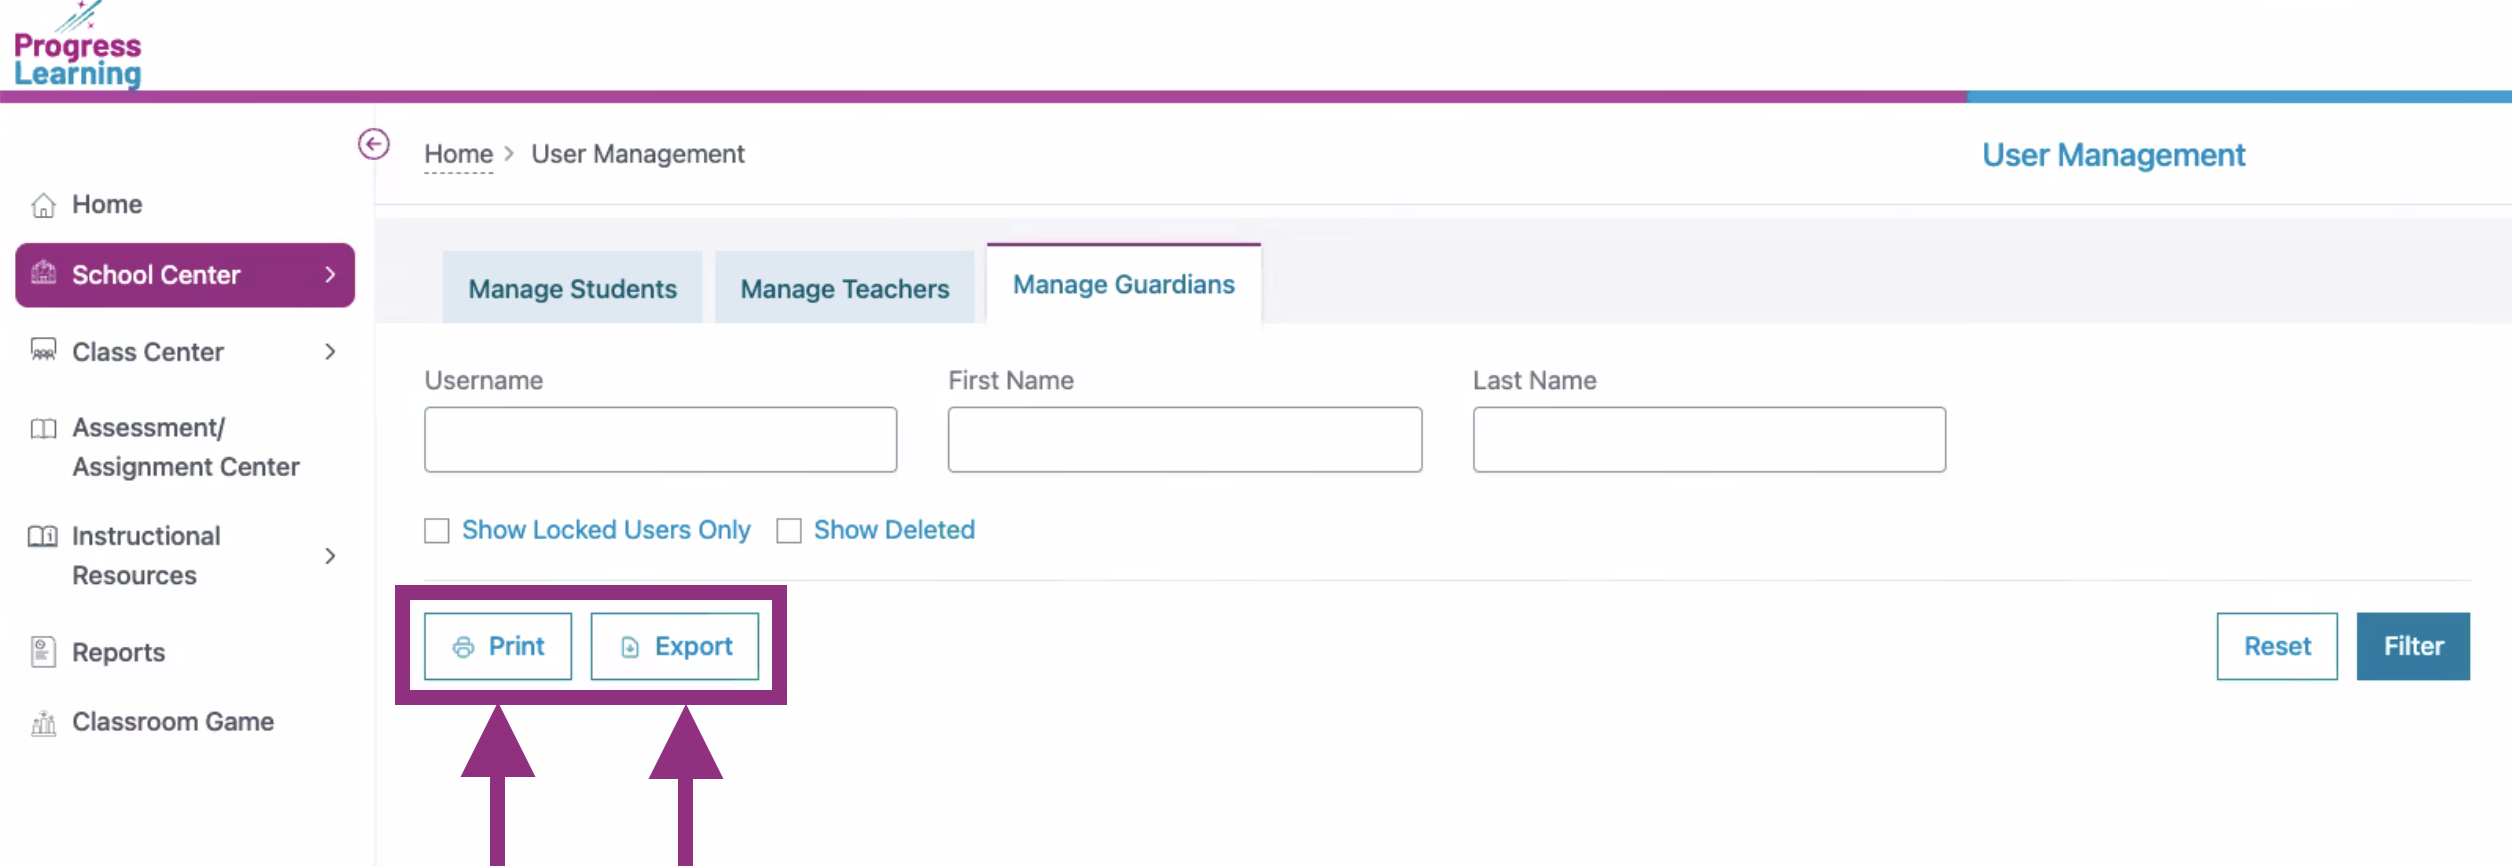
How to Export
Click the Export button to download a CSV file of the current filtered results.
How to Print
Click the Print button to open a printable version of the filtered list.